 Free shipping on orders over £29,85


How do you repair silicone rubber fish?
Achieve seamless repairs on delicate silicone fish models


Repairing silicone rubber fish is crucial for hobbyists, model makers, or professionals seeking to restore lifelike artificial fish for display, angling, or educational purposes. With the right technique and materials, it’s possible to achieve seamless, durable repairs that blend perfectly with the original moulding.
What You’ll Need
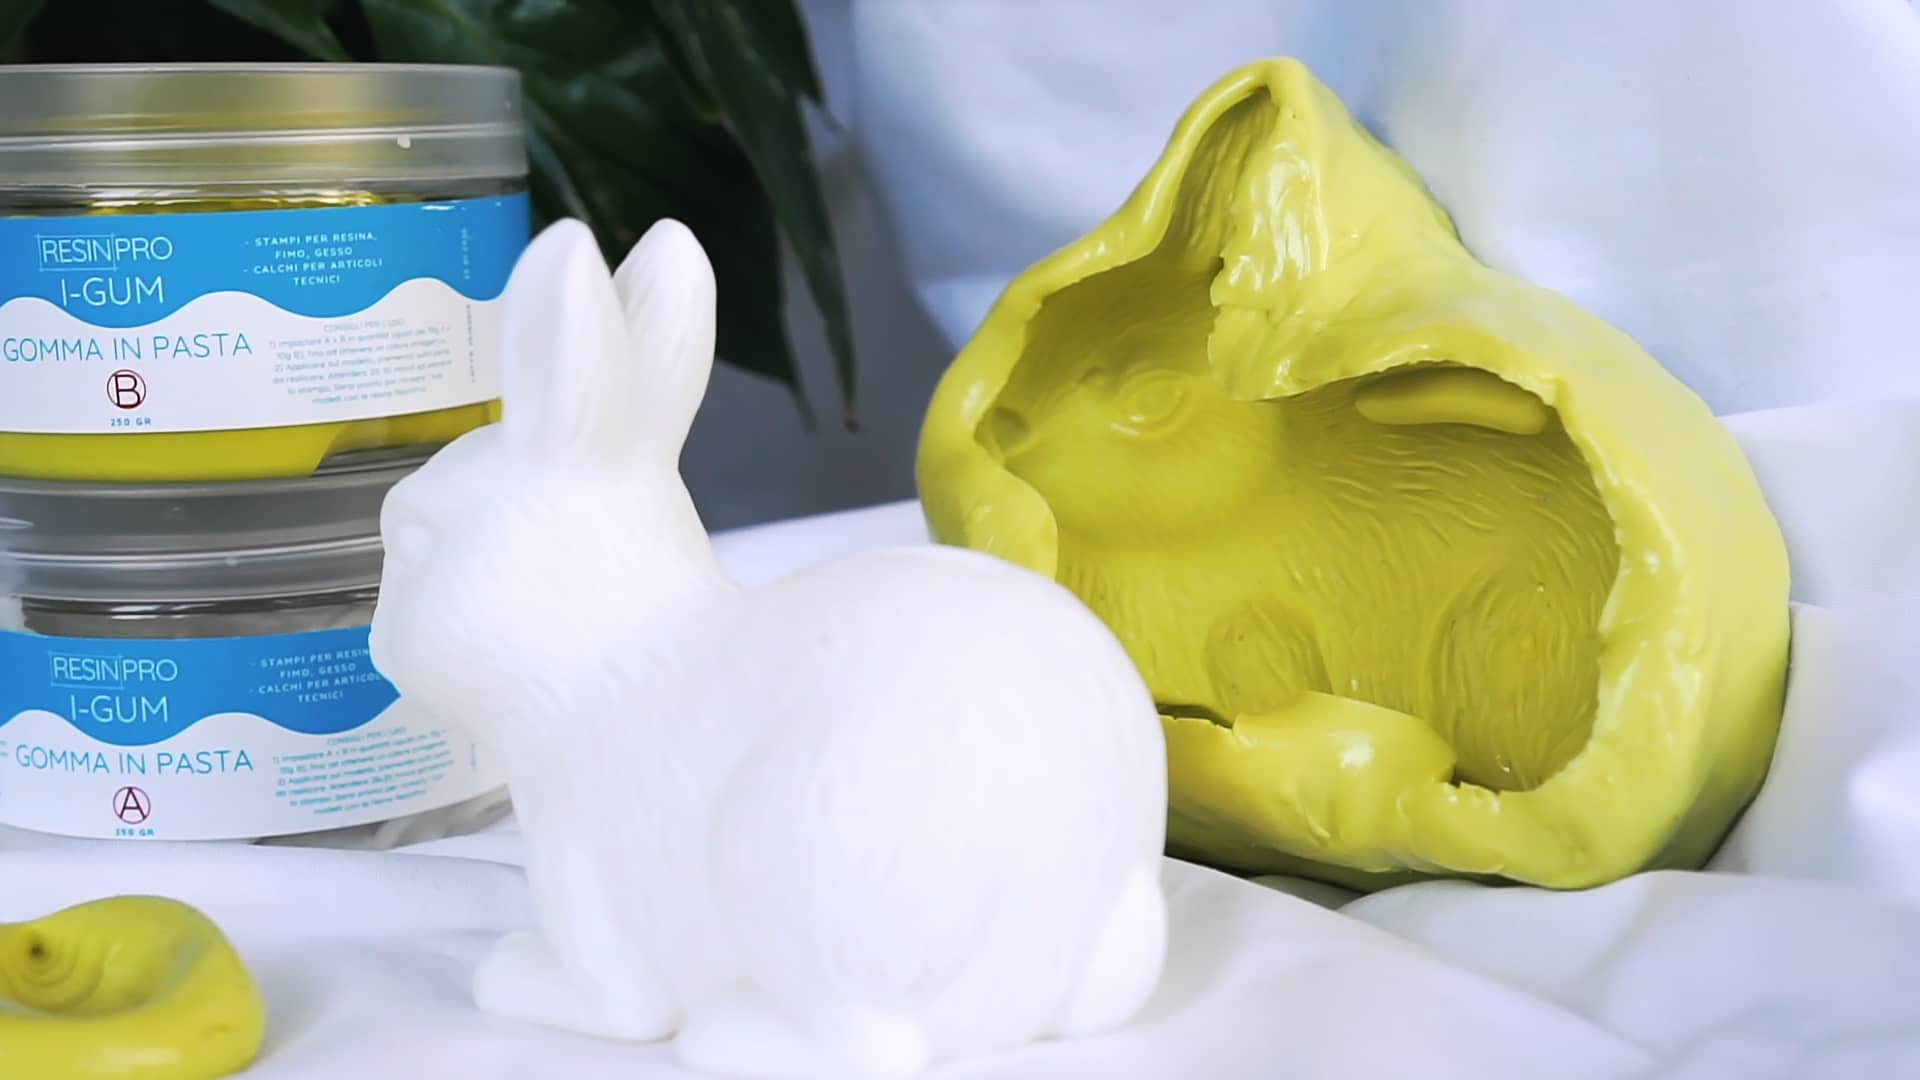
- “I–Gum” – Non-Toxic Silicone Putty for Mould Making: For small detail repair moulds and patch work.
- “Pure Mould” – Translucent Liquid Silicone Rubber for Mould Making: Ideal for larger areas or translucent repairs.
- “Liquid Mould” – Casting Liquid Silicone Rubber, 5-40 Shores, Bi-Component A+B: Suitable for highly detailed or complex repairs that require flexibility and firmness options.
- Cleaning agents (isopropyl alcohol or mild soap and water)
- Mixing tools and containers
- A sharp craft knife or small scissors
- Disposable gloves (optional, for handling sensitive repairs)
- Elastic bands or clips (for mould alignment if necessary)
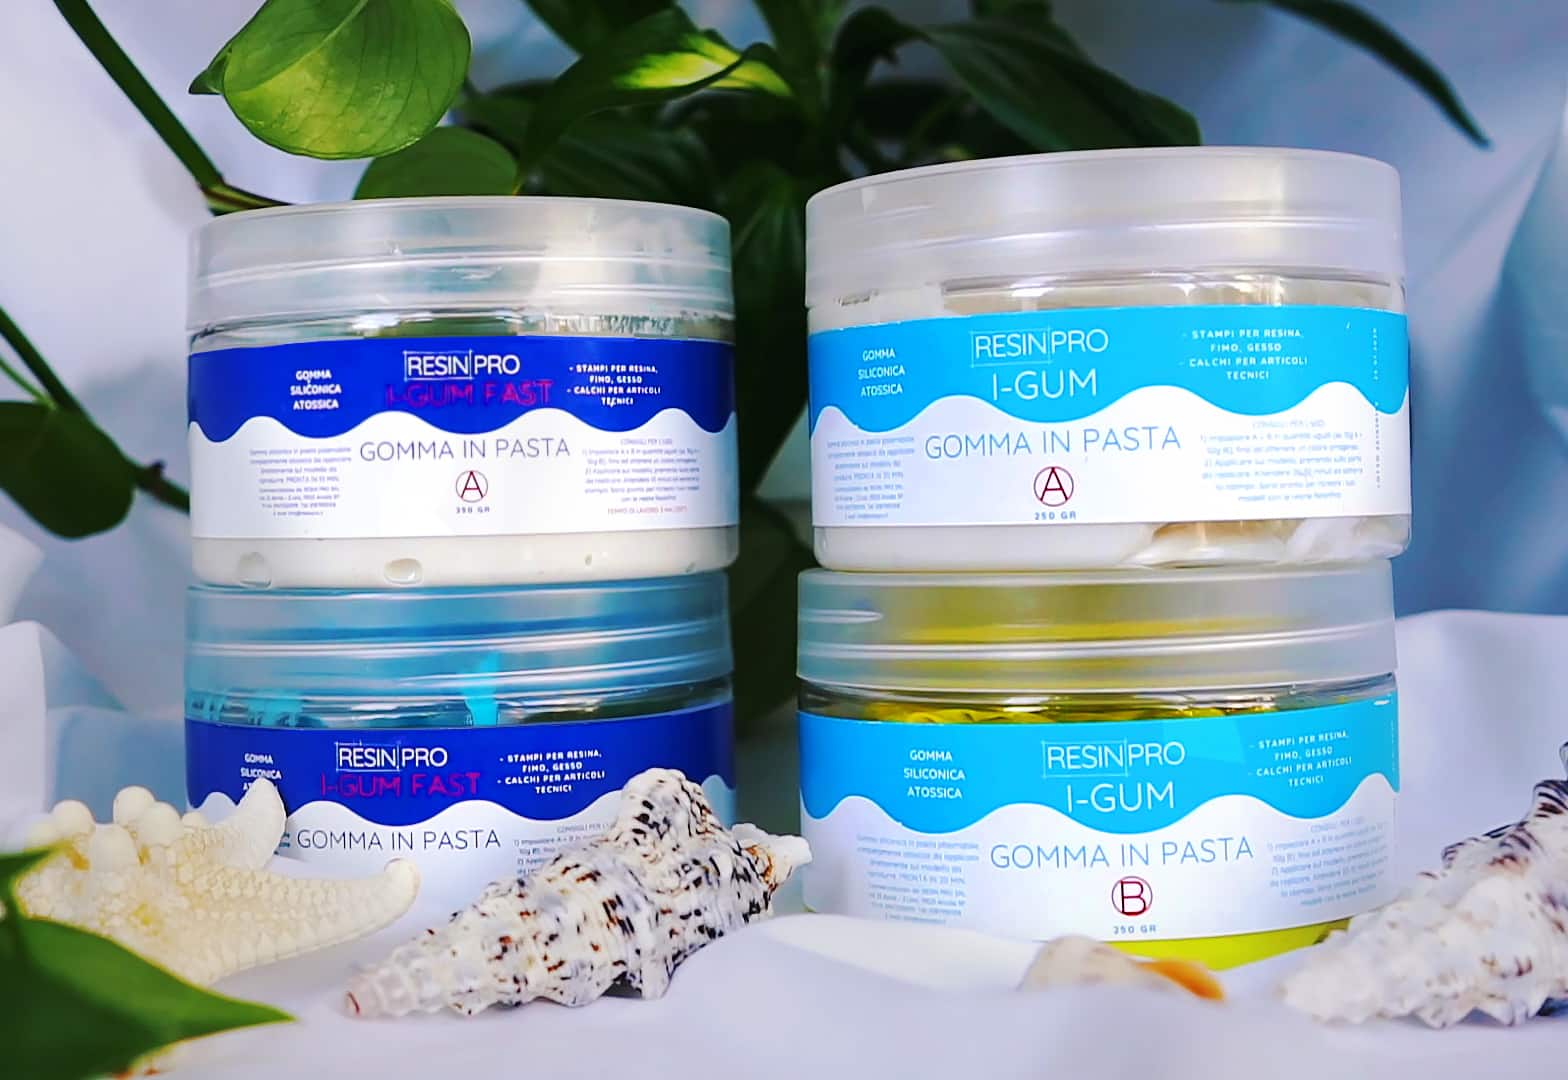
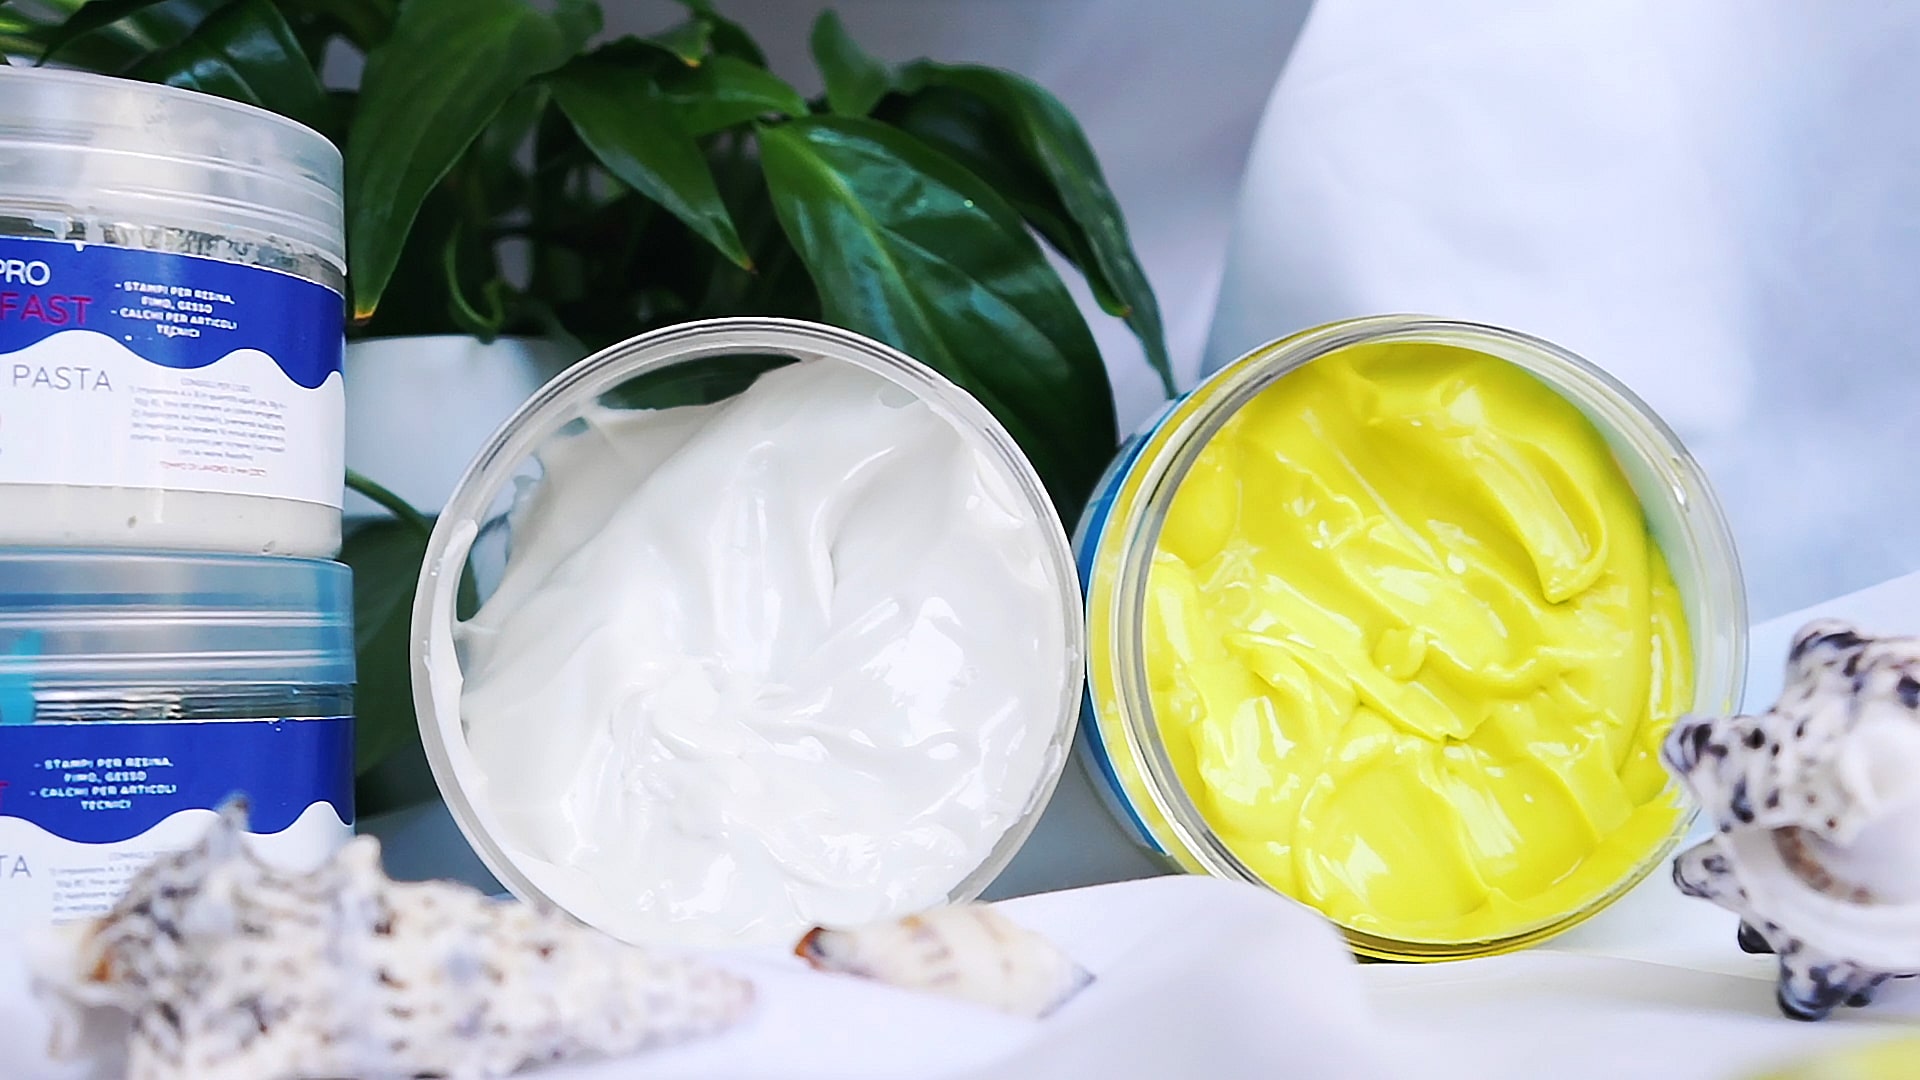
Visual Reference for Key Repair Materials
Explore examples of the silicone rubbers in use, including close-ups of fish detail moulds and patch applications. See how translucency and accurate mixing improve repair results.
Step 1: Assess the Damage and Prepare the Area
Examine the silicone fish carefully to locate tears, holes, or missing sections. Use good lighting and, if necessary, a magnifying glass to spot fine damage. Carefully Clean and dry the damaged area thoroughly before starting—use mild soap and water or isopropyl alcohol to remove oils, dust, or residue, and allow the fish to dry completely. Failure to properly clean can lead to poor adhesion or visible patch lines.
Step 2: Create a Suitable Repair Mould or Patch
For small holes, tears, or minor details, mould a small patch directly onto the affected area. You may find that “I–Gum” – Non-Toxic Silicone Putty for Mould Making works well for creating precision repair forms and capturing surface textures. For larger or more complex shapes, craft a simple mould cavity by pressing pliable putty or using a thin layer of liquid silicone around a reference area of the same fish or a matching donor part. This approach helps achieve the original fish’s contours and finer details.
If transparency is required for the repair or for better alignment, “Pure Mould” – Translucent Liquid Silicone Rubber for Mould Making is useful, as it allows you to visually monitor the patching process and check for trapped bubbles or gaps.
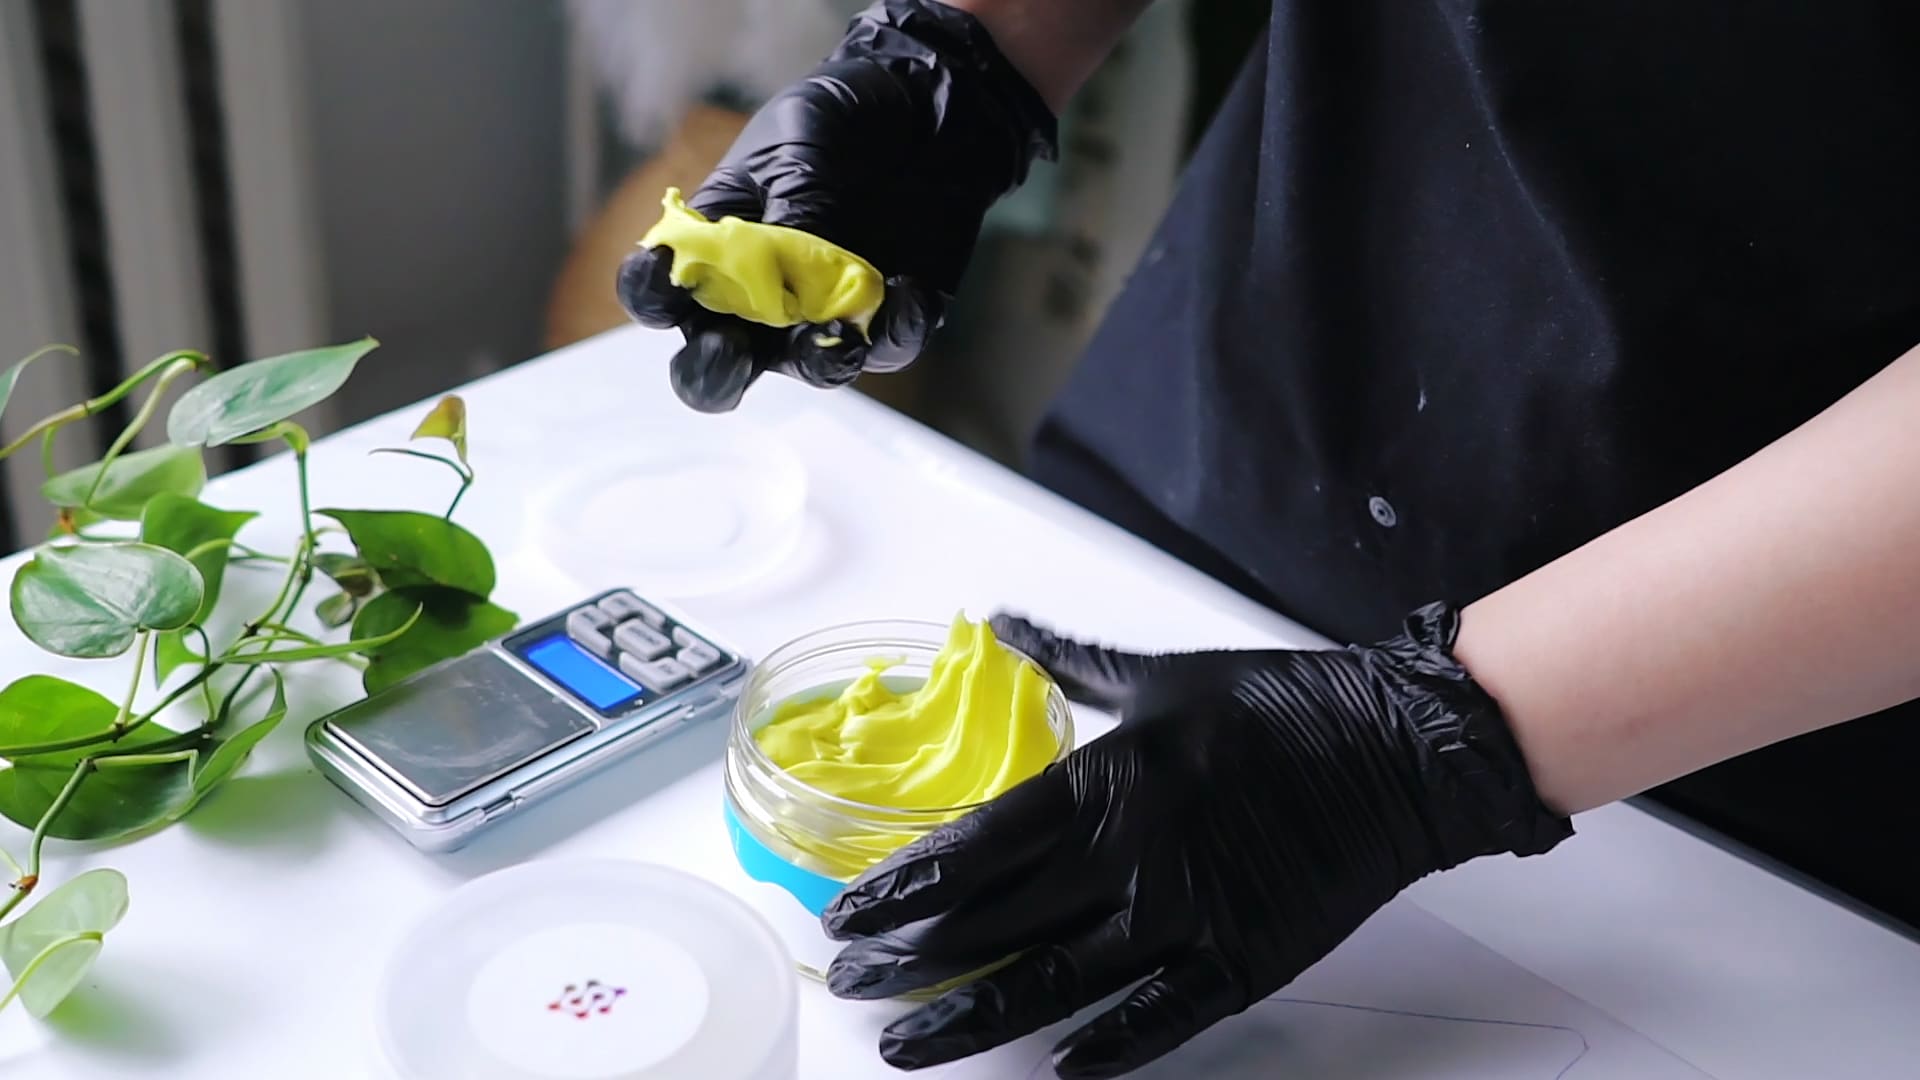
Step 3: Mix and Apply the Silicone Rubber
Select a silicone rubber that matches the texture and firmness of your original fish. Use a clean mixing container and follow the specified 1:1 ratio, ensuring the base and catalyst (or hardener) are thoroughly blended for an even cure. Use the right silicone for a seamless patch—for highly detailed or flexible repairs, “Liquid Mould” – Casting Liquid Silicone Rubber, 5-40 Shores, Bi-Component A+B offers options for softness or firmness, and easily flows into small details.
Carefully pour or press the mixed silicone into the mould or directly onto the repair spot. Remove any air bubbles by tapping or gently vibrating the piece. Let the silicone overfill slightly for feathered blending with the original material.
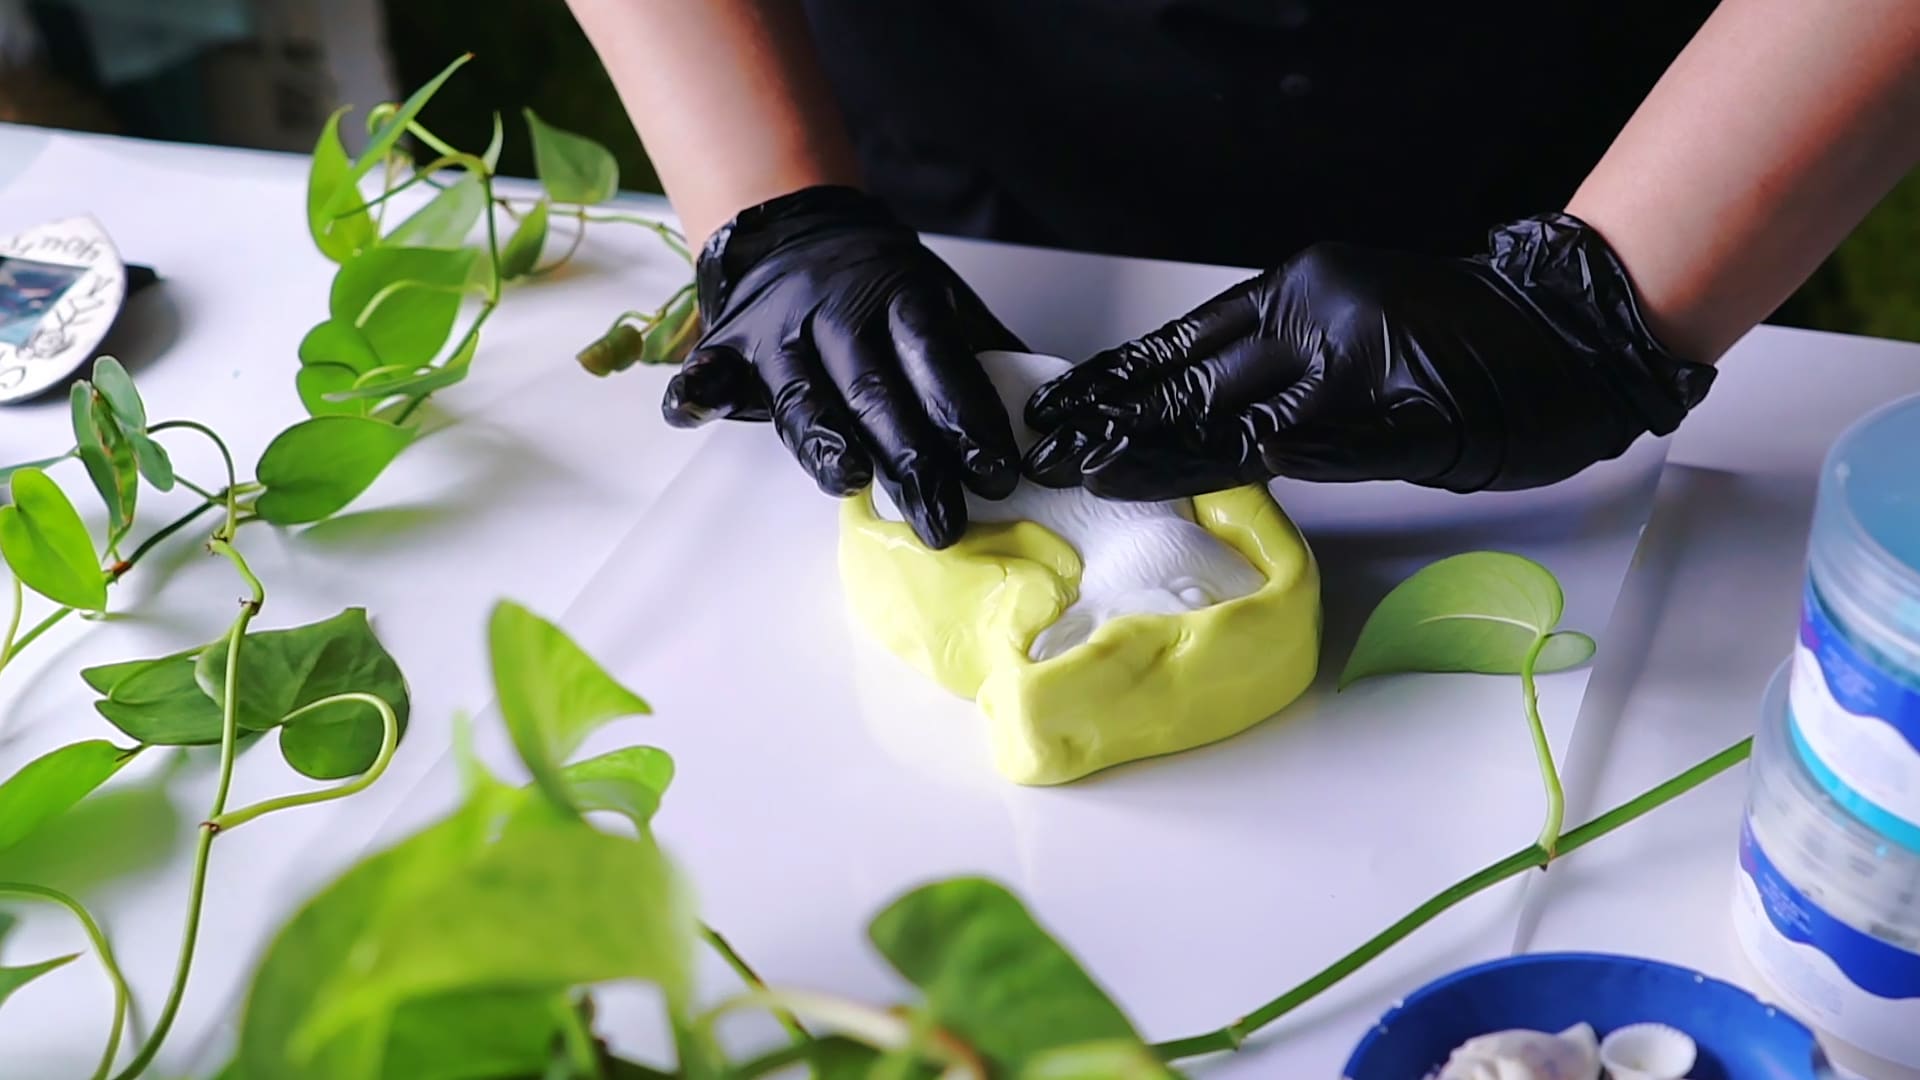
Step 4: Position, Cure, and Finishing Touches
Align the new patch or moulded segment precisely over the damaged area. Secure everything using elastic bands or clips, taking care not to distort the shape. Align and secure the mould to avoid shifting as movement during curing can ruin the seamless look.
Allow the silicone to cure completely according to product specifications—some cure in 20 minutes, others may take up to 8 hours.
Once fully cured, use a sharp craft knife or fine scissors to trim excess material. Blend the repaired area gently with fine sandpaper, if required, and wipe away any dust. If desired, airbrush or hand-paint the surface to match the original finish.
Tips, Common Mistakes, and Troubleshooting
- Allow full curing time before handling the fish—removing moulds or moving the part too soon can distort the repair.
- Trapped air bubbles often occur when pouring silicone too quickly—introduce slowly and tap the mould gently to minimise them.
- Silicones differ in hardness—Match silicone type and firmness for repairs to keep the look and movement natural.
- If the colour is noticeably different, use suitable pigment or apply a matching paint layer over the repair for a seamless effect.
- Always test your chosen silicone on a hidden area first to check for chemical compatibility.
Troubleshooting and Finishing Gallery
View finished repairs on silicone rubber fish and common issues such as seam lines or air bubbles. Compare before and after shots for a clear understanding of repair quality.
- "I–Gum" – Non-Toxic Silicone Putty for Mould MakingPrice range: £24.00 through £104.95"I–Gum" is a non-toxic silicone putty suitable for making moulds and frames for resin, wax, cement and similar materials.
- "Pure Mould" – Translucent Liquid Silicone Rubber for Mould MakingPrice range: £23.95 through £166.95"Pure Mould" is a platinum based translucent liquid silicone rubber suitable for mould making, compatible with various materials including resins and…
 "Liquid Mould" – Casting Liquid Silicone Rubber, 5-40 Shores, Bi-Component A+BPrice range: £14.45 through £387.45"Liquid Mould" is a casting liquid silicone rubber designed for making detailed moulds, suitable for small objects and fine details.
Frequently Asked Questions
Can you repair torn silicone rubber fish?
Yes, using compatible silicone rubbers allows you to patch or remake damaged sections so the repair remains durable and nearly invisible.
How long does silicone rubber fish repair take?
Basic repairs can cure in as little as 20 minutes, but more complex repairs may require several hours before handling.
What type of silicone is best for fish repair?
Use bi-component casting or putty silicones with similar firmness to the original fish for best results and natural feel.
Can silicone rubber be painted after repair?
After curing, most silicone rubbers can be painted with compatible paints for a perfectly blended finish.
How do you match texture when repairing a silicone fish?
Use a mould of the undamaged area or recreate details with silicone putty, then blend the patch by trimming and sanding lightly.
Is the repair safe for aquarium use?
If your silicone is labelled non-toxic and fully cured, it’s generally safe, but always verify with the material's product data sheet.