 Free shipping on orders over £29,85


How to repair religious resin statues?
Step-by-step restoration for cherished resin figurines


Restoring religious resin statues can breathe new life into cherished spiritual items, preserving their beauty and meaning for years. Whether the statue has cracks, chips, or missing fragments, this guide will walk you through practical repair approaches that help you achieve a professional-looking result at home.

What You’ll Need
- “FixExpress” – Two-Component Epoxy Glue 500g – for rapid repairs needing strong, reliable bonds
- Resin Fibreglass Repair Kit – Complete Polyester Resin and Hardener Set – when reinforcing larger or structural damage
- CROP 2K Fiberglass Putty – 750 ml + Hardener – for filling deep cracks or missing material
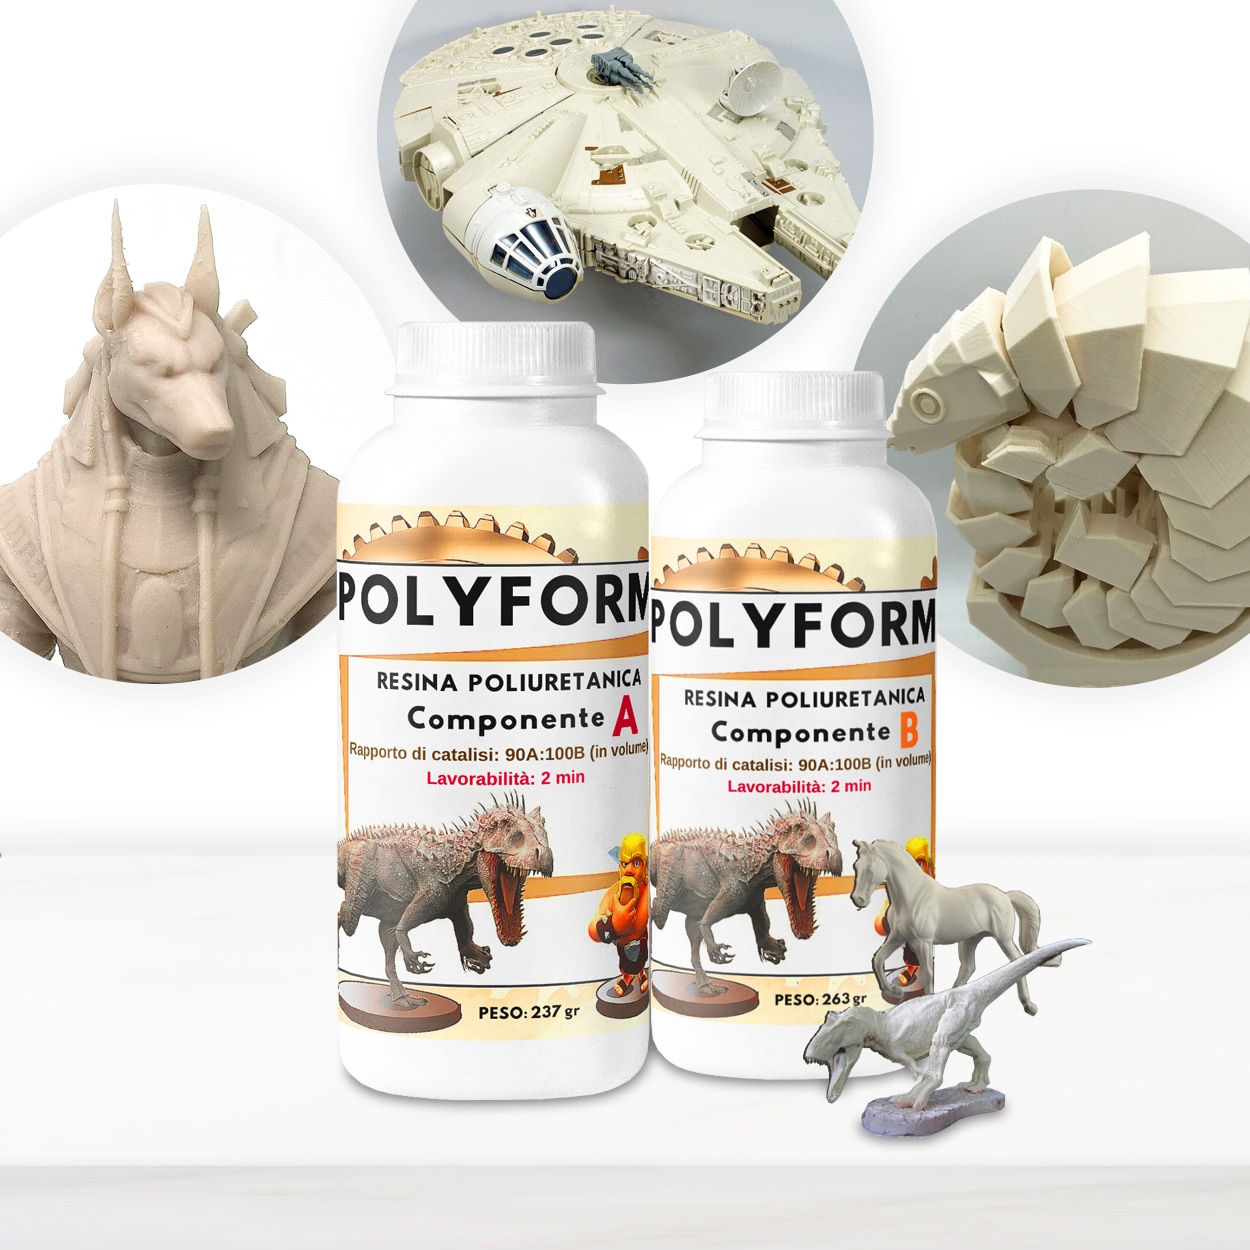
- “Polyform” – Polyurethane Casting Resin, Beige, Fast-Setting for Prototyping – creating replacement parts where detail counts
- Sandpaper in fine and medium grits
- Disposable gloves, mixing sticks and an old brush
- Cleaning cloth and a mild detergent
- Touch-up paints suitable for resin if colour matching is needed

Essential Tools and Materials Up Close
The right adhesive or resin sets the foundation for a flawless restoration. Choose a fast-setting epoxy glue for bonding, a robust fibreglass repair kit for structural fixes, and a fine-detail casting resin for rebuilding missing parts.
Step 1: Assess and Clean the Damaged Statue
Begin by inspecting your resin statue carefully to identify all areas needing repair, including hairline cracks, missing fragments, or chips. Take photographs if needed to help remember the statue’s original condition for reference during restoration.
Gently remove dust, dirt, or oils using a soft cloth dampened with mild detergent and water. Allow the statue to dry completely before proceeding with repairs. Clean and dust-free surfaces are crucial for achieving optimal adhesion later on.


Step 2: Bond Broken Parts and Fill Fine Cracks
If there are clean breaks or separated pieces, align them carefully before gluing. Use a rapid-setting adhesive for best results when bonding resin parts. An ideal solution for this purpose is “FixExpress” – Two-Component Epoxy Glue 500g, which provides a strong, fast-setting bond suitable for both small and substantial breaks. Mix equal parts of the epoxy and apply thinly to each broken edge. Press together firmly and hold until set—usually five minutes. Work quickly with fast-setting adhesives to avoid premature curing.
For hairline or shallow cracks, carefully inject the epoxy into the crevice with a toothpick or fine brush, ensuring complete penetration.
Step 3: Repair Large Cracks or Missing Sections
For statues suffering from deep cracks, dents, or lost features, a reinforced filler is best. CROP 2K Fiberglass Putty – 750 ml + Hardener is designed for such robust repairs, offering fibreglass reinforcement, moisture and chemical resistance. Mix and apply in layers, shaping as needed. Allow each layer to cure fully before building the next. Layer for strength when filling extensive cracks, and always sand smoothly between applications for a natural, invisible repair.
If the damage compromises the statue’s structure or affects load-bearing points, consider using the Resin Fibreglass Repair Kit – Complete Polyester Resin and Hardener Set. Employ the provided fibreglass mat and resin to reinforce weakness from within, particularly on the statue’s back or interior.


Step 4: Recreate Details or Replacement Parts
To restore lost individual elements—such as fingers, crosses, or intricate embellishments—create a simple mould from a similar undamaged statue, plasticine, or silicone. Then cast replacement sections with “Polyform” – Polyurethane Casting Resin, Beige. This resin is ideal for capturing fine detail and cures rapidly, letting you sand and fit new parts within an hour.
Use a sharp blade and fine sandpaper to finish the replacement, blending it seamlessly with the original surface. Blend colours for a seamless finish with touch-up paints as needed, matching the statue’s existing shades.
Step 5: Final Sanding and Finishing Touches
Once all adhesive or filler has cured, sand the repair site as required with fine-grit paper. Clean away dust, then repaint or touch up the area to harmonise with the surrounding surface. Several thin coats of suitable resin-compatible paint achieve the most lifelike restoration.
Allow painted areas to cure fully before handling or returning the statue to its display location.


Tips, Common Mistakes, and Troubleshooting
Treat each repair with patience; rushing can compromise results. Avoid excess adhesive that can mar detail. Only apply as much as needed and remove overflow immediately. Do not mix more product than required, as many adhesives and resins have a limited working time.
If repainting is necessary, always test paint compatibility on a hidden area first. Keep the workspace well-ventilated, and wear gloves to protect skin when handling chemicals. Store adhesives and resins properly for longevity, sealing containers tightly after use and keeping them away from direct sunlight or moisture.
Expert Insights for Precise Repairs
Careful preparation and patience are key to creating seamless repairs. Each type of resin and adhesive brings unique strengths, so match your technique to the material and always test your colour blends before final application.

- "FixExpress" – Two-Component Epoxy Glue 500g£26.95"FixExpress" offers rapid bonding with strong adhesion suitable for repairs requiring quick and durable fixing.
- Resin Fibreglass Repair Kit – Complete Polyester Resin and Hardener SetResin Fibreglass Repair Kit provides strong structural reinforcement and waterproof bonds, suitable for various rigid plastics and metals.
- CROP 2K Fiberglass Putty – 750 ml + Hardener£15.85CROP 2K Fiberglass Putty is reinforced with fibreglass for strength and resists moisture and chemicals. Suitable for repairs needing durable filling.
 “Polyform” – Polyurethane Casting Resin, Beige, Fast-Setting for PrototypingPrice range: £15.95 through £141.95Polyform polyurethane casting resin offers fast-setting, high fluidity and durable beige casts, suitable for rapid prototyping and detailed model…
Frequently Asked Questions
Should I clean and dust the statue before using resin products?
Yes, surface cleanliness ensures better adhesion and a longer-lasting repair on resin statues.
What is the fastest way to reattach a broken resin part?
Use a quick-setting two-component epoxy glue and hold the pieces together firmly for a few minutes.
What do I use for deep cracks or holes in a resin statue?
A fibreglass-reinforced putty or resin repair kit fills large gaps and offers enhanced strength.
How can I restore lost details or missing features?
Cast new parts in a suitable mould using a fast-setting casting resin for detailed replication.
Is it possible to paint over repaired resin areas?
Yes, use resin-compatible paints and thin coats after sanding to achieve a seamless colour match.
How can I avoid using too much adhesive and ruining detail?
Apply adhesive sparingly and immediately remove any that squeezes out before it sets.
How do I store resin and adhesives after use?
Seal containers tightly and keep in a cool, dry place, out of direct sunlight, to prolong shelf life.
How long should I wait before handling the repaired statue?
Wait until all products have fully cured, which can take from 5 minutes for adhesives up to 30 minutes or more for castings.