 Free shipping on orders over £29,85


← Back to How to spread GLS 50 silicone rubber?

Bubbles in silicone rubber moulds can spoil fine details and lead to imperfections in your castings. With the right pouring and spreading techniques, you can greatly reduce bubble formation when working with GLS 50 and similar silicone products.
Pouring and Spreading Techniques
Begin by mixing the GLS 50 silicone rubber carefully to avoid whipping in air. When ready to pour, introduce the liquid slowly and steadily into one corner of your mould, letting it flow naturally across the surface. This controlled approach helps air escape as the silicone fills details. Use a dedicated spatula, such as the Tooth Shaped Spatula, to gently spread the silicone and release any trapped bubbles—avoid vigorous stirring or scraping, which can introduce more air.
Encouraging Bubble Release
Once the mould is filled, lightly tap or vibrate the mould container on a solid surface. These subtle movements encourage bubbles to migrate upwards and break at the surface. For highly detailed or deep moulds, repeating this process a few times further reduces the risk of bubbles being caught underneath overhangs or within intricate patterns. If you work regularly with silicone, a pressure pot is an advanced option to force out lingering air during curing, though most hand-poured castings can be managed without one.
When This Matters Most
Bubble prevention is crucial when making moulds for small objects, jewellery, or any project where even minor imperfections could compromise the final result. Detail-sensitive work benefits most from careful pouring and bubble release techniques.

Related products
Related guides
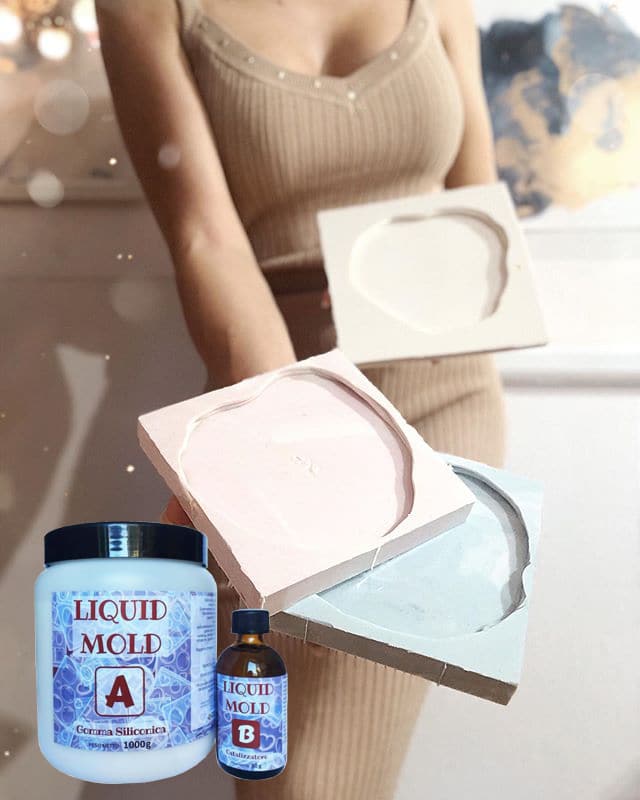
Mastering these anti-bubble steps ensures that your silicone moulds—whether made with GLS 50, bi-component rubbers like “Liquid Mould”, or translucent solutions—achieve sharp, professional-quality castings. For more on smooth silicone application, visit our full guide on how to spread GLS 50 silicone rubber.