 Free shipping on orders over £29,85

How do you use E-30 water effect resin?
Step-by-step guide for achieving stunning ocean wave effects


Ready to transform your creative visions into breathtaking seascape resin art? Whether you’re a hobbyist or an experienced artist, this practical guide covers everything you need to achieve stunning water effects with E-30 water effect resin—from surface prep to wave techniques and finishing. Dive in to discover artist-approved approaches for realistic results.

What You’ll Need
- “Sea” – Resin Kit for Creating Ocean Art, 1.7kg Epoxy, Pigments & Canvas: A complete kit containing epoxy, ocean pigments, additives, and essential tools.
- “Art Pro Deluxe” – Ultra-High Viscosity Epoxy Resin for Artists: Perfect for controlled wave pours and layering effects.
- “Marine Palette” – Set of Dyes for Ocean Art, Epoxy Resin, and Beach Effects: Highly pigmented marine hues to build depth and realism.
- “Colourfun Set” – Liquid Epoxy Resin Colourant Set for Solid Colour Effects: Intense translucent or opaque tints for dynamic ocean variations.
- Mixing cups, spatulas, protective wear, and a heat gun or torch for detailing.
- Protective covering for your workspace.

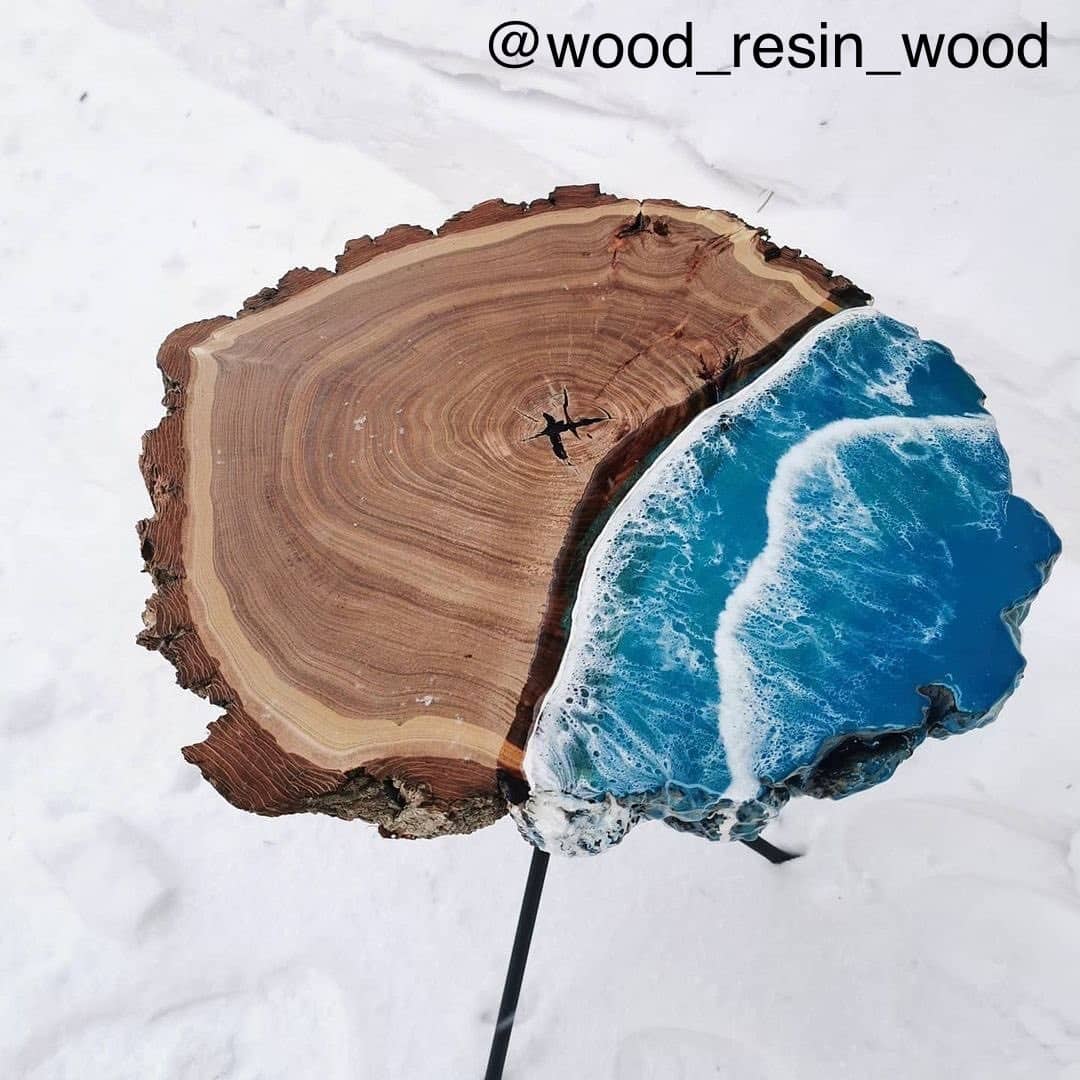
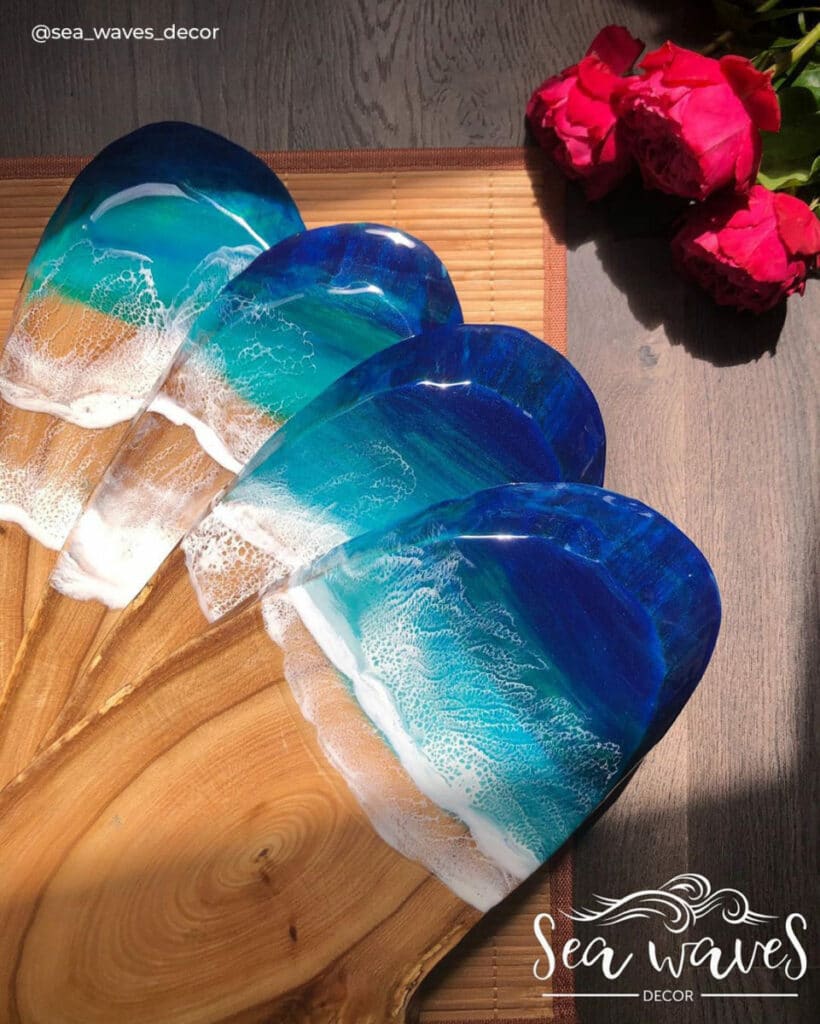
Get Inspired: Resin Ocean Art in Action
See captivating examples of water effect resin art and step-by-step in-process shots to guide your own project. Notice how varied shades and layering bring seascapes to life. Experiment with different pigment blends for unique wave patterns.
Step 1: Prepare Your Workspace and Canvas
Work in a dust-free, well-ventilated space to avoid dust settling or fume build-up. Lay down a protective sheet under your work area and make sure your canvas or wood panel is level. An uneven surface can cause resin to pool or run.
Wear gloves and long sleeves to protect your skin. If you’re using a kit such as the “Sea” – Resin Kit for Creating Ocean Art, 1.7kg Epoxy, Pigments & Canvas, you’ll have all required tools like gloves, mixing sticks, and instructions included to get started efficiently.


Step 2: Measure and Mix Your E-30 Resin
Measure and mix your E-30 resin according to the manufacturer’s instructions. Precise ratios ensure proper curing, clarity, and strength. Blend the resin and hardener in a clean container, stirring slowly for a few minutes until fully combined and free of streaks.
If you’re working on complex pours or want extended control, consider “Art Pro Deluxe” – Ultra-High Viscosity Epoxy Resin for Artists for its slow drip and self-levelling properties ideal for detailed layering.
Step 3: Add Colour and Create Depth
Choose a suite of ocean-inspired pigments from your preferred set. Mix colours gradually into separate portions of pre-mixed resin. Start with a touch of pigment and add more for the opacity or translucence desired. Combining vibrant marine tones from the “Marine Palette” – Set of Dyes for Ocean Art, Epoxy Resin, and Beach Effects creates a realistic sense of depth.
For dramatic or solid effects and easy blending, the “Colourfun Set” – Liquid Epoxy Resin Colourant Set for Solid Colour Effects offers versatile, intense tints that disperse smoothly into resin. Layer resin for water depth—darker shades for deep water, lighter towards the shore.


Step 4: Pour, Design, and Create Waves
Start with the deepest colours and pour across the canvas or board, working up towards where the foamy shoreline will be. Feather the colours together with a spatula for seamless blending. Create foamy, realistic waves by applying a dedicated wave additive or a small amount of white resin towards the beach: after pouring, use a heat gun and quick bursts of airflow to gently push and shape the resin, forming realistic lacing and cellular “sea foam” effects.
Kits like the “Sea” – Resin Kit for Creating Ocean Art, 1.7kg Epoxy, Pigments & Canvas include a special wave additive ideal for this step. Practice waves in layers for multi-dimensional movement.
Step 5: Curing and Final Finishing
Let the artwork cure fully, following the recommended curing period for your chosen resin system. Allow full curing time in a dust-free environment to retain maximum clarity and gloss. Avoid touching or moving the project while uncured.
Once hardened, you may add a final clear layer for extra shine or gently sand rough edges. Display your finished piece away from prolonged sunlight to keep the colours vivid.
Tips, Common Mistakes, and Troubleshooting
- Avoid over-mixing pigments as this can cloud the resin and mute depth effects.
- Always follow mixing ratios and timings for your chosen resin.
- Protect from dust and temperature swings during curing to prevent imperfections.
- Use a heat gun for cell effects, but avoid overheating which could introduce bubbles or scorch the resin.
Expert Finishing Touches
When perfecting your artwork, consider adding a final gloss layer with a clear resin for museum-quality shine. Proven techniques with E-30 resin help achieve lasting, crystal-clear results. Keep your workspace orderly for professional consistency.

- "Sea" – Resin Kit for Creating Ocean Art, 1.7kg Epoxy, Pigments & Canvas£47.45"Sea" resin kit includes thick epoxy resin, pigments, and additives for ocean art, suited to the theme 'How do you use E-30 water effect resin?
- "Art Pro Deluxe" – Ultra-High Viscosity Epoxy Resin for ArtistsPrice range: £35.95 through £302.45Art Pro Deluxe is an ultra-high viscosity epoxy resin designed for artists needing precise control and clear finish layers.
- "Marine Palette" – Set of Dyes for Ocean Art, Epoxy Resin, and Beach EffectsPrice range: £11.45 through £17.95The "Marine Palette" Set of Dyes offers concentrated, odourless pigments designed for ocean-inspired epoxy resin artworks.
 "Colourfun Set" – Liquid Epoxy Resin Colourant Set for Solid Colour EffectsPrice range: £14.45 through £50.95Colourfun Set offers intense translucent colours suitable for transparent epoxy resin projects and sea water effects.
Frequently Asked Questions
What makes E-30 water effect resin special for ocean effects?
E-30 water effect resin is formulated for flawless clarity and self-levelling, which is essential for creating realistic wave effects in resin art.
Can I layer colours with E-30 water effect resin?
Yes, the resin’s controlled viscosity makes it perfect for layering translucent shades, helping create depth and realistic water transitions.
Which pigments work best for ocean resin effects?
Opt for epoxy-safe, highly concentrated dyes like the Marine Palette or Colourfun sets to achieve ocean-inspired hues without cloudiness.
How do I prevent bubbles in resin water effect art?
Stir slowly and use a heat gun or torch to pop surface bubbles immediately after pouring, ensuring the resin is bubble-free before curing.
How long does E-30 water effect resin take to cure?
Initial curing takes 10–12 hours; full strength and clarity are achieved after 24–48 hours. Allow more time in cooler environments.
Can I use E-30 water effect resin on wood or canvas?
Yes, E-30 resin works well on both primed wood panels and stretched canvas as long as surfaces are level, stable, and sealed.