 Free shipping on orders over £29,85


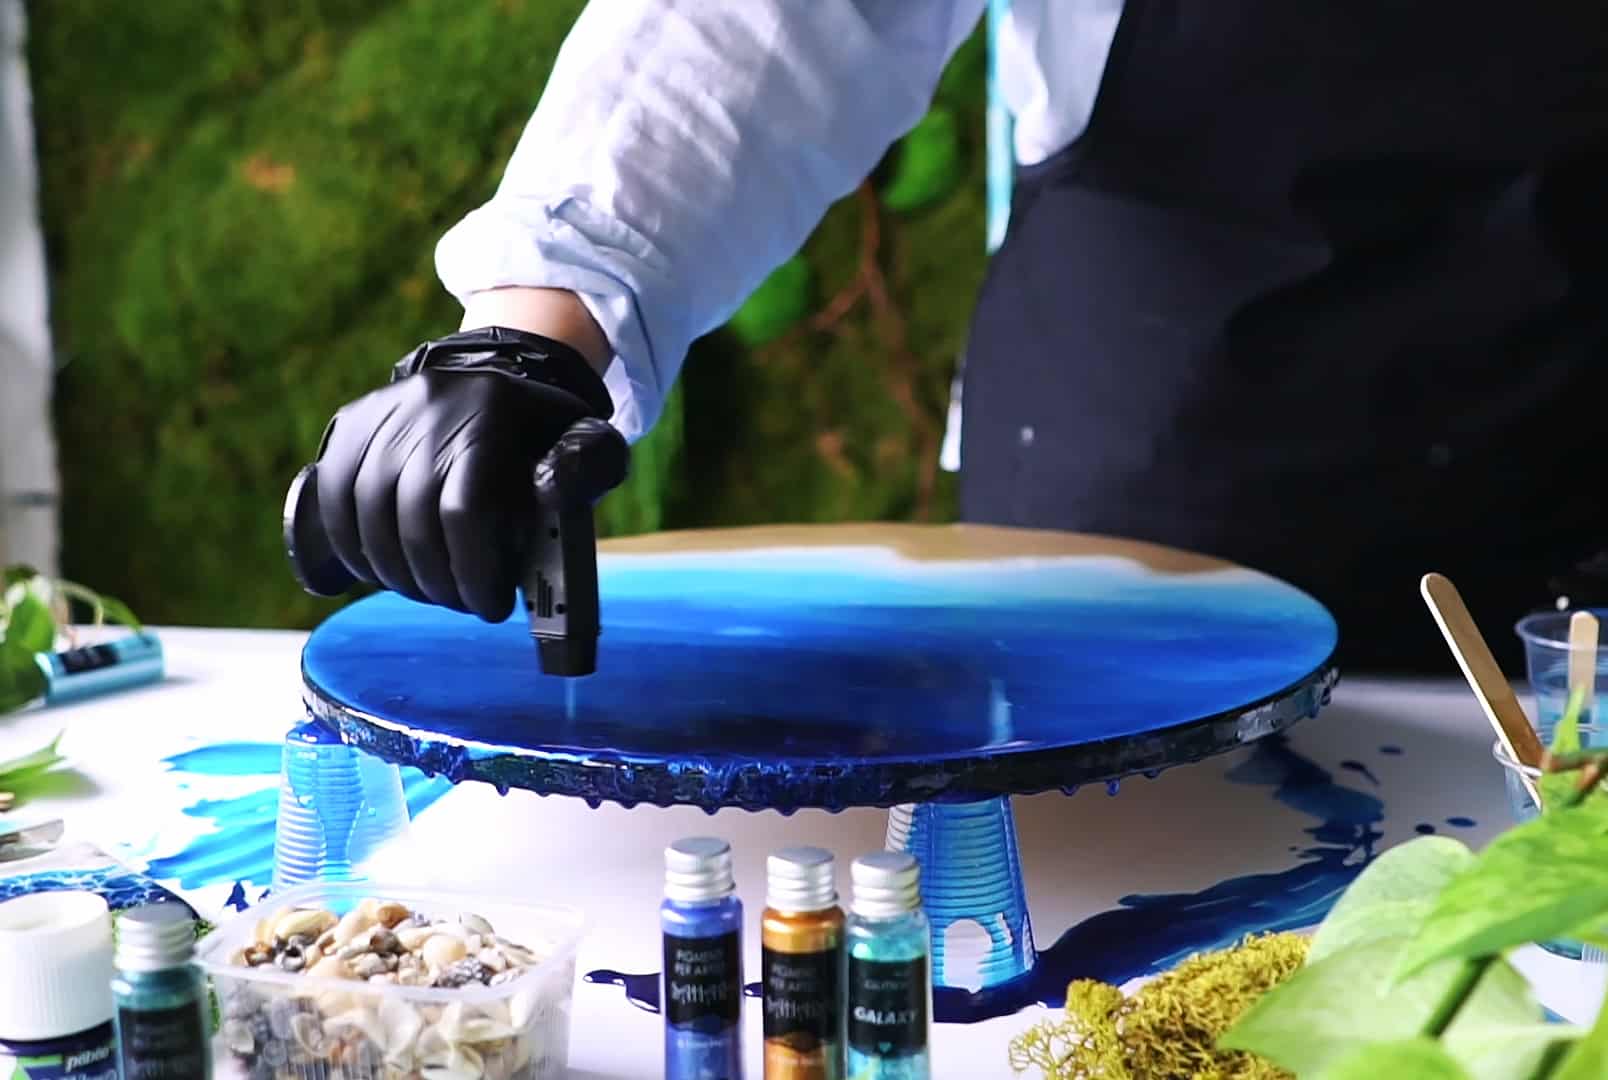
← Back to How to apply Caldart epoxy primer?
Air bubbles can spoil the look and performance of your epoxy primer coat. The good news is, with a few simple steps, you can achieve a flawless, professional finish. Here’s how to tackle bubbles after primer application.
Why Bubbles Appear and How to Spot Them
Bubbles in epoxy primer are often caused by air trapped during mixing or spreading, or from moisture in the substrate. You’ll typically notice small pinholes or raised spots as the primer begins to settle. Catching these early, while the surface is still wet, makes them far easier to remove.
Best Ways to Remove Bubbles
- Use a heat gun: Gently sweep a heat gun like the Gas Heat Gun for Epoxy Resin over the surface while the primer is still wet. The warmth causes bubbles to rise and pop rapidly, ensuring a smooth layer.
- Apply light, even passes: Avoid holding the heat gun too close or in one spot – a gentle, constant movement is key to prevent discolouration or overheating.
- Check edges and corners: These areas often trap more bubbles, so pay extra attention to details.
When Bubble Removal Matters Most
Bubbles not only affect the appearance, but can compromise the adhesion of subsequent resin layers. For a durable, resilient finish—especially for high-traffic floors or decorative projects—removing bubbles is an essential step.
Related products
Related guides
Taking the time to remove bubbles after priming ensures your surface is truly ready for the next stages of resin application. Explore more tips on preparing and applying Caldart epoxy primer for professional results on our main guide.