 Free shipping on orders over £29,85


How do you make a provisional in resin?
Step-by-step guidance for professional resin provisionals


Creating a provisional in resin is a valuable technique for professionals and hobbyists alike, whether you are prototyping an object, producing test models, or preparing accurate replicas for further work. This guide will walk you through the essential steps, common pitfalls, and trade tricks to achieve a crisp, reliable provisional using the right resin methods and materials.
What You’ll Need
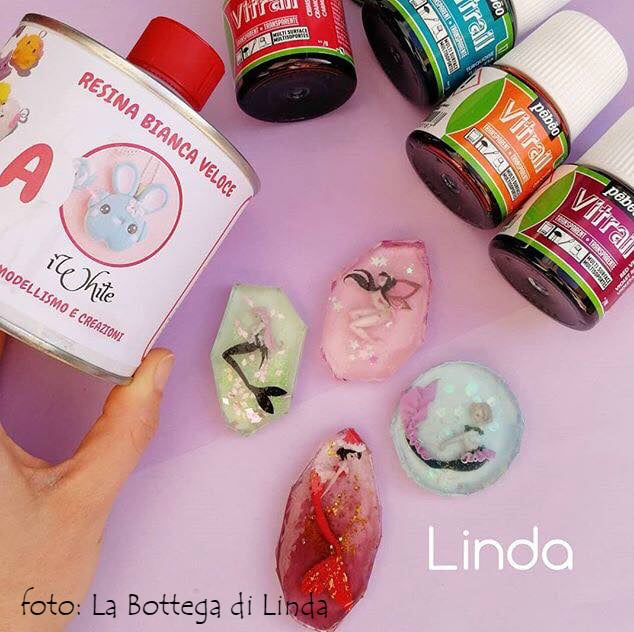
- “IWhite” – Polyurethane Casting Resin – White, Fast-Curing Two-Part System: Ideal for rapid, detailed casting work
- “Polyform” – Polyurethane Casting Resin, Beige, Fast-Setting for Prototyping: Fast-setting for quick project turnaround
- “Liquidissima” – Epoxy Resin For Creations & Jewellery: Best when clarity and long working time are vital
- Mould (preferably made from silicone for easy release)
- Mixing containers and wooden stirrers
- Digital scales for precise measurements
- Disposable gloves and mask
- Release agent (suitable for resin casting if required)

See Example Provisional Castings and Preparation
This visual gallery demonstrates workspace setup, dealing with air bubbles, and demoulding strategies for crisp and reliable resin provisionals. Notice the clarity and detail that careful technique can achieve using recommended polyurethanes and epoxies.

Step 1: Prepare Your Workspace and Mould
Begin by ensuring your workspace is clean, dry, and well-ventilated. Place a protective covering on all surfaces and set up your tools within easy reach. Select a silicone mould appropriate for the size and detail of your provisional. If reusing a mould or concerned about sticking, lightly spray or brush a release agent into the cavity, making sure it does not pool.
It is crucial to pre-warm the mould and your chosen resin components to room temperature (ideally 18–25°C) to facilitate optimal flow and reduce any risk of premature thickening, especially during colder months.
Step 2: Measure and Mix Accurately
Accurate measurement of resin and hardener components ensures solid, defect-free results. Use digital scales for polyurethane products such as “IWhite” – Polyurethane Casting Resin – White, Fast-Curing Two-Part System or “Polyform” – Polyurethane Casting Resin, Beige, Fast-Setting for Prototyping, as they require precise weight ratios for the chemical reaction. Epoxy resins like “Liquidissima” – Epoxy Resin For Creations & Jewellery benefit from slow, thorough mixing—scrape sides and base often to ensure a uniform blend.
Mix accurately for best results: Undermixing can cause unreacted patches, while inaccurate measures affect curing. Work steadily and within the resin’s pot life—especially with fast-curing polyurethanes—to avoid setting up in the container.
Step 3: Pour and Release Air Bubbles
Pour your mixed resin slowly into the lowest point of the mould, allowing the liquid to fill up from the bottom and rise gently, which reduces trapment of air. For detailed provisionals using polyurethane or low viscosity epoxy, knock the filled mould gently on the workbench or use a cocktail stick to tease bubbles from corners and edges.
If using “Liquidissima” for clear effects or intricate jewellery, bubbles are less likely due to the specialised formula, but a quick pass with a heat gun at a safe distance can help. Release air bubbles thoroughly before curing to achieve crisp detail and a smooth finish.
Step 4: Demould and Inspect Carefully
Observe the recommended demould time for your chosen resin—5–30 minutes for most polyurethane products, and several hours for epoxies. Never force a resin piece from the mould before it is firm enough, as this risks distortion or cracking. For difficult shapes, flex the mould gently or use compressed air from the back.
Demould with care to avoid damage: Although silicone offers easy release, rushing this step can ruin otherwise perfect provisionals.
Step 5: Finishing and Surface Perfection
Inspect your demoulded provisional for sharp edges, small flash marks, or surface irregularities. Light sanding with fine wet-and-dry paper smooths these away. If an ultra-clear finish is needed, ‘post-cure’ epoxies at room temperature for a day or use a fine polishing compound.
Surface finish is key to fidelity—every stage from mixing to demoulding influences the detail and reliability of your resin provisional. Take your time to trim or polish as required, so it precisely matches your intended outcome.
Tips and Troubleshooting for Perfect Provisionals
Work within stated temperature ranges and observe pot life times closely—polyurethanes especially can set very fast. Always use protective gloves and ventilate well, as all resins can emit vapours or irritate skin. If bubbles persist, review your mixing speed and mould preparation. For best results, trial a small sample before committing to detailed work.
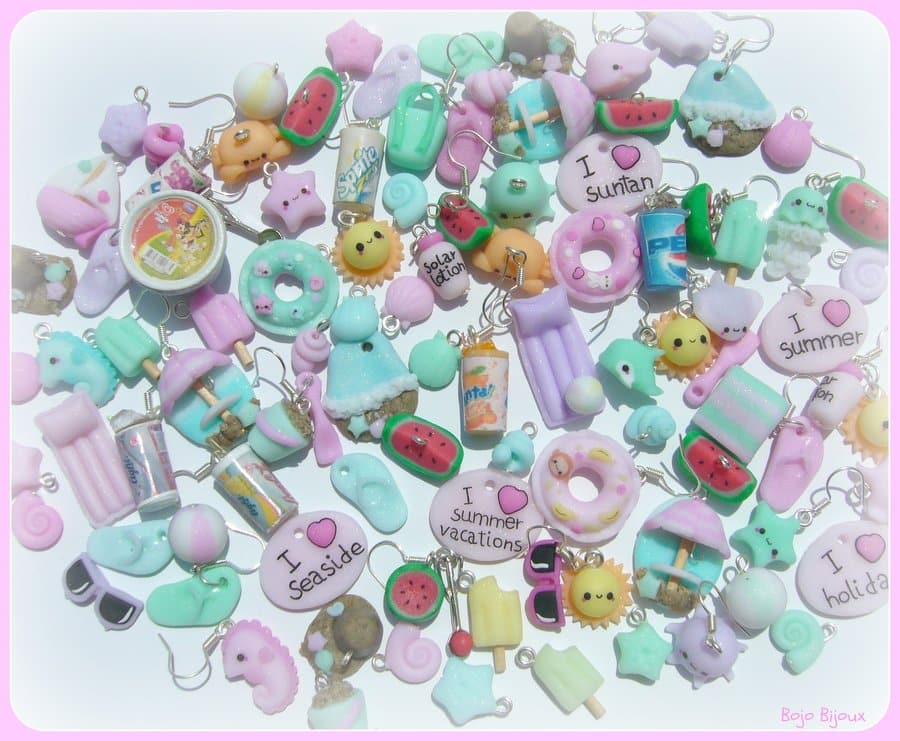
Finishing Techniques Showcased
Explore close-ups of trimmed, sanded, and polished resin provisionals. Observe how surface finishing brings prototypes and jewellery to a professional level, ready for presentation or further processing.

- “IWhite” – Polyurethane Casting Resin – White, Fast-Curing Two-Part SystemPrice range: £24.00 through £36.95IWhite is a fast-curing polyurethane resin suitable for rapid, detailed casting in line with the theme of making provisionals in resin.
- "Art Pro Deluxe" – Ultra-High Viscosity Epoxy Resin for ArtistsPrice range: £35.95 through £302.45Art Pro Deluxe is an ultra-high viscosity epoxy resin suitable for precise resin art and glossy finish layers.
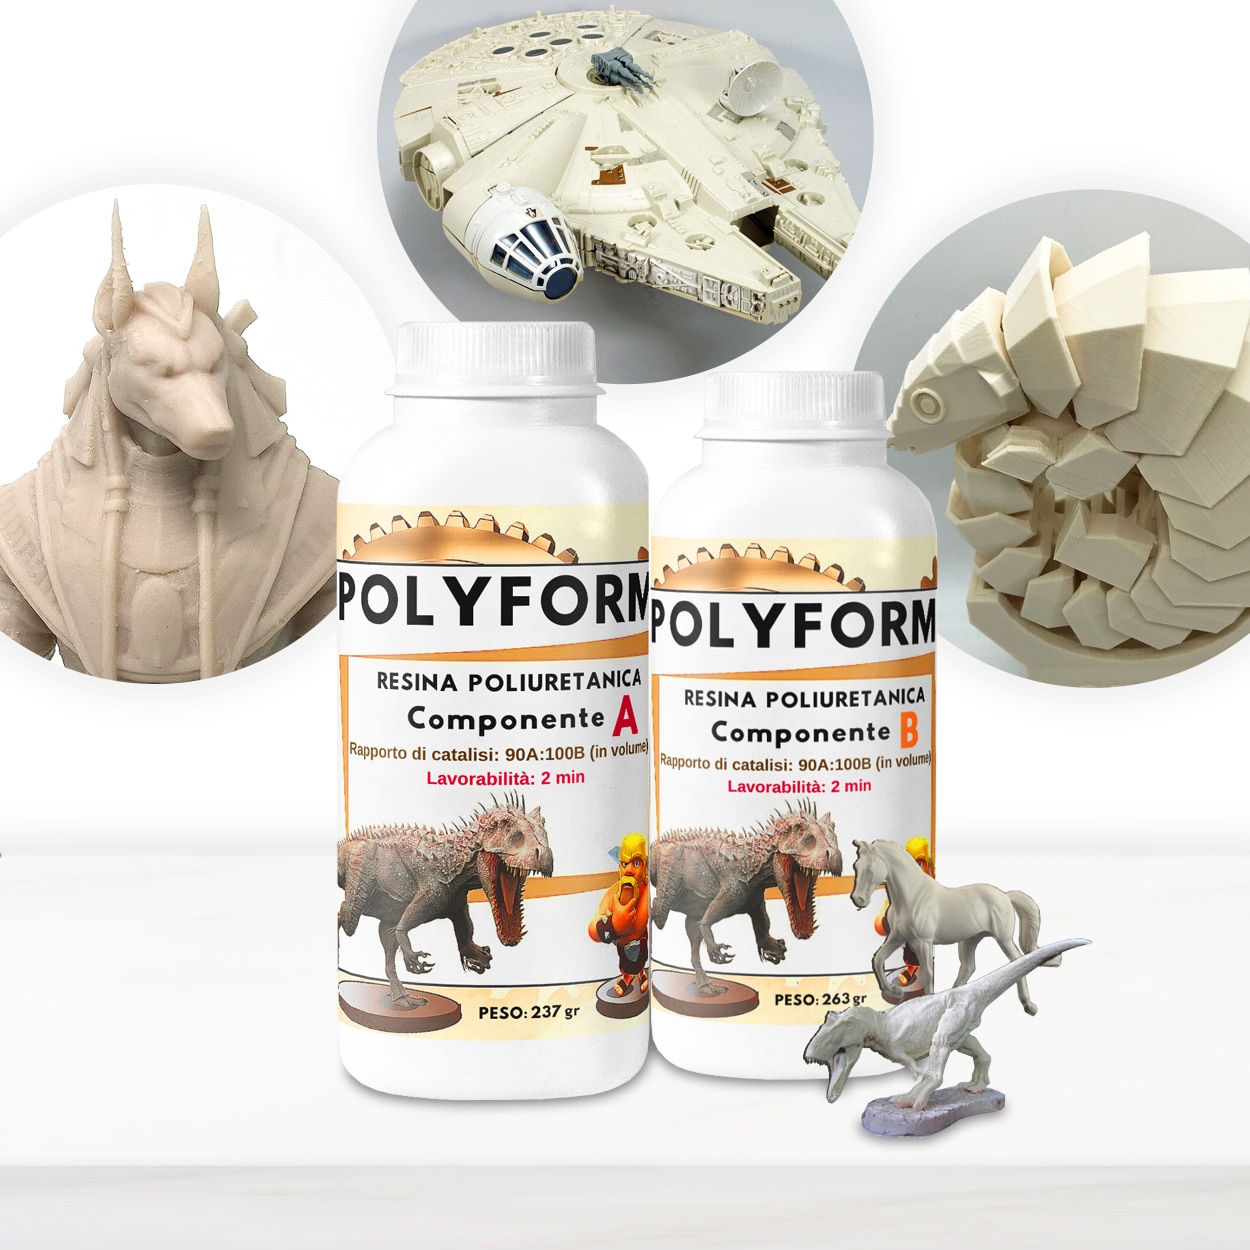 “Polyform” – Polyurethane Casting Resin, Beige, Fast-Setting for PrototypingPrice range: £15.95 through £141.95Polyform is a beige polyurethane casting resin designed for rapid prototyping with fast-setting and high detail, suitable for model making.
 "Liquidissima" – Epoxy Resin For Creations & JewelleryPrice range: £12.85 through £31.85Liquidissima epoxy resin combines high transparency and long working time, suitable for detailed jewellery and creation moulds.
Frequently Asked Questions
Which resin is best for fast, detailed provisionals?
Polyurethane resins such as “IWhite” or “Polyform” cure rapidly and capture fine detail, making them ideal for quick provisional work.
Is it possible to colour resin provisionals?
Many casting resins, including “IWhite” and “Liquidissima”, accept colouring or painting for custom effects on your provisional piece.
How do I avoid bubbles in resin provisionals?
Pour slowly, use a heat gun if needed, and tap the filled mould gently—these methods all help reduce bubble formation.
When can I safely demould a resin provisional?
Wait for the resin to reach recommended hardness—usually 30 minutes for polyurethane, several hours for epoxy—to prevent distortion or breakage.
What to do if the provisional sticks in the mould?
Use a release agent before casting and gently flex the mould or use compressed air from behind to free difficult shapes.
How can I make my provisionals glossy?
Use a high-quality, self-levelling resin like "Liquidissima" and polish the surface after full cure for a clear, glossy finish.