 Free shipping on orders over £29,85

How to apply resin on a kitchen car?
Step-by-step guide for durable, beautiful kitchen surfaces


Transform your kitchen countertop with a smooth, glossy resin finish. This guide walks you through preparing, mixing, pouring, and curing resin for a stunning surface that’s resistant to spills and easy to clean. Perfect for upcycling worn worktops, creating designer effects, or ensuring hygienic food zones, this step-by-step approach is ideal for both beginners and DIY enthusiasts.
What You’ll Need
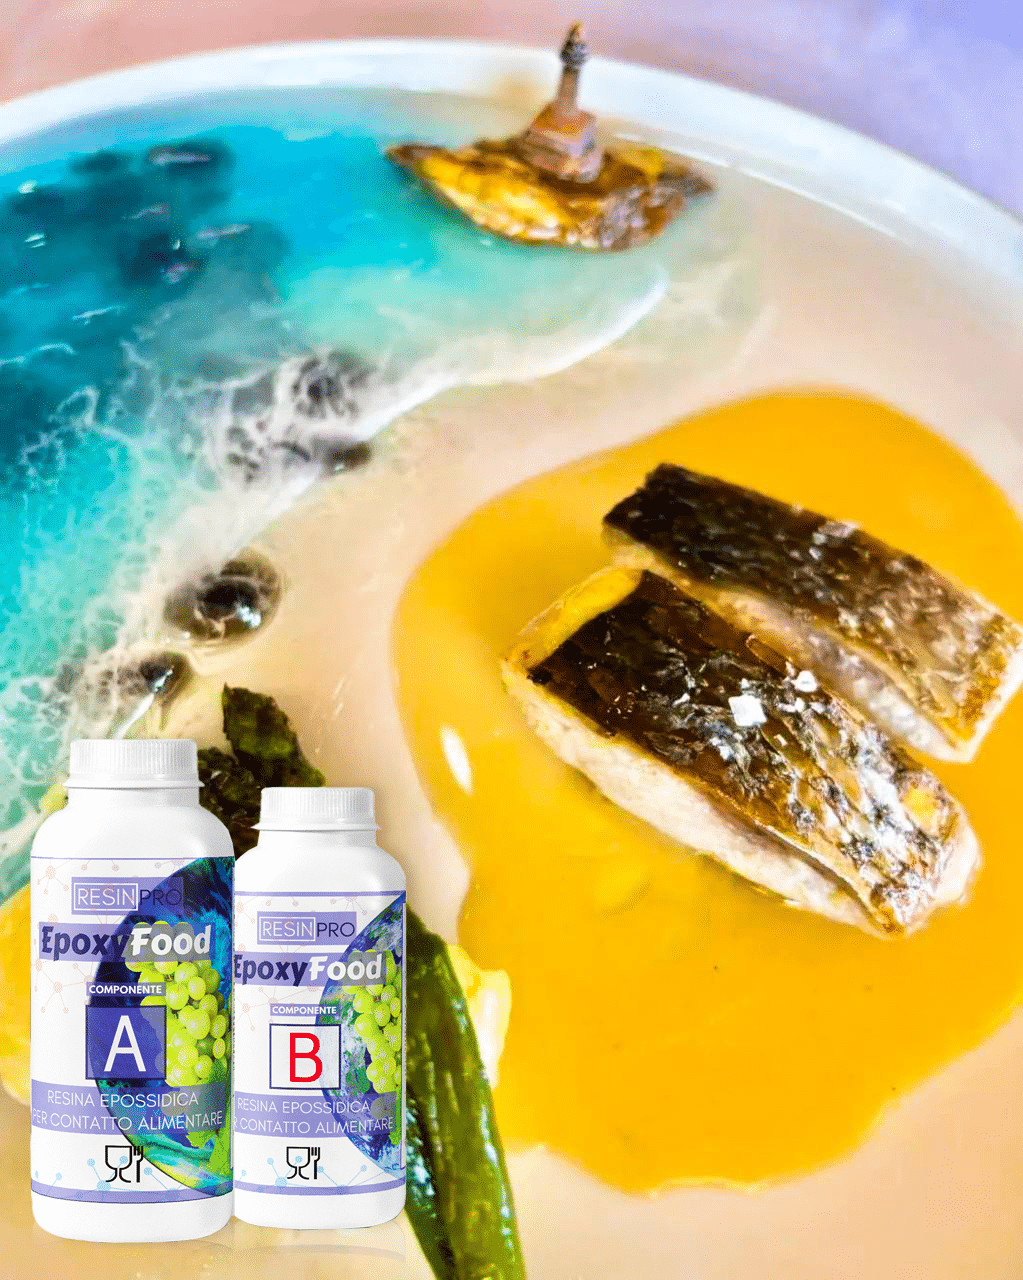
- “EpoxyFood” – Certified Clear Food Contact Epoxy Resin for Coating: Food-safe resin for surfaces in contact with cold snacks.
- “Art Pro” – Clear Epoxy Resin for Artists and Surface Coating: For decorative, high-gloss, scratch-resistant results.
- “Trasparente” – Multipurpose Clear Epoxy Resin for Casting – Up to 2cm: Best for thicker, decorative pours or restoration.
- “Stone Effect Collection” – Marble Epoxy Resin Countertop Kit: Comprehensive kit for stone and marble effects.
- Sandpaper (various grits)
- Degreaser and lint-free cloths
- Painter’s tape and plastic sheeting
- Mixing cups, stir sticks, and application tools
- Protective gloves and respirator mask
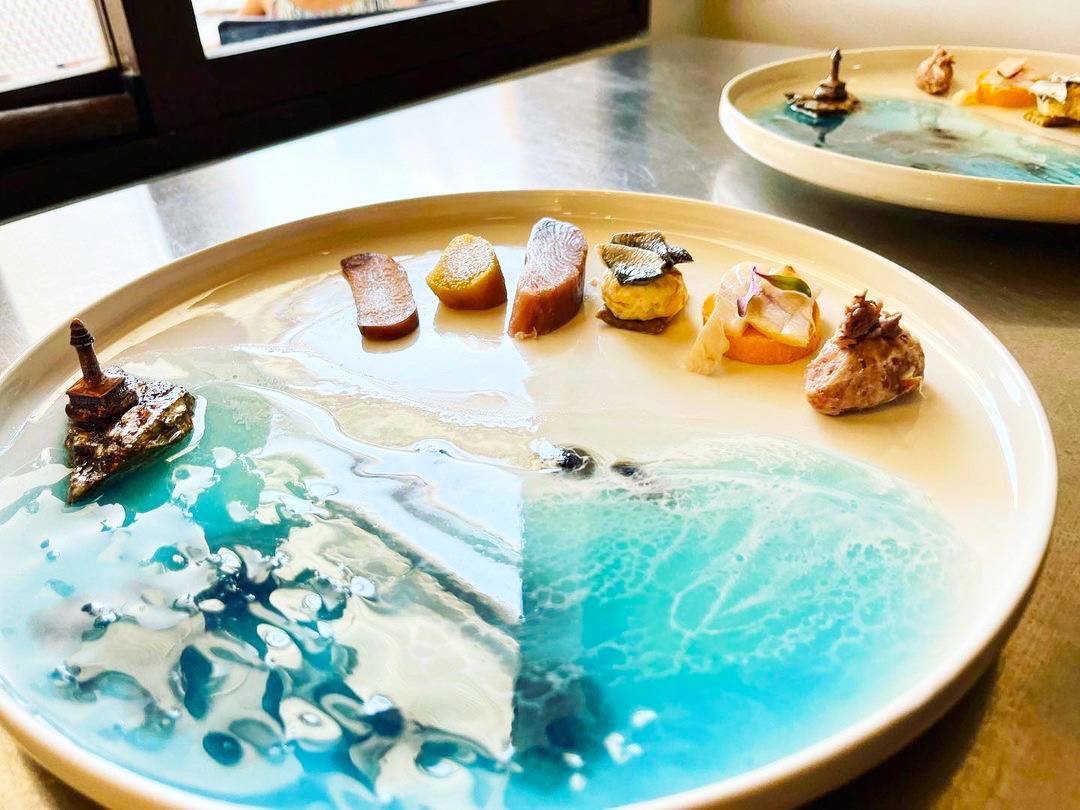
Visual Inspiration: Stunning Resin Countertops
See the transformation possible with resin coatings—ranging from subtle, crystal-clear finishes for timeless style to striking marble and stone effects using the Stone Effect Collection. Photos showcase different finishes, thicknesses, and creative patterns achievable in modern kitchens.

Step 1: Prepare the Surface
Start by making sure your countertop is clean, dry, and free of grease. Remove any objects, then scrub the surface thoroughly with a degreaser and rinse well. Lightly sand the surface using medium-grit sandpaper to promote resin adhesion, and wipe away all dust using a damp, lint-free cloth.
Use painter’s tape and plastic sheeting to mask off sinks, edges, and cabinets to protect against drips. Cover the floor beneath your work area. Always wear gloves and a respirator during both prep and application for safety.
Ensure your workspace is dust-free and well-ventilated to avoid imperfections in the cured resin.
Step 2: Mix the Resin
Accurate mixing is crucial for a flawless, durable finish. Pour the resin and hardener into a clean container, carefully measuring according to the manufacturer’s ratio.
If applying to a food-preparation area, choose EpoxyFood, ensuring it’s mixed at the correct 100:55 weight ratio.
Mix slowly and methodically, scraping the sides and base of the container to combine thoroughly and avoid introducing air bubbles. After mixing, allow the resin to sit for a minute to help bubbles rise to the surface. Follow the mixing ratio exactly to avoid curing problems or sticky spots.
Step 3: Pour and Spread the Resin
Gradually pour resin from the centre and work outwards. Use a notched spreader or gloved hand to distribute evenly, taking care not to overwork as this can trap air. Pour in thin, even layers—for most applications, 2 mm is ideal, repeating if a thicker surface is needed.
For creative effects like marble or stone, opt for the Stone Effect Collection – Marble Epoxy Resin Countertop Kit, following the included instructions for pigment blending and veining techniques.
Cover the freshly poured resin with a dust shield. If air bubbles appear, remove with a heat gun or kitchen torch held at a safe distance. Address drips and bubbles quickly while the resin is still fluid.
Step 4: Curing and Finishing Touches
Allow the resin to cure undisturbed in a stable environment. Avoid direct sunlight, dust, and changes in temperature. Most resins reach touch-dry stage within 12–24 hours and cure fully in several days, but always consult the specific product’s instructions for recommended timing.
Once hardened, inspect the surface for any imperfections. If needed, gently sand down dust nibs then buff and polish to restore gloss. Carefully peel away masking tape before the resin cures completely on the edges for a clean result.
If using Art Pro, its dense, non-drip formula allows thicker, glass-like topcoats.

Tips, Common Mistakes, and Troubleshooting
Work in consistent conditions—the key is patience and attention to detail throughout every stage. Rushing the cure can result in surface imperfections or reduced hardness. Avoid pouring thick layers in one pass unless the resin formulation specifically allows this. Mis-measuring ratios, ignoring pot life, and neglecting surface prep are top causes of poor results.
If sticky spots remain after curing, the most likely culprit is incomplete mixing or incorrect ratios. Lightly sand and recoat as needed. If bubbles or dust appear, use fine sandpaper and a final thin topcoat for best results.
Finishing Touches and Real User Results
Completed resin countertops reveal the depth and gloss achievable with proper application. Durability is matched by unique aesthetic results, from food-safe translucency to bold designer appearances for trend-conscious households.

- "EpoxyFood" – Certified Clear Food Contact Epoxy Resin for CoatingOriginal price was: £39.00.£32.85Current price is: £32.85."EpoxyFood" is a transparent, food-safe epoxy resin designed for kitchenware coatings, offering clarity and safety for cold snacks.
- "Art Pro" – Clear Epoxy Resin for Artists and Surface CoatingPrice range: £31.15 through £388.85Art Pro clear epoxy resin provides a transparent, durable finish suitable for artists and crafters working on glass-like surfaces.
 "Trasparente" – Multipurpose Clear Epoxy Resin for Casting – Up to 2cmPrice range: £8.45 through £948.85"Trasparente" is a clear epoxy resin suitable for layered casting projects up to 2cm thick, compatible with woodworking and restoration.
 "Stone Effect Collection" – Marble Epoxy Resin Countertop KitPrice range: £54.85 through £394.85"Stone Effect Collection" offers an all-in-one kit for achieving professional marble and stone effects on kitchen and bathroom surfaces.
Frequently Asked Questions
Can I use resin on existing laminate worktops?
Yes, as long as the surface is well-cleaned, sanded, and properly primed for adhesion before resin application.
Is epoxy resin safe for food contact areas?
Only food-certified resins, such as EpoxyFood, are recommended for surfaces in contact with food. Always check product certifications.
How thick should resin layers be on kitchen countertops?
2 mm per coat is typical for even coverage. Thicker builds may require multiple pours to ensure proper curing and minimise defects.
What if air bubbles appear after pouring resin?
Use a heat gun or kitchen torch, passed gently over the surface, to remove bubbles while the resin is still fresh.
Can I create marble or stone effects on my counter with resin?
Yes, by using special kits like the Stone Effect Collection, which include pigments and tools for realistic veining and patterning.
How long does resin take to cure on kitchen countertops?
Most resins become touch dry in 12-24 hours and reach full durability in up to 7 days, depending on product and conditions.