 Free shipping on orders over £29,85


How to colour epoxy glue?
Transform clear epoxy adhesive into vibrant resin art pieces.


Colouring epoxy glue allows you to create custom shades and visual effects in jewellery, art pieces, coatings, and repairs. This guide explains simple, safe methods to tint epoxy glue, helping you get professional, consistent colours in your resin projects.
What You’ll Need
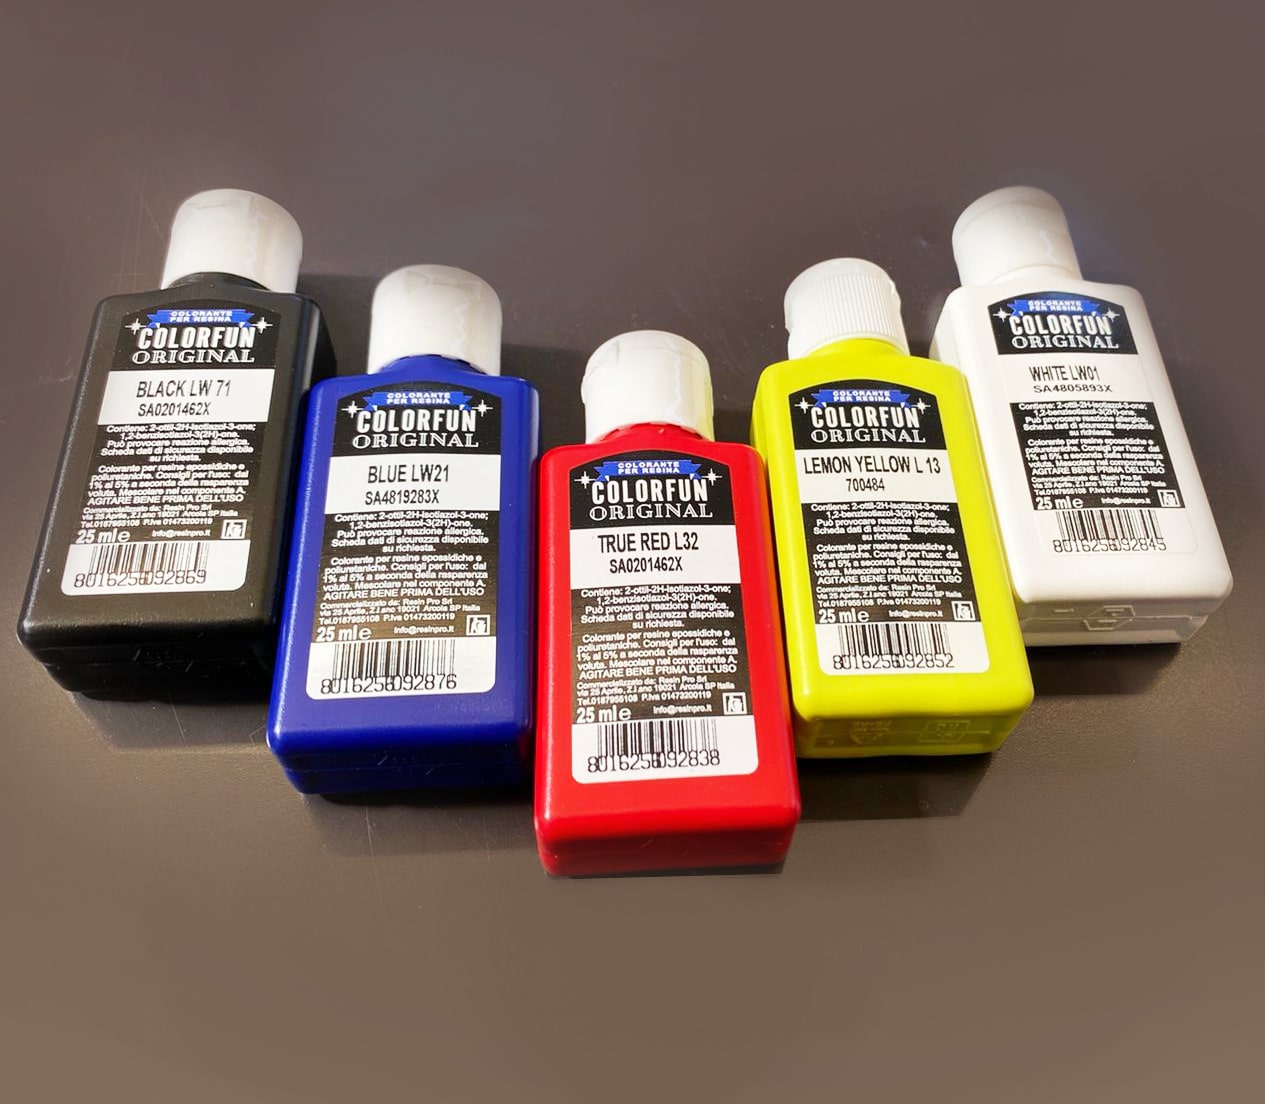
- “Colourfun” – Liquid Epoxy Resin Colourant 25-100ml – High coverage – for vivid, easily blendable colour (opaque or translucent)
- “Colourfun Set” – Liquid Epoxy Resin Colourant Set for Solid Colour Effects – a variety of concentrated pastes for custom-blending shades
- “Magic Crystal” – Transparent Resin Colour 45ml – for crystal-clear, tinted resin effects
- “Magic Crystal” – Set of 5 Transparent Colourants, 5 x 45ml – a set for multi-shade, transparent resin work
- Standard epoxy glue and hardener
- Mixing cups and stirring sticks
- Nitrile gloves, safety glasses, protective apron

Colourant Types and Sample Effects
Opaque liquid colourants create bold, solid colours ideal for statement pieces, while transparent dyes add delicate, glass-like hues perfect for jewellery and geode art. Try test-mixing each type to compare the vibrancy and clarity achievable on small resin samples.
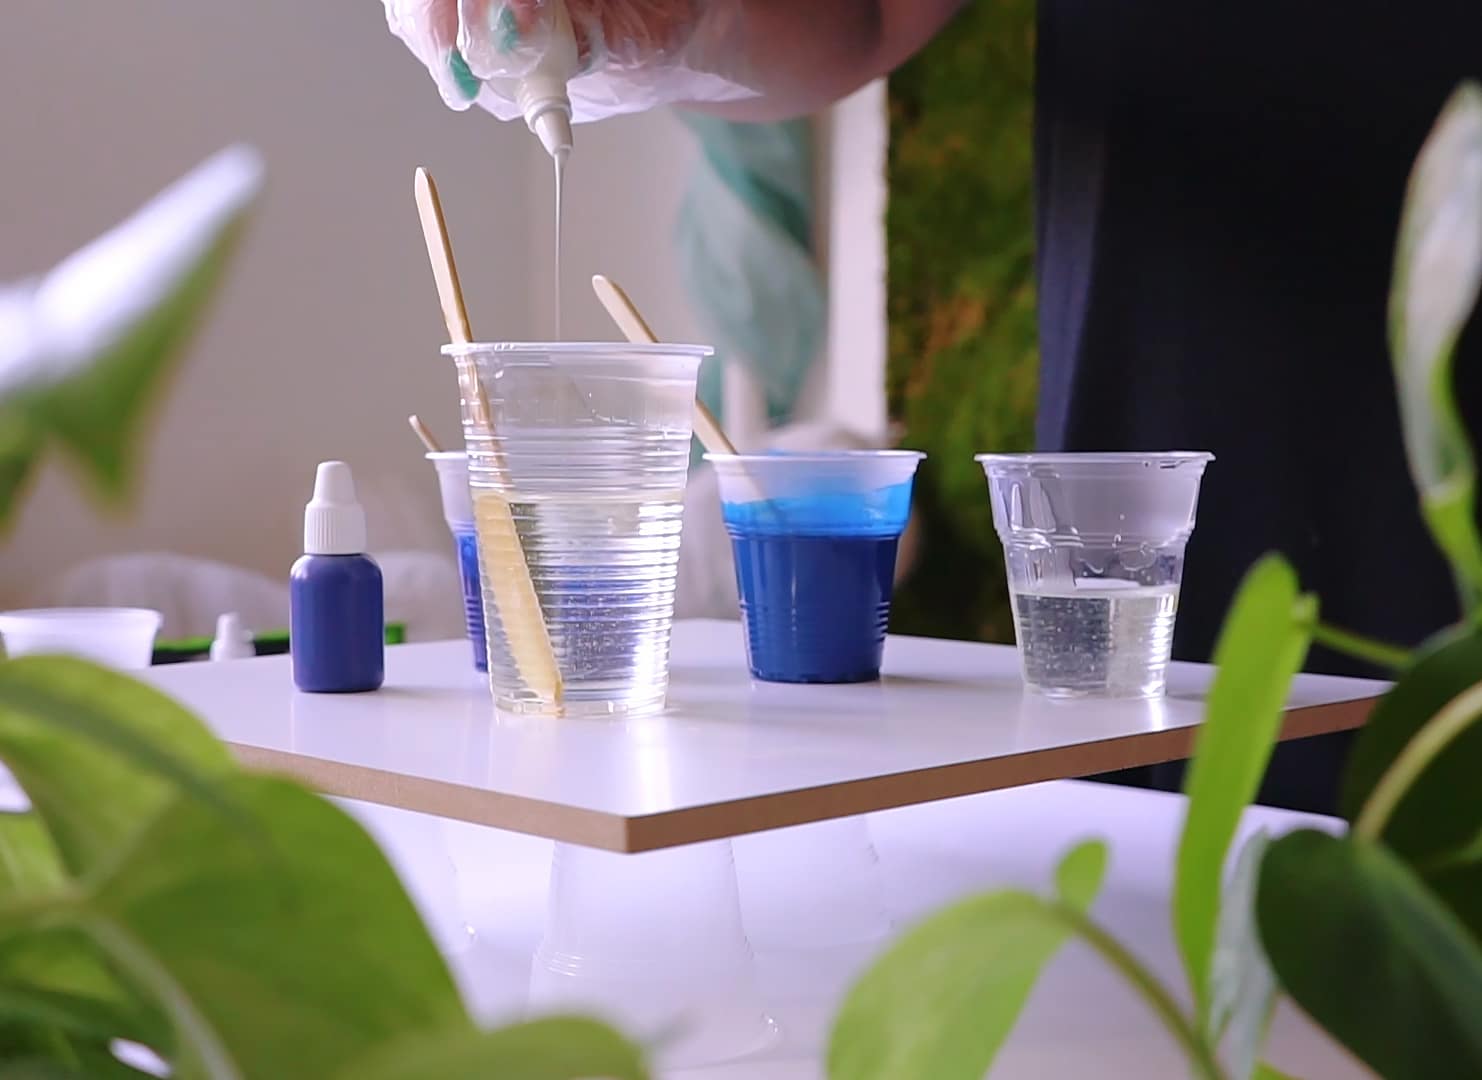
Step 1: Set Up Your Workspace and Safety Equipment
Begin by arranging all your materials on a clean, well-ventilated surface. Epoxy resins and colourants can be sticky and may cause stains or irritation, so wear protective gloves and eyewear to prevent skin or eye irritation. Lay out mixing utensils, and ensure that any surfaces you want to protect are covered with disposable sheets or craft mats.
Proper lighting helps you accurately gauge colour mixing results, and ventilation minimises exposure to epoxy fumes. Always read the safety instructions for both epoxy glue and colourants before you start.
Step 2: Select and Prepare Your Colourants
Decide on the style of colour you wish to achieve—solid, semi-transparent, or crystal clear—and pick a matching resin dye or pigment. Choose the appropriate colourant based on your desired effect: opaque, translucent, or clear.
For deep, opaque colours or vibrant effects, use a drop or two from the “Colourfun” – Liquid Epoxy Resin Colourant line. If aiming for true transparency and stained-glass finishes, try “Magic Crystal” – Transparent Resin Colour 45ml or the “Magic Crystal” – Set of 5 Transparent Colourants, 5 x 45ml.
Prepare small amounts to experiment until you achieve the shade and intensity required. Re-cap bottles and store them away from direct sunlight after use to preserve pigment quality.
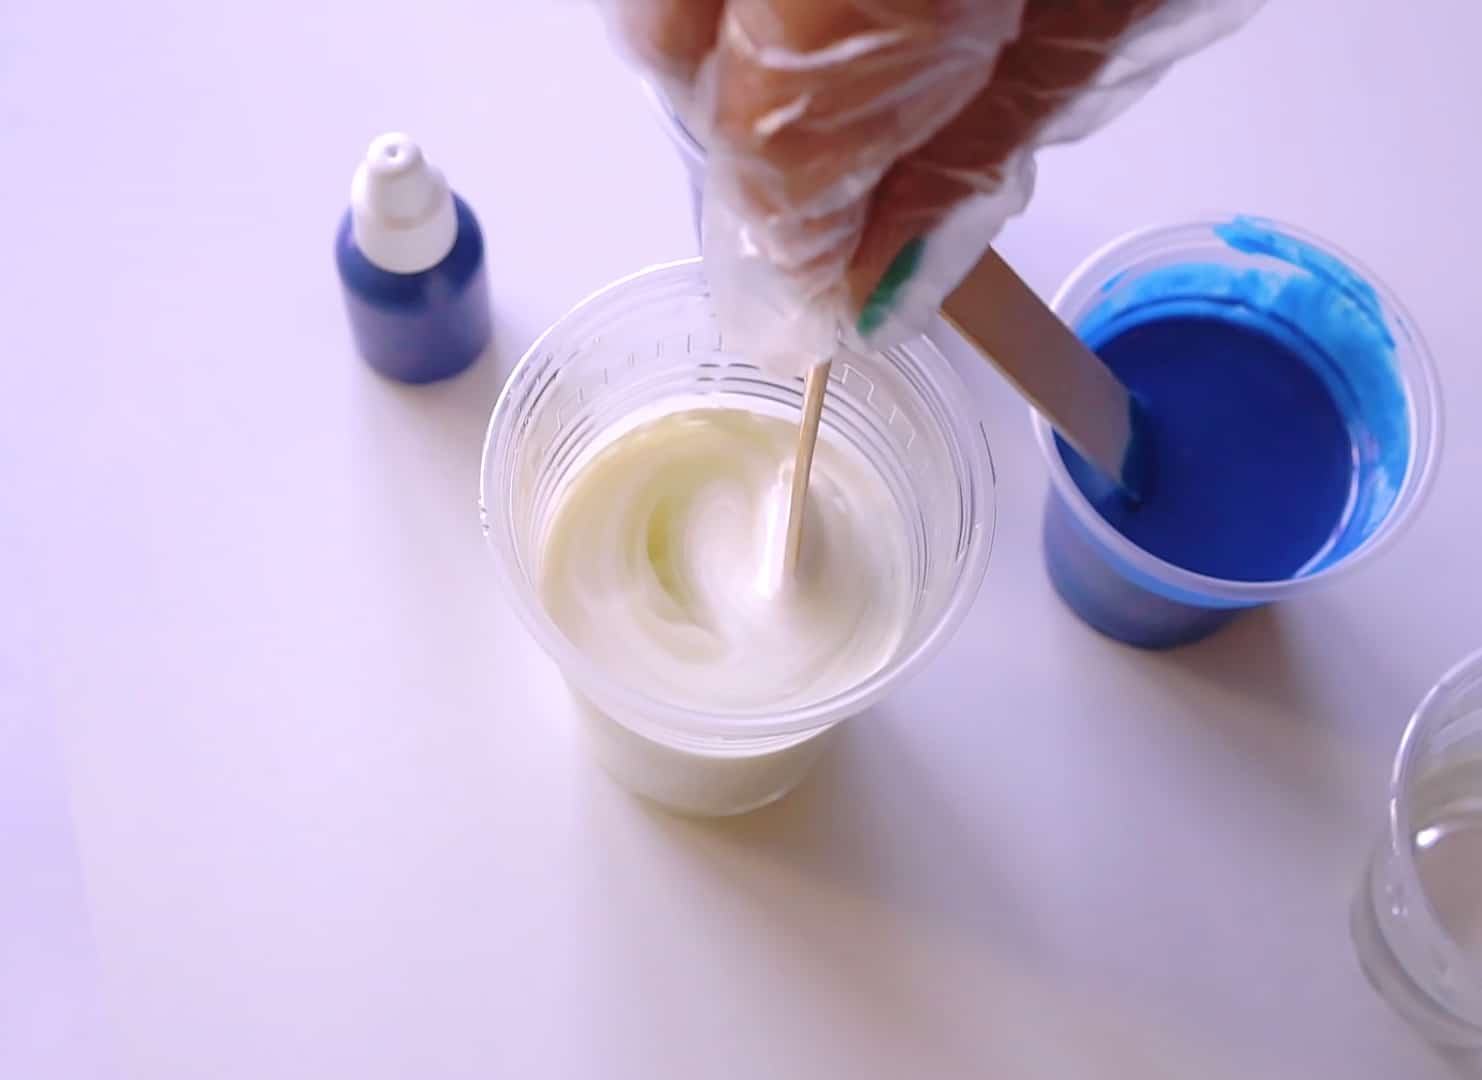
Step 3: Mix the Epoxy Glue and Introduce Colourant
Combine the epoxy resin and hardener according to manufacturer instructions, mixing thoroughly. Once blended, add drops or a small spatula tip of your chosen colourant. Add a minimal amount of colourant at first, then mix thoroughly.
If using the “Colourfun Set” – Liquid Epoxy Resin Colourant Set, use a stirring stick or spatula to scoop out a controlled quantity. For transparent effects, a single drop of “Magic Crystal” – Transparent Resin Colour 45ml is often sufficient to tint a full mixing cup.
Gradually increase the amount until your resin reaches the desired depth of colour. Stir until you achieve an even, streak-free colour. Avoid adding pigment beyond manufacturer recommendations, as heavy loading can compromise clarity or cure performance.
Step 4: Apply to Your Project and Cure
Pour or brush the coloured epoxy onto your prepared surface, mould, or join. Move slowly and take care to avoid bubbles or uneven application. The working time will vary based on the specific brand and ambient temperature; check for pot life guidance in your epoxy instructions.
Allow the coloured epoxy to cure undisturbed in a dust-free space, ensuring room temperature meets recommended parameters. Touch only once fully cured to avoid marks or impressions. If needed, repeat the colouring and coating process for intense, layered effects or additional protection.

Tips for Professional Colouring Results
- Adding too much pigment may affect curing or clarity. Stick to the recommended maximum percentage—rarely more than 5% by weight.
- Seal porous materials beforehand to avoid pigment absorption. Wood or stone may draw in resin and change the final hue.
- Work in a dust-free environment for best results. This prevents debris from settling in your wet resin and clouding the colour.
Test colours on a small batch before committing to large pieces. If blending custom shades, start with base tones and add accent pigments in tiny increments. For crystal effects, transparent dyes produce depth and luminosity, while opaque pigments are best for bold, solid hues.
Creative Colouring Inspiration
Layering different colourants in one piece can produce stunning gradients or unique crystal effects. Use transparent shades for depth or experiment with dyes and pigments to discover your signature style.
- "Colourfun" – Liquid Epoxy Resin Colourant 25-100ml – High coveragePrice range: £3.65 through £9.85"Colourfun" – Liquid Epoxy Resin Colourant offers versatile, highly concentrated pigments for even mixing and vibrant colours in epoxy resin projects.
- "Colourfun Set" – Liquid Epoxy Resin Colourant Set for Solid Colour EffectsPrice range: £13.45 through £48.15"Colourfun Set" offers intense, translucent colours designed for epoxy resin projects, suitable for effects like sea water and resin tables.
 "Magic Crystal" – Transparent Resin Colour 45ml£4.65"Magic Crystal" Transparent Resin Colour helps create resin projects with clear, vibrant colours and a glass-like finish.
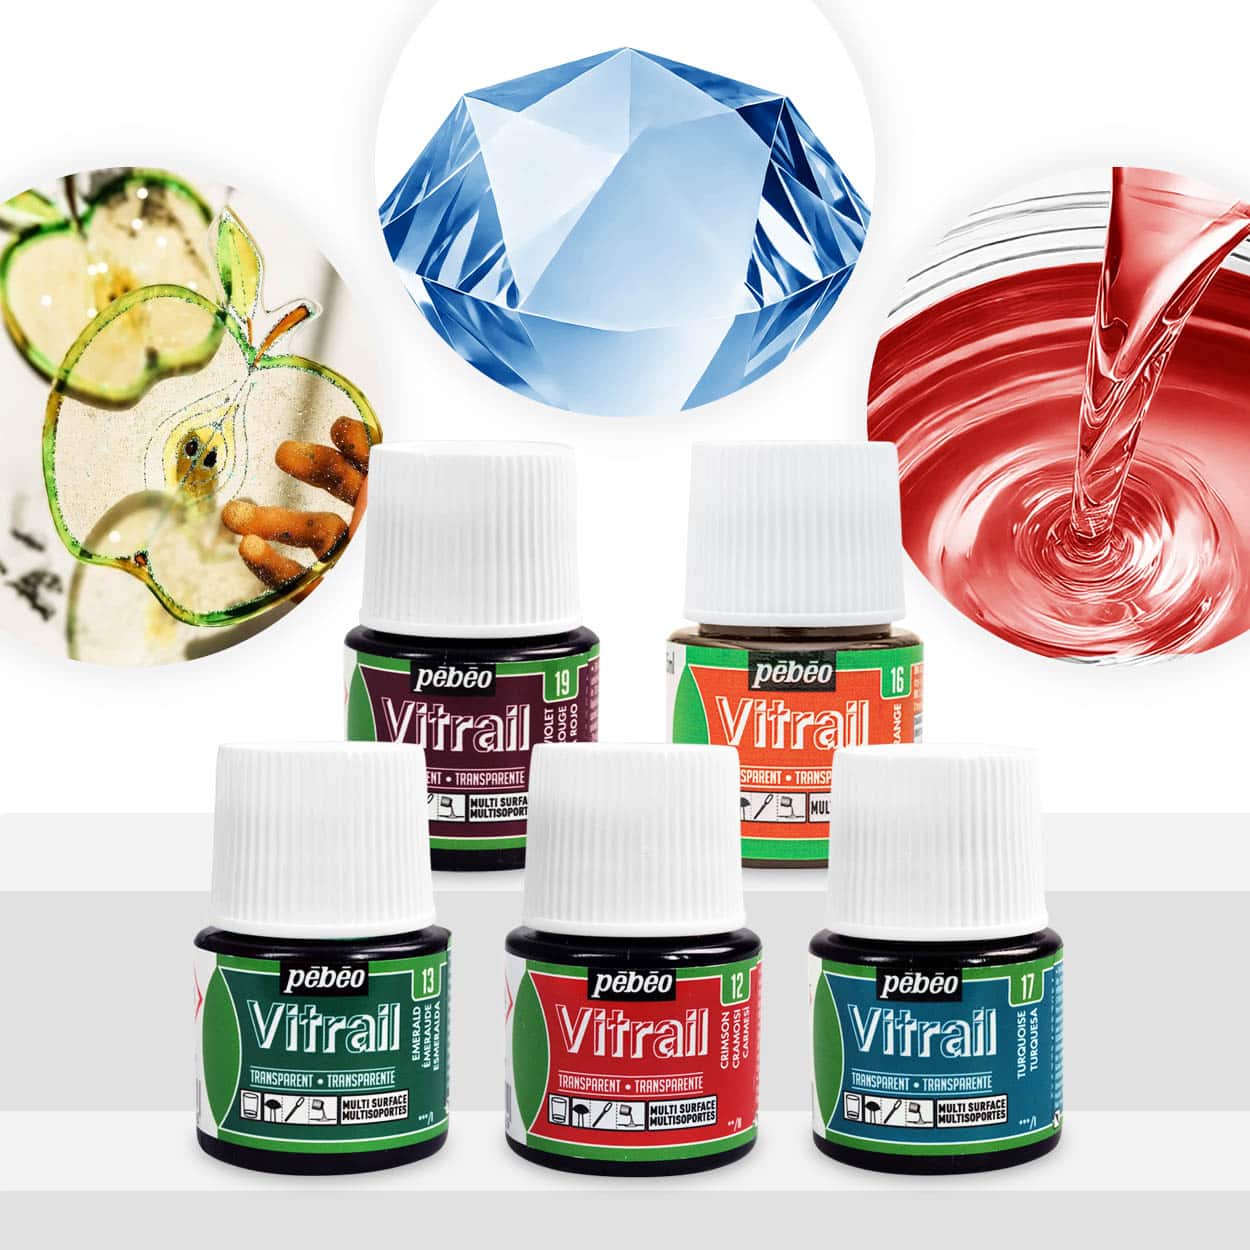 "Magic Crystal" – Set of 5 Transparent Colourants, 5 x 45ml£18.85"Magic Crystal" colourants set offers transparent shades for custom crystal effects with epoxy glue.
Frequently Asked Questions
Can I use acrylic paint to colour epoxy glue?
Acrylic paint is not recommended as it may affect epoxy curing. Use colourants designed for epoxy for best results.
How much colourant should I add to epoxy glue?
Add colourant gradually, typically up to 5% by resin weight. Exceeding this may affect cure or clarity.
How do I prevent cloudiness in coloured epoxy glue?
Use transparent dyes and avoid over-pigmenting. Stir thoroughly to mix evenly but do not introduce excess air.
Will the colour fade after curing?
Proper epoxy colourants are durable and resist fading, especially if protected from prolonged UV exposure.
Can I mix different epoxy dyes together?
Yes, most epoxy resin colourants can be blended to create custom shades. Test combinations on a small amount first.
Is coloured epoxy glue safe for food contact?
Standard epoxy and colourants are not food-safe unless certified. Avoid direct food contact unless specified.