 Free shipping on orders over £29,85


How to create different colours in epoxy resin?
Expert techniques for stunning resin colour effects every time.


Unlocking brilliant colour in your epoxy resin projects opens up a world of creativity — from bold jewellery and shimmering river tables, to custom art pours and dazzling coasters. This guide shows you how to add a broad range of colours and effects to epoxy resin, using careful technique and the right pigments for a professional, streak-free finish.
What You’ll Need
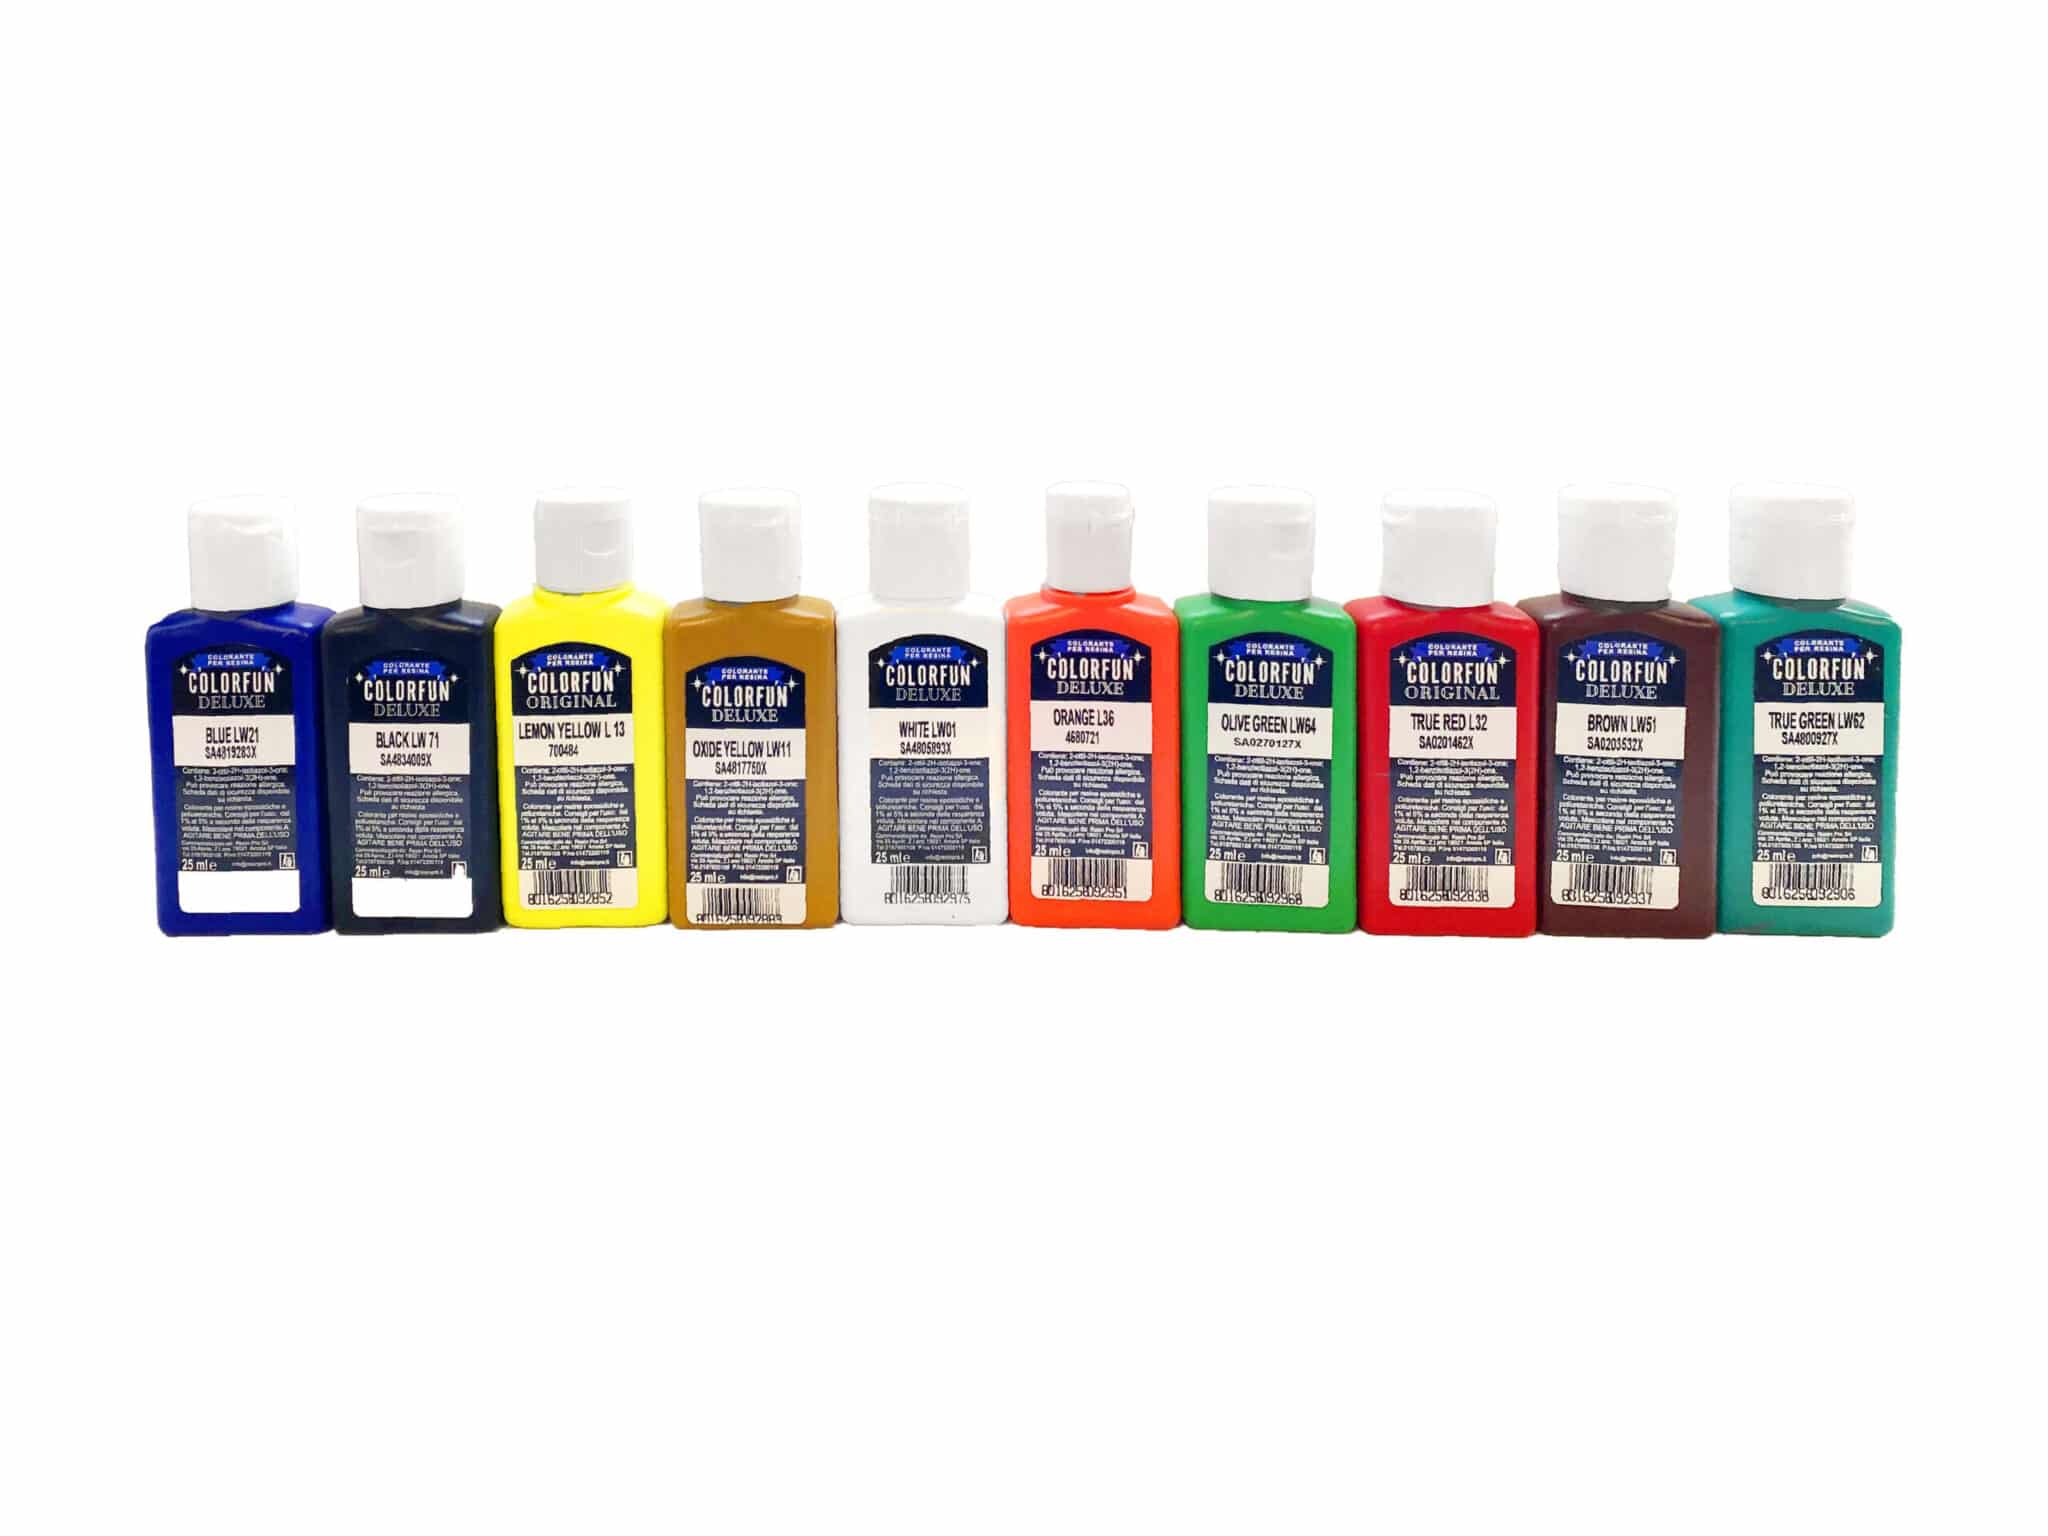
- “Colourfun Set” – Liquid Epoxy Resin Colourant Set for Solid Colour Effects — Highly concentrated paste for vibrant, opaque or translucent colours.
- “Colourfun” – Liquid Epoxy Resin Colourant 25-100ml – High coverage — Liquid pigment ideal for intense, vivid effects and easy colour blending.
- “Magic Crystal” – Transparent Resin Colour 45ml — For perfectly transparent, glass-like colour effects.
- “Trasparente” Epoxy Resin Kit 800g + Mica Powder 10g – 10 Colour Variations — Clear resin and mica powders to create metallic or pearlescent tones.
- Nitrile gloves, mixing sticks, measuring cups, and a dust-free workspace
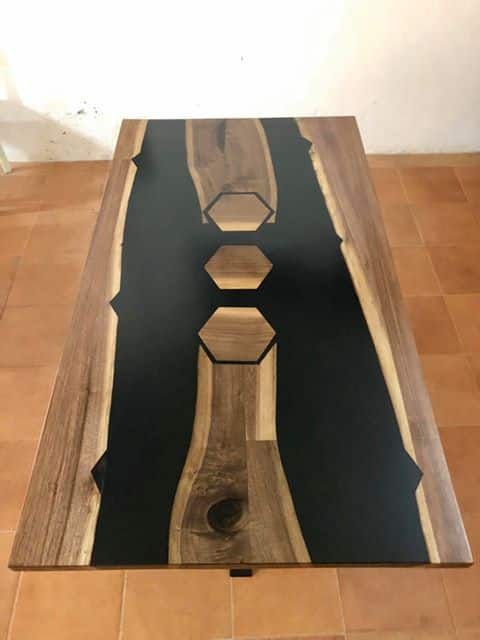
Inspiring Colour Effects in Epoxy Resin
Explore a variety of finished resin projects showcasing subtle tints, bold solid colours, and shimmering metallics. Notice how different pigments produce unique effects — from the glassy clarity of transparent dyes to the intensity of pastes and the sparkle of mica powders.
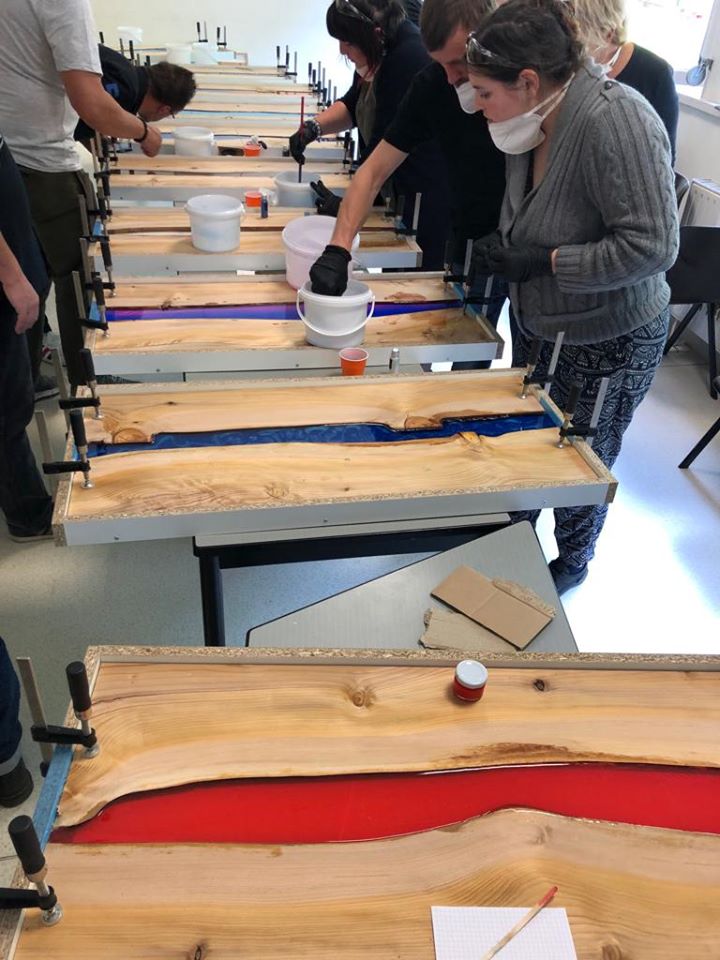
Step 1: Prepare Your Epoxy Resin Base
Measure and mix your clear epoxy resin and hardener precisely according to your product instructions. Work slowly to minimise air bubbles, stirring thoroughly and scraping the sides and bottom of the mixing vessel. Ensure your workspace is dust-free and at a stable, recommended temperature for optimal curing and clarity. Always start with a clear epoxy base for best colour clarity.
Step 2: Select and Add Your Pigments
Choose the right pigment for your desired effect. Paste and liquid colourants offer vibrant or opaque results, while transparent tints provide a stained-glass look. For metallic or pearlescent finishes, mica powder is ideal. Add the pigment incrementally, beginning with small amounts, and stir gently until fully blended. “Colourfun” Liquid Epoxy Resin Colourant is especially effective for both translucent and bold colours. Blend pigments thoroughly to avoid unwanted streaks.
Step 3: Adjust Colour Intensity and Pour
Once the pigment is evenly dispersed, visually check the intensity. Add more pigment drop by drop if a stronger shade is needed, bearing in mind that too much pigment can affect the curing process. Pour the tinted resin steadily into your desired mould or surface. For achieving layered or gradient effects, pour separate coloured resin batches in stages. Add pigment slowly and build up to your desired intensity.
Step 4: Finish and Cure for Lasting Colour
Allow the coloured resin to cure fully in a dust-free environment as specified in your resin’s instructions. Avoid handling or moving the piece during curing to prevent colour shifting or surface imperfections. Once cured, enjoy a smooth, even colour effect, whether opaque, translucent or shimmering with metallic highlights from mica powder. Work in small batches to maintain control over colours.

Tips for Vibrant Resin Colouring and Common Pitfalls
Test pigment proportions before large pours. Always run a small sample before colouring large batch resin projects to preview curing and colour results. Beware of over-pigmenting, which can inhibit proper setting or create uneven tones. For extra clarity or glass-like effects, use transparent dyes like “Magic Crystal” – Transparent Resin Colour 45ml. When blending two or more pigments, mix thoroughly to ensure even distribution and avoid patches of uneven colour.
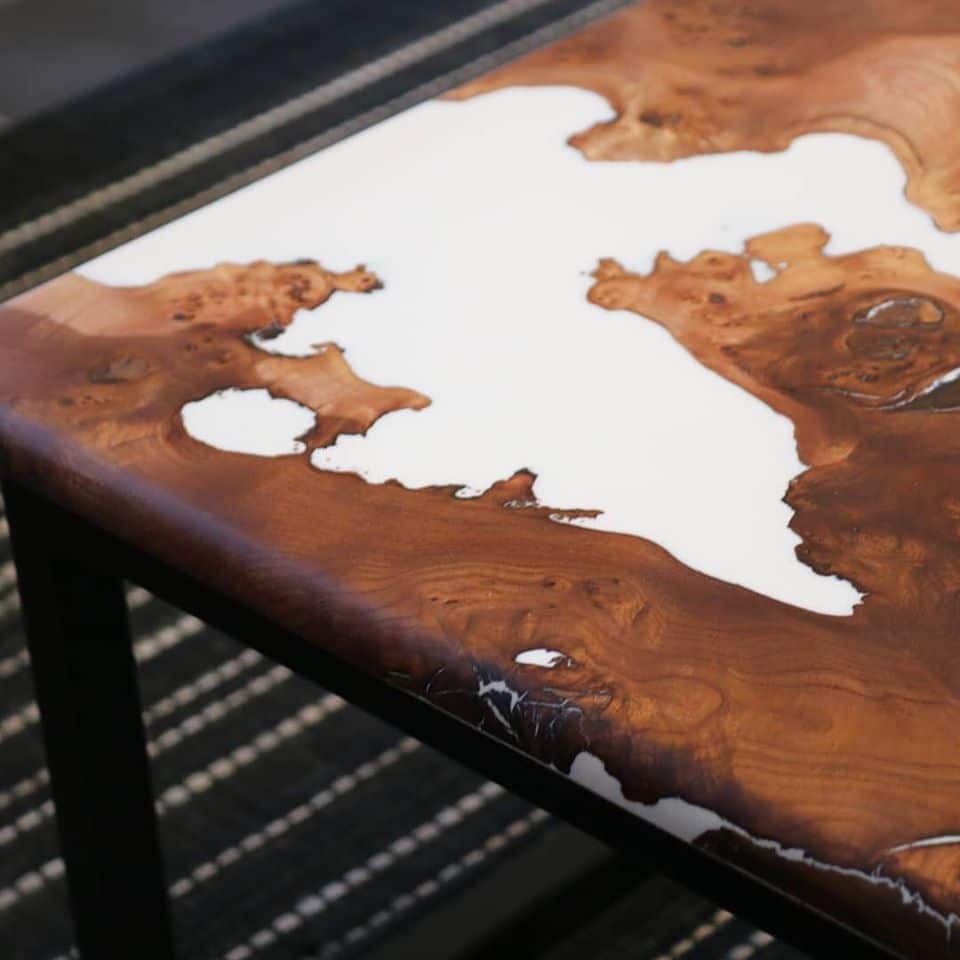
Examples of Successful Resin Colour Customisation
See how artists and makers combine pigments to achieve layered colours, marbled surfaces, and luminous gradient effects. Practical images show how starting with a clear base and careful pigment blending produces reliable, professional finishes.
- "Colourfun Set" – Liquid Epoxy Resin Colourant Set for Solid Colour EffectsPrice range: £13.45 through £48.15"Colourfun Set" offers intense, translucent colour pastes designed for transparent epoxy resin projects under the theme 'How to create different…
- "Colourfun" – Liquid Epoxy Resin Colourant 25-100ml – High coveragePrice range: £3.65 through £9.85"Colourfun" Liquid Epoxy Resin Colourant provides vivid, intense colours suited for resin art with easy blending and compatibility in epoxy resin…
 "Magic Crystal" – Transparent Resin Colour 45ml£4.65"Magic Crystal" Transparent Resin Colour 45ml is designed for creating vibrant, glass-like coloured effects in epoxy resin crafts.
 "Trasparente" Epoxy Resin Kit 800g + Mica Powder 10g – 10 Colour Variations£19.85"Trasparente" kit offers ultra clear epoxy resin with mica powder for colour variation, suitable for casting, tables and DIY projects.
Frequently Asked Questions
What pigments work best for opaque vs transparent resin colours?
Paste or liquid colourants are ideal for opaque effects, while transparent dyes such as 'Magic Crystal' create stunning clear tints.
How can I prevent streaks when colouring epoxy resin?
Blend your chosen pigment thoroughly into the resin and pour promptly to avoid streaks or uneven colour patches.
Can I mix different types of pigment together in epoxy resin?
Yes, combining liquid, paste, and mica pigments can create custom effects, but always test for compatibility first.
How much pigment should I add when colouring epoxy resin?
Start with a small amount and increase gradually; avoid exceeding manufacturer guidelines to prevent curing issues.
Can I create metallic colours in epoxy resin?
Mica powders are ideal for achieving a metallic or pearlescent look when mixed evenly into clear epoxy resin.
Is coloured epoxy resin safe for use on food-contact surfaces?
Most craft resins are not food safe; check certifications if intending use with items like coasters or trays.
How do I achieve gradient or layered colour effects in resin?
Pour separate batches in stages, each tinted to different shades, and tilt or blend gently for a smooth transition.