 Free shipping on orders over £29,85


How to make a resin statue?
Step-by-step guide for detailed, durable resin statues

Making a resin statue allows you to capture intricate detail, durability, and creative flair all in one unforgettable piece. Whether you’re an artist looking to showcase your work in three dimensions or a hobbyist eager to experiment, this guide will lead you step by step through the process of creating your own striking resin statues using modern casting techniques.
What You’ll Need
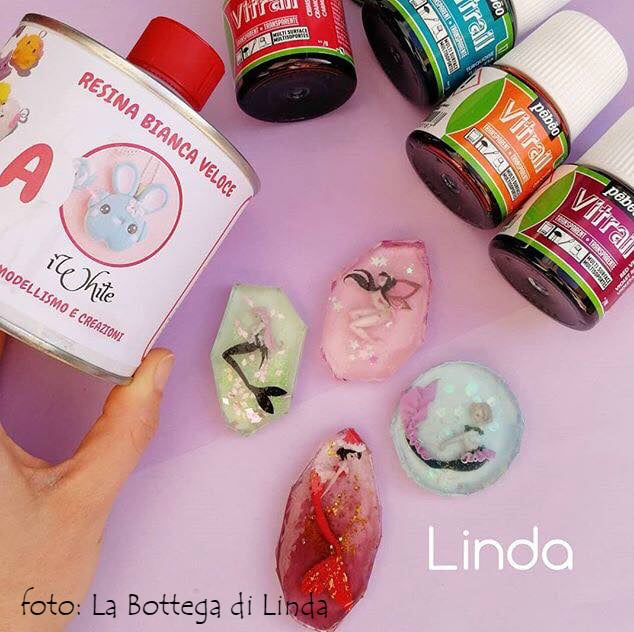
- “IWhite” – Polyurethane Casting Resin – White, Fast-Curing Two-Part System: Fast-curing, highly detailed casting for crisp features.
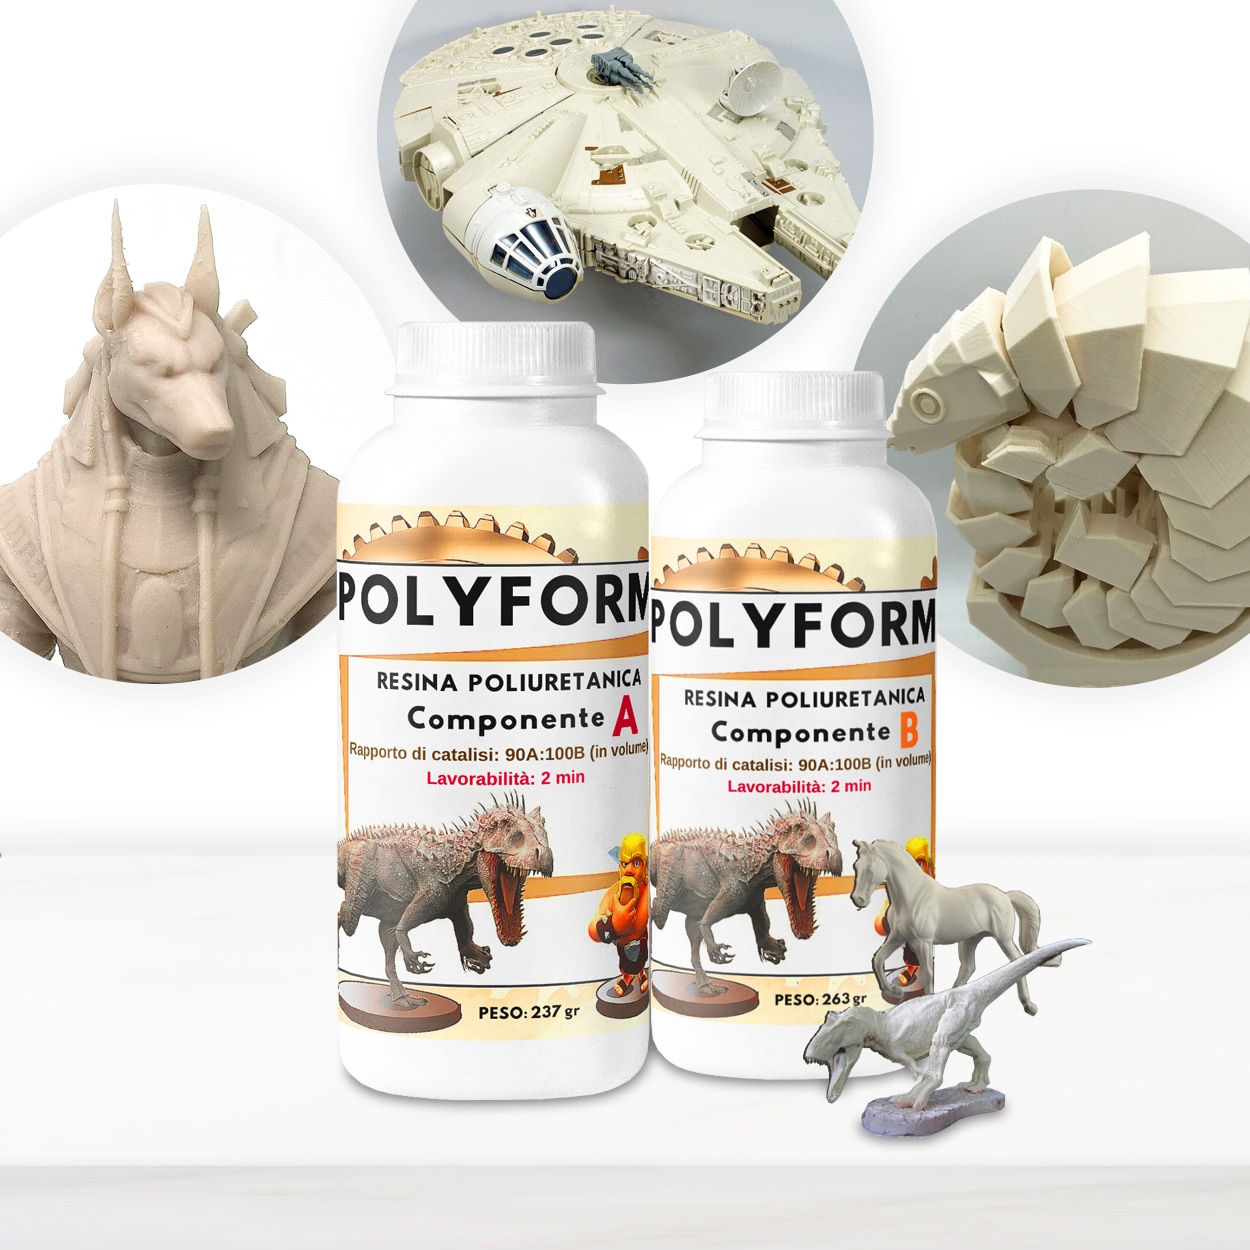
- “Polyform” – Polyurethane Casting Resin, Beige, Fast-Setting for Prototyping: Suits rapid, small batch statues with robust structure.
- “One-2-One” – Epoxy Resin for Handcraft, 1:1 Mixing Ratio: Suitable for beginners seeking a clear, glossy finish.
- “ICreation” – Fast Epoxy Resin, 6h Demoulding, Transparent Gloss Finish: For artistic, transparent or time-sensitive projects.
- High-quality statue mould (silicone preferred for detail)
- Mixing cups, wooden sticks or paddle for blending
- Nitrile gloves and safety goggles
- Protective apron or disposable covering
- Disposable pipette or dropper (for detail work, optional)
- Sanding pads, files, and paints for finishing touches

Essential Materials and Workplace Setup
Choosing the right resin and mould is key to capturing each detail in your statue. Arrange all your materials before mixing to ensure a smooth workflow and consistent results. Carefully select your casting surface with safety and ventilation in mind for a professional finish.

Step 1: Prepare Your Workspace and Mould
Before you begin, ensure your workspace is well-ventilated, protected from spills, and free from dust or loose fibres. Wear nitrile gloves and safety goggles to keep your skin and eyes safe from accidental splashes. Place your silicone or specialist statue mould on a flat, stable surface. Inspect the mould for debris or defects, cleaning it thoroughly if required. A release agent may be used if the mould is known to be difficult to demould, but many silicone moulds do not require one.
Prepare your workspace and safety gear first to ensure the whole casting process is smooth and hazard-free.
Step 2: Measure and Mix the Resin
Carefully read the instructions specific to your chosen resin type. Polyurethane casting resins, such as “IWhite” – Polyurethane Casting Resin – White, Fast-Curing Two-Part System, typically require exact ratios (often by weight, not volume). Epoxy resins, such as “One-2-One” – Epoxy Resin for Handcraft, 1:1 Mixing Ratio, may use a 1:1 by volume for straightforward blending. Use clean mixing cups to combine the correct amounts of A and B components. Stir slowly, scraping the sides and bottom of the cup, to avoid trapping air bubbles and to ensure full integration. If you wish to add tints, pigments, or fillers, do so at this stage but avoid over-mixing or introducing excess air.
Measure and mix the resin precisely—small inaccuracies can result in incomplete curing or bubbles in the finished statue.
Step 3: Pour the Resin and Fill the Mould
Pour the mixed resin slowly into one corner of the mould, allowing the liquid to flow and envelop all details. For highly detailed statues or complex cavities, consider pouring in stages or tapping the mould gently to release trapped air. If your project involves multiple colours or transparent layers, pour sequentially and allow partial setting between layers as instructed by your resin manufacturer. Products like “ICreation” – Fast Epoxy Resin, 6h Demoulding, Transparent Gloss Finish are ideal for projects where clarity and demoulding speed are priorities.
Pour the resin slowly and evenly to minimise the risk of air pockets, especially in fine details or undercuts.
Step 4: Allow the Resin Statue to Cure
Leave the filled mould undisturbed on a level surface for the full curing time stated in your resin’s specifications. Polyurethane resins like “Polyform” – Polyurethane Casting Resin, Beige, Fast-Setting for Prototyping may demould in as little as 30 minutes, while some epoxy systems could require several hours. Avoid moving or flexing the mould before full demould time; premature handling can deform details or leave tacky surfaces. Temperature and humidity can impact curing speed—work within the recommended range for your chosen resin.
Allow adequate time for curing before demoulding to ensure a flawless and durable finish.
Step 5: Demould and Finish Your Statue
Carefully release the cured statue from the mould, starting from the edges and supporting delicate features. Inspect for any sharp seams or imperfections—these can be refined using fine sanding pads or files. Should the statue require painting or surface treatment, ensure it is fully cured (some resins benefit from additional post-cure time before decorating). Non-toxic epoxy systems such as “One-2-One” – Epoxy Resin for Handcraft, 1:1 Mixing Ratio are suitable for artistic toppers or clear display pieces, while polyurethane variants can be painted for hyper-realistic effects. For best results, apply paints in thin layers and use a soft brush for blending.
Finishing touches enhance detail and realism, letting your resin statue shine as a unique artistic work.
Tips and Troubleshooting
Work in a dust-free environment to avoid imperfections. Wear protective gear when handling uncured resin and mix only what you can use within the pot life. Always follow the specific instructions for each resin regarding mixing, ambient temperature, and demoulding time. If air bubbles appear, gentle tapping or the use of a pipette can help. For statues with fragile or extended features, consider reinforcement or a staged pouring method. Should the statue remain soft or tacky after demoulding, it is often due to incorrect mixing or curing below the required temperature.
Perfecting Techniques for Flawless Results
Minor adjustments to timing, pouring angle, and finishing techniques can transform a good cast into a masterful resin statue. Take your time and be patient through each step for a statue that truly stands out.

- “IWhite” – Polyurethane Casting Resin – White, Fast-Curing Two-Part SystemPrice range: £24.00 through £36.95IWHITE is a fast-curing, highly fluid polyurethane resin suitable for detailed casting in rapid prototyping and model making.
- “Polyform” – Polyurethane Casting Resin, Beige, Fast-Setting for PrototypingPrice range: £15.95 through £141.95Polyform polyurethane resin is designed for rapid prototyping and detailed casting suitable for hobbyists and professionals.
 "One-2-One" – Epoxy Resin for Handcraft, 1:1 Mixing RatioPrice range: £15.95 through £59.95"One-2-One" epoxy resin has a 1:1 mixing ratio and is suitable for beginners and experienced crafters working on jewellery and decorative projects.
 "ICreation" – Fast Epoxy Resin, 6h Demoulding, Transparent Gloss FinishPrice range: £15.95 through £55.95"ICreation" Fast Epoxy Resin offers a clear, glossy finish with a 6-hour demoulding time for efficient craft and art projects.
Frequently Asked Questions
What are the best resins for casting detailed statues?
Polyurethane resins like IWhite offer high detail and fast curing, while epoxy systems provide clarity for artistic effects.
How can I avoid bubbles in resin statue casting?
Mix the resin slowly and pour gently, tapping the mould to release trapped air for a smooth, bubble-free finish.
Why is my resin statue tacky after curing?
Tacky surfaces result from incorrect mixing ratios or curing at low temperatures. Double-check measurements and ambient conditions for best results.
Can I paint my resin statue after curing?
Yes, most cured resins can be sanded and painted for detailed artistic effects once fully hardened.
How long should I wait before demoulding the statue?
Timing depends on the resin; some polyurethane types demould in 30 minutes, while epoxy resins may need several hours.
What precautions should I take when working with resin?
Always wear gloves, goggles, and work in a ventilated area to protect yourself from splashes and fumes.