 Free shipping on orders over £29,85


How to make Sicily-shaped pendants in resin?
Step-by-step process for crafting unique island pendants


Crafting Sicily-shaped resin pendants allows you to capture the beauty of the island in a personalised piece of jewellery. Whether you’re creating gifts, keepsakes, or adding a Mediterranean touch to your accessory line, this guide will take you through each step to achieve professional-looking results at home.
What You’ll Need
- “Liquidissima” – Epoxy Resin For Creations & Jewellery – Clear epoxy with excellent flow for detailed moulds
- “Evershine Collection” – Artisan Jewellery Epoxy Resin Kit with 100+ Accessories – Full kit ideal for beginners
- “Five” – 5-Piece Silicone Mould Set for Jewellery Making 9x8cm – Reusable silicone moulds suitable for pendant shapes
- Set of 10 Open Metal Bezels for Jewellery Making and UV Resin Projects – Useful for bezel pendant styles
- Mixing sticks and disposable cups
- Protective gloves and a clean, dust-free workspace
- Pendant findings (chains, clasps, bails)

Sicily-Shaped Inspiration
Bring an island to life in your next resin project! From dazzling azure tints to intricate inclusion art, Sicily-shaped pendants offer limitless creative options. Find motivation with our gallery and see how artists around the world use clear resins, pigments, and imaginative moulding techniques to craft truly original jewellery.

Step 1: Prepare Your Mould and Workspace
Begin by ensuring your workspace is protected and free of dust or moisture, as both can affect the finish of resin jewellery. Select a Sicily-shaped mould or the closest available shape from a mould set, and make sure it is clean, dry, and free from residue. Use silicone moulds specifically designed for jewellery to guarantee easy release and crisp edges. Take the time to gather all your materials within easy reach, as once you start mixing resin, timing is crucial.
If you’re using the “Five” – 5-Piece Silicone Mould Set for Jewellery Making 9x8cm, these flexible moulds ensure detail and make demoulding straightforward.
Step 2: Mix and Colour the Resin
Carefully read the mixing instructions for your chosen epoxy resin before proceeding. For intricate pendants, select a clear resin with low viscosity to enable flow into all corners of the mould. Accurately measure the components and mix slowly to avoid introducing air bubbles. At this stage, you can add pigments, dyes, or inclusions, such as glitter or dried flowers, to personalise your pendant. Mix thoroughly, ensuring the colour is even and free from streaks.
The “Liquidissima” – Epoxy Resin For Creations & Jewellery provides excellent clarity and working time, making it ideal for careful combining and artistic adjustments.
Step 3: Pour and Cast with Precision
Slowly pour the mixed resin into the mould, filling it evenly to avoid spilling over the edges. Tap the sides gently or use a toothpick to help any trapped bubbles rise and escape. It’s often helpful to let the resin level itself naturally for a smooth surface. If your design includes multiple colours or embedded items, pour in layers and allow some curing time between pours for crisp separation. Cover the mould during the cure to protect from dust.
If you are using the “Evershine Collection” – Artisan Jewellery Epoxy Resin Kit with 100+ Accessories, you’ll benefit from a simple 1:1 mix and convenient decorative elements supplied in the kit.

Step 4: Demould and Finish Your Pendant
Once the resin is fully cured (usually 12–24 hours depending on the product), gently release the pendant from the mould. Do not rush this step, as premature removal may distort fine details or mar the glossy finish. Inspect for any rough edges or small surface imperfections; these can be sanded down with fine-grit sandpaper or polished for a mirror-like shine. For bezel pendants, fill an open bezel with resin and allow to cure upright to avoid leaks.
The Set of 10 Open Metal Bezels for Jewellery Making and UV Resin Projects is a good option for making framed pendants in unique shapes.

Step 5: Attach Findings and Complete the Pendant
After ensuring your pendant is free of tackiness and perfectly hardened, attach bails or jewellery findings according to your preferred style. Use jump rings, chains, or keyrings to transform your resin casting into a wearable piece. Ensure any drilled holes or hardware attachments are snug and secure for durability. Your Sicily-shaped pendant is now ready to be worn, given as a gift, or added to your collection.
Tips and Troubleshooting for Pendant Success
- Thorough preparation leads to clearer resin casts – always clean and dry both the mould and your workspace before beginning.
- Pour slowly and use a level surface for accuracy – this helps avoid uneven thickness and reduces the risk of overflow.
- Be patient with demoulding to avoid distortion – full curing is essential for a glossy, undamaged finish.
- Experiment with colours and inclusions – small quantities allow for individual designs, from classic clear to boldly personalised.
Customising Your Resin Jewellery
Add character to your Sicily-shaped pendants by incorporating gold flakes, dried flora, or artisan pigments for a unique look. Using precision moulds and clear epoxy resins makes intricate details stand out beautifully, giving your jewellery a show-stopping finish.

- "Liquidissima" – Epoxy Resin For Creations & JewelleryPrice range: £12.85 through £31.85LIQUIDISSIMA epoxy resin is designed for detailed jewellery moulds with high transparency and a self-levelling finish suited to the theme.
- "Evershine Collection" – Artisan Jewellery Epoxy Resin Kit with 100+ Accessories£21.95"Evershine Collection" provides a complete jewellery kit with clear 1:1 epoxy resin and over 100 accessories, designed for crafting unique resin…
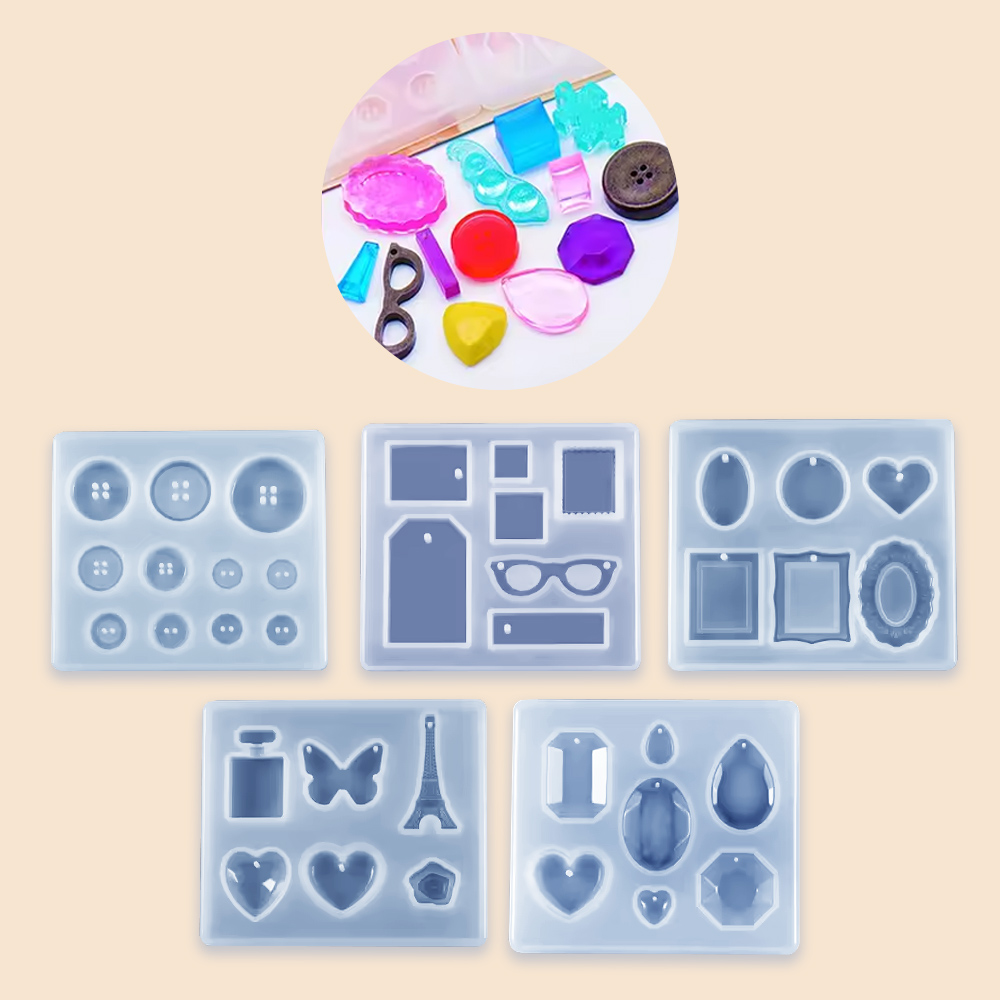 "Five" – 5-Piece Silicone Mould Set for Jewellery Making 9x8cmOriginal price was: £13.95.£9.95Current price is: £9.95.The "Five" set includes five reusable silicone moulds designed for jewellery making and personalised resin gifts.
 Set of 10 Open Metal Bezels for Jewellery Making and UV Resin ProjectsOriginal price was: £8.95.£7.45Current price is: £7.45.Set of 10 open metal bezels designed for creative resin jewellery projects and festive keepsakes.
Frequently Asked Questions
What is the best resin for detailed Sicily-shaped pendants?
A low-viscosity epoxy resin like "Liquidissima" is ideal for capturing intricate mould details and ensuring clarity.
How can I avoid air bubbles in my resin casting?
Mix resin slowly and pour gradually into the mould. Using specialised resins formulated to minimise bubbles also helps.
When is the right time to demould the pendant?
Wait until the resin is fully cured—usually 12–24 hours—before attempting to demould to ensure a flawless finish.
What is the safest way to drill holes in resin pendants?
Use a mini precision drill on fully cured resin. Work slowly to prevent cracking and always wear protective gear.
How do I polish the finished pendant for a gloss effect?
Use fine-grit sandpaper for smoothing, then polish with a microfibre cloth or polishing paste for added shine.
Can I use UV resin and metal bezels for Sicily pendants?
Yes, open metal bezels work with UV resins to create shaped pendants, but ensure compatibility with your resin type.