 Free shipping on orders over £29,85

How to paint a resin artificial?
Step-by-step techniques for vibrant and lasting finishes


Painting resin artificial objects elevates them from simple castings to vibrant works of art. Whether you’re personalising decorative pieces, crafting unique gifts, or refining home decor, mastering the correct painting approach is vital for professional, long-lasting results on resin surfaces.
What You’ll Need
- 12-Piece Artists Paint Brush Set for Epoxy Resin Art & DIY Projects – for detailed and broad painting
- 5-Piece Disposable Paint Brush Set for Art, Crafting & DIY Projects – ideal for one-off or messy jobs
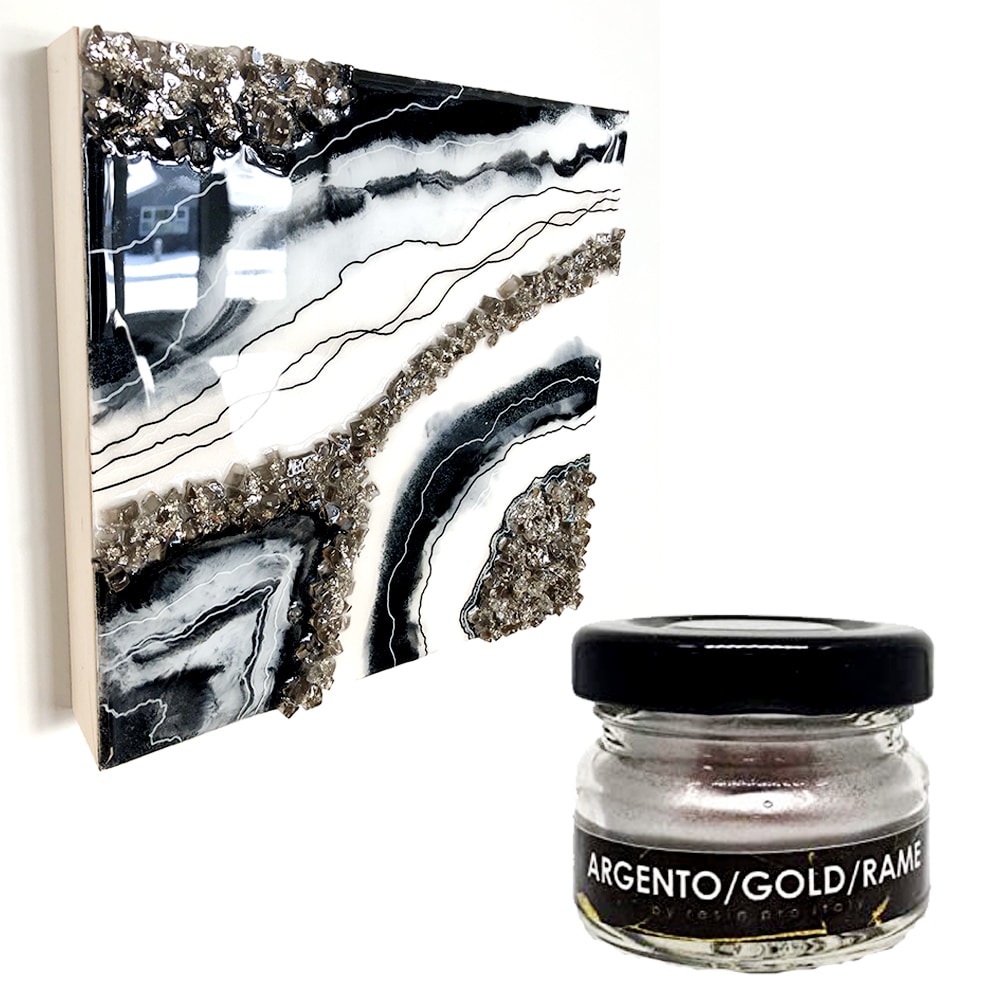
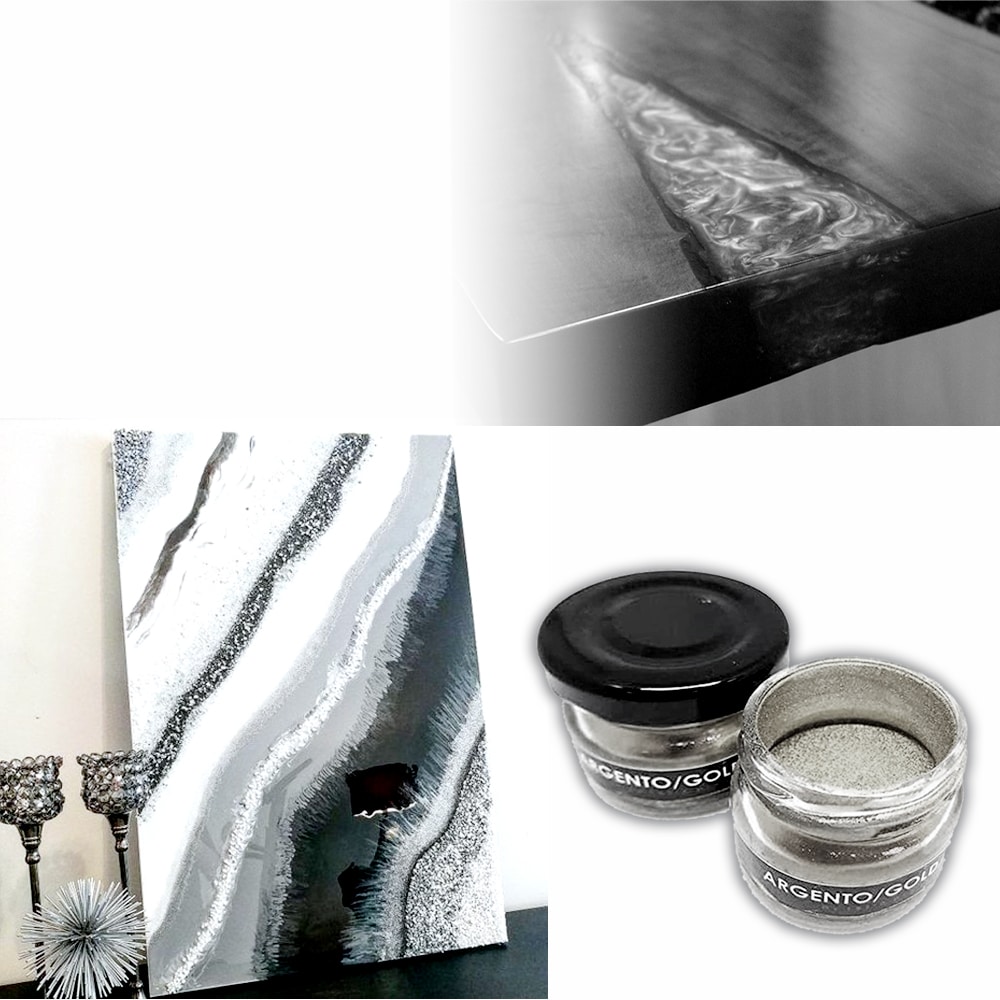
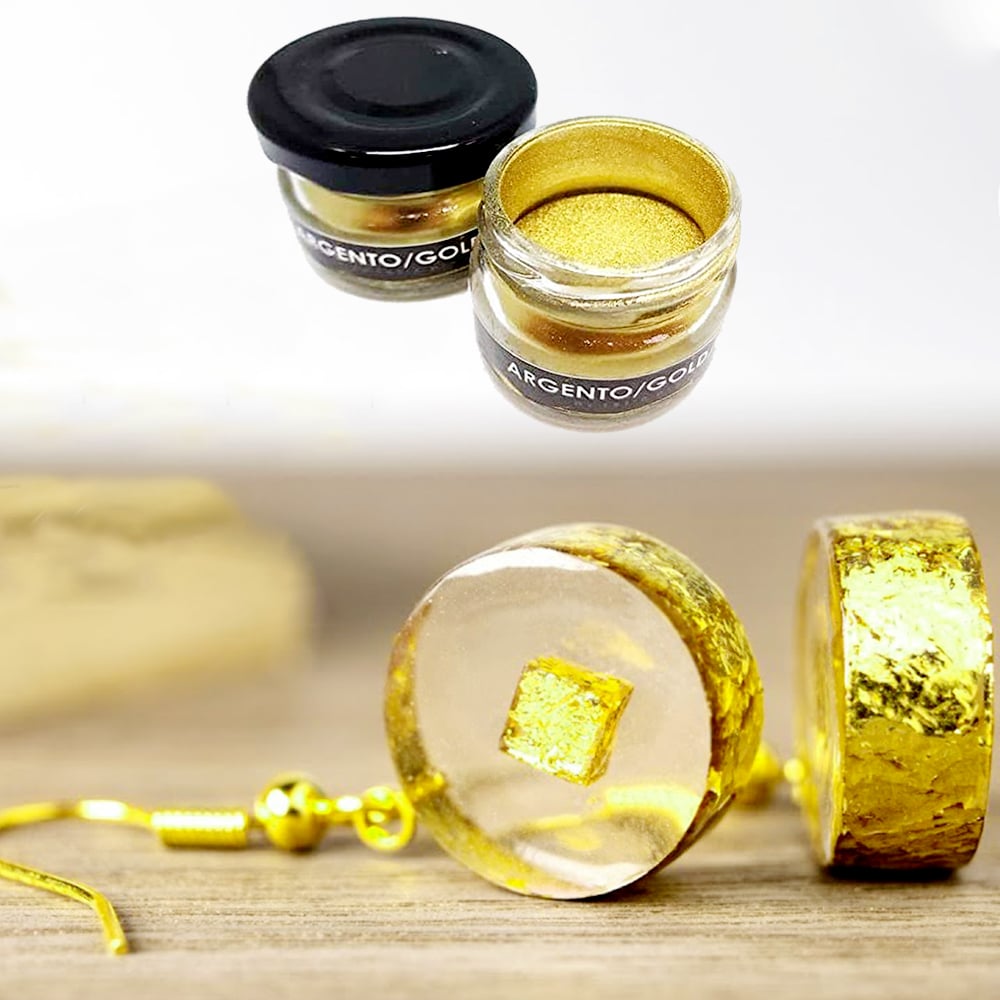
- “Argento/Gold/Rame” – Floating Metallic Pigment – 20ml – to add unique metallic or reflective effects
- “UV–Creation” – Fast Acrylic Resin, 3 Minute UV Cure – for sealing your finished paintwork with a glossy, durable coat

Essential Tools for Painting Resin Artificials
Quality brushes and specialist pigments make all the difference for resin painting. Choose tools that suit your surface and planned effects, and keep extras for testing colours or techniques first. For beginners, start simple and build up complexity as you gain confidence.
Step 1: Prepare the Resin Surface
Proper surface preparation is crucial for successful paint adhesion. Start by ensuring the resin artificial is clean, dry, and free from dust or grease. Wash the piece gently with warm soapy water, rinse thoroughly, and let it air-dry. If the surface is glossy or especially smooth, lightly sand using fine-grit sandpaper (600–800 grit) to promote paint grip. Wipe away any residue with a lint-free cloth.
Always ensure your resin artificial is fully cured before painting. Painting on uncured resin can result in poor adhesion and surface defects.

Step 2: Apply Base Colours Evenly
Select the appropriate paintbrush for your project—use the 12-Piece Artists Paint Brush Set for Epoxy Resin Art & DIY Projects for precision and versatility, or opt for the 5-Piece Disposable Paint Brush Set for Art, Crafting & DIY Projects for disposable convenience on more intricate or single-use tasks.
Use acrylic paints for best results on resin. Load the brush sparingly, and apply the paint in smooth, consistent strokes. Multiple thin coats produce a more uniform finish than one heavy application.
Use long, even brush strokes for a smoother finish. Allow each coat to dry thoroughly as per the paint manufacturer’s instructions.
Step 3: Add Details and Special Effects
Once the base colour is dry, you can enhance your resin artificial with artistic effects. For instance, add metallic or shimmering finishes by gently dusting or painting with the “Argento/Gold/Rame” – Floating Metallic Pigment – 20ml. These pigments float to the surface and create visually striking streaks or highlights—ideal for decorative pieces or accent lines.
Thin, even layers are key to preventing streaks and pooling. Experiment on a test piece to gauge pigment effects before tackling the main artwork.


Step 4: Seal and Protect the Painted Surface
To ensure your artwork’s longevity, finish with a clear, protective coat. Apply a thin layer of “UV–Creation” – Fast Acrylic Resin, 3 Minute UV Cure using a clean brush. Cure the resin under a UV lamp as directed, ensuring complete and even coverage.
This glossy sealer not only enhances colour depth but also guards against scratches and wear. Allow each layer to fully dry before recoating. Avoid touching the surface during curing to prevent marks.
Tips and Troubleshooting
Mistakes can often be corrected before the paint is fully cured. If you notice streaks, bubbles, or dust, lightly sand and repaint the affected area.
Work in a dust-free, well-ventilated space for best results. Avoid rushing—patience leads to smoother finishes and better colour vibrancy. Handle your painted resin artificial gently for at least 24 hours after sealing. This allows protective coatings to fully harden for maximum durability.

Creative Inspiration for Painted Resin
Bold colour blocking, metallic accents, or delicate detail work—resin artificials can reflect any artistic taste. Find more accessories and inspiration here for elevating your next resin project.
- 12-Piece Artists Paint Brush Set for Epoxy Resin Art & DIY Projects£6.95A 12-piece brush set designed for epoxy resin art, providing versatile shapes and durable synthetic bristles suited to resin painting.
- “Argento/Gold/Rame” – Floating Metallic Pigment – 20mlFloating Metallic Pigment designed to add golden streaks for resin art, decoupage, and various decorations.
- 5-Piece Disposable Paint Brush Set for Art, Crafting & DIY Projects£6.45The 5-Piece Disposable Paint Brush Set offers versatile brushes designed for detailed work including epoxy resin projects.
 "UV–Creation" – Fast Acrylic Resin, 3 Minute UV CurePrice range: £8.45 through £62.95"UV–Creation" is a ready-to-use UV gel resin that cures quickly under UV light, providing a crystal-clear, glossy finish suitable for jewellery…
Frequently Asked Questions
How can I make paint stick to resin artificial objects?
Lightly sand the surface with fine-grit sandpaper and clean thoroughly to create a suitable texture for adhesion.
What is the best type of paint for resin decoration?
Acrylic paints are widely recommended for resin, offering good adhesion, strong colour, and easy application.
Why do I need a protective coating on painted resin?
A clear sealer protects the paint from scratches and fading, preserving your artwork for longer.
How do I achieve metallic effects on a resin surface?
Use floating metallic pigments, gently applied, to create streaks or shimmery highlights after the base paint is dry.
Can I repaint my resin artificial if I make a mistake?
Yes, most errors can be lightly sanded smooth before repainting or resealing as needed.
Any tips for clean brushwork when painting resin?
Use quality brushes, thin paint layers, and steady strokes. Work methodically to avoid visible brush marks.