 Free shipping on orders over £29,85

How to remove resin flooring?
Step-by-step guide for effective resin floor removal

Removing resin flooring is a vital step when renovating interiors, repairing surfaces, or preparing areas for a new finish. This guide explains how to strip away resin floors—whether epoxy, polyurethane, or other common types—efficiently and with minimal mess. It’s especially valuable for DIY renovators, tradespeople, and property owners tackling floor removal for the first time.

What You’ll Need
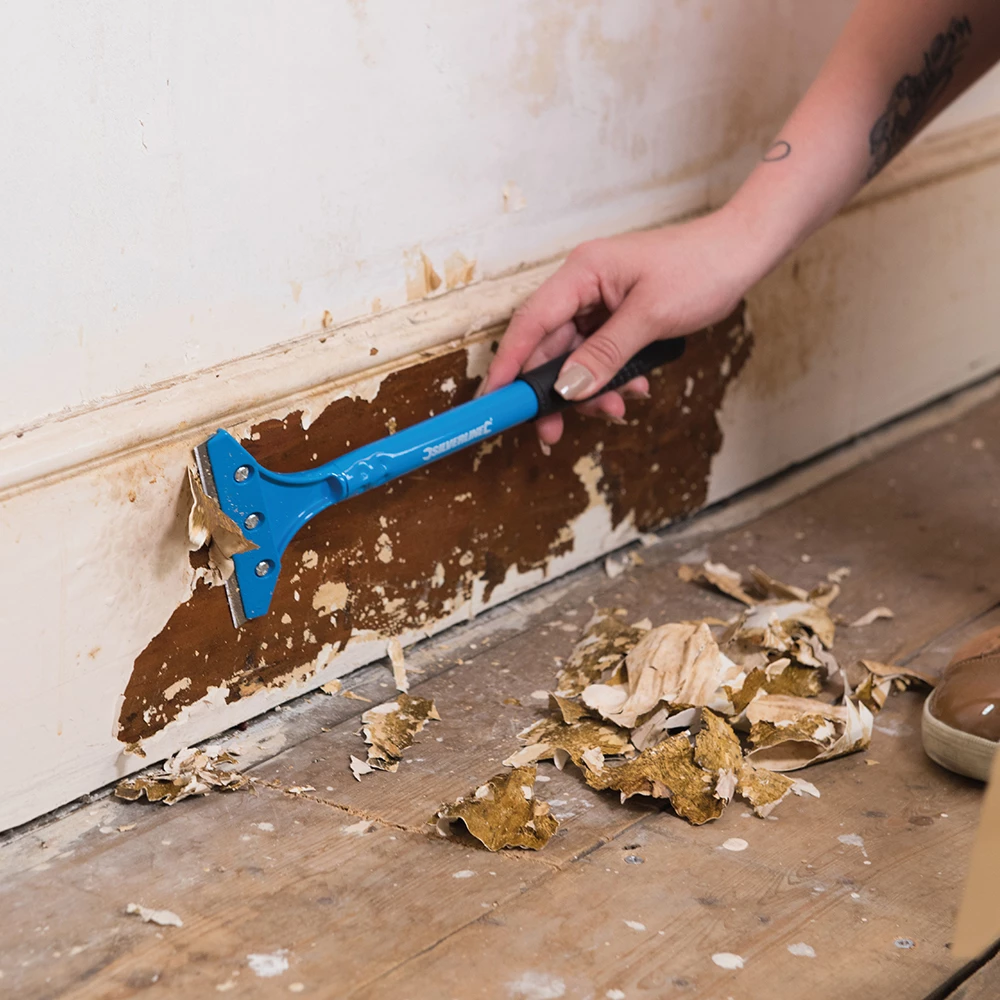
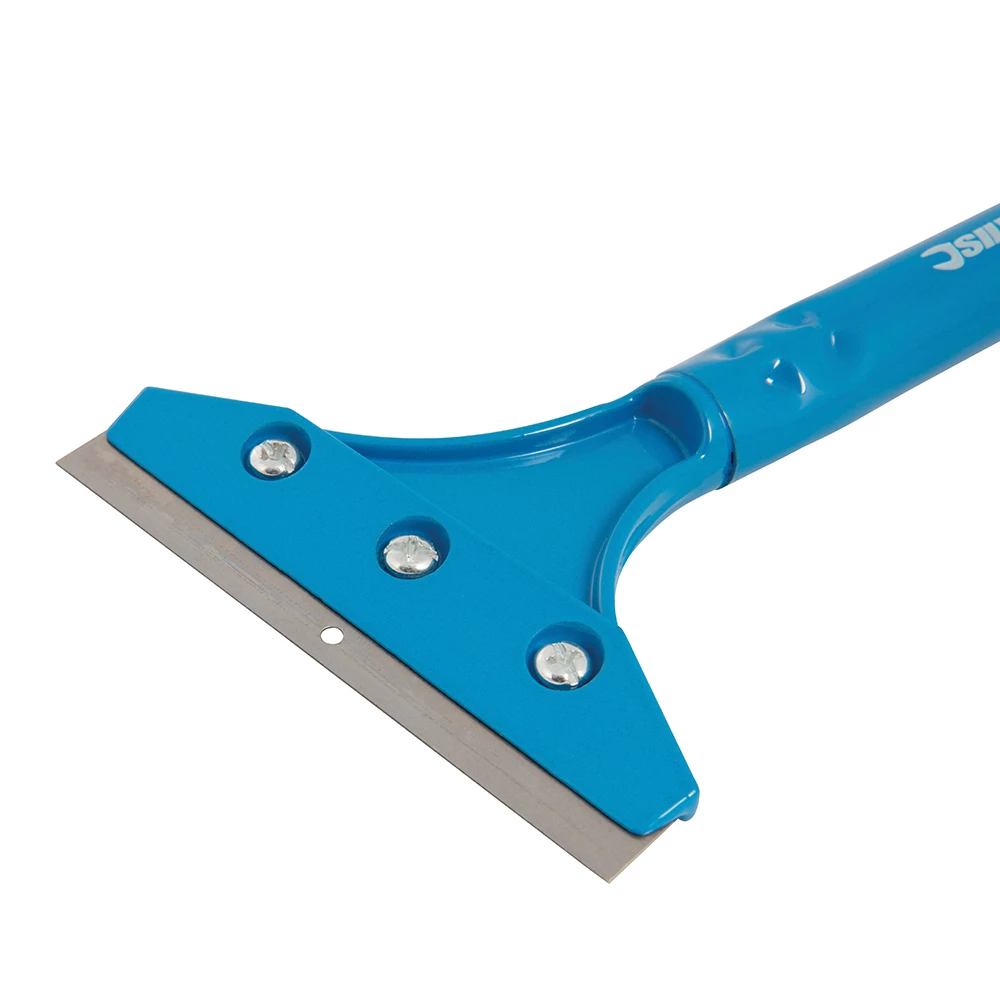
- Heavy Duty Scraper for Paint and Epoxy Resin Removal – Designed for controlled, effective scraping of cured resin layers.
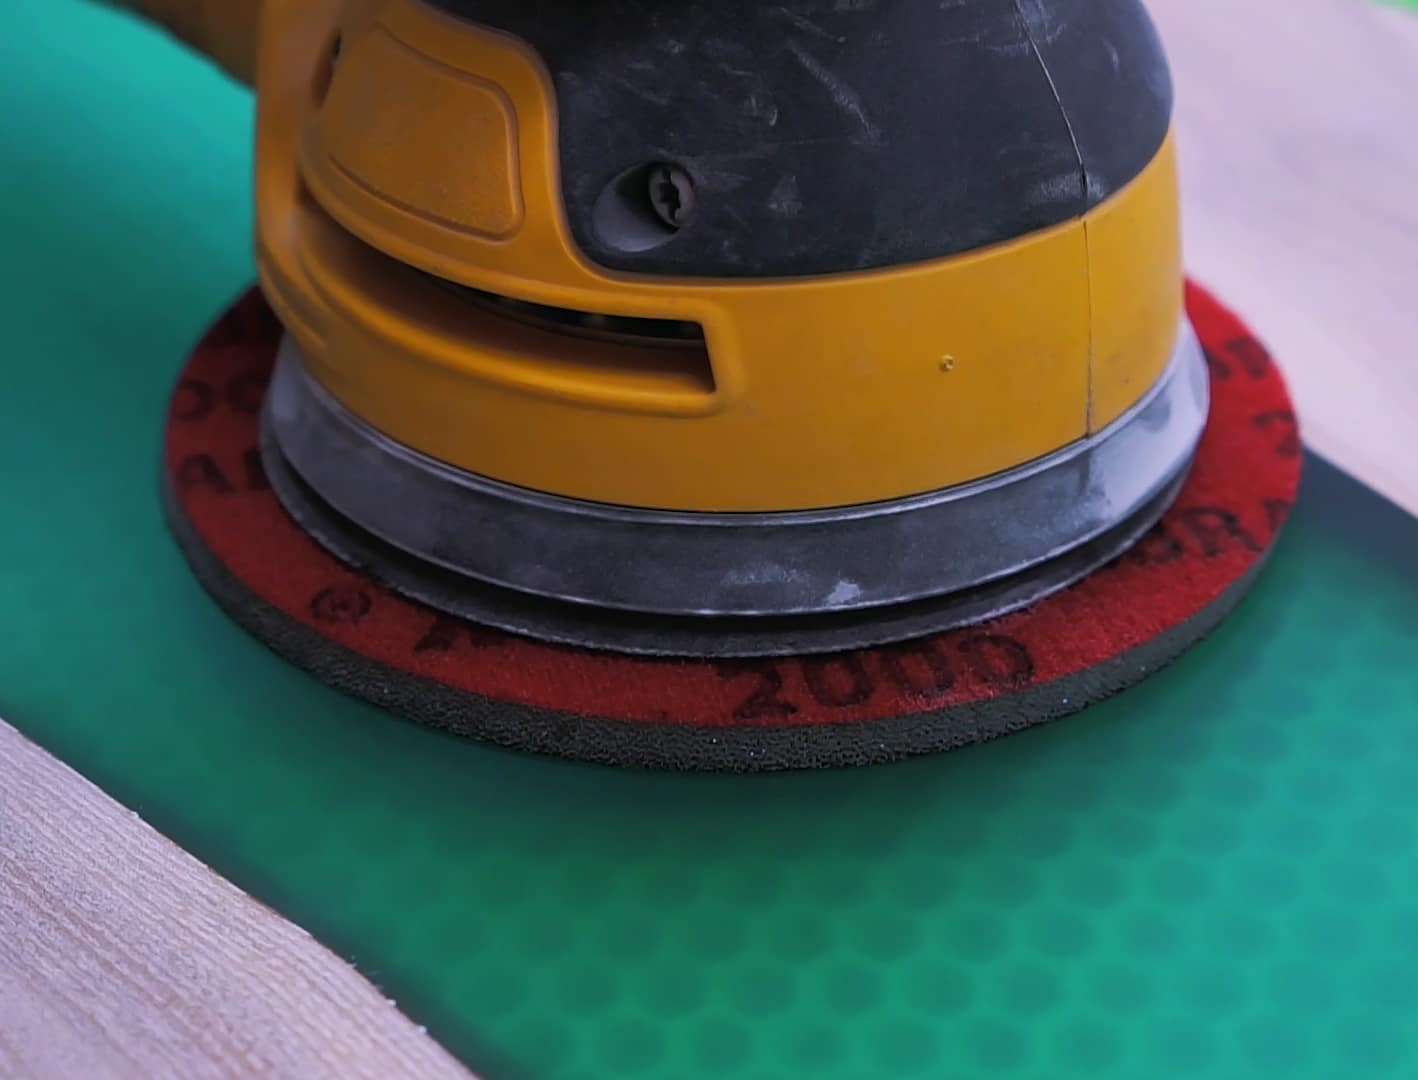
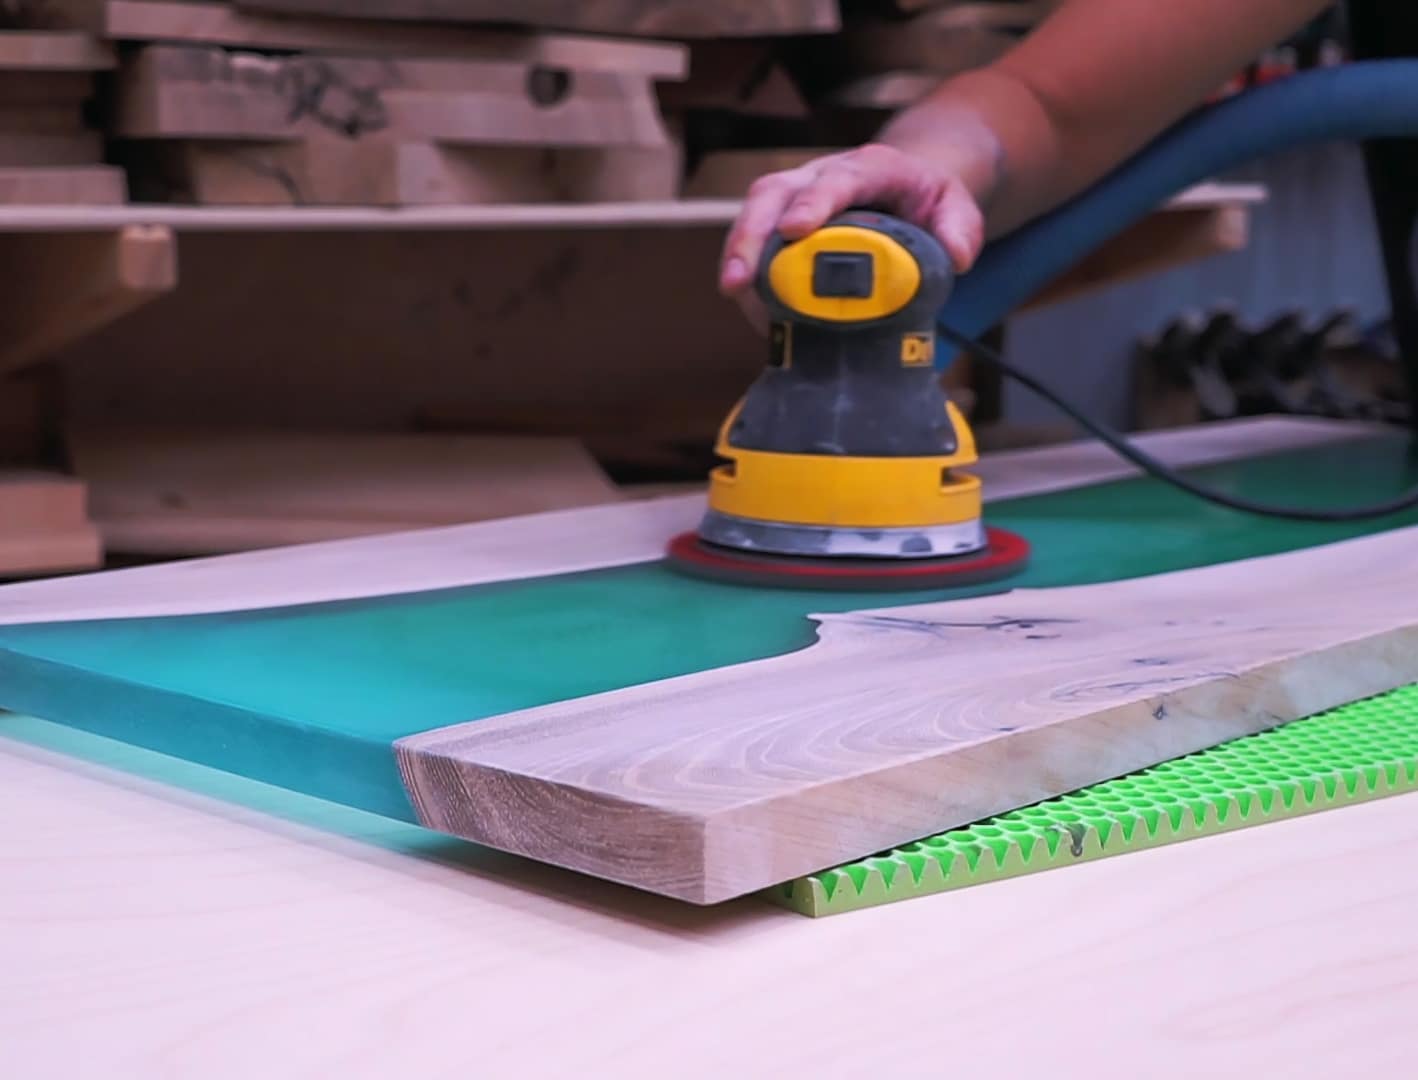
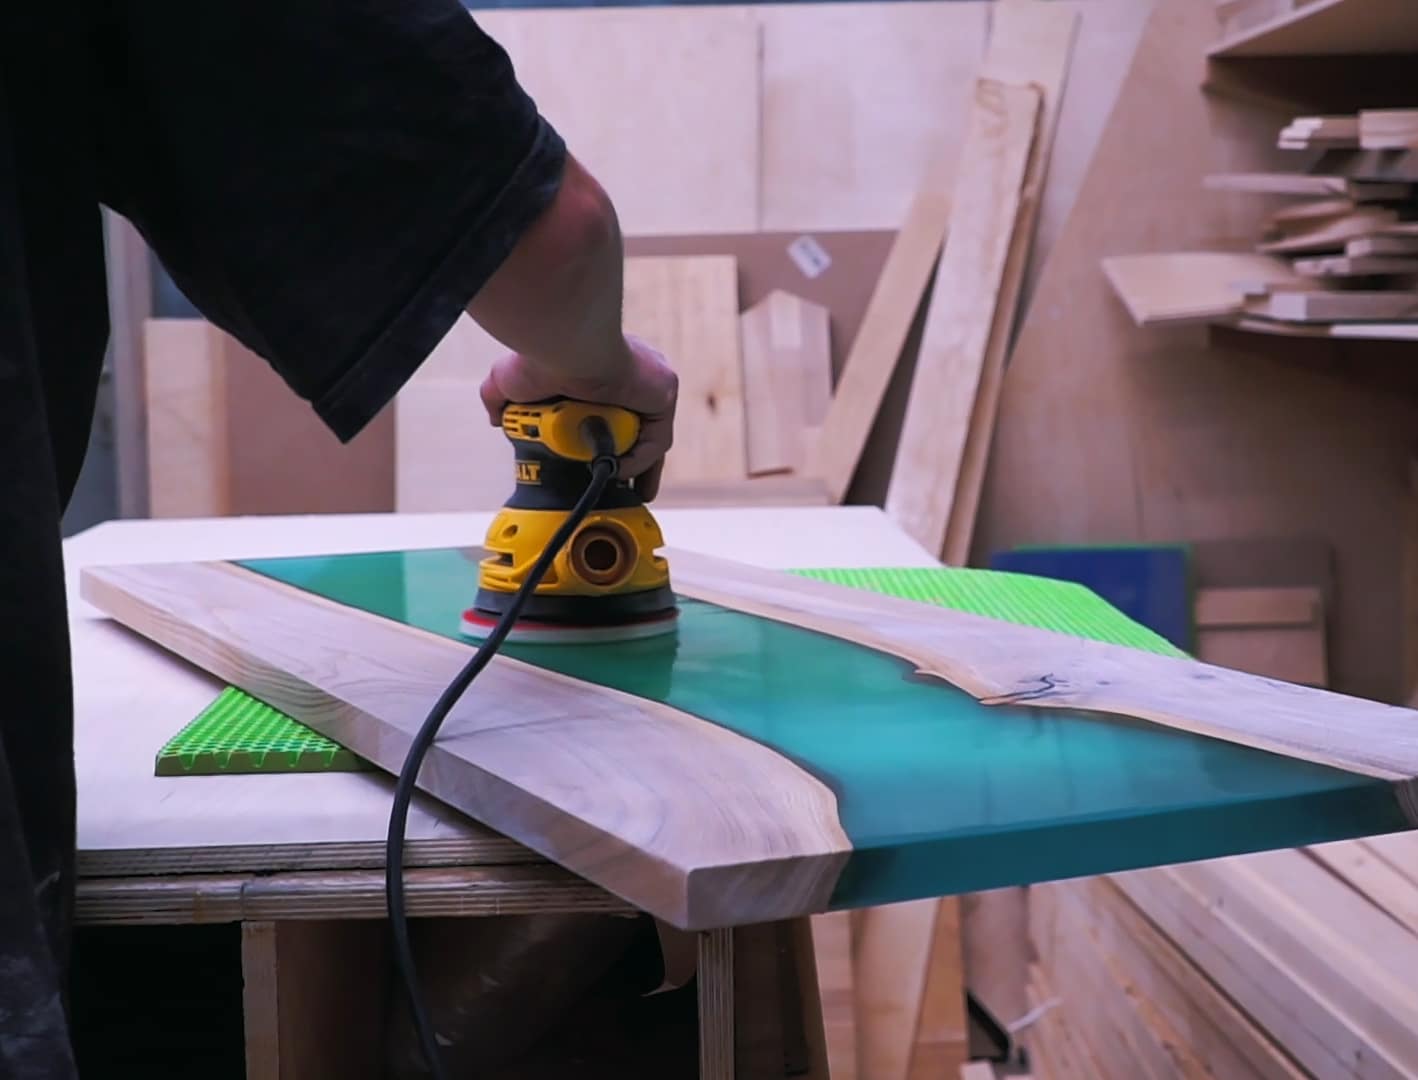
- “Ebonite Abralon” – Sanding Pads 360-4000 Grit for Resin and Wood – Ideal for smoothing and finishing the subfloor after main removal.
- Personal protective equipment (PPE): gloves, eye protection, dust mask
- Plastic sheeting or tape to protect nearby areas
- Dustpan and brush or vacuum for cleanup
See the Tools in Action
Watch resin flooring removal in progress and explore detailed tool usage in our photo gallery. Find specialist resin removal tools here or check out project showcases from our customers for inspiration.
Step 1: Assess and Prepare the Space
Begin by carefully examining the floor to understand the thickness of the resin layer and how firmly it is bonded to the underlying surface. Remove all furniture and objects from the area and ventilate well, as dust and debris can be produced even without chemical agents. Use plastic sheeting and tape to cover skirting boards, walls, and other surfaces adjacent to the floor. This containment will help prevent accidental damage during removal and reduce cleanup time.
Assess the type and condition of your resin floor so you can plan your removal technique accordingly; thicker or older floors may require more persistence or multiple sessions.
Step 2: Break Up and Scrape the Resin Floor
Start at an edge or seam where the resin is likely to be weaker. Using a suitable manual tool, work the blade under the resin layer and apply steady, even pressure to lift and separate it from the substrate. For especially tough patches, apply additional force but never use excessive swings that could gouge the substrate underneath.
For best results, use the Heavy Duty Scraper for Paint and Epoxy Resin Removal, which is specifically designed for efficient removal of resin coatings and paint. Its lightweight design and razor-sharp blade provide excellent control, reducing fatigue during longer jobs.
Use a sturdy scraper or floor removal tool with both hands for maximum safety and effectiveness when tackling particularly stubborn areas.
Step 3: Work in Small Sections and Remove Residue
Progress methodically across the floor in sections no larger than one square metre. Systematic removal helps you maintain concentration and ensures consistent finish quality. Periodically stop to clear broken resin pieces and wipe away dust—this maintains visibility and surface accessibility as you work.
Work methodically in manageable sections to prevent overwhelming yourself and to make any necessary spot-treatments easier to identify as you go.
Step 4: Sand and Finish the Subfloor
Once the majority of resin is lifted, inspect for thin patches or stubborn residue that may remain stuck to the substrate. Use sanding pads or a polisher to smooth the entire area, creating an even surface ready for your next project or finish. Incrementally move from lower to higher grit to avoid unnecessary scratches.
For detailed and consistent results, the “Ebonite Abralon” – Sanding Pads 360-4000 Grit for Resin and Wood are ideal: they work well both wet and dry and ensure a uniform finish.
Finish with sanding for a smooth subfloor before installing new flooring or resealing the area.
Tips and Common Mistakes in Resin Floor Removal
Avoid attempting removal without appropriate PPE, as even manual techniques can generate sharp shavings or fine dust. Take frequent breaks to prevent fatigue, particularly with hand tools. Never use metal scrapers on delicate subfloors prone to scratching, and always test removal in a discreet corner before addressing the main area.
Protect adjacent surfaces and yourself to ensure a safe and professional outcome on every resin flooring removal job.

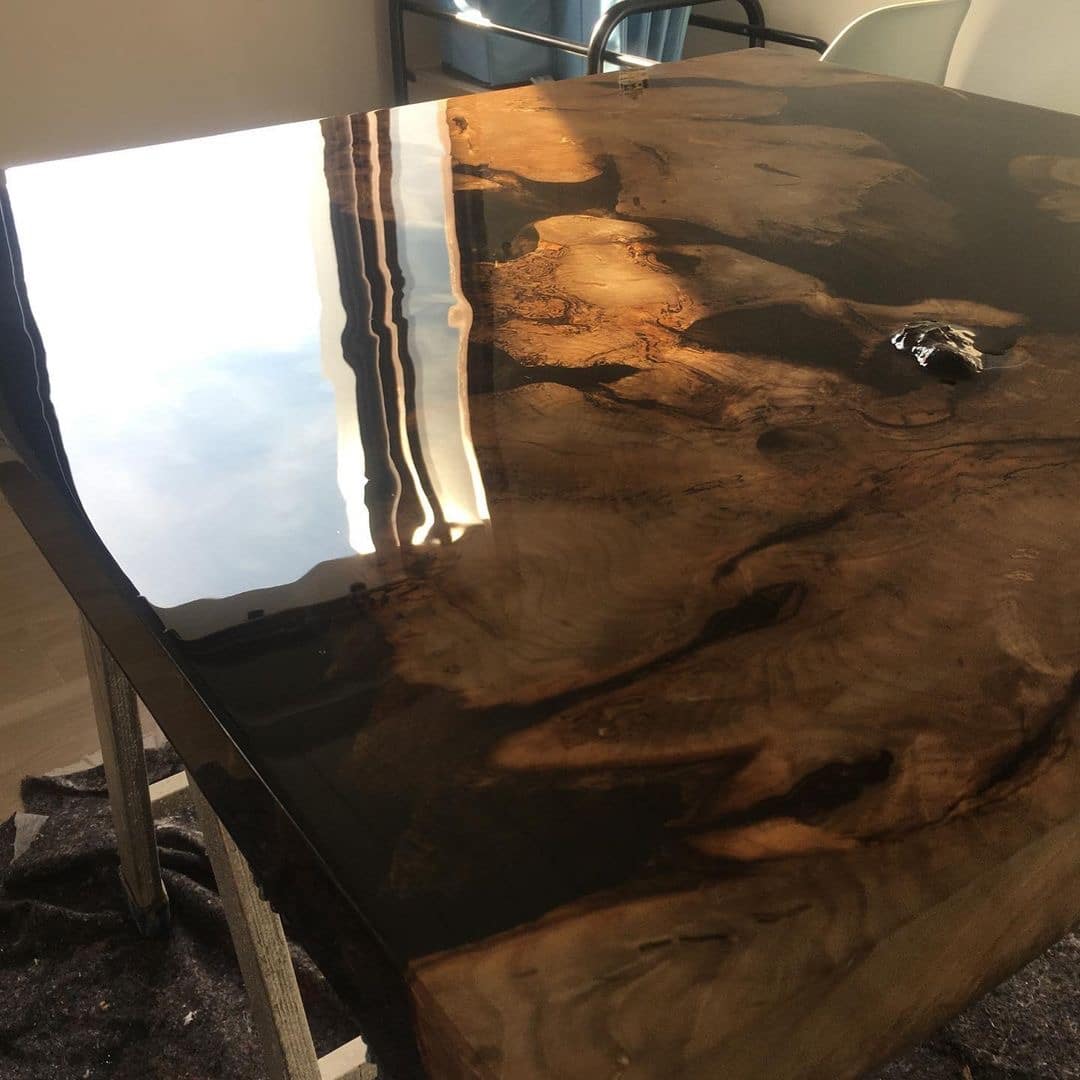
Explore Before and After Results
Discover dramatic transformations by comparing resin floors before and after removal. Notice how thorough prep and the right approach achieve professional results every time.
- Heavy Duty Scraper for Paint and Epoxy Resin Removal£8.95A lightweight scraper designed for controlled removal of wall coverings, floor tiles, paint, and epoxy resin.
- "Ebonite Abralon" – Sanding Pads 360-4000 Grit for Resin and Wood£4.15"Ebonite Abralon" Sanding Pads suit detailed polishing for resin and wood projects, supporting wet or dry use with foam backing for consistent…
Frequently Asked Questions
What tools are recommended for manually removing resin flooring?
A heavy duty scraper and durable sanding pads are ideal for manually lifting and finishing resin floors without chemical strippers.
How long does it take to remove a resin floor?
A typical room takes several hours to one day, depending on floor size and thickness of the resin layer.
Can I remove a resin floor myself or do I need a professional?
DIY removal is possible with the right tools and preparation. For very large or complex areas, professional help may be advisable.
Does epoxy resin come up differently than polyurethane floors?
Both require similar technique, but epoxy may be more brittle while polyurethane can be tougher to lift. Choose tools accordingly.
Do I need to sand after removing a resin floor?
Yes, sanding smooths out any remaining residue and prepares the subfloor for a new finish or covering.
How can I protect nearby surfaces while removing resin flooring?
Cover adjacent walls and skirting boards with plastic sheeting and secure with tape to prevent scratches or chips.
What safety equipment should I wear when removing resin flooring?
Wear gloves, eye protection, and a dust mask to shield against sharp fragments and fine particulates.