 Free shipping on orders over £29,85


How to create sea foam effects with epoxy resin?
Master ocean art techniques for dazzling, realistic wave effects
Creating authentic sea foam effects with epoxy resin is a captivating technique popular among resin artists and crafters aiming for ocean-inspired artwork. Achieving that signature lacy foam and realistic wave pattern takes thoughtful layering, careful manipulation, and a touch of know-how. This guide will walk you through each essential step to transform your resin art into a mesmerising seascape—perfect for beginners and seasoned creators alike.
What You’ll Need
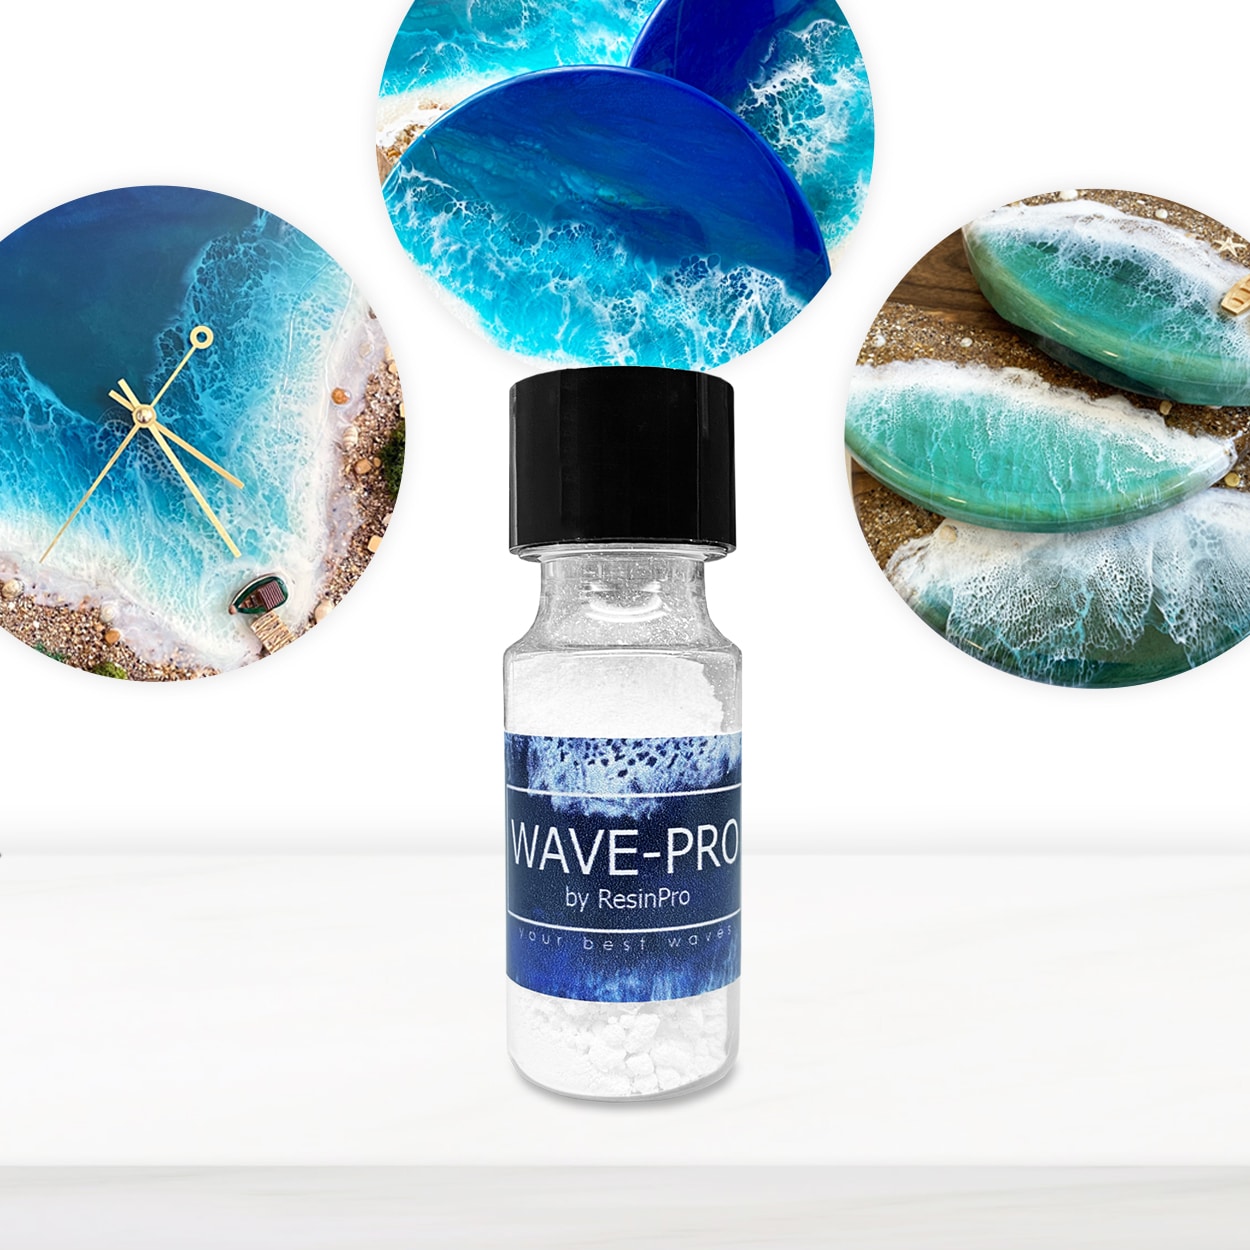
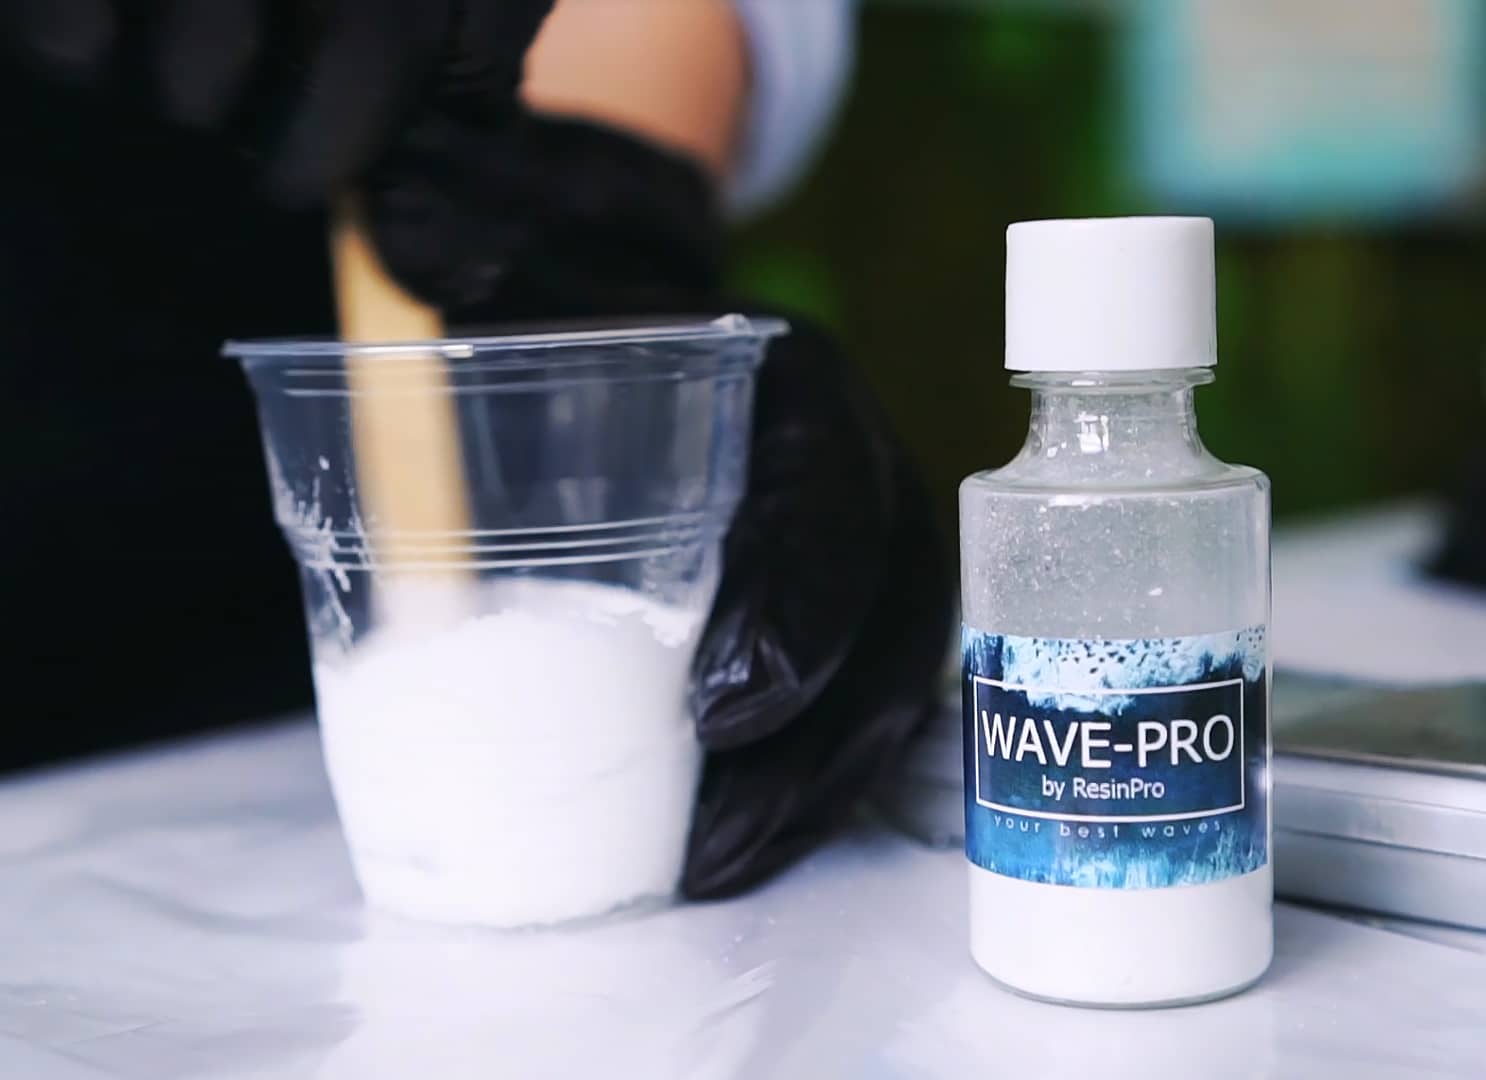
- “Wave-Pro” – Pigment Additive for Sea Wave Effect in Epoxy Resin: For creating sea wave and cell effects
- “Sea” – Resin Kit for Creating Ocean Art, 1.7kg Epoxy, Pigments & Canvas: All-in-one kit, including resin, pigments, canvas, and additives
- “Marine Palette” – Set of Dyes for Ocean Art, Epoxy Resin, and Beach Effects: For vibrant ocean-inspired colours
- Mixing cups, gloves, and stir sticks
- Protective work surface and apron
- Canvas, board, or wooden panel as your base
Key Materials for Sea Foam Effects
For best results, use an epoxy resin formulated for art projects and combine it with professional pigment additives. Products like Wave-Pro Pigment Additive and the Marine Palette Set of Dyes simplify achieving popular ocean effects. All-in-one kits such as the “Sea” Resin Kit offer everything needed for beginners and experienced artists alike.
Step 1: Prepare Your Workspace and Materials
Ensure your workspace is clean, level, and dust-free before pouring. Cover your work area to protect from spills, and keep the environment at a stable room temperature. Gather all your materials—including mixing tools, pigments, and canvas or board—so everything is close at hand. Wear gloves, and use an apron for safety.
Position your canvas or board on risers to allow any excess resin to drip freely, and double-check it’s perfectly level. This prevents resin from pooling unevenly and helps your sea foam patterns form consistently across the surface.
"Wave-Pro" – Pigment Additive for Sea Wave Effect in Epoxy Resin
A pigment additive designed for creating sea wave and cell effects in epoxy resin artworks.
Step 2: Mix and Colour Your Epoxy Resin
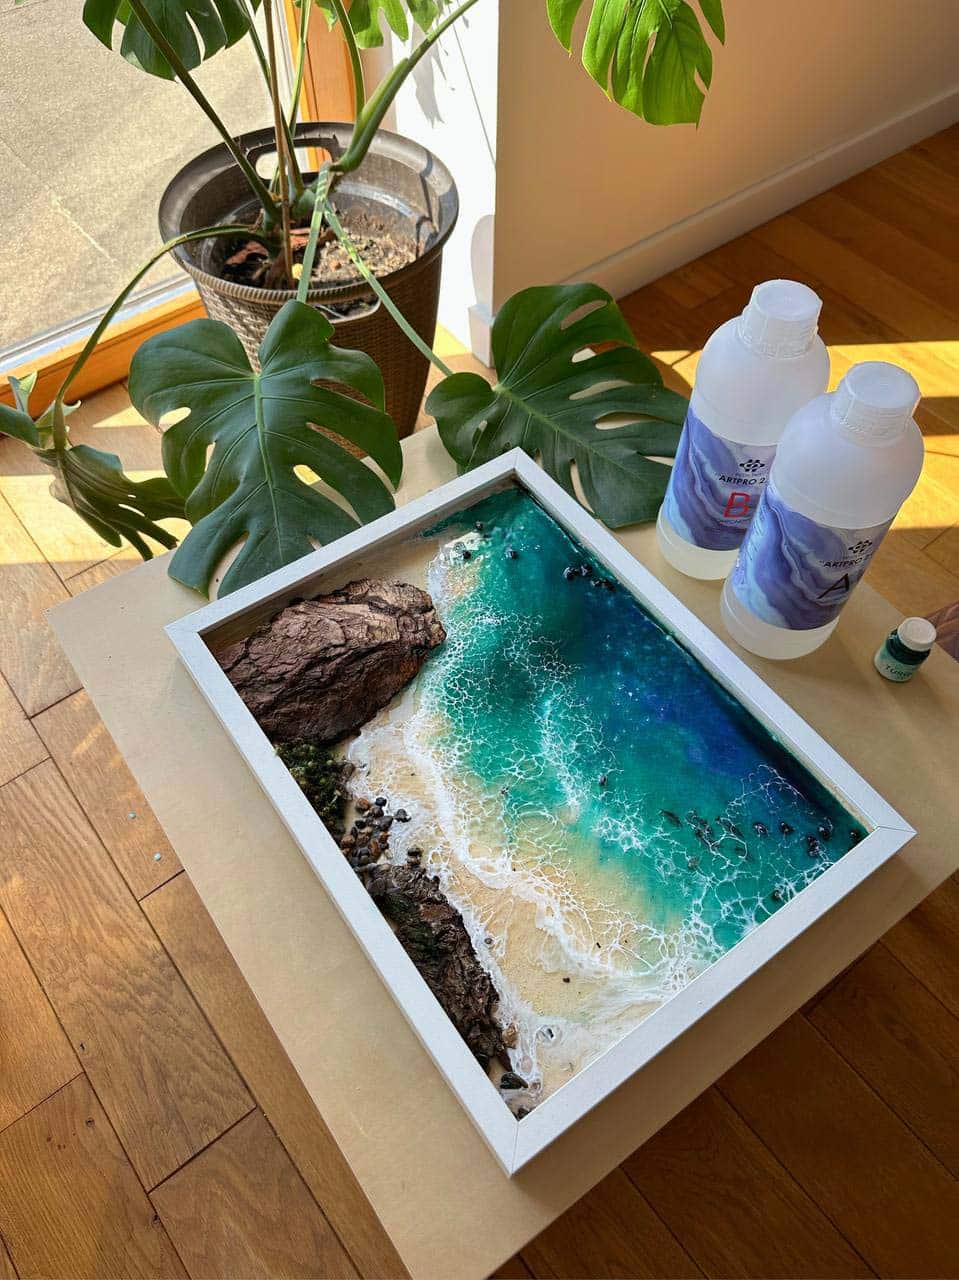
Mix your epoxy resin and chosen pigments thoroughly until streak-free. Carefully follow the resin manufacturer’s instructions for correct ratios. If you’re using the “Sea” – Resin Kit for Creating Ocean Art, 1.7kg Epoxy, Pigments & Canvas, all required components, including pigments and the correct type of resin, are included and measurements are straightforward.
Start by mixing a batch of clear resin for your water base. Then prepare separate portions, tinting them with ocean blue, green, and white dyes from the Marine Palette Set of Dyes until you achieve the desired shades and opacity. Only a small amount of pigment is needed for strong colour.
Step 3: Pour and Layer the Resin
Apply resin in layers to build up depth and create realistic ocean gradients. Begin by pouring your coloured resin in parallel bands across the canvas, with deeper blues and green tones further from the ‘shoreline’, and lighter shades closer to where the sea foam will appear.
Using a mixing stick or gloved hand, gently blend the boundaries between colours for a smooth transition. Work efficiently, as epoxy resin has a limited open time. Avoid overworking, as this can lead to excessive blending or unwanted bubbles.
"Wave-Pro" – Pigment Additive for Sea Wave Effect in Epoxy Resin
A pigment additive designed for creating sea wave and cell effects in epoxy resin artworks.

Step 4: Create Dynamic Sea Foam and Wave Effects
Manipulate the wet resin to form dynamic sea foam and wave patterns. For the signature foamy look, lightly drizzle a line of white-tinted resin along the intended crest of your wave. Next, sprinkle a measured amount of Wave-Pro Pigment Additive over the white resin, following your desired foam pattern. The reactive powder physically disperses the resin, producing natural cells and concentric lacy effects—no torch or heat gun required.
Watch as the sea foam blooms and interacts with the underlying colours. If desired, repeat the process for additional wave crests. This technique allows for organic, professional-level results even for beginners.
Step 5: Allow to Cure and Finish Your Artwork
Allow the piece to cure completely in a dust-free environment. Carefully cover your art with a protective box or tent to prevent dust from settling while the resin sets. Typical cure times vary according to the resin brand and temperature, but most pieces require at least 24 hours before handling.
Once fully cured, remove any drips from the reverse side and inspect the surface. Your sea foam and wave effects should appear three dimensional and glossy. If you’d like to build additional layers or waves, repeat the process above after the resin cures.

"Wave-Pro" – Pigment Additive for Sea Wave Effect in Epoxy Resin
A pigment additive designed for creating sea wave and cell effects in epoxy resin artworks.
Tips and Common Mistakes to Avoid
Plan your colour gradients and pour sequence in advance to avoid rushed decisions once the resin is mixed. Over-mixing after pigments are added can introduce bubbles, so stir slowly and thoroughly. Remember, resin reacts differently depending on room temperature—warmer conditions will accelerate curing, while colder environments can slow the reaction.
If your sea foam cells are too small or fail to form, verify you’ve used enough Wave-Pro Pigment Additive or adjust the spacing of your white resin lines. Avoid using UV resin for wave effects—it does not produce the same results as epoxy resin. For additional guidance, review the Free Step-by-Step Resin Ocean Art Lesson by Natalia Natirum to see the complete process in action.
Extra Advice for Ocean-Inspired Resin Art
Always work in a temperature-controlled area and plan your pour sequence to avoid rushing. A free online tutorial, like the Resin Ocean Art Lesson by Natalia Natirum, provides detailed demonstrations and inspiration for mastering the wave technique.

- "Wave-Pro" – Pigment Additive for Sea Wave Effect in Epoxy ResinPrice range: £4.15 through £10.85Wave-Pro is a non-toxic additive designed to create natural wave and cell effects in epoxy resin, suitable for ocean art techniques.
- Free Step-by-Step Resin Ocean Art Lesson by Natalia NatirumOriginal price was: £99.00.£0.00Current price is: £0.00.Free video tutorial for Resin Ocean Art by Natalia Natirum, suitable for creating sea foam effects with epoxy resin.
 "Sea" – Resin Kit for Creating Ocean Art, 1.7kg Epoxy, Pigments & Canvas£44.85"Sea" Resin Kit includes thick epoxy resin and pigments designed for creating ocean-themed artworks with realistic wave effects.
 "Marine Palette" – Set of Dyes for Ocean Art, Epoxy Resin, and Beach EffectsPrice range: £10.85 through £16.85The Marine Palette Set of Dyes offers professional epoxy-safe pigments for ocean art and beach effects, suitable for sea foam techniques.
Frequently Asked Questions
What is the best resin for sea foam effects?
Epoxy resins with medium or high viscosity provide the best control for layering and creating foamy, lacy effects. Thicker resins such as those included in the "Sea" kit help cell effects stay crisp and three-dimensional.
Do I need a heat gun or torch to create sea foam?
No, a product like Wave-Pro Pigment Additive physically disperses wet resin and forms cells without the need for heat. This makes the technique safer and more accessible, especially for beginners.
Why are my sea foam cells not forming?
This could be due to insufficient additive, low resin viscosity, or the timing of adding the additive. Always use the recommended amount, and ensure your white resin line is still fluid when you apply the Wave-Pro powder.
Can I use UV resin for ocean art?
Sea foam and wave effects rely on the slow movement and thickness of epoxy resin. UV resin cures too quickly, making it unsuitable for these techniques.
How do I prevent bubbles in my resin art?
Mix pigments slowly to minimise bubbles, and allow the resin to rest before pouring. Using a level surface also prevents air from being trapped during pours.
Do I need to seal my canvas or board before pouring resin?
For best results, pre-seal porous surfaces like wood or MDF with a thin layer of resin or acrylic medium. This prevents air escape and potential bubbles in your artwork.
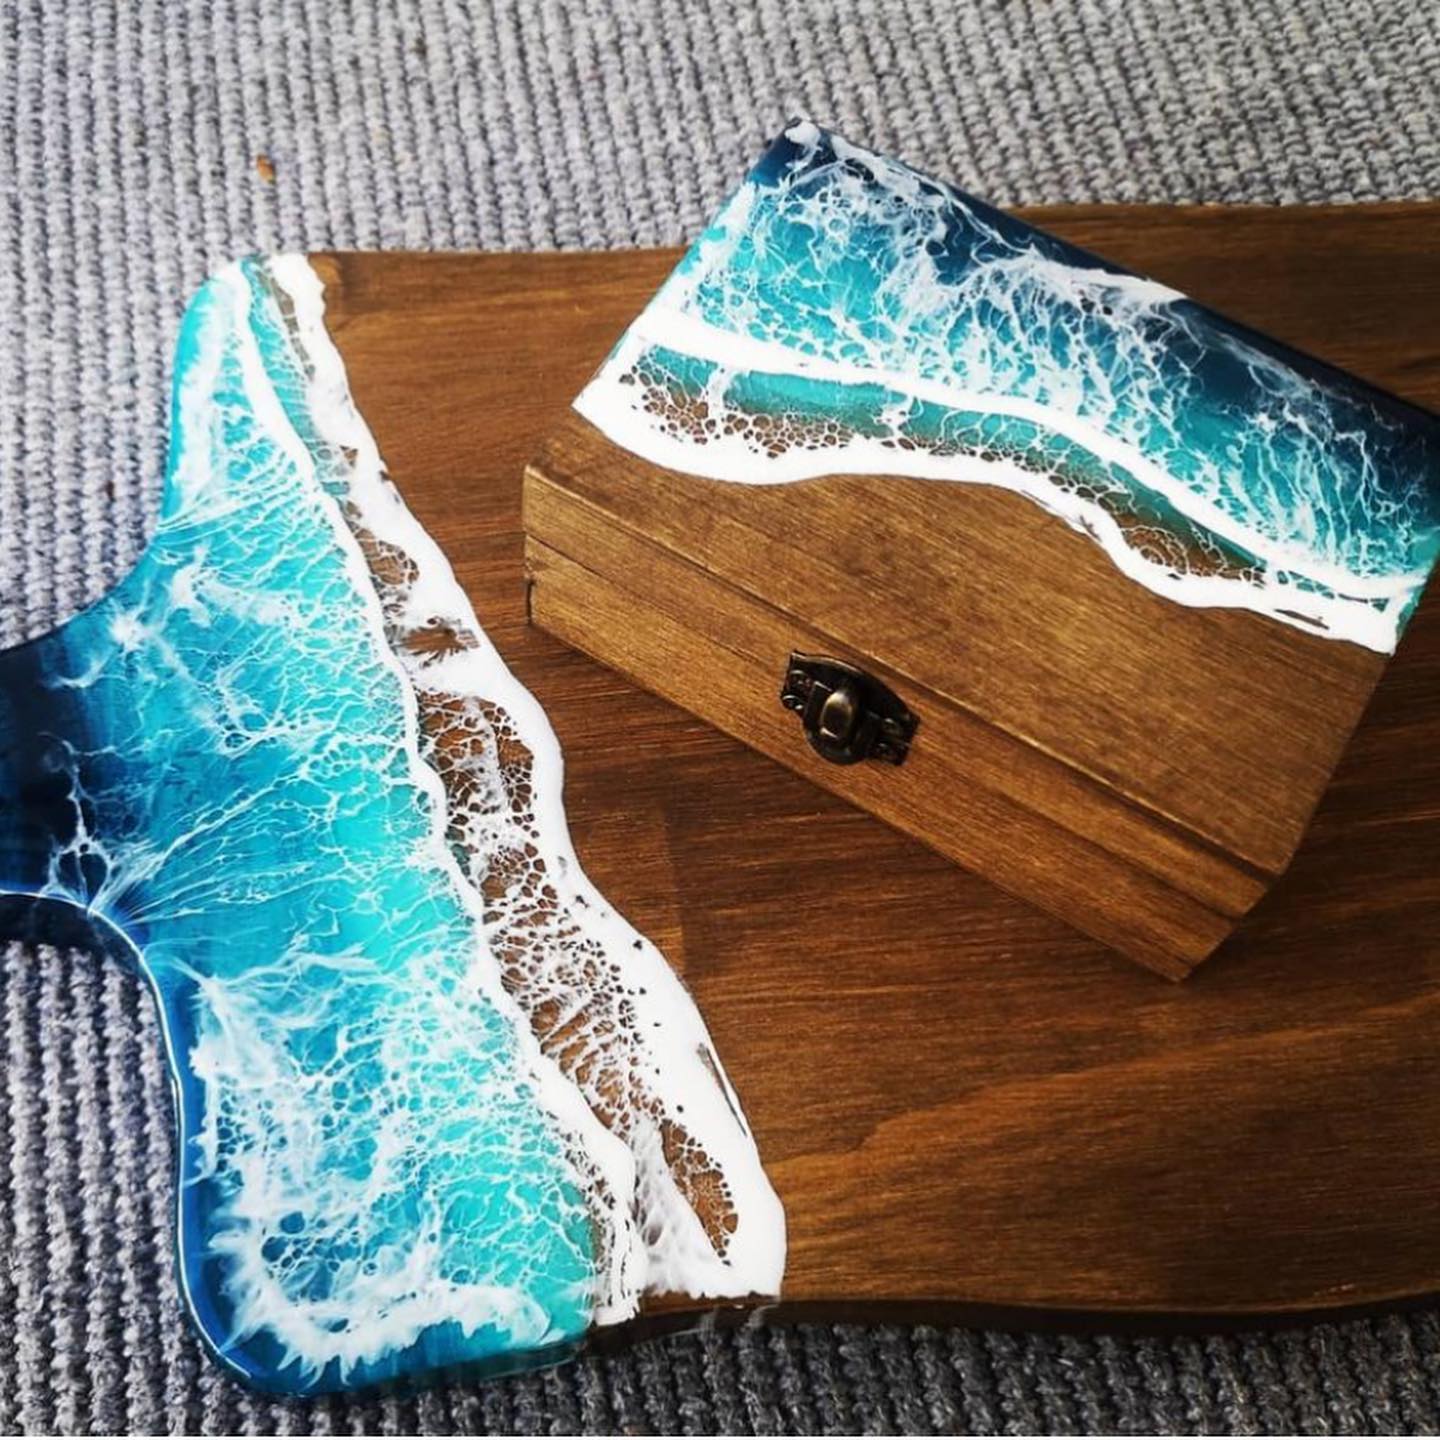
How can I add more realism to my ocean resin art?
Combine different blue, turquoise, and white hues in gentle gradients, and experiment with the density and position of sea foam lines. Adding details like shells or pebbles can enhance the seascape effect.
"Sea" – Resin Kit for Creating Ocean Art, 1.7kg Epoxy, Pigments & Canvas
A complete resin kit designed for creating ocean art with thick epoxy resin, pigments, and wave additives.