 Free shipping on orders over £29,85


How do you colour UV resin?
Master UV resin colouring techniques for luminous and vibrant effects.
Colouring UV resin unlocks endless creative possibilities for jewellery makers, crafters, and artists. By adding colour to UV resin, you can produce everything from shimmering metallic finishes to glass-like transparencies and vibrant glow-in-the-dark effects. This guide will walk you through everything you need to know to colour UV resin successfully—whether you’re working on small charms, intricate 3D projects, or statement design pieces.
What You’ll Need
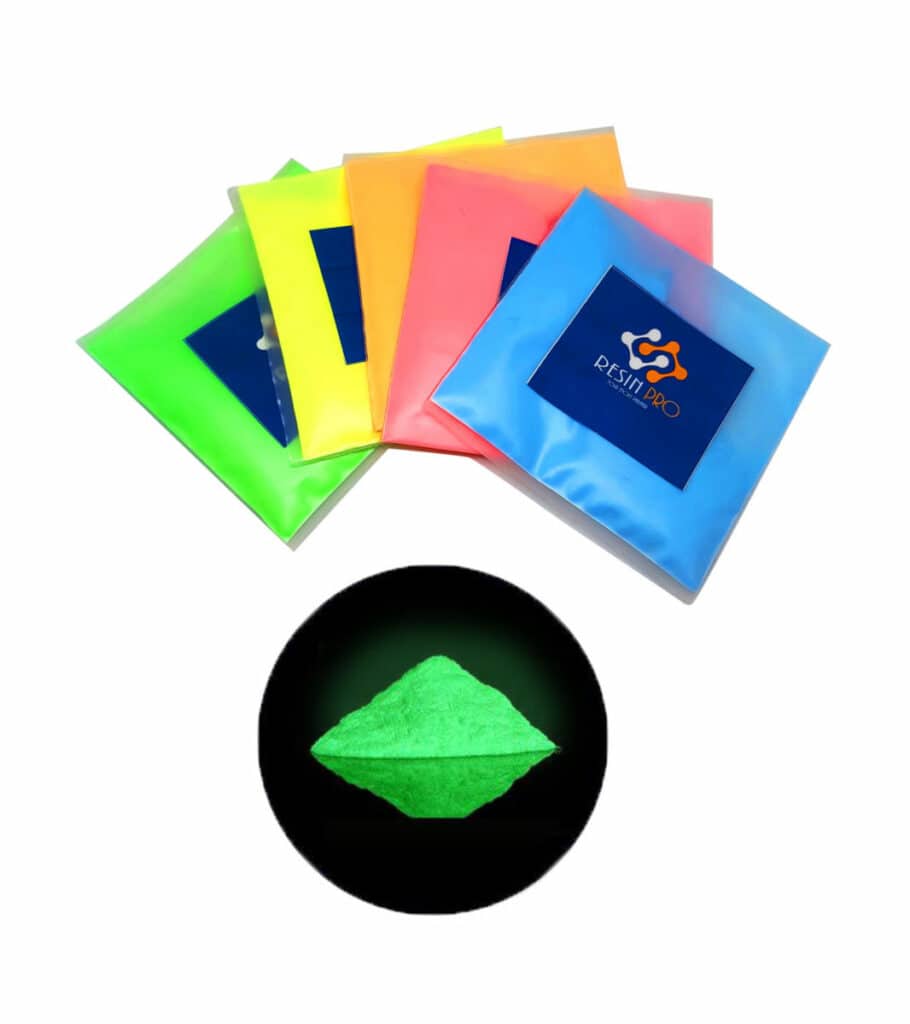
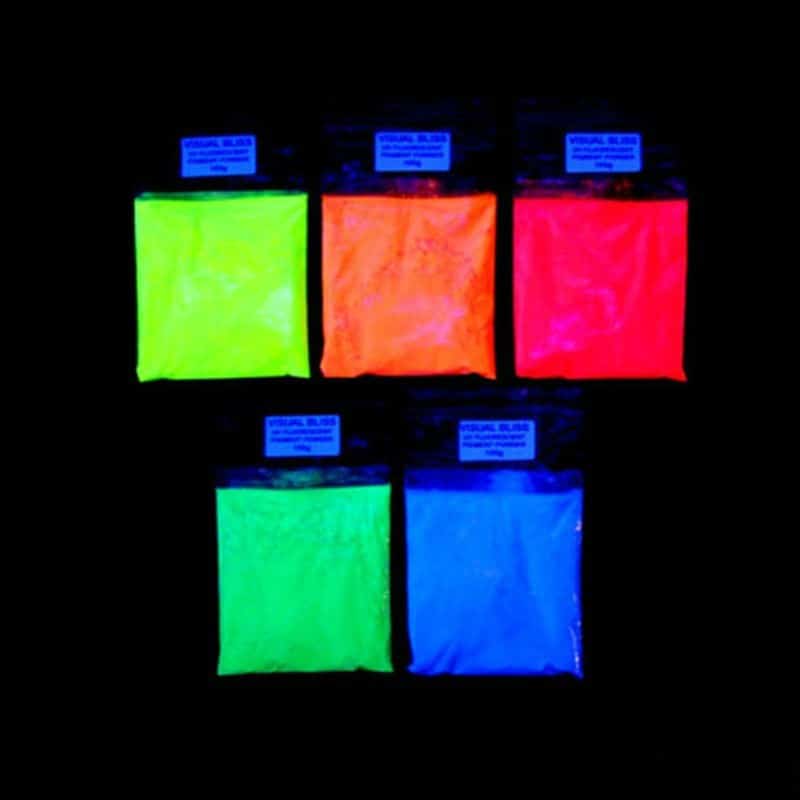
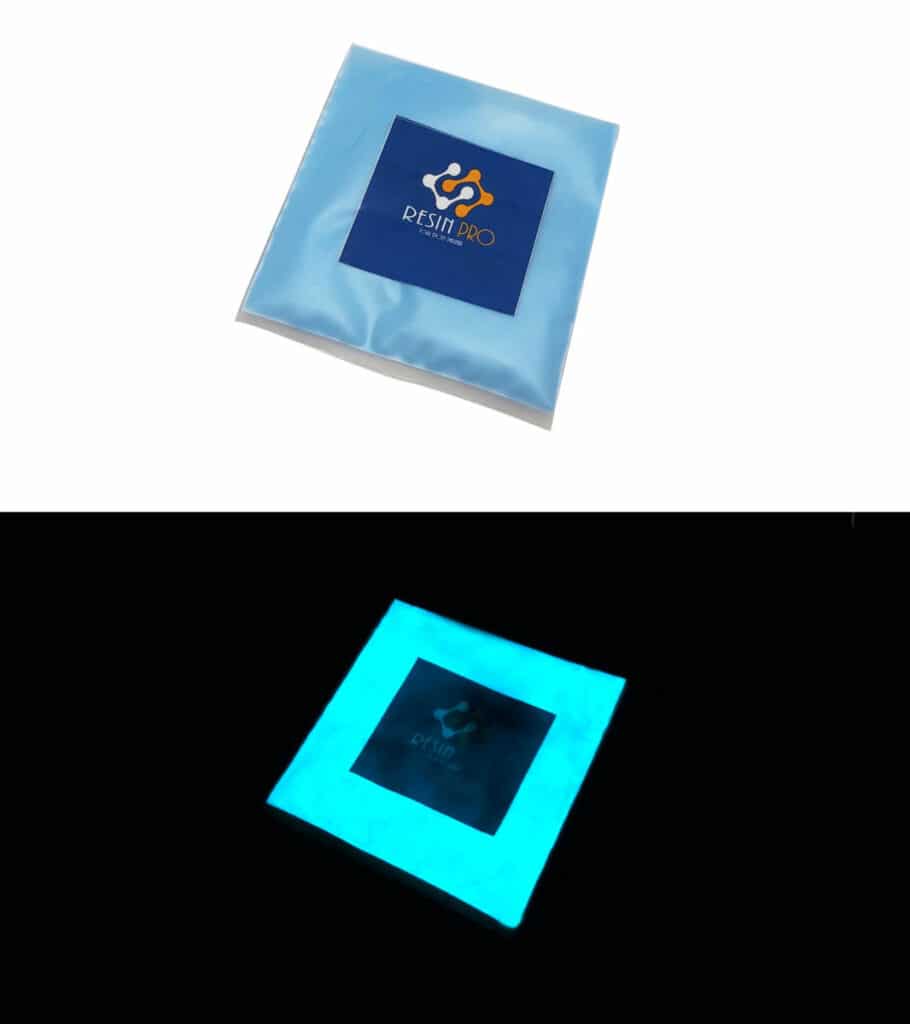
- Fluorescent UV Pigment Powder – Coloured Glow-in-the-Dark Additive for Resin, Paint, and Varnish: Perfect for creating glow-in-the-dark resin effects.
- “Magic Crystal” – Transparent Resin Colour 45ml: Ideal for transparent, glass-like colour results.
- “Sahara Space” – Interference Metallic Pigment, 10g: For adding metallic shimmer or pearlescent hues.
- “Fairy Wings” – UV Resin for Volumetric Reliefs, Dual Colour, 30ml: Ready-to-use dual colour UV resin for volumetric details.
- Mixing sticks
- Small mixing cups
- Gloves and protective workspace cover
- UV lamp (appropriate for resin curing)
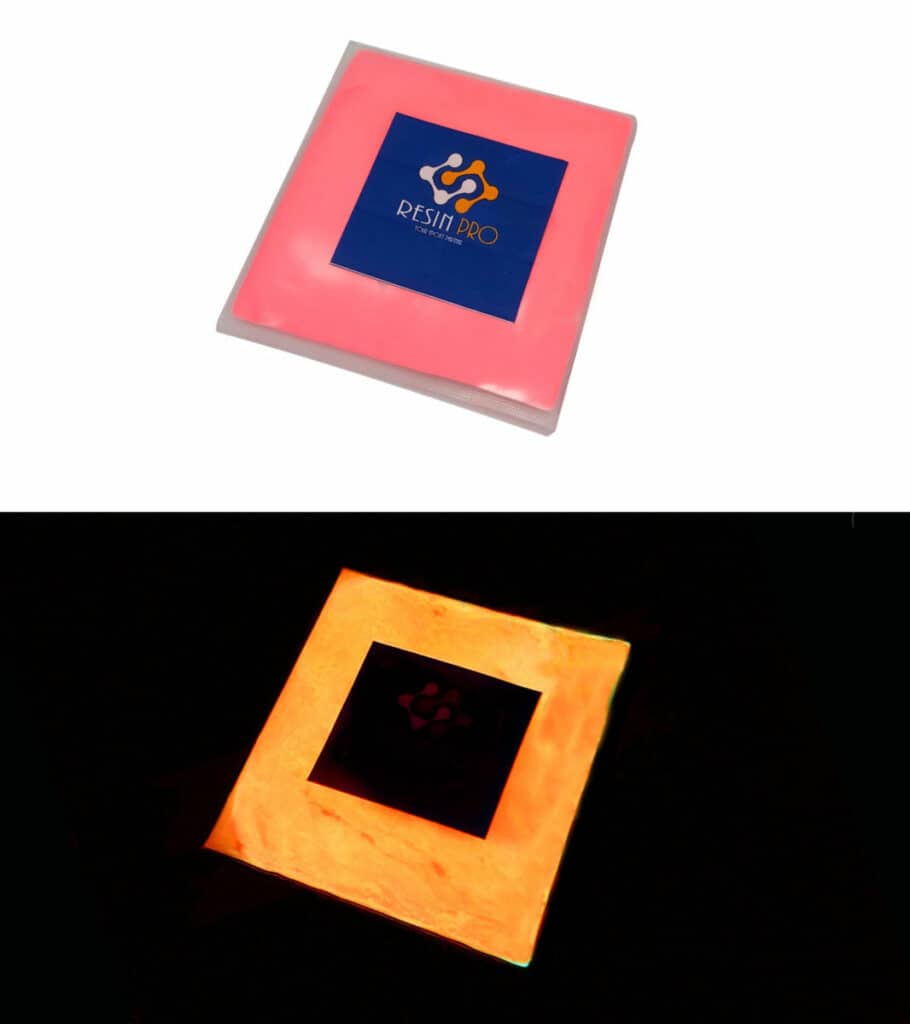
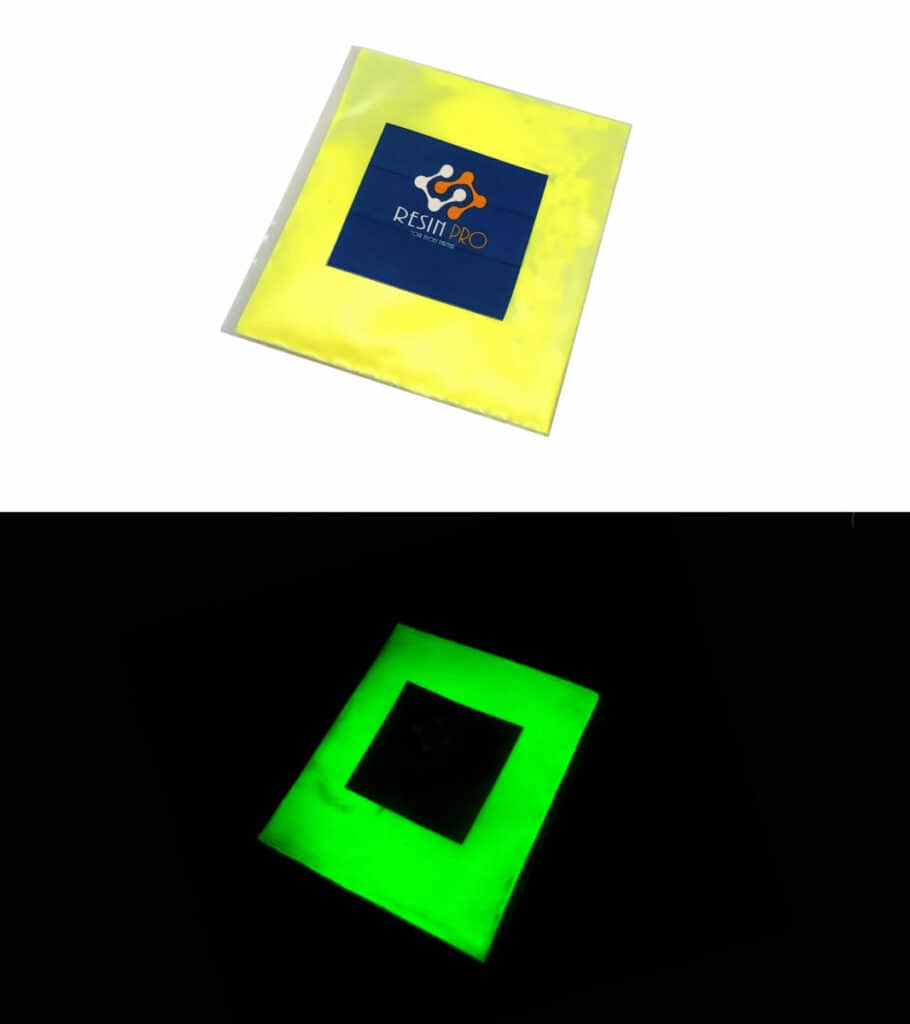
See Inspiring UV Resin Colour Examples
Explore a collection of projects highlighting different methods for colouring UV resin, from subtle glass-like tints and bold metallics to luminous glow-in-the-dark creations. Notice how varying the pigment type and concentration changes both the vibrancy and transparency of the finished piece.
Step 1: Prepare Your Workspace and Materials
Ensure all tools are clean and your work area is well-ventilated and protected. UV resin cures quickly under UV light, so keep the workspace away from direct sunlight and set all materials within arm’s reach before you begin. Put on gloves to keep your hands clean and to avoid contaminating the resin with oils or dust. Pour a small amount of UV resin into a mixing cup; only prepare what you intend to use in one session, as UV resin will harden rapidly after mixing if exposed to UV rays.
Step 2: Select and Add Colourant
Choose a colourant based on the desired effect. For transparent, jewel-like finishes, use a drop or two of “Magic Crystal” – Transparent Resin Colour 45ml. If you want to introduce brilliant, glow-in-the-dark properties, opt for Fluorescent UV Pigment Powder – Coloured Glow-in-the-Dark Additive for Resin, Paint, and Varnish. For metallic or interference effects, select from the “Sahara Space” – Interference Metallic Pigment, 10g range. Sprinkle or drop your chosen pigment or colourant into the prepared UV resin.
Mix thoroughly but gently using a mixing stick. Stirring too vigorously can introduce air bubbles. Start with a small amount—pigments and colourants are highly concentrated and a little goes a long way, especially if you’re after a translucent result. Use pigments sparingly for beginners, increasing quantity gradually for more intense colour.
Step 3: Pour and Combine Colours
Once the pigment is fully blended, pour the coloured resin into your chosen mould, frame, or onto the decorative item. If you plan to create multi-colour effects, such as dual-tone reliefs or mixed metallics, repeat the mixing process separately for each colour. For projects such as fine details or 3D embellishments, consider using “Fairy Wings” – UV Resin for Volumetric Reliefs, Dual Colour, 30ml, which simplifies combining colours for layered or dimensional effects.
Use clean tools for each shade to prevent muddling. Before curing, you can swirl or blend colours inside the mould for gradient or marbled designs.
Step 4: Cure the Coloured Resin
Expose your poured, coloured resin to a UV lamp as soon as you are satisfied with the design and colour distribution. Follow the recommended curing time for your resin—this is typically between 1 and 5 minutes, but check the manufacturer’s instructions for specific products. For volumetric effects or projects requiring layering, cure each thin layer (about 3mm or less) before applying a new one to avoid issues with incomplete curing or trapped bubbles.
Handle the cured resin with care, and inspect it for complete hardening and colour consistency. If a deeper effect or additional colour is needed, repeat mixing and layering steps.
Tips, Common Mistakes, and Troubleshooting
Avoid over-pigmentation which can hinder UV light penetration and result in sticky or improperly cured resin. Stick to the manufacturer’s recommended pigment-to-resin ratios—typically below 5% by weight. Mix only what you need per session, as UV resin hardens quickly on exposure to light. Store pigments and resin containers tightly closed and away from UV sources when not in use. If you encounter air bubbles, gently warm the resin before curing or use a toothpick to remove trapped bubbles. For best longevity, use colourants specifically formulated for use with UV resin.
Creative Applications for Coloured UV Resin
Coloured UV resin unlocks striking effects in jewellery, model decoration, craft embellishments, and home décor accents. Experiment with combinations of metallic, transparent, and phosphorescent colours to personalise your work. Success comes from testing in small batches and observing the outcome in both daylight and low-light conditions.
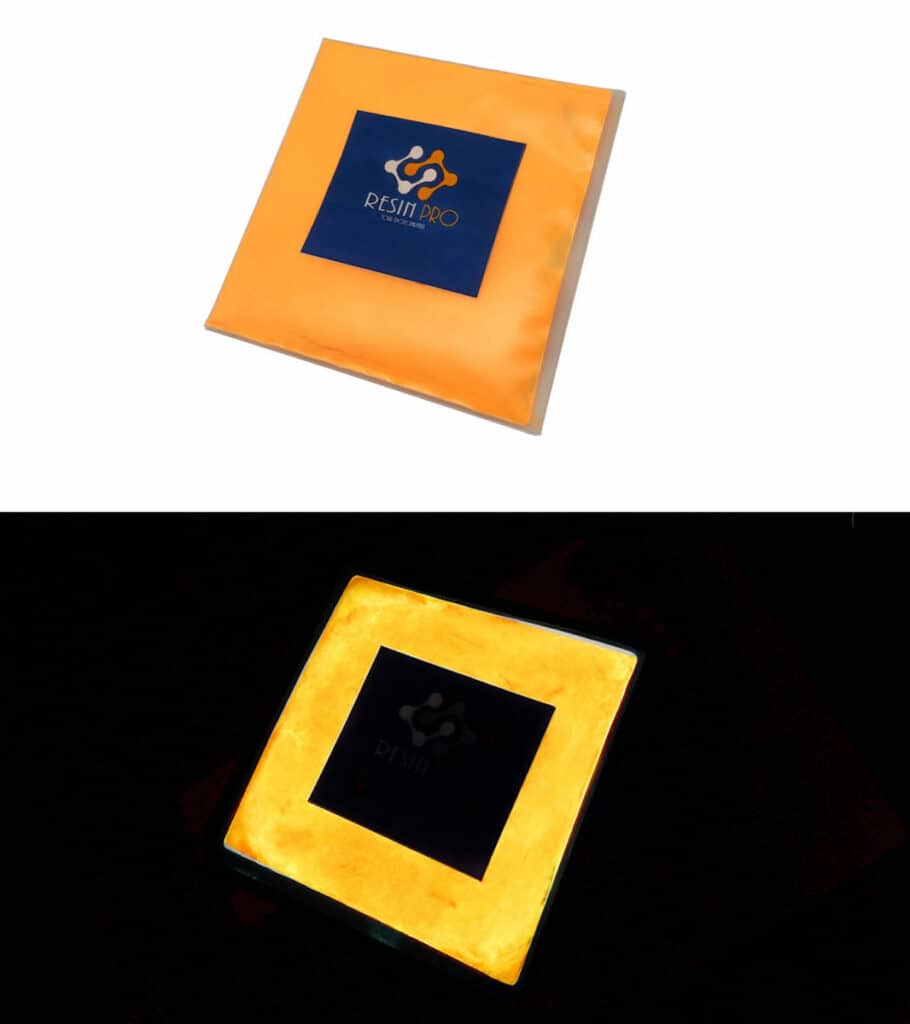
- Fluorescent UV Pigment Powder – Coloured Glow-in-the-Dark Additive for Resin, Paint, and VarnishPrice range: £7.75 through £19.85Fluorescent UV Pigment Powder glows in the dark and is designed as a coloured additive for resin, paint, and varnish applications.
 "Magic Crystal" – Transparent Resin Colour 45ml£4.65"Magic Crystal" Transparent Resin Colour is suitable for achieving glass-like colour effects with clarity and vibrancy.
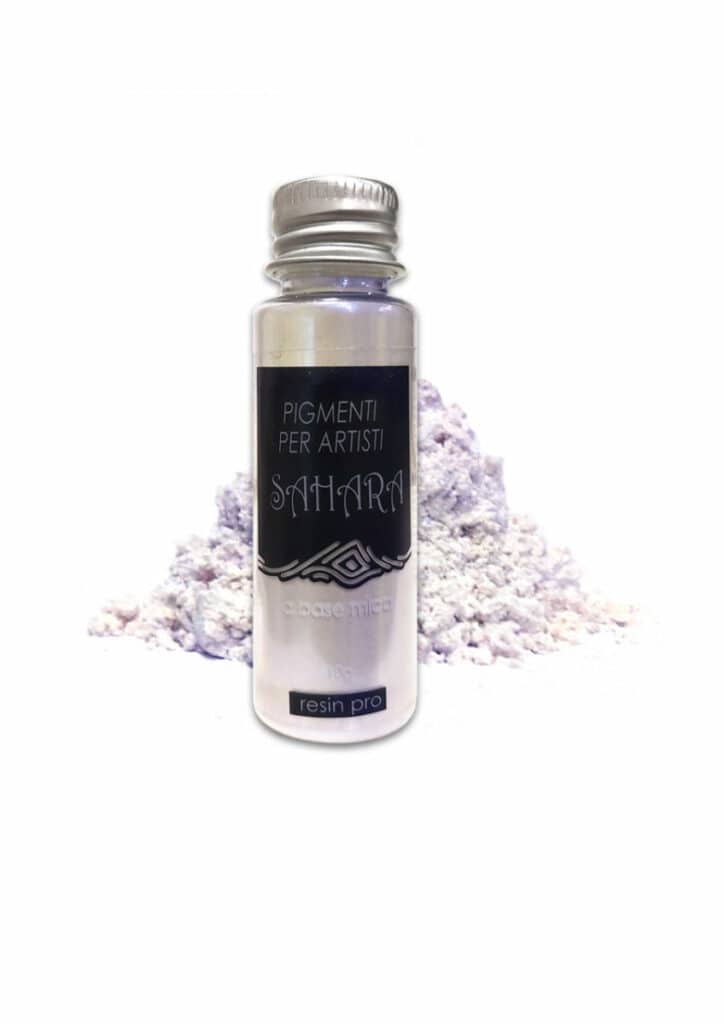 "Sahara Space" – Interference Metallic Pigment, 10g£3.45"Sahara Space" interference metallic pigments provide a choice of four colours suitable for use with epoxy jewellery and resin art.
 "Fairy Wings" – UV Resin for Volumetric Reliefs, Dual Colour, 30mlOriginal price was: £15.15.£2.85Current price is: £2.85."Fairy Wings" UV Resin is a ready-to-use acrylic gel suited to detailed 3D patterns and decorative work, supporting thin layer applications.
Frequently Asked Questions
What's the difference between pigments and dyes for UV resin?
Dyes dissolve fully for translucent effects, while pigments remain as fine particles for opaque or special finishes. Both can be used depending on your desired result.
How much pigment should I add to UV resin?
Usually less than 5% by weight. Adding too much colourant can block UV light and prevent proper curing, resulting in a sticky finish.
Can I mix different colourants in a single UV resin piece?
Yes—combine metallic, transparent, and glow pigments for layered or marbled effects. Mix each colour separately before pouring.
How do I make UV resin glow in the dark?
Mix fluorescent pigment powder into the resin, ensuring even distribution, then expose the finished piece to light to charge it.
Why is my coloured UV resin cloudy or bubbly?
Over-mixing, using the wrong pigment, or mixing in dust or air can cause this. Mix gently and ensure all tools are clean.
Which colourant gives glass-like transparency in UV resin?
Use liquid transparent colourants formulated for UV resin, such as Magic Crystal, for vivid clarity.