 Free shipping on orders over £29,85


How to colour epoxy resin?
Colouring epoxy resin opens up a world of creative opportunities, from bold abstract art pieces to subtle, glass-like jewellery finishes. This guide covers key techniques and expert tips to help you achieve even, vibrant results every time you colour your resin, regardless of whether you’re working on art pours, river tables, coasters, or decorative castings.
Achieve vibrant, even colours in your resin pours and castings


What You’ll Need
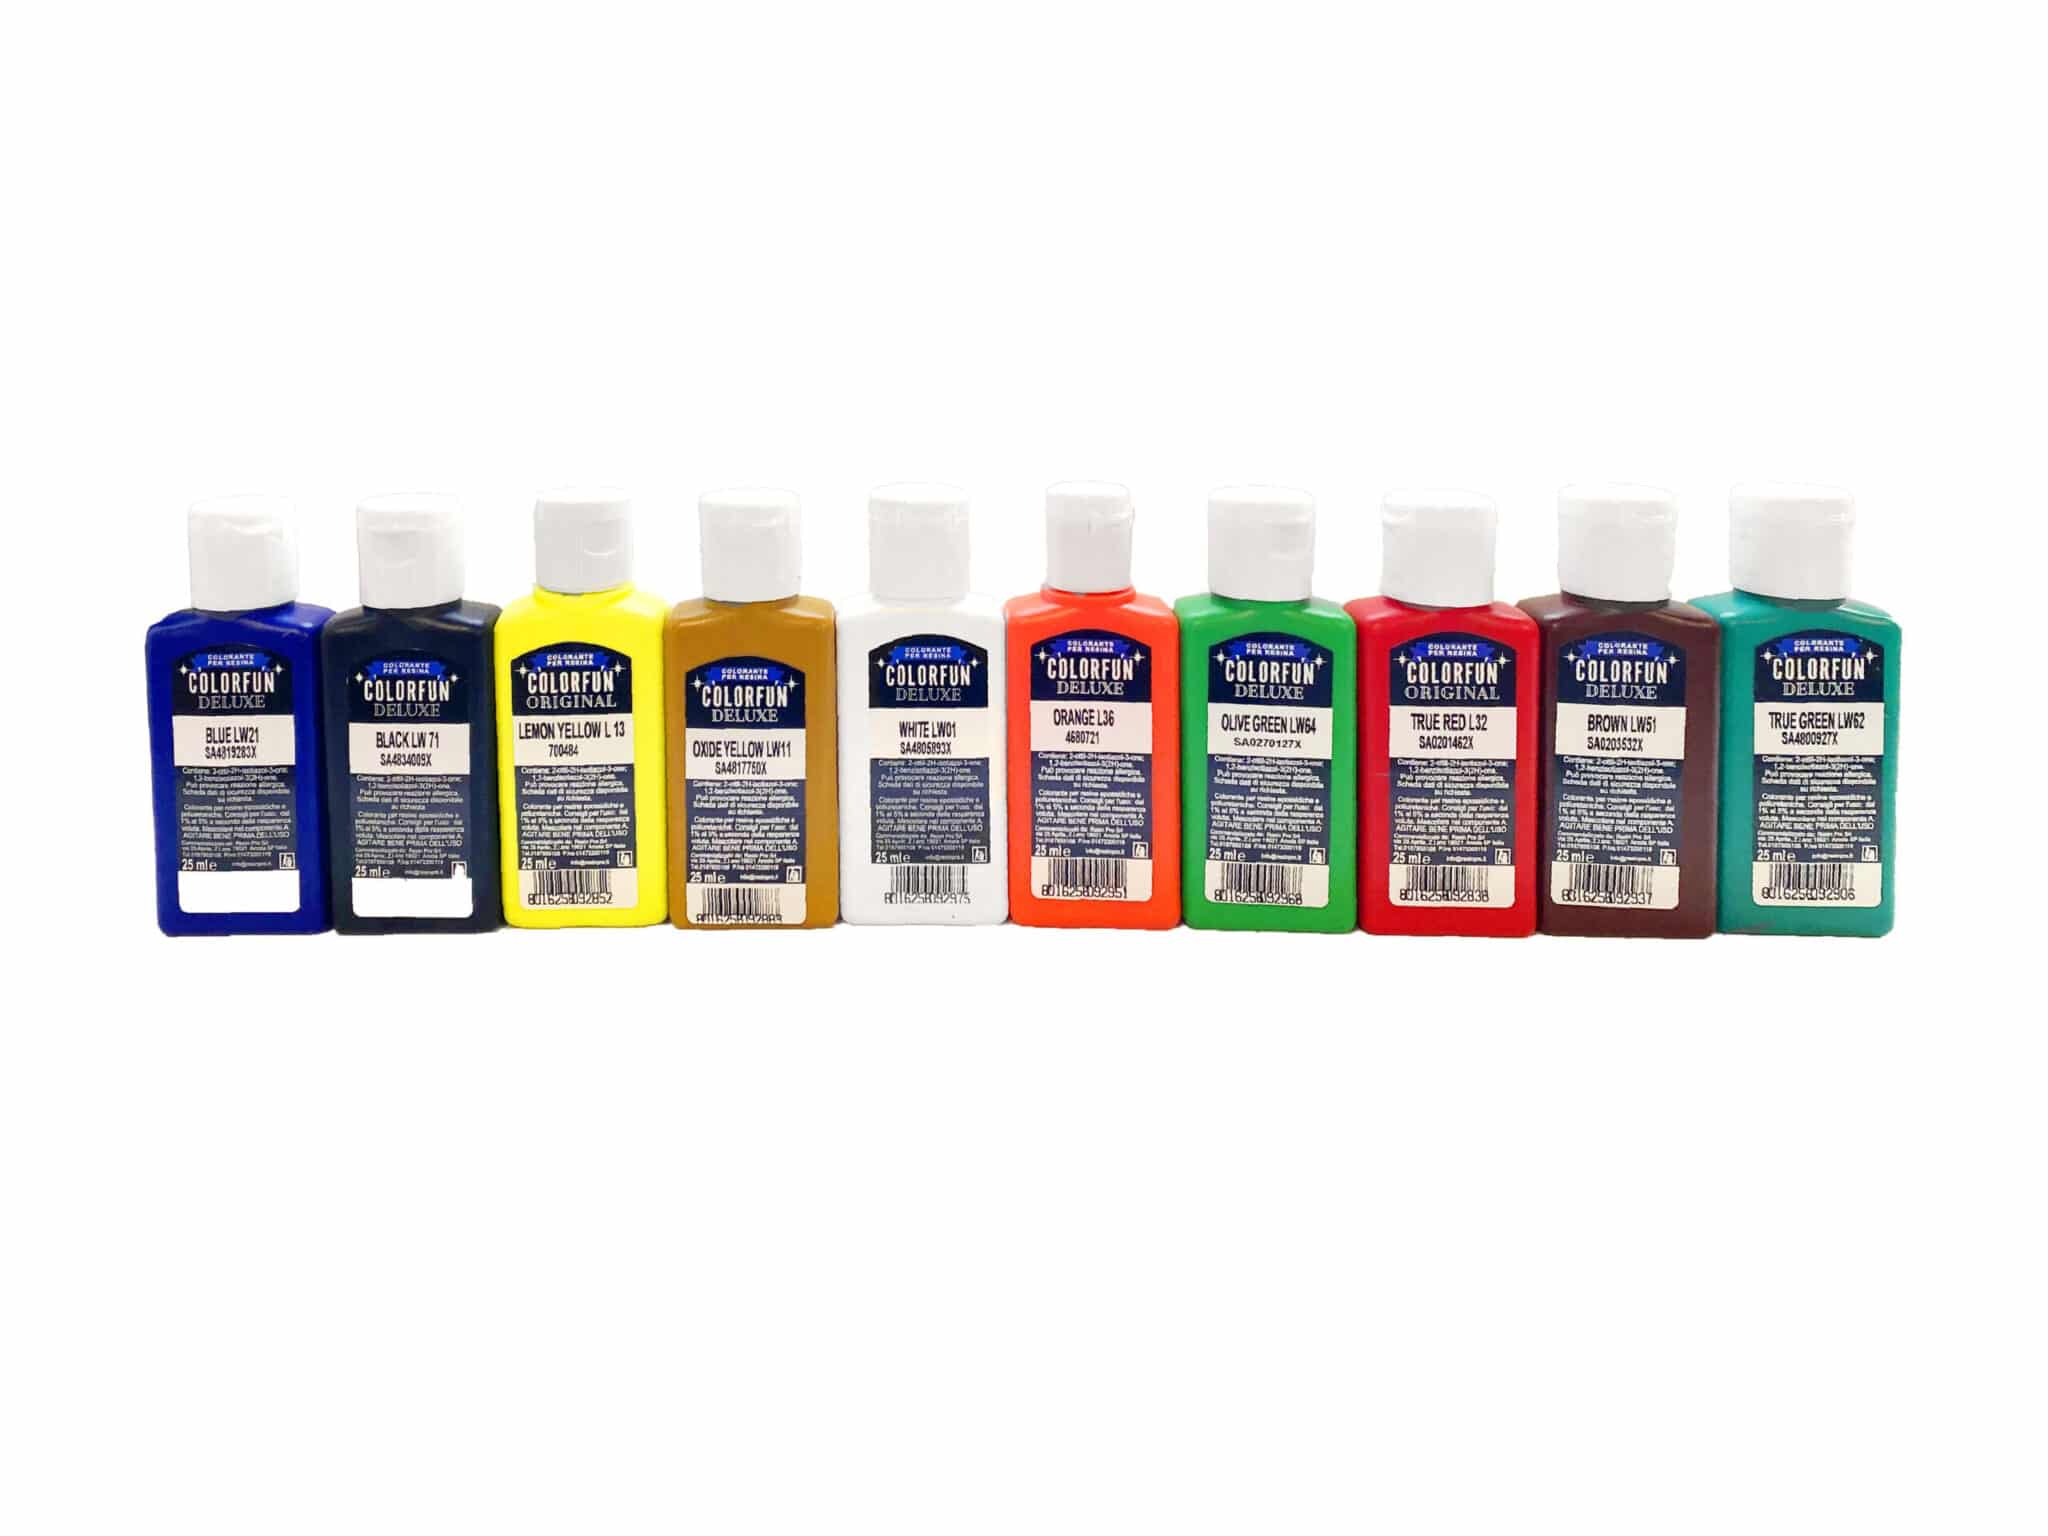
- “Colourfun Set” – Liquid Epoxy Resin Colourant Set for Solid Colour Effects – Highly concentrated paste for opaque and custom shades
- “Magic Crystal” – Transparent Resin Colour 45ml – Ideal for glass-like transparent effects
- “Marine Palette” – Set of Dyes for Ocean Art, Epoxy Resin, and Beach Effects – For realistic, marine-inspired hues
- “Colourfun” – Liquid Epoxy Resin Colourant 25-100ml – High coverage – Liquid pigment for bright and vivid results
- Mixing containers and stirring sticks
- Nitrile gloves and a clean, dust-free workspace
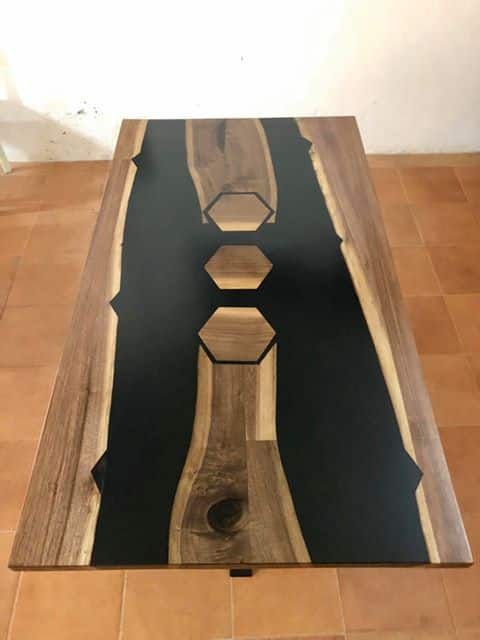
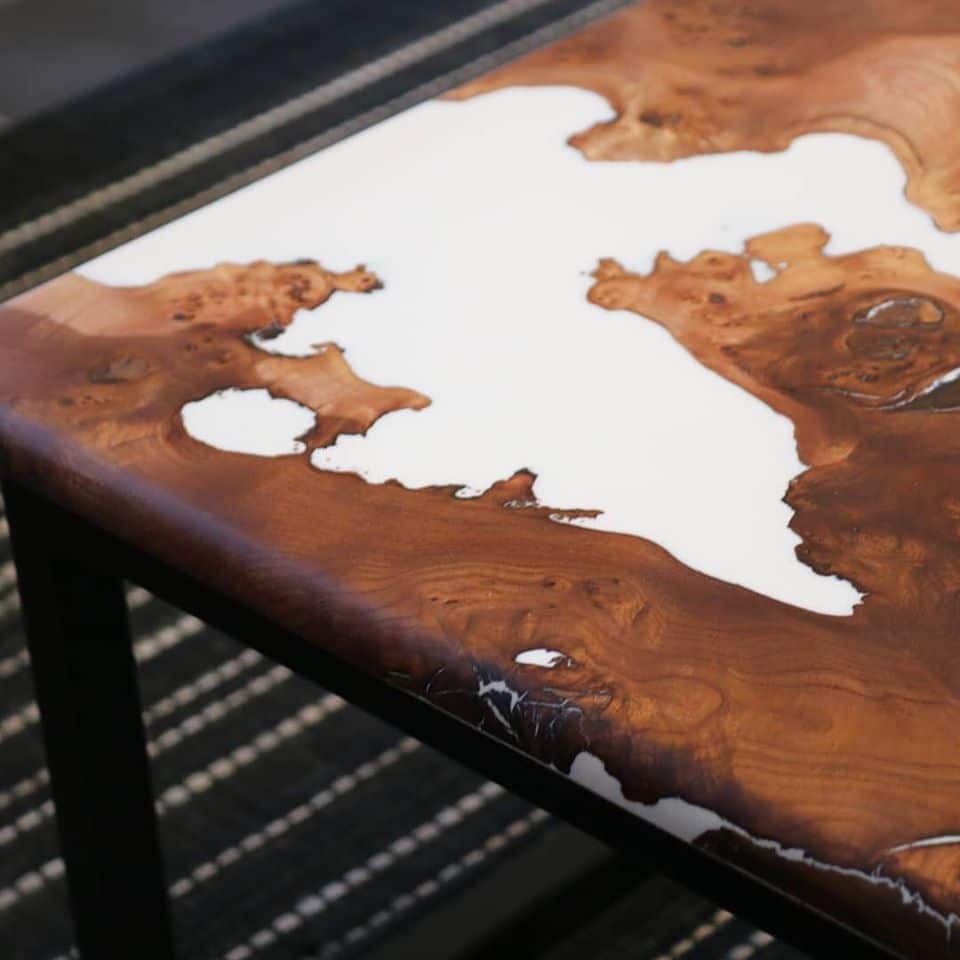
Visual Inspiration: Finish Styles and Colour Effects
Explore various epoxy resin colour effects—transparent, translucent, and opaque—to decide which suits your project best. Notice the clarity of the transparent Magic Crystal shades compared to the bold, solid tones from the Colourfun Set. Experiment with ocean-inspired gradients using Marine Palette dyes for stunning beach or wave art.
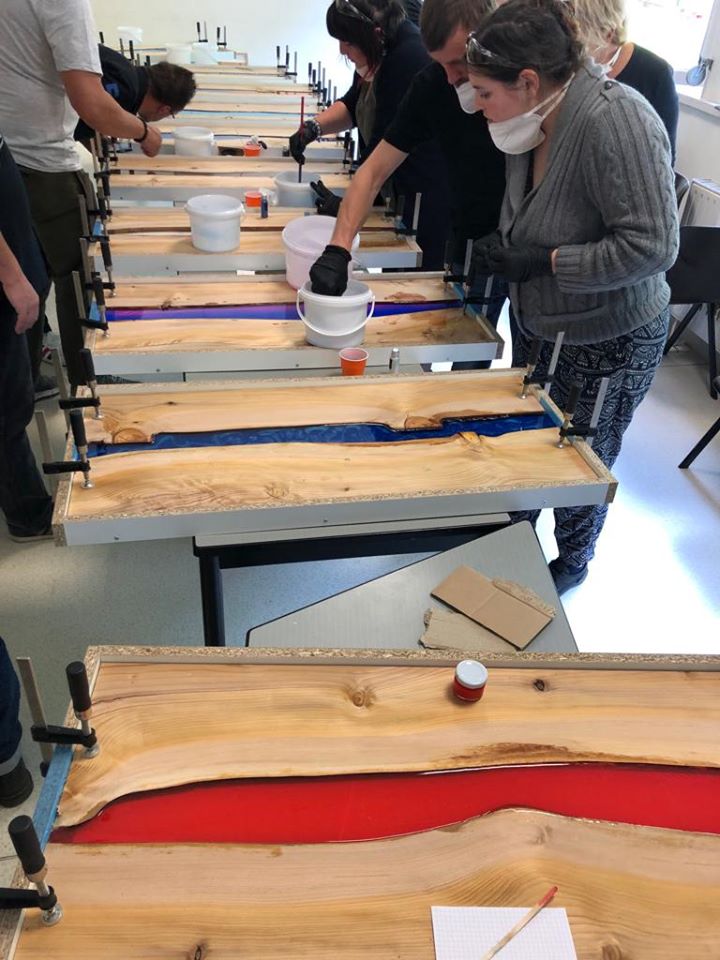
Step 1: Prepare Your Workspace and Safety
Before working with epoxy resin and pigments, ensure your workspace is protected and free from dust, as tiny particles can mar your finished surface. Wear gloves and work in a ventilated area to protect your skin and lungs from resin and concentrated colourants. Organise your pigments, mixing tools, and containers so that you can work efficiently and smoothly. Read and follow the safety instructions on your chosen resin and pigment products.
Step 2: Mix Resin According to Manufacturer Guidance
Begin by carefully measuring and mixing your epoxy resin and hardener in the correct ratio, ensuring you stir thoroughly but gently to minimise bubbles. Mix only the amount of resin you can use within the working time specified by your resin manufacturer, as the open time is limited and colouring slows the process slightly. Clean mixing tools are essential for uniform pigment dispersion and to avoid contaminating your resin.
Step 3: Add and Blend Your Chosen Colourant
Decide whether you want a transparent, translucent, or opaque finish. For transparent glass-like effects, add drops of “Magic Crystal” – Transparent Resin Colour 45ml and stir gently until evenly dispersed. For deeper hues, a Colourfun Set paste creates bold, uniform shades and can be blended with other pastes for bespoke tones. If working on an ocean-themed project, reach for the Marine Palette for authentic blue and sea-inspired shades. Add colourant gradually—less is more—build intensity drop by drop, stirring thoroughly after each addition. Never exceed 5% pigment by resin weight to ensure proper curing and structural integrity.
Step 4: Pour and Create Your Design
Once your colour is fully blended and even, pour the coloured resin into your mould, onto your artwork, or across your casting surface. For layered or gradient effects, you may prepare several shades and pour them sequentially or side by side. Blend colours before pouring to avoid unexpected reactions and cloudy patches; mixing colours directly on your workpiece is risky and can lead to unplanned results. Use clean sticks for each shade to prevent colour contamination.

Step 5: Finishing Touches and Curing
Allow your resin project to cure undisturbed in a dust-free, stable environment. Avoid moving or covering your piece in the first several hours to prevent dust settling or marks. After the surface cures, demould or lift carefully, inspecting for uniformity in colour. Test a small batch before full pours if you are experimenting with an unfamiliar dye, especially when blending pigments for a custom shade.
Tips, Common Mistakes, and Troubleshooting
Always add pigment to the mixed resin, never the hardener, as improper blending may result in streaks or unmixed patches. Pigment concentration above the recommended percentage may lead to poor curing or sticky spots. For highly translucent effects, start with the smallest amount of colourant and build up gradually. If bubbles appear, allow the resin to sit briefly or use a heat gun to remove surface bubbles, taking care not to disturb the coloured resin. If you’re unsure about final results, create a test swatch.
Creative Colour Layering and Artistic Surfaces
Combine techniques: try layering multiple pre-mixed colours for complex, marbled, or wave patterns. Swirl, pour, or feather different shades together for one-of-a-kind visuals. Using the right pigment for your style ensures your resin artwork is vivid and professional.
- "Colourfun Set" – Liquid Epoxy Resin Colourant Set for Solid Colour EffectsPrice range: £13.45 through £48.15The "Colourfun Set" offers intense, translucent epoxy resin pastes, suitable for creating various solid and gradient colour effects.
- "Magic Crystal" – Transparent Resin Colour 45ml£4.65"Magic Crystal" Transparent Resin Colour offers glass-like vibrant effects suitable for colouring epoxy resin with clarity and ease.
 "Marine Palette" – Set of Dyes for Ocean Art, Epoxy Resin, and Beach EffectsPrice range: £10.85 through £16.85Ready-to-use marine dyes designed for epoxy resin art to create ocean-inspired effects with safe, odourless pigments.
 "Colourfun" – Liquid Epoxy Resin Colourant 25-100ml – High coveragePrice range: £3.65 through £9.85The "Colourfun" liquid epoxy resin colourant offers intense pigments and is easy to blend for different effects suited to colouring epoxy resin.
Frequently Asked Questions
Do I need special pigment for epoxy resin?
Yes, always use pigments specifically formulated for epoxy resin to ensure full dispersion and reliable curing results.
How much colourant should I use in epoxy?
Keep pigment below 5% by resin weight. Add small amounts gradually for the best consistency and to avoid curing issues.
Can I mix different colours in epoxy resin?
Yes, you can blend colours to create custom shades. Mix thoroughly before pouring to avoid streaks or inconsistent colour.
How do I get ocean effects with resin colours?
Use marine pigment sets for blue gradients and pair with wave-effect powders. Pour in layers for realistic sea and foam.
Can I use acrylic paint or ink in epoxy resin?
It’s not recommended. Paints and inks can affect resin curing and might cause cloudiness or separation over time.
Why did my coloured resin cure sticky?
Too much pigment, improper mixing, or adding pigment to the hardener can prevent proper curing. Stick to recommended pigment ratios.