 Free shipping on orders over £29,85

How to make resin stick to ceramic and metal?
Getting resin to bond securely to ceramic and metal can be challenging due to the slippery, non-porous nature of these surfaces. This guide breaks down the exact preparation and application process so you can achieve lasting, professional bonding, whether you are repairing, casting, or creating art pieces with epoxy resin.
Expert steps for reliable bonding on smooth, challenging surfaces


What You’ll Need
- “FixExpress” – Two-Component Epoxy Glue 500g – quick-bonding adhesive for ceramic and metal repairs
- “Epoxyprimer” – Universal Water-Based Two-Component Epoxy Floor Primer – surface preparation for ceramic tiles or similar substrates
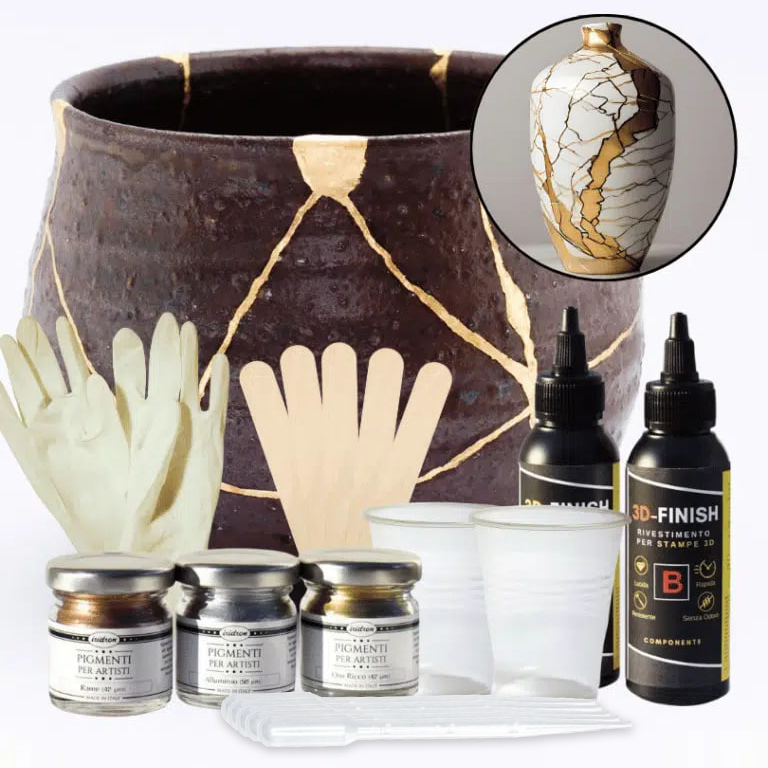
- “Kintsugi” – Ceramic Repair Kit with Gold, Silver, or Copper Metallic Pigments – ideal for precise ceramic bonding and restoration
- “Stone Effect Collection” – Marble Epoxy Resin Countertop Kit – for decorative coatings on countertops
- Mild detergent and clean cloths
- Isopropyl alcohol (for degreasing)
- Fine-grit sandpaper (320–600 grit)
- Protective gloves and respirator (if needed)

Surface Preparation in Action
Proper prep makes the difference – video or photo guides can illustrate the critical cleaning and sanding steps for ceramics and metal. Visual comparison of a glossy vs. abraded surface helps users spot when the substrate is ready for adhesion.

Step 1: Clean and Degrease the Surface
Thorough cleaning is essential to ensure there is no grease, dust, or residue that could interfere with adhesion. Wash ceramics and metals with mild detergent and water, then rinse well. To further remove oils or polishing compounds from metal, wipe the area with isopropyl alcohol and a lint-free cloth. Allow all surfaces to dry completely before proceeding, as trapped moisture can weaken bonds.
Step 2: Sand to Create Micro-Abrasions
Ceramic tiles and metallic objects are highly smooth, so increasing their surface area helps resin grip. Abrade smooth surfaces gently using 320–600 grit sandpaper, working in small circles. The goal is to create a slightly rough, matt finish without visible scratches. Clean away sanding dust with a tack cloth or compressed air before moving on.
Step 3: Prime or Select the Right Epoxy
For flooring, countertops, or larger projects on glazed ceramic or metal (such as worktops), primer improves resin adhesion and helps prevent delamination. For ceramic tiles, use a dedicated primer such as “Epoxyprimer” – Universal Water-Based Two-Component Epoxy Floor Primer to maximise epoxy resin bonding. For smaller repairs, choose a specialist high-bond resin or adhesive. The “FixExpress” – Two-Component Epoxy Glue 500g delivers rapid, strong adhesion on both ceramic and metal. If you’re restoring pottery or using decorative metallic seams, the “Kintsugi” – Ceramic Repair Kit offers a high-viscosity formula designed not to run, ideal for vertical or fine work.

Step 4: Apply the Resin or Adhesive
Follow your product’s instructions precisely for ratios and timing. Mix resin components thoroughly, scraping sides and bottom of the mixing vessel for consistency. For bonding, use just enough to cover the area in a thin, even layer. For coatings and larger surfaces, pour or brush evenly, working quickly before the resin gels. Clamp or hold bonded items in place if needed, and immediately clean up any excess with a cloth before it cures.
Step 5: Allow Resin to Fully Cure
Resin and adhesives should be left undisturbed for their full cure time—typically 5 minutes for rapid adhesives like “FixExpress”, or 24–48 hours for floor coatings and countertop resins. Allow for full curing before use to ensure the bond reaches maximum strength and durability on ceramic and metal.
Tips & Troubleshooting for Lasting Resin Bonds
If resin peels or lifts, insufficient surface preparation is often the culprit. Always clean, sand, and prime as needed. For glossy finished ceramics or stainless steel, extra care in abrasion and degreasing is crucial. Avoid excess moisture and dust during curing.
When making decorative repairs on ceramics, check product instructions regarding food safety or heat resistance. The Kintsugi kit is not food safe, so reserve it for decorative or display pieces. When in doubt, test the process on a small area first.
Examining Different Project Approaches
From quick fixes to countertop makeovers, seeing product-used examples helps users navigate the choices above. Before-and-after results demonstrate the impact of correct prep and the benefits of choosing the right product for repairs or resurfacing.

- "FixExpress" – Two-Component Epoxy Glue 500g£25.45"FixExpress" epoxy glue provides rapid repairs with strong adhesion for a range of materials relevant to ceramic and metal bonding.
- "Epoxyprimer" – Universal Water-Based Two-Component Epoxy Floor PrimerPrice range: £148.84 through £272.45"Epoxyprimer" is a water-based epoxy floor primer designed for reliable adhesion on concrete, ceramic, screed, and timber surfaces.
- "Kintsugi" – Ceramic Repair Kit with Gold, Silver, or Copper Metallic PigmentsPrice range: £16.25 through £21.85The "Kintsugi" kit uses high-viscosity resin with metallic pigments for careful ceramic repair, suitable for mindful restoration projects.
 "Stone Effect Collection" – Marble Epoxy Resin Countertop KitPrice range: £54.85 through £394.85"Stone Effect Collection" is a resin kit designed for creating durable, professional marble and stone effects on kitchen and bathroom surfaces.
Frequently Asked Questions
What is the best primer for making resin stick to ceramic?
A dedicated epoxy primer like Epoxyprimer is suited to ceramic tiles and ensures strong adhesion before applying epoxy resins.
Does epoxy adhesive work for both metal and ceramic?
Yes, two-component epoxy glues are engineered to form durable bonds with both ceramics and metals when surfaces are properly prepared.
How should I prepare ceramic or metal for resin?
Ensure both surfaces are clean, degreased, and gently abraded with fine sandpaper before applying any resin or adhesive.
Why does resin peel off ceramic or metal surfaces?
Common causes are poor cleaning, not sanding the surface, or skipping primer when recommended. Proper prep improves results.
Can I use resin repairs on items for food use?
Not all resins are food safe. Kintsugi kits are not certified for food contact. For food-safe use, choose certified resins.
What is the quickest way to bond resin to metal?
Ultra-fast two-part epoxy adhesives like FixExpress bond metal in around 5 minutes when surfaces are prepped correctly.