 Free shipping on orders over £29,85


How to make a vase with resin
Resin vase making opens up a world of creative possibilities, whether you’re looking to craft a bespoke decorative piece or a stunning gift. This practical guide will take you through the key steps for making a vase with resin, including essential techniques for safety, mixing, pouring, and finishing effects. Follow along to create your own long-lasting, beautiful resin vase.
A step-by-step guide to creating unique resin vases at home

What You’ll Need
- “Vase” – Flower Vase Resin Art Kit with Mica Powder and Silicone Mould: a complete kit with resin, pigments, mould, and accessories
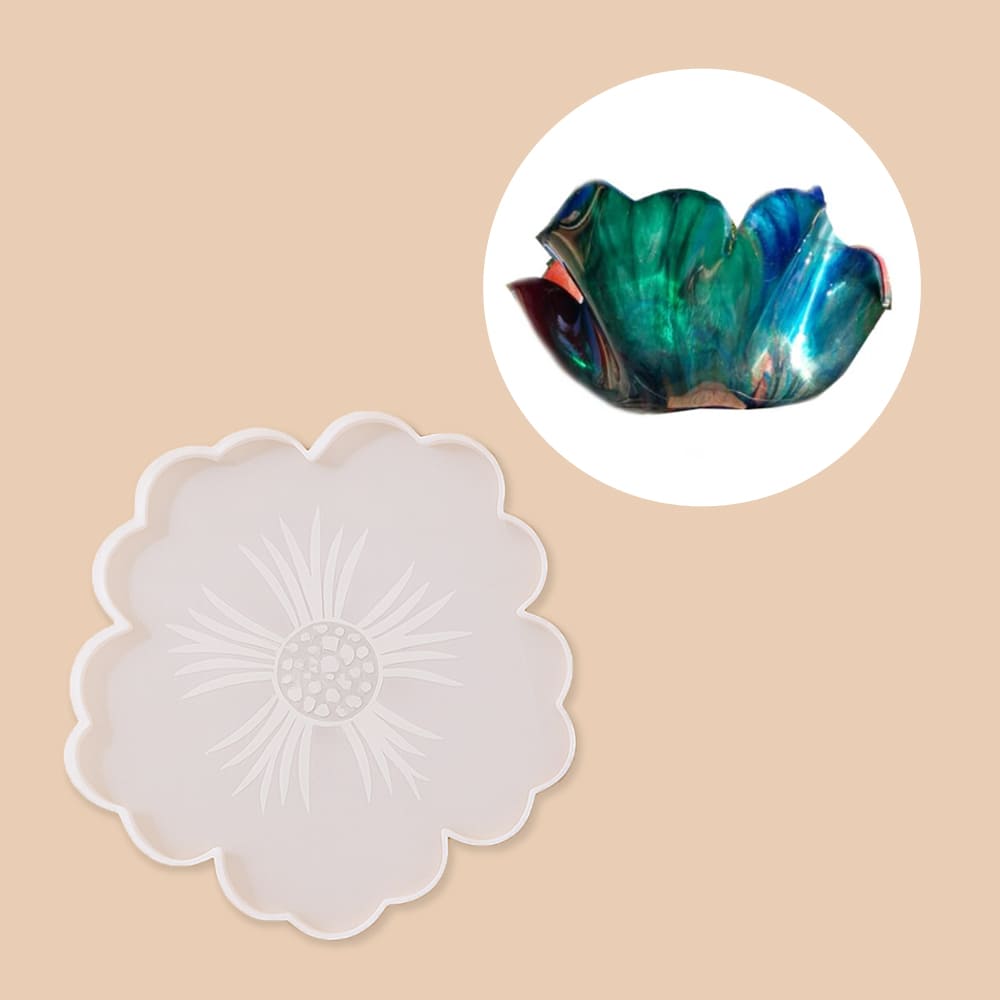
- “Flower Tray” – Vase Silicone Mould 35cm: reusable silicone mould for shaping the resin vase
- “Epoxytable 10-Ten” – Deep Pour Epoxy Resin for Tables, Up to 10cm Casting: deep pour projects
- “IWhite” – Polyurethane Casting Resin – White, Fast-Curing Two-Part System: for rapid setting and detailed casting options
- Nitrile gloves, protective apron, and safety goggles
- Mixing cups and wooden or silicone sticks
- Isopropyl alcohol and paper towels for cleaning

Essential materials for beginner resin artists
High-quality resin, reliable silicone moulds, and precise pigments form the foundation for creative vase projects. Using a dedicated kit streamlines the process and reduces mess, making your introduction to resin art both successful and enjoyable.

Step 1: Prepare your workspace and materials
Choose a well-ventilated area with a level surface covered by a protective sheet or disposable covering. Gather all materials and ensure you have suitable protective equipment such as gloves and goggles. If working with a silicone mould, make sure it’s clean and dry, as any dust or residue can affect the final clarity of your vase. Temperature conditions should be within the recommended range for your chosen resin system, typically between 18°C and 25°C.
Careful organisation at this stage prevents hurried mistakes later and ensures a smooth workflow throughout your resin vase project.
Step 2: Mix the resin and pigment thoroughly
Read the instructions on your resin or casting kit, paying close attention to the mix ratio and pot life. For most epoxy and polyurethane systems, accurately measure the two components by weight. Pour both parts into a mixing container and stir with a slow, steady motion for at least two to three minutes, scraping the sides and bottom frequently to avoid unmixed portions.
If using the “Vase” – Flower Vase Resin Art Kit with Mica Powder and Silicone Mould, add mica powder or pigment provided to achieve your desired colour and shimmering effect, then blend until the mixture is free of streaks.
Step 3: Pour the resin and create effects
Once you have a homogenous resin mixture, slowly pour it into your prepared silicone mould, starting at the lowest point and allowing the resin to flow evenly to reduce air bubbles. You may gently tap or flex the mould to help bubbles rise and release. Experiment with pouring in layers, swirling pigments, or embedding decorative items to personalise your design. If your project calls for a deep pour, consider using a low-viscosity, deep casting resin such as “Epoxytable 10-Ten” – Deep Pour Epoxy Resin for Tables, Up to 10cm Casting to ensure clarity and even curing.
Avoid overfilling and take care to follow the manufacturer’s guidance on maximum pour depth and curing time for your chosen product.

Step 4: Demould and finish your vase
Allow the resin to cure fully, which may take several hours to a day depending on the specific system. Do not attempt to unmould the piece prematurely, as handling it before the recommended curing time can lead to deformation or surface marks. Once cured, gently remove your vase from the silicone mould. Any sharp edges or rough spots can be smoothed using fine-grit sandpaper, working in gentle circular motions.
For extra sheen or to remove minor marks, polish the surface with a soft, lint-free cloth. Consider sealing the vase with a suitable clear varnish if you desire additional gloss or surface protection.

Tips, Common Mistakes, and Troubleshooting
Always measure and mix your resin components accurately; imprecise measurement can result in a tacky or brittle vase. Work in the temperature range stated by the resin manufacturer to avoid incomplete curing or excess bubbles. If air bubbles persist, wave a heat gun gently above the poured resin—but do not place it too close, as this could damage the mould.
Let patience guide you: rushing demoulding risks ruining your design. Clean your tools and mould with isopropyl alcohol promptly after use to ensure both are ready for future projects.
Creative finishes and troubleshooting advice
Polishing and sanding can bring a professional look to your resin vase, while careful attention to pouring technique reduces imperfections. Should issues like cloudiness or bubbles occur, review your curing times, ensure thorough mixing, and adapt temperature or tools as needed.

- "Vase" – Flower Vase Resin Art Kit with Mica Powder and Silicone Mould£39.85"Vase" Resin Art Kit includes a flower-shaped silicone mould and mica powders to create a decorative resin vase or tray.
- "Flower Tray" – Vase Silicone Mould 35cm£9.45The "Flower Tray" mould is designed for resin vase and decorative item creation within the 'How to make a vase with resin' theme.
- “Epoxytable 10-Ten” – Deep Pour Epoxy Resin for Tables, Up to 10cm CastingPrice range: £33.85 through £334.85Epoxy resin designed for super-deep pours up to 10cm, suitable for table creations in a practical art project theme.
 “IWhite” – Polyurethane Casting Resin – White, Fast-Curing Two-Part SystemPrice range: £22.85 through £34.85IWHITE White Polyurethane Casting Resin is suitable for fast prototyping and detailed moulding with a quick 30-minute cure.
Frequently Asked Questions
Which resin is best for making a decorative vase?
Epoxy resins offer clarity and durability, while polyurethane resins cure quickly and capture fine detail. Choose based on your design and working time needs.
Can mica powders be used in resin vases?
Yes, mica powders add colour and shimmer to resin vases, creating unique, eye-catching effects within the finished piece.
Is it safe to leave resin in the mould for a long time?
It is best to demould within the time recommended by the resin manufacturer. Prolonged time in the mould may lead to sticking or surface defects.
How do I remove air bubbles from resin?
Pour slowly, use a heat gun briefly, and tap the mould gently to reduce bubbles. Mixing carefully also minimises trapped air.
Can I colour or paint my resin vase after casting?
Resin vases can be painted or coloured post-curing using suitable paints. Some resins can also be tinted during mixing for deeper colour effects.