 Free shipping on orders over £29,85


How to use PU31 resin?
Step-by-step instructions for safe and effective PU31 resin projects

PU31 resin, a two-part polyurethane system, is celebrated for its rapid curing and fine detail reproduction—making it ideal for casting, model making, and even protective coatings. This guide explains how to prepare, mix, and apply PU31 resin safely and effectively, whether you’re making detailed moulds, doming labels, or finishing driveable surfaces.
What You’ll Need
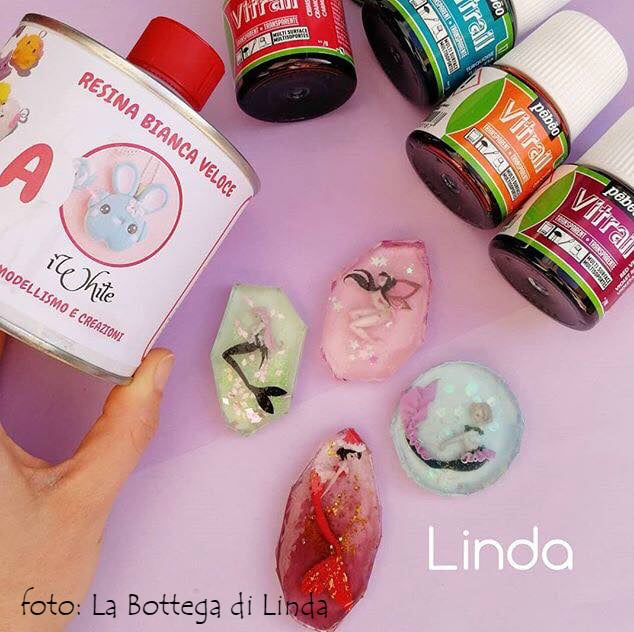
- “IWhite” – Polyurethane Casting Resin – White, Fast-Curing Two-Part System – For fast prototyping, detailed models or artistic creations.
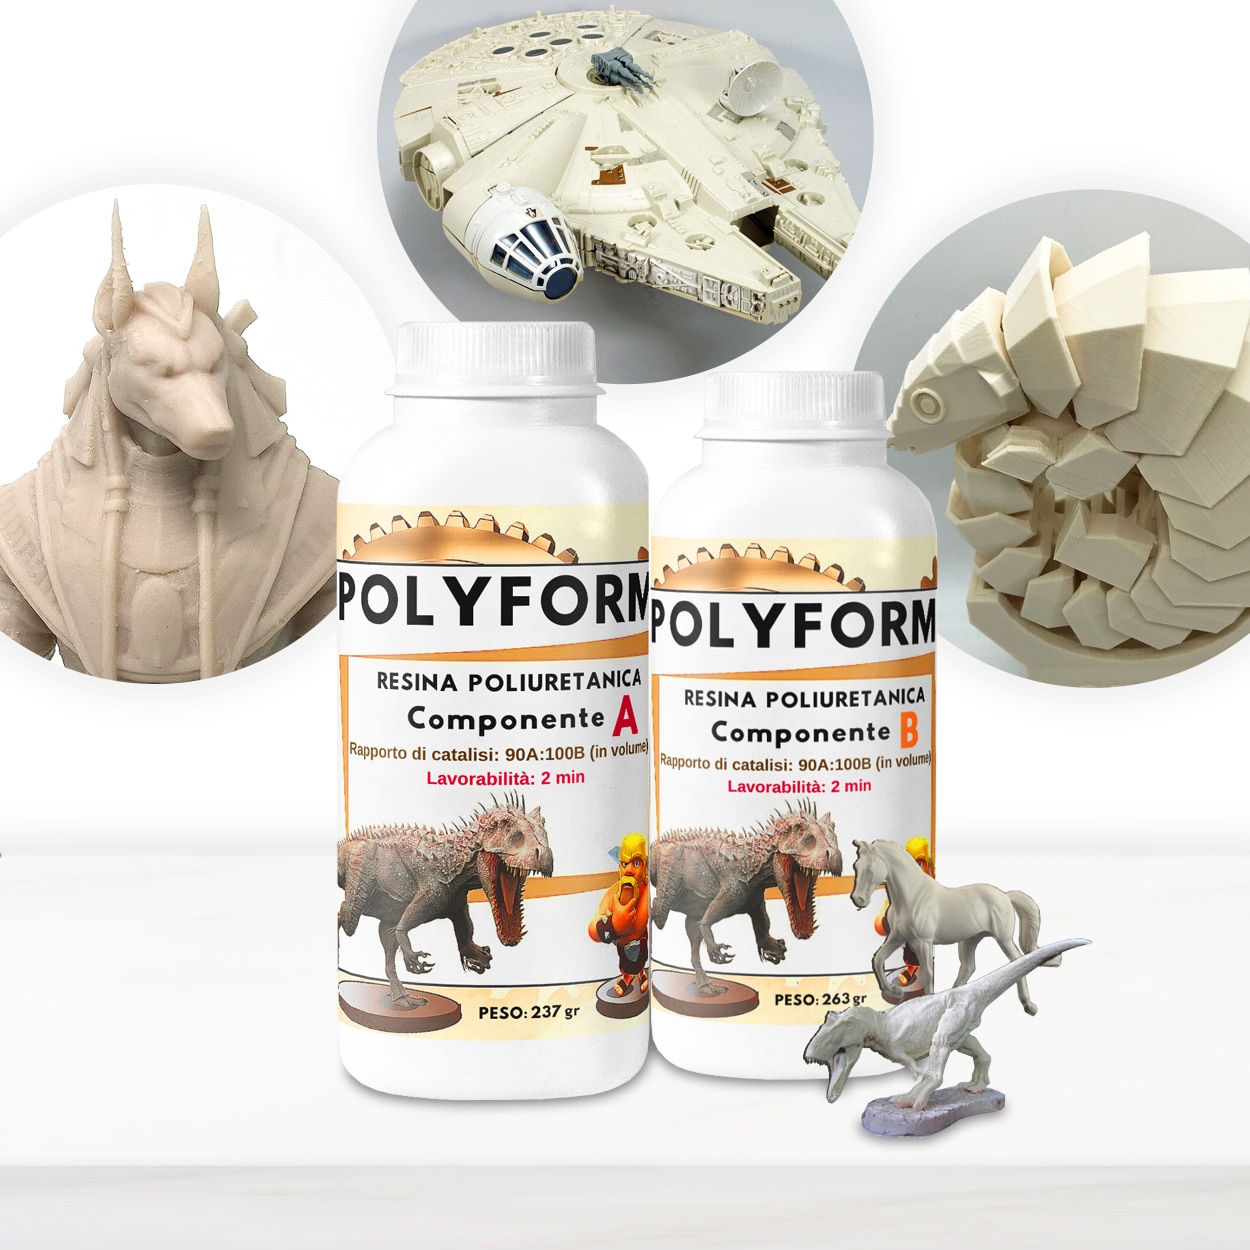
- “Polyform” – Polyurethane Casting Resin, Beige, Fast-Setting for Prototyping – Ideal for rapid batch production and durable, robust castings.
- “Be Flex” – Transparent Polyurethane Doming Resin – Scratch-Resistant – Best for flexible, clear doming on stickers and badges.
- “Prolux” – PU coating for tiles, concrete, plastic and metal – suitable for driveable surfaces – Perfect for floors, exteriors, and high-wear areas.
- Appropriate silicone moulds or substrate (depending on your project type)
- Mixing tools and clean mixing cups
- Personal protective equipment (gloves, mask, goggles)
- Weighing scale (for precise ratio measurement)
- Disposable work surface covering

Essential Tools and Safety for PU31 Resin Projects
Gather all tools and protective gear before starting to streamline your workflow. Check product instructions for the correct mixing ratios and always work in a well-ventilated area. Use nitrile gloves, safety goggles, and a mask to safeguard your health.
Keeping your workspace organised helps prevent spills and accidents when working with fast-curing polyurethane resins.

Step 1: Prepare Your Work Area and Moulds
Choose a well-ventilated area free from dust and moisture, as polyurethane reacts quickly and can be affected by humidity. Organise your materials before starting: lay out your mixing tools, protective gear, and ensure that your silicone moulds or surfaces are dry and clean. If casting, pre-fit your moulds without resin to confirm ease of demoulding later. For surfaces or coatings, ensure substrates are dust-free and, where necessary, primed as per your project needs.
Always wear personal protective equipment when working with PU resins, as these materials contain chemicals best handled with care.
Step 2: Measure and Mix the Resin Components
Polyurethane resins typically require mixing two components by weight according to the manufacturer’s guidelines. Use a digital scale for accuracy, and pour each part into your mixing cup—measurements must be precise to ensure optimal curing and finished performance. Mix slowly and thoroughly for at least 30–60 seconds, scraping the sides and base, until the resin is fully uniform in colour and consistency.
For detailed casting or artistic projects, “IWhite” – Polyurethane Casting Resin – White, Fast-Curing Two-Part System is an excellent choice, as its high fluidity allows it to reach all parts of the mould and pick up intricate details.
Accurate measurements matter — incorrect ratios can lead to imperfect curing or tacky, brittle results.
Step 3: Pour and Manipulate the Resin
Promptly pour the mixed resin into your prepared mould or spread it over your chosen substrate. Work efficiently, as PU31 resin reacts swiftly—especially in warm conditions. Lightly tap or shake the mould to release air bubbles if casting; for coatings, use a roller or brush for even application. Avoid over-pouring or pausing mid-process, as initial curing can begin in minutes and impact the final result.
If you are aiming for flexible domed labels or badges, “Be Flex” – Transparent Polyurethane Doming Resin – Scratch-Resistant provides a glossy, resilient surface that adheres well to curved forms.
Cure times depend on temperature. Warmer rooms will accelerate setting, while lower temperatures can prolong curing.
Step 4: Curing and Demoulding
Allow the poured resin to cure as specified—many fast-setting formulas are demouldable within 30 minutes. Avoid disturbing the project while curing for optimal surface quality. If you are using the resin as a coating, wait for full cure before exposing to traffic, abrasion, or cleaning. Some coatings, such as “Prolux” – PU coating for tiles, concrete, plastic and metal – suitable for driveable surfaces, provide a ready-to-use surface after a single, even coat and are suitable for both interior and exterior use.
Remove carefully from moulds to avoid damaging intricate details in cast parts. Surface lubrication before pouring can aid with easier demoulding if needed.
Mix thoroughly and leave sufficient curing time for best durability and performance.
Tips, Common Mistakes, and Troubleshooting
Work quickly but carefully to prevent premature setting. Always use accurate measurements to avoid sticky or incomplete curing. Ensure both parts are at room temperature for easy pouring and optimal results. Avoid adding water or working in humid conditions, as polyurethane resins are moisture-sensitive and may foam or cure improperly if contaminated.
If you spot bubbles, brief surface tapping usually releases them, but avoid vigorous mixing which can introduce air. Store resin with lids tightly sealed to extend shelf life.
Avoid moisture contamination. Keep containers closed and tools dry at all times for reliable results.
Expert Advice: Achieving Flawless PU Results
For best results, maintain a steady room temperature and avoid high humidity. Cleanliness and accurate timing are key factors in every step, from mixing to pouring and curing. Patience during curing ensures maximum durability and clarity for both castings and coatings.

- “IWhite” – Polyurethane Casting Resin – White, Fast-Curing Two-Part SystemPrice range: £24.00 through £36.95“IWhite” polyurethane casting resin is a fast-curing, fluid two-part resin suitable for detailed moulding and rapid prototyping tasks.
- “Polyform” – Polyurethane Casting Resin, Beige, Fast-Setting for PrototypingPrice range: £15.95 through £141.95Polyform is a beige polyurethane casting resin suited to rapid prototyping and small batch production requiring detailed, durable castings.
 "Be Flex" – Transparent Polyurethane Doming Resin – Scratch-ResistantPrice range: £45.00 through £81.95Flexible, transparent polyurethane doming resin designed for stickers and labels with a self-healing, scratch-resistant finish.
 "Prolux" – PU coating for tiles, concrete, plastic and metal – suitable for driveable surfacesPrice range: £44.85 through £494.85"Prolux" PU coating offers a durable polyurethane finish suitable for floors and external surfaces in gloss or satin colours.
Frequently Asked Questions
How long does PU31 resin take to cure when used for casting?
PU31 resin typically sets within minutes and can be demoulded after about 30 minutes, depending on temperature and product type.
What safety equipment should I use when handling PU31 resin?
Always wear gloves, goggles, and a mask to protect yourself from fumes and skin contact during mixing and application.
Can PU31 resin be coloured or painted?
Some types can be coloured in the liquid state or painted after curing. Always check the product's instructions for compatibility.
Why am I getting bubbles in my PU31 castings?
Bubbles can result from vigorous mixing or trapped air in the mould. Mix slowly and tap the mould after pouring to minimise bubbles.
How should PU31 resin be stored?
Store PU31 resin in tightly sealed containers in a dry, cool place, away from moisture and direct sunlight to prolong shelf life.
Is PU31 resin suitable for floors subjected to traffic?
Some PU31-type coatings are designed for use on driveable or high-traffic surfaces. Use a product specified for this application.
Can I use PU31 resin in cold environments?
Most PU resins work best above 8–10°C. Cold temperatures can slow curing and affect finished quality.
Is PU31 resin waterproof and UV resistant?
Many PU31 resin systems offer good waterproofing and UV resistance, but always confirm the specification for your chosen product.