 Free shipping on orders over £29,85


How do you use mold resin?
Step-by-step guide for clear, smooth resin results at home


Mould resin allows you to create everything from keepsake boxes to exquisite jewellery and decorative objects. With careful preparation and the right materials, casting with resin in silicone moulds produces crystal-clear, durable, and beautifully detailed pieces. This guide walks you through the essential steps and techniques to use mould resin successfully, whether you are new to the craft or looking to perfect your results.
What You’ll Need
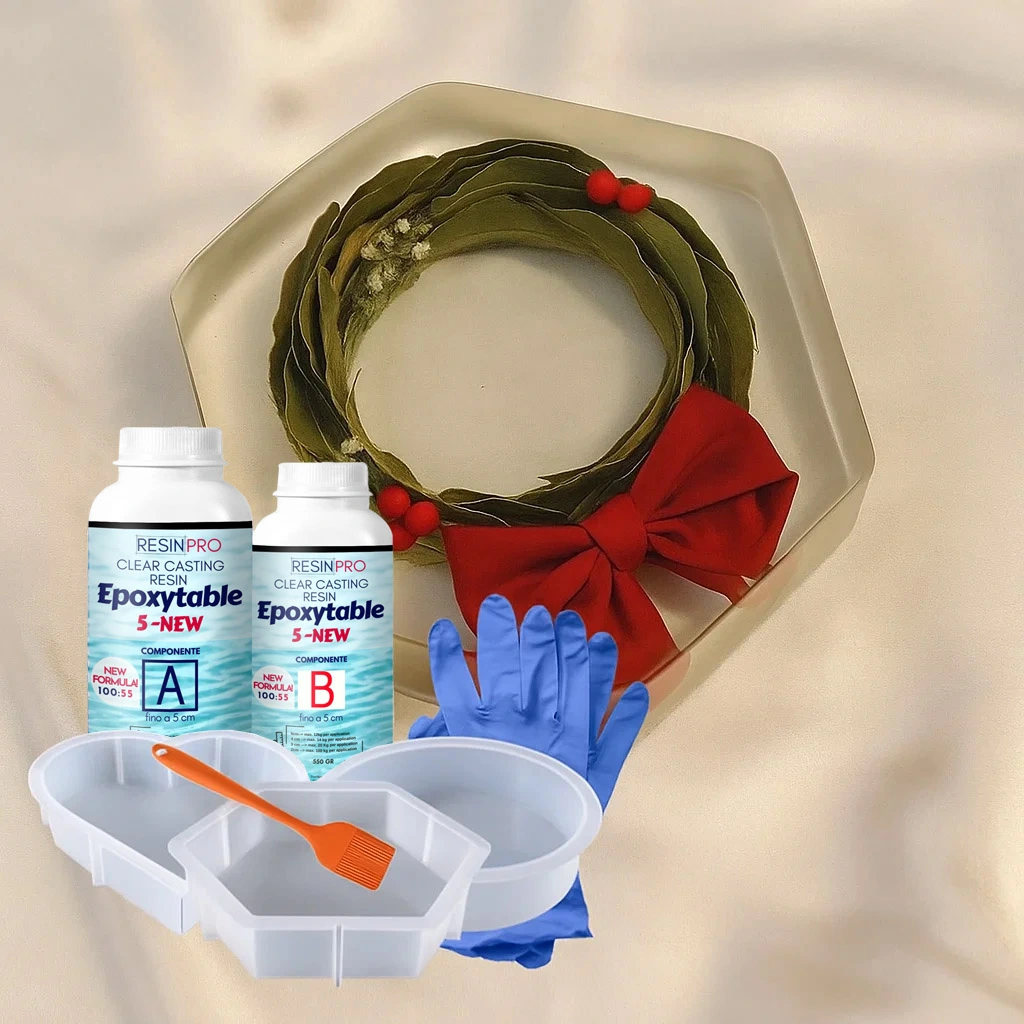
- Resin Memory Box Complete Epoxy Resin Kit with Silicone Moulds – 3kg: Complete kit ideal for keepsakes or larger projects
- “One-2-One” – Epoxy Resin for Handcraft, 1:1 Mixing Ratio: Great for smaller crafts or jewellery with an easy mixing ratio
- “Liquidissima” – Epoxy Resin For Creations & Jewellery: Perfect for finely detailed or delicate designs
- “Trasparente” – Multipurpose Clear Epoxy Resin for Casting – Up to 2cm: Versatile and clear for artwork and woodworking casts
- Silicone moulds (variety of shapes and sizes)
- Mixing cups and sticks
- Protective gloves and apron
- Level workspace and protective covering
- Optional: heat gun or torch (for releasing trapped bubbles)
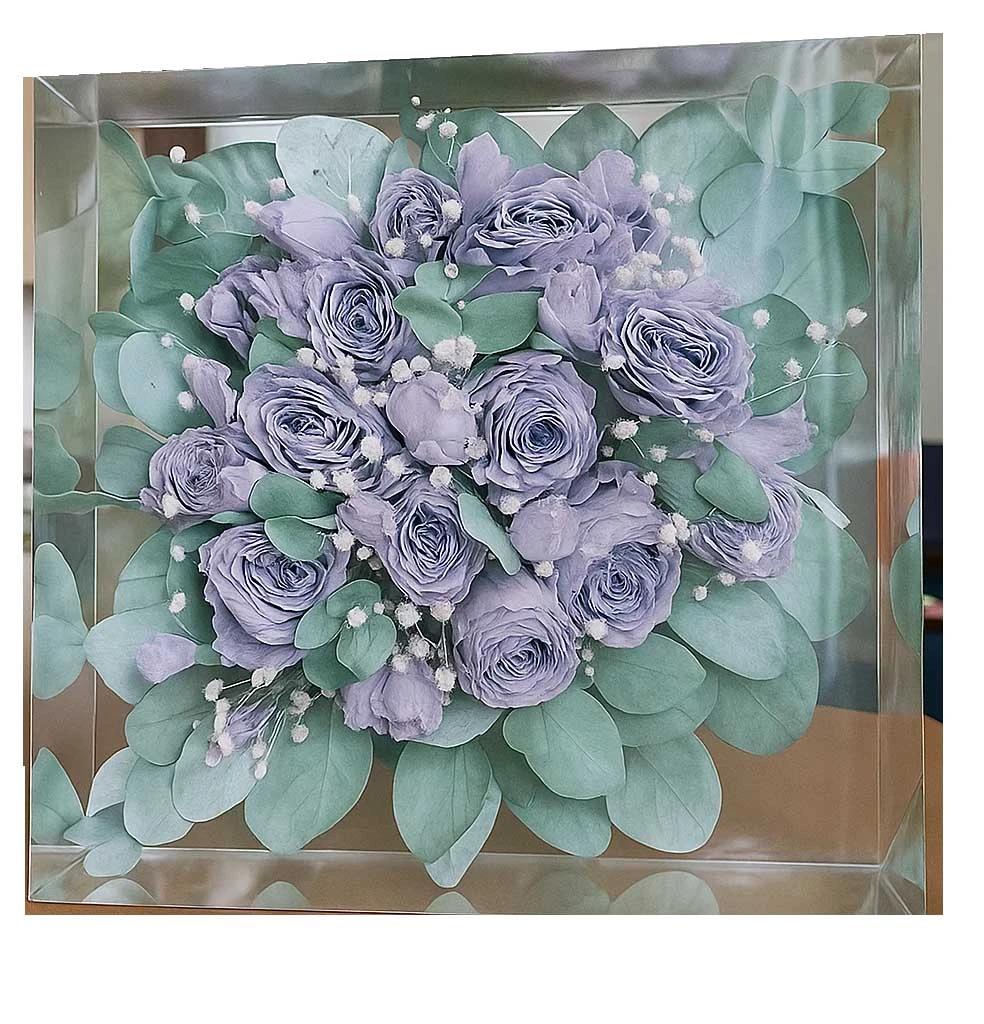
Visual Inspiration: Resin in Silicone Moulds
Explore examples of beautifully finished resin creations, from delicate jewellery to keepsake memory boxes, all crafted using different types of epoxy and silicone moulds.

Step 1: Prepare Your Workspace and Safety Gear
Wear gloves and protect your workspace before starting. Ensure your work area is level, well-ventilated, and free from dust. Lay down a disposable protective sheet or use a silicone mat for easier clean-up. Inspect your silicone moulds to check they are clean and dry; any debris can impact the final finish.
Gather all supplies within reach to keep the workflow smooth. Moulds should be positioned on a stable, flat surface to prevent uneven setting. Avoid working in spaces prone to temperature changes or humidity, as this can affect curing.
Step 2: Measure and Mix Your Resin
Accurate measurement is crucial for a successful casting. Measure resin and hardener precisely according to your chosen product’s instructions. Most resins, such as the “One-2-One” – Epoxy Resin for Handcraft, 1:1 Mixing Ratio, are designed to mix in equal parts by volume, while others may vary, so always double-check directions.
Mix resin slowly and thoroughly using a stirring stick, scraping the sides and base of your container. Stir for at least 3–5 minutes until the mixture becomes clear and uniform. Mixing too quickly or inadequately can introduce excess bubbles or lead to incomplete curing.
Step 3: Pour the Resin into the Mould
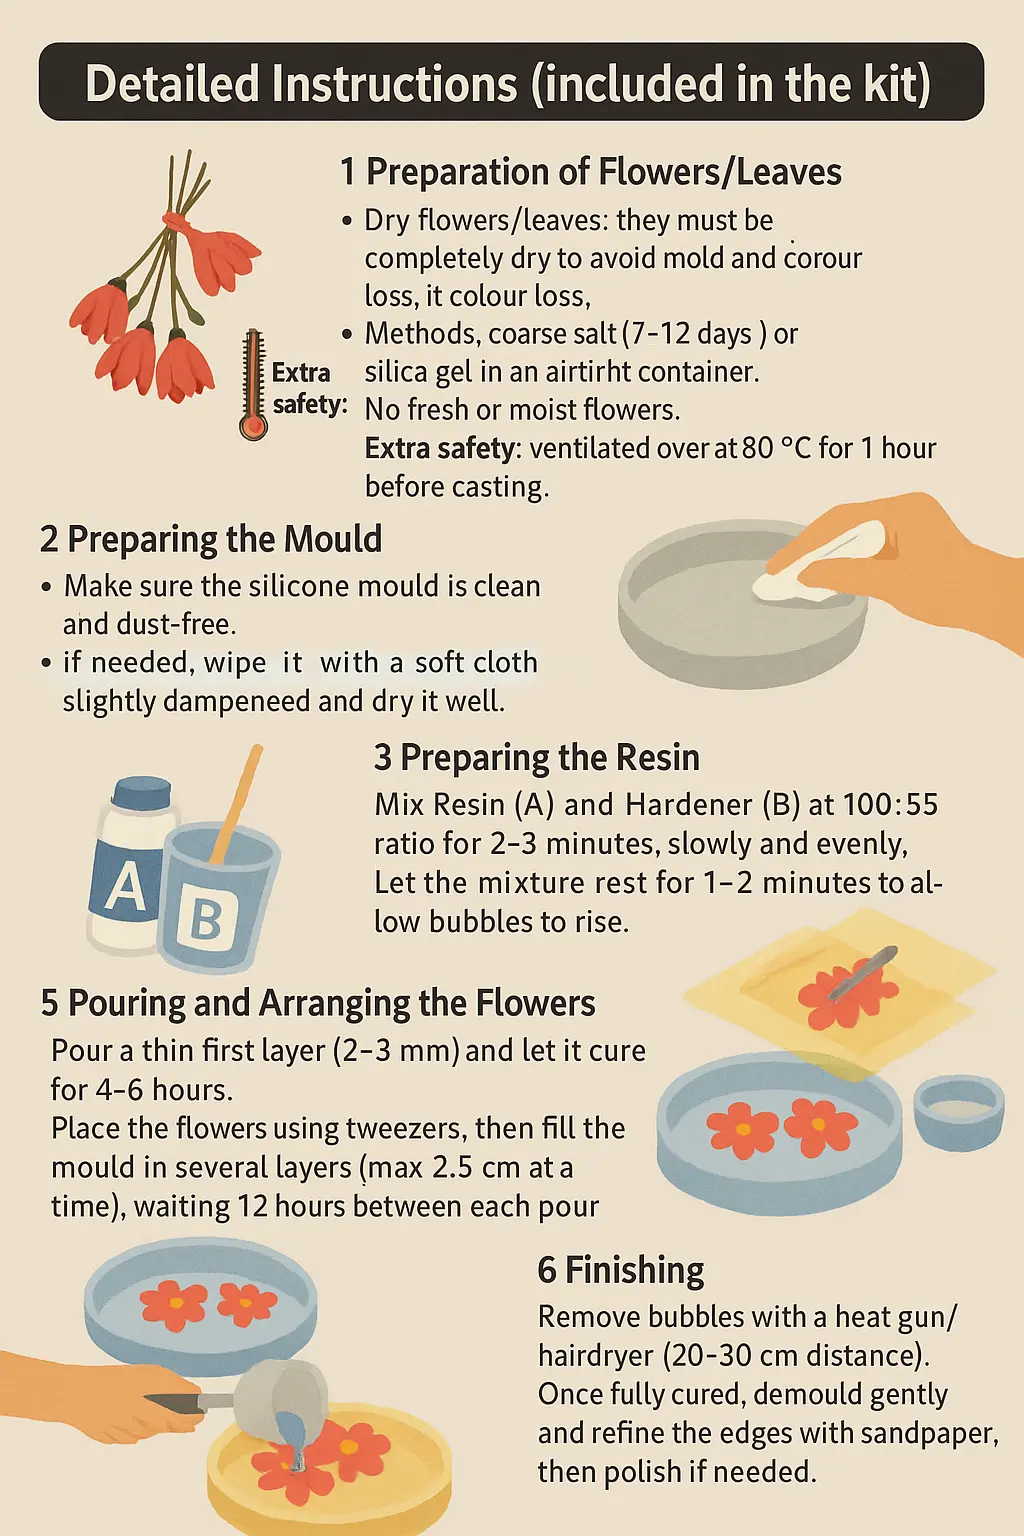
If you’re embedding objects (like dried flowers), place them inside the mould before pouring. Pour slowly to prevent bubbles and allow the resin to reach all intricate areas. For highly detailed or jewellery projects, a low-viscosity formula such as “Liquidissima” – Epoxy Resin For Creations & Jewellery can make it easier to fill small spaces without trapping air.
After pouring, wait a few minutes and, if needed, gently pass a heat gun or torch over the surface to release any bubbles. Avoid overfilling the mould, and refer to product guidelines regarding maximum recommended layer thickness.

Step 4: Allow to Cure and Demould Carefully
The curing time varies depending on resin type and layer depth. Follow the instructions for your specific resin—deep cast resins from kits like the Resin Memory Box Complete Epoxy Resin Kit with Silicone Moulds – 3kg require longer curing periods and may benefit from anti-yellowing additives for crystal-clear results.
Allow resin to cure fully before demoulding—this could take 24 to 72 hours. Once hard, flex the silicone mould gently to release your piece. If sticky or soft, allow extra time to set; premature removal can damage the finish.
Tips, Common Mistakes, and Troubleshooting
Work at recommended room temperature (18–25°C) to ensure optimal curing and clarity. Avoid moisture in the mould as it can cloud the resin and cause surface imperfections. For layers thicker than product guidelines (e.g., more than 2cm for “Trasparente” – Multipurpose Clear Epoxy Resin for Casting – Up to 2cm), pour in stages to prevent overheating and warping. If bubbles form in intricate details, lightly tap the mould or use a pin to coax them out.
Troubleshooting Resin Casting Projects
See side-by-side images of common resin mould issues—like trapped bubbles, surface cloudiness, or incomplete curing—against successful, flawless castings, highlighting ways to improve your results.
- Resin Memory Box Complete Epoxy Resin Kit with Silicone Moulds – 3kg£65.95This kit includes reusable moulds and anti-yellowing epoxy resin, designed for creating lasting resin memory boxes.
- "One-2-One" – Epoxy Resin for Handcraft, 1:1 Mixing RatioPrice range: £15.95 through £59.95The "One-2-One" epoxy resin offers a medium viscosity and an easy 1:1 mixing ratio, suitable for handcraft and decorative projects.
- "Liquidissima" – Epoxy Resin For Creations & JewelleryPrice range: £12.85 through £31.85"Liquidissima" epoxy resin is suited for intricate moulds and jewellery creations, offering high transparency and a self-levelling finish.
 "Trasparente" – Multipurpose Clear Epoxy Resin for Casting – Up to 2cmPrice range: £8.95 through £397.95"Trasparente" offers a clear, self-levelling finish suitable for detailed casts and woodworking projects under the theme 'How do you use mold resin?'.
Frequently Asked Questions
How do I choose the best mould resin for my project?
Consider your project size, detail, and layer thickness. Jewellery favours lower viscosity; deep pours require specialised formulas.
How can I avoid bubbles when casting resin in moulds?
Mix slowly and pour steadily. Use a heat gun on the surface to help bubbles escape, especially for intricate projects.
What is the best way to demould cured resin?
Let the resin cure fully, then gently flex the silicone mould. If the cast sticks, allow more time to harden before retrying.
Why is my resin cloudy or tacky after curing?
This can occur from incorrect mixing ratios or humidity. Check measurements and workspace conditions, and cure longer if needed.
Can I pour deep layers of resin in one go?
Most resins have a maximum layer depth. For thick casts, pour in stages to prevent overheating and avoid yellowing or warping.
Is mould resin safe for embedding dried flowers?
Yes, as long as the flowers are fully dried and suitable resin is used. Avoid fresh or untreated flowers for best results.