 Free shipping on orders over £29,85


How to get transparent red resin?
Achieve flawless glass-like red finishes with simple expert steps.


Creating flawless, transparent red resin can elevate your artwork, jewellery, or casting projects by combining striking clarity with vivid colour. This guide will help you achieve a brilliant glass-like red finish, walking you through the right materials, mixing tips, and expert tricks to avoid common issues such as cloudiness or uneven colouration. Whether you are aiming for a crystal effect or a robust, deep-red finish, follow these steps for professional results.
What You’ll Need
- “Trasparente” – Multipurpose Clear Epoxy Resin for Casting – Up to 2cm: A crystal-clear base resin ideal for casting vibrant colours.
- “Icrystal” – Clear Epoxy Resin – Odourless Formula – Up to 1.5cm: Suitable for smaller, intricate resin projects with excellent clarity.
- “Magic Crystal” – Transparent Resin Colour 45ml: A transparent colouring agent designed for intense, stain-glass red resin finishes.
- “Colourfun” – Liquid Epoxy Resin Colourant 25-100ml – High coverage: Highly concentrated, ideal for finely controlling colour intensity.
- Mixing cups, sticks, gloves, and a level workspace.
Crystal-Red Results at a Glance
Transparent resin colouring requires pairing a glass-clear base with specialist dyes. Achieve vivid results when you select both high-clarity resin and colourant designed for unclouded, gemstone-like transparency.
Step 1: Choose and Prepare a Clear Epoxy Resin
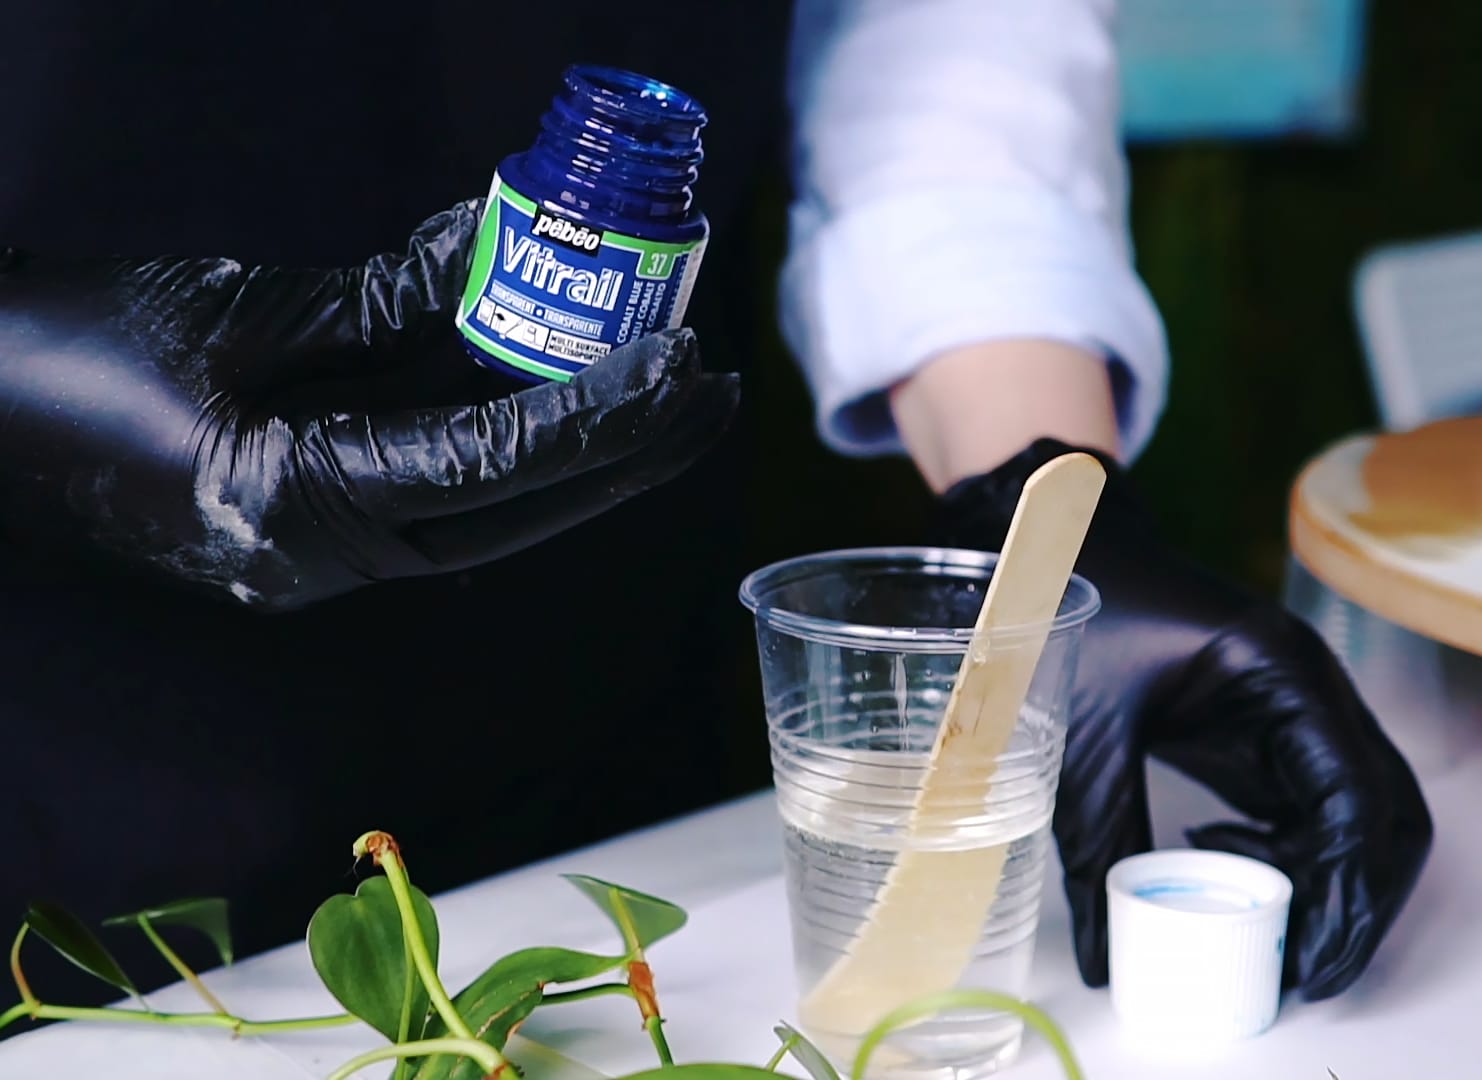
Begin by selecting a clear casting resin. The success of a transparent red finish depends on using a resin with excellent optical clarity. Options such as “Trasparente” – Multipurpose Clear Epoxy Resin are formulated for layers up to 2 cm, making them ideal for most jewellery, geodes, or shallow pours. For smaller projects, “Icrystal” – Clear Epoxy Resin offers an odourless finish and strong UV resistance.
Ensure your workspace is clean, dust-free, and level. Wear gloves and follow safety guidelines, such as working in a ventilated area. Accurately measure your resin and hardener according to the manufacturer’s instructions—improper ratios can cause hazy or tacky results.
Step 2: Select and Add Your Transparent Red Colourant
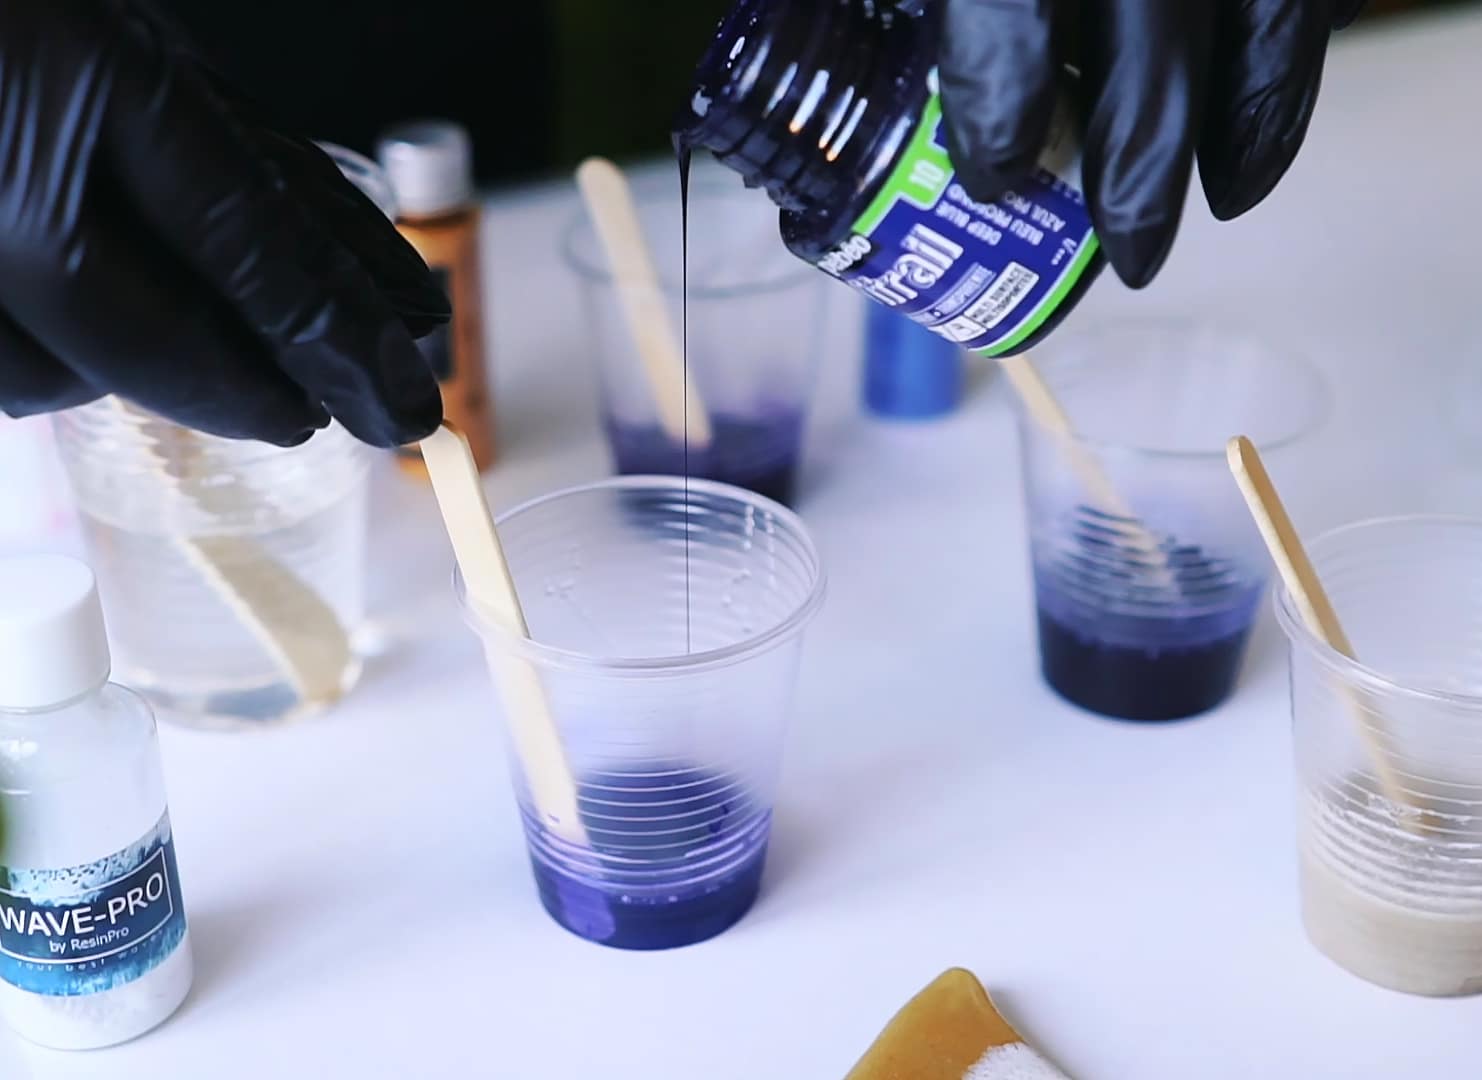
To achieve a truly transparent red, use a specialist resin dye or liquid pigment designed for crystal-clear finishes. “Magic Crystal” – Transparent Resin Colour is specifically formulated to create gemstone-like results without any clouding or settling. Add the colourant gradually—one drop at a time—and stir thoroughly between each addition.
Alternatively, for more vivid or customisable tones, “Colourfun” – Liquid Epoxy Resin Colourant allows for precise control from pale tints to deep glass-red shades. Always mix colourants in well before combining with your hardener to avoid streaks and ensure consistency throughout your resin.
Step 3: Mix Carefully for Maximum Clarity
When blending your coloured resin, stir slowly and steadily to reduce air entrapment, as bubbles can ruin the transparent effect. Scrape down the sides and base of your mixing container to fully incorporate both the colour and resin components. If bubbles persist, allow your mixture to rest for several minutes or gently warm the cup (following resin manufacturer instructions).
Poor mixing or rushing this stage often leads to haziness after curing, so be patient and assured in your method to maintain the resin’s clarity and a flawless red appearance.
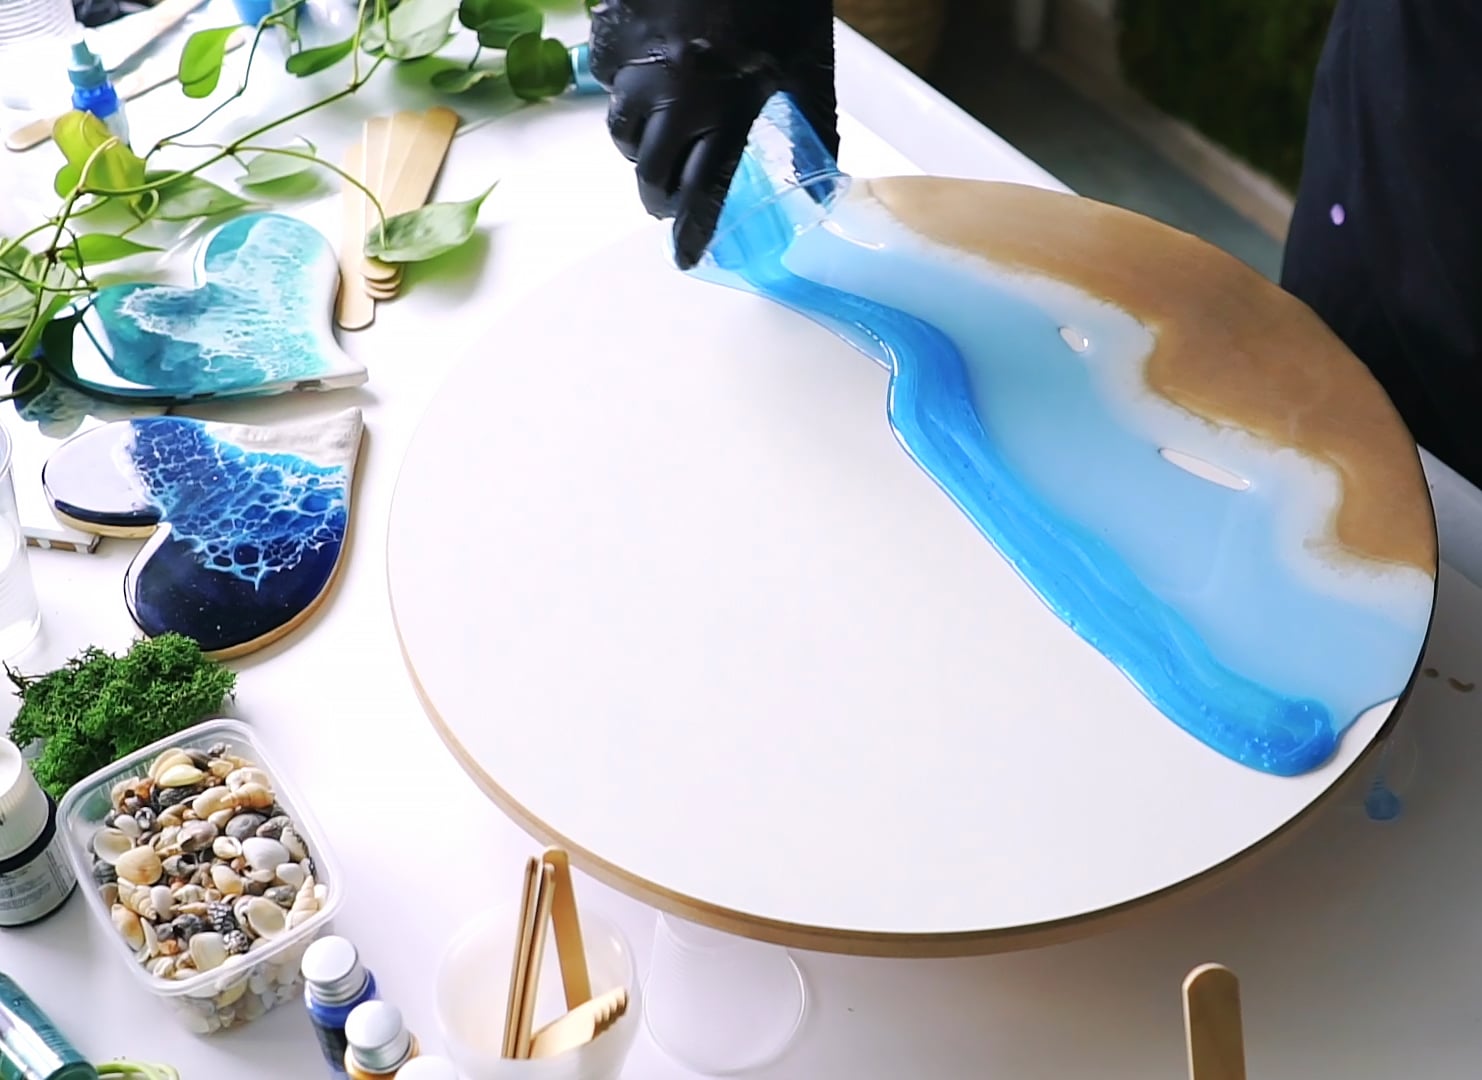
Step 4: Pour and Cure with Attention to Detail
Carefully pour your resin into your prepared mould or onto your surface in a steady, even stream. For best results with transparent red effects, pour in layers no thicker than recommended (e.g., 1.5–2 cm depending on your resin choice). This avoids overheating and ensures a uniform cure. Cover your piece while curing to keep away dust, and maintain ambient temperatures as advised by the resin product.
Do not disturb the piece during cure time. Attempting to manipulate or move the curing resin can introduce imperfections or alter the finished clarity. Once fully cured, your transparent red resin should display both intense colour and immaculate glass-like depth.

Tips, Troubleshooting, and Common Mistakes
Always use colourants designed specifically for transparent resin art—standard paints or powders are likely to produce cloudiness or settle in uneven layers. Stick to recommended pigment percentages (typically under 5% by volume) to ensure the resin remains perfectly clear.
Work in a dust-free, low-humidity environment, and take care to follow the exact mixing ratios for your chosen resin. If you encounter tacky finishes or cloudy results, check that your workspace is level and that your ratios and curing temperatures are correct. Patience during mixing and curing is key to achieving the most vibrant, flawless result.
Expert Guidance for Clear Red Finishes
Consistent, controlled pouring and proper curing are the secrets to impeccable transparent red resin. Keep your workspace clean, measure accurately, and use only transparent-compatible colourants for best outcomes.
- "Magic Crystal" – Transparent Resin Colour 45ml£4.65"Magic Crystal" provides transparent colour for resin suitable for creating clear glass-like and crystal-like effects.
- "Trasparente" – Multipurpose Clear Epoxy Resin for Casting – Up to 2cmPrice range: £8.45 through £948.85"Trasparente" is a clear epoxy resin suitable for detailed castings and tables up to 2 cm thick, delivering a glossy, self-levelling finish.
 "Colourfun" – Liquid Epoxy Resin Colourant 25-100ml – High coveragePrice range: £3.65 through £9.85"Colourfun" colourant provides vivid pigments suitable for resin art, allowing control from opaque to translucent results.
 "Icrystal" – Clear Epoxy Resin – Odourless Formula – Up to 1.5cmPrice range: £11.65 through £954.85"Icrystal" is a transparent epoxy resin suitable for scratch-resistant coatings and artistic projects under the theme How to get transparent red…
Frequently Asked Questions
What is the best resin for achieving a transparent red effect?
Use ultra-clear resins such as 'Trasparente' or 'Icrystal' for base pours; they are designed for clarity and suitable for tinting.
Which red colourant works best for transparent resin?
Use specialist transparent dyes like 'Magic Crystal' to achieve vibrant, glass-like red without cloudiness.
How can I prevent my transparent red resin from turning cloudy?
Use only recommended colourants and keep pigment below 5%. Mix thoroughly and avoid contamination in your workspace.
Is it possible to add red colour to resin after it has cured?
No, resin must be coloured before pouring and curing to achieve a uniform, transparent red finish.
What is the ideal ratio of colourant to resin for clarity?
Start with minimal drops and do not exceed 5% pigment by volume to maintain full transparency.
What common mistakes should I avoid when making transparent red resin?
Avoid excess pigment, inaccurate mixing, and pouring over maximum recommended layer thickness to prevent haze or curing issues.