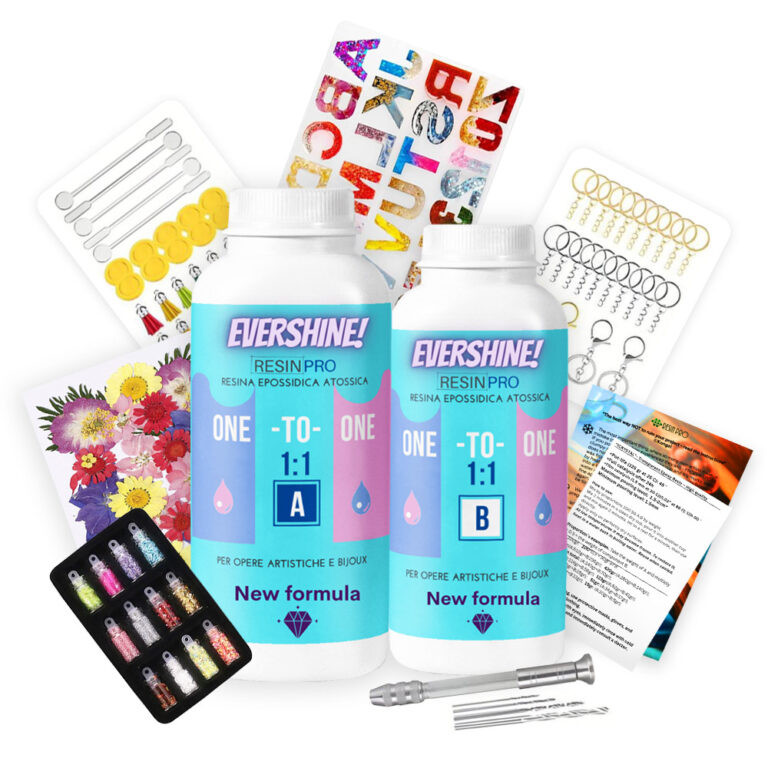
💥 About The Evershine Epoxy Resin Starter Kit with 500g resin and 100+ accessories is your go-to set for creating bespoke resin jewellery and DIY crafts. Designed for crafters and those new to resin, it features an easy 1:1 mix epoxy with medium viscosity, making it the ideal "quick solution" for gift creation, where the time from pouring to finished keychain or jewellery requires minimal effort. This kit includes all tools and decorative elements needed for unique projects, from pendants to keychains. 💡 Key Benefits Crystal-clear epoxy resin – 500g with one-to-one mixing ratio, ensures flawless, glass-like finishes ✨ Enhanced degassing properties – critical for working with fine details and dried flowers; bubbles dissipate on their own, leaving perfectly transparent pieces Over 100 premium accessories – Includes keyrings, clasps, rings, tassels and more 🔑 Natural dried flowers included – not just glitters, but authentic botanical elements for creating popular botanical-style jewellery straight from the box Comprehensive creative pack – 12 artisan pigments, alphabet silicone mould, and mini drill 🎨 Beginner-friendly – Includes gloves, mixing tools, and full instructions for a smooth experience 📘 Perfect for resin crafters looking to create charms, gifts, and personalised jewellery 💍 ☝🏽 Useful Information Mixing Ratio – 1:1 (epoxy and hardener simplified for beginners) Drying Time – Demould after 12 hours; fully cures in 24 hours Customisation – Add pigments, flowers or glitter for unique designs Includes Safety Gear – Gloves and step-by-step guide included 🎯 Who It’s For – Resin artists and crafters – Hobbyists and DIY enthusiasts Confidently start your resin jewellery journey with a beautifully presented kit that delivers results. Perfect as a gift for creative souls.
£21.95
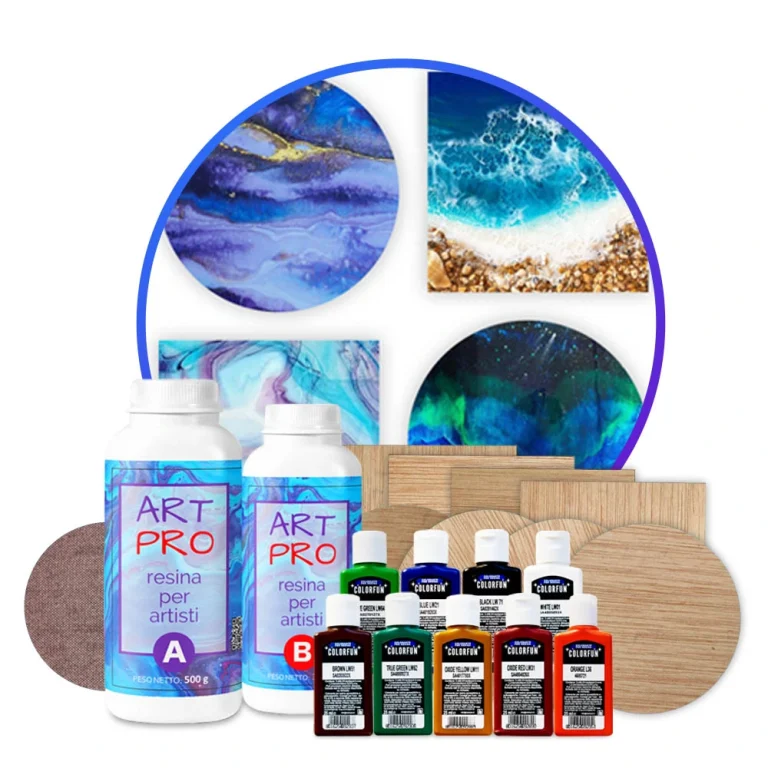
Next steps and creative possibilities 6️⃣ Remove bubbles and allow the resin to cure After pouring the resin onto the wooden coasters, leave it undisturbed for approximately 15–20 minutes. This allows trapped air bubbles to naturally rise to the surface. Using a small gas torch or heat gun, gently pass the heat over the resin surface. This will help remove remaining bubbles and create a smooth, glossy finish. Keep the heat source moving continuously and avoid holding it too close to the resin, as excessive heat may damage the surface. Place the coasters on a flat, level surface and allow the resin to cure for 24–48 hours in a dust-free environment. Avoid touching or moving the coasters during the curing process to ensure an even finish. Once the resin has fully cured, inspect the underside of each coaster. If any excess resin has dripped over the edges or collected underneath, carefully remove it using the included sanding disc until the surface feels smooth and even. Your handmade resin coasters are now ready to use, display, gift, or sell as beautiful handcrafted creations. Creative ideas: Ocean-inspired waves Create stunning coastal designs using shades of blue, turquoise, and white resin. Gently blend the colours to imitate rolling ocean waves. Add decorative shells, sand, or miniature starfish for an authentic beach-inspired appearance. Galaxy effect Design a cosmic masterpiece by combining deep blue, purple, and black pigments with glitter or shimmer powders. Add reflective particles to recreate stars, nebulae, and distant galaxies for a magical space-themed effect. Elegant geode art Recreate the luxurious appearance of natural geodes using transparent resin, rich colours, and metallic pigments. Add gold or silver accents to form crystal-like veins and create a sophisticated decorative finish. Marble-inspired elegance Combine white, grey, black, gold, or rose gold pigments to create a timeless marble effect. Gently swirl the colours together to imitate the natural patterns and veins found in real stone. Lava pour Use vibrant red, orange, and yellow pigments to create the appearance of flowing molten lava. Add touches of black or metallic pigments to increase depth, contrast, and dramatic visual impact. Personalised colour combinations Experiment with different pigment blends, pouring techniques, metallic powders, glitter, and decorative inclusions. Every coaster will develop its own unique appearance, ensuring that no two pieces are ever exactly alike. Custom gifts Create personalised coaster sets for birthdays, weddings, anniversaries, housewarming parties, holidays, or special occasions. Handmade resin coasters make thoughtful and memorable gifts that can be customised to suit any style or colour scheme. Home décor projects Coordinate your coaster designs with matching resin trays, wall art, serving boards, or decorative accessories to create a complete handmade home décor collection. Tips for best results: • Allow bubbles to rise before applying heat. • Use a torch or heat gun carefully to avoid overheating the resin. • Keep the coasters on a perfectly level surface during curing. • Protect curing resin from dust and debris. • Remove excess resin only after the piece has fully hardened. • Experiment with colours and effects to develop your own creative style. Enjoy creating professional-looking resin coasters with endless design possibilities. Every project becomes a unique piece of functional art. Instruction
£50.85

NatuResin Plus 1.3 kg pack is the evolved version of our natural resin: it keeps the same mineral appearance and origin, now enhanced with a water-based acrylic binder (included in the kit) for greater strength, flexibility and waterproofing. Increased impact and flexural strength – reducing brittleness and the risk of chipping or breaking. Superior durability and waterproofness – Thanks to the combination of mineral base and acrylic binder, the product is more resistant to wear, weather, and temperature changes. Its improved waterproofness also makes it ideal as a container for liquids – without sweating! Smoother finish and precise details – Maximum fluidity of the mix, ensuring a more uniform casting and better definition in the details of the molds. Greater versatility in applications – Ideal for design objects, architectural panels and continuous surfaces, offering a wide range of finishes and creative possibilities. Optimized processing times – The curing process is improved, reducing the risk of shrinkage cracks and improving the quality of the final product. Similar to porcelain in terms of finesse and aesthetics Can be colored with the Naturcolor range – natural, intense or delicate shades Suitable for any shape and surface – textures, reliefs, complex details or continuous surfaces Perfect for custom designs – the only limit is your imagination
£21.38
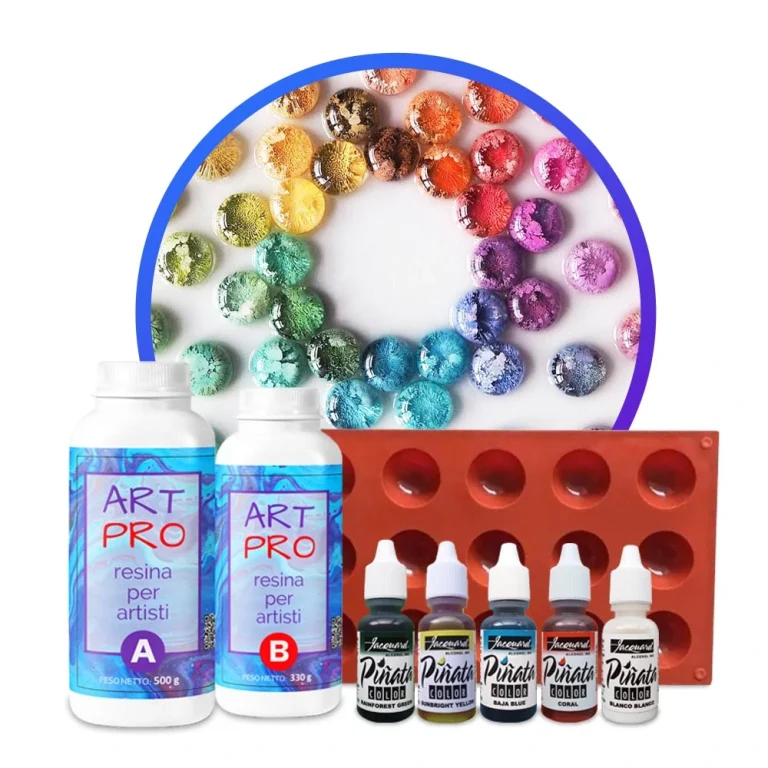
This kit contains: 830 g epoxy resin Silicone half-sphere mould 5 alcohol ink colours Gloves and mixing tools Step-by-step guide Prepare your workspace by covering the surface with a protective plastic sheet. Ensure that the silicone mould is clean, dry, and free from dust. Arrange all materials within easy reach and put on the included disposable gloves before starting. Mix the epoxy resin according to the ratio of 100:66 by weight. For example, combine 50 g of component A with 33 g of component B. Measure accurately for the best curing results. Stir thoroughly for approximately 3 minutes, scraping the sides and bottom of the mixing cup to achieve a completely uniform mixture. Allow the resin to rest for 2–3 minutes so that trapped air bubbles can rise to the surface. Slowly pour the mixed resin into the half-sphere cavities of the silicone mould. Fill each cavity evenly for a smooth, professional finish. Select one alcohol ink colour (excluding white) and place a few drops onto the resin surface. Next, add several drops of white alcohol ink directly over the coloured drops. As the white ink sinks through the resin, it pulls the coloured pigments downward, creating the signature Petri Dish effect with dramatic depth, delicate tendrils, and organic patterns. Experiment with different colour combinations by repeating the process with additional inks. Layer colours strategically to create unique designs ranging from subtle marble effects to bold, high-contrast artwork. Every piece will develop its own one-of-a-kind pattern. Leave the mould on a level surface and allow the resin to cure for 24–48 hours in a dust-free environment. Avoid moving the mould during curing to maintain crisp details and smooth surfaces. Next steps and creative possibilities Once the resin has fully cured, gently remove the pieces from the silicone mould. You will reveal beautiful Petri art creations with impressive depth and intricate colour formations. These finished pieces are perfect for personal projects, gifts, or selling as handmade creations. Creative ideas: Animal brooches Use flat animal-shaped moulds and choose ink colours inspired by natural fur, feathers, or scales. The Petri effect adds texture and movement, making each brooch look artistic and unique. Jewellery making Transform your resin pieces into earrings, pendants, keychains, bag charms, or statement accessories. The vibrant colours and organic patterns make every item completely unique and highly eye-catching. Home décor and wall art Decorate photo frames, decorative boxes, trays, coasters, and other craft projects with your Petri art pieces. Multiple half-spheres can also be arranged on a wooden panel or canvas to create a modern wall display with a luxurious artistic appearance. Custom gifts Create personalised handmade gifts for birthdays, holidays, weddings, or special occasions. No two Petri designs are ever identical, making every gift truly one of a kind. Experimenting with dilution Adjust the appearance of your Petri effects by changing the consistency of the white ink. Undiluted white ink creates stronger sinking action, larger formations, and dramatic cloud-like effects. Diluting the white ink with alcohol produces finer details, cleaner lines, and more controlled patterns. Experiment with different levels of dilution to develop your own signature style. Tips for best results: • Measure resin accurately for proper curing. • Mix slowly and thoroughly to minimise bubbles. • Use white ink sparingly at first and add more if needed. • Test different colour combinations to discover unique effects. • Allow full curing before demoulding for the best finish. Enjoy creating professional-looking Petri Dish resin art with endless colour combinations and stunning visual depth. Every project becomes a unique piece of art. Instruction
£55.85
 Free shipping on orders over £29,85
 Shipping Tracking!



 Google
 Facebook