 Free shipping on orders over £29,85


How to make a resin grinder?
Step-by-step guide to casting your own custom grinder


Creating your own resin grinder is a rewarding way to combine practicality and creativity. This guide walks you through each stage of crafting a resin grinder, from preparation and mixing to casting and finishing. Whether you are a seasoned maker or just starting, you’ll learn essential tips to ensure a professional, durable result.
What You’ll Need
- “IWhite” – Polyurethane Casting Resin – White, Fast-Curing Two-Part System: For rapid, precise casting and fine detail.
- “One-2-One” – Epoxy Resin for Handcraft, 1:1 Mixing Ratio: A straightforward, non-toxic option suitable for decorative projects.
- “Art Pro” – Clear Epoxy Resin for Artists and Surface Coating: Ideal for a high-gloss, durable grinder finish.
- Anti Bubble Mixer for Epoxy Resin – Reusable Mixing Tool: Reduces bubbles for a flawless appearance.
- Food-safe silicone mould (specialised for grinder parts)
- Mixing cups, spatula
- Protective gloves and mask
- Fine sandpaper and micro-polishing pads
- Non-stick spray for easy demoulding (optional)

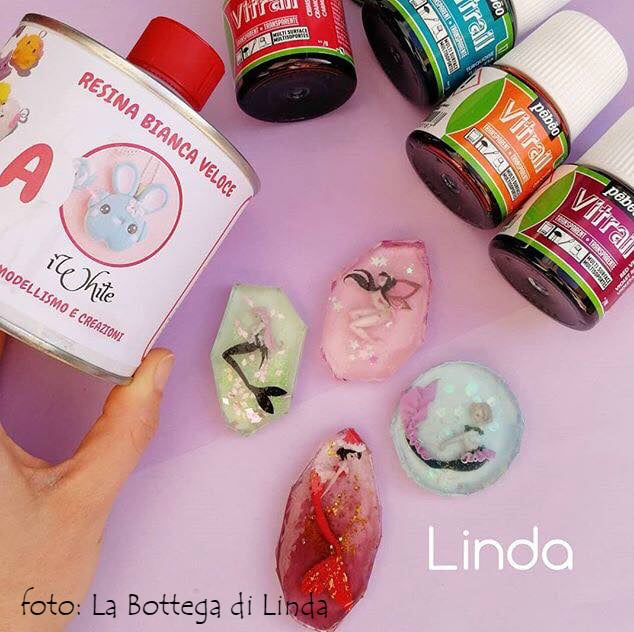
Visual Inspiration: Resin Grinders in Progress
See how various resin types can achieve different effects and finishes when creating custom grinders. Note the clarity of epoxy for transparent grinders and the crisp definition with polyurethane blends.

Step 1: Prepare Your Workspace and Mould
Select a clean, dust-free environment with good ventilation. Cover your workspace with protective sheeting and gather all your tools before starting. Make sure your silicone mould for the grinder is thoroughly clean and dry, as any debris will affect the finished piece. Apply a non-stick mould release spray if you wish to simplify removal later.
Wear nitrile gloves and, if working with fine powders or sanding, a protective mask. Good preparation at this stage helps avoid common pitfalls such as dust inclusions or difficult demoulding.
Step 2: Mix and Colour Your Resin
Choose your resin according to your finishing requirements and experience level. If you want a rapid cure and white appearance, “IWhite” – Polyurethane Casting Resin – White, Fast-Curing Two-Part System is ideal. For a glossy, transparent grinder, opt for “Art Pro” – Clear Epoxy Resin for Artists and Surface Coating. If you are new to resin, “One-2-One” – Epoxy Resin for Handcraft, 1:1 Mixing Ratio offers straightforward mixing.
Measure out your resin and hardener as directed (usually by volume or weight depending on the product), then blend thoroughly. For best results and fewer bubbles, consider using the Anti Bubble Mixer for Epoxy Resin – Reusable Mixing Tool. If you wish to add pigment or mica powder, do so gradually until you achieve your desired effect, mixing gently to avoid introducing air.
Step 3: Pour and Cast the Grinder Components
Slowly pour the mixed resin into your grinder mould, starting at one edge and letting it flow to fill all cavities. Take care to avoid overfilling, as excess resin can result in time-consuming sanding later. If your grinder design requires multiple layers or embedded artwork, pour in stages, allowing each layer to become tacky before adding the next.
If you notice any bubbles rising to the surface, gently pop them with a toothpick or by lightly blowing across the resin. Position the mould on a level surface and leave it undisturbed during curing. Always follow the recommended setting times indicated on your chosen resin product.
Step 4: Demould and Finish Your Resin Grinder
When the resin has fully cured (timing varies—polyurethane resins set in about 30 minutes; epoxies may take up to 48 hours), carefully flex the silicone mould to release your grinder components. Take your time to avoid stress cracks or chipping. If any sharp edges or excess material (flash) remain, use fine sandpaper, progressing to micro-polishing pads for a smooth finish.
Polish all grinder surfaces gently for the best appearance, and test-fit the components to ensure smooth movement. If small imperfections remain, further buffing with polishing compound can help achieve a glass-like shine.

Tips and Common Pitfalls
Take your time with mixing and pouring, as rushing increases the risk of air bubbles or uneven colouring. Choose a suitable mould crafted for grinders; generic moulds may not align or function well. Allow full curing before demoulding or sanding to prevent deformation. Use safety equipment at all times, including gloves and masks, as both polyurethane and epoxy can be hazardous if handled improperly.
Experiment with colours and finishes to create a truly custom grinder. Store finished grinders away from direct sunlight to preserve clarity and prevent yellowing over time.
Project Showcase and Finishing Touches
Finished resin grinders demonstrate the impact of careful moulding, bubble-free mixing, and detailed sanding. Your project can range from minimalist white to vivid, artistically layered styles.

- “IWhite” – Polyurethane Casting Resin – White, Fast-Curing Two-Part SystemPrice range: £22.85 through £34.85IWHITE is a fast-curing polyurethane resin designed for detailed, rapid casting suitable for handcrafted and prototyping work.
- "One-2-One" – Epoxy Resin for Handcraft, 1:1 Mixing RatioPrice range: £14.85 through £56.85"One-2-One" epoxy resin offers crystal clear, non-toxic medium viscosity suitable for various decorative handcrafts following the 1:1 mixing ratio.
 Anti Bubble Mixer for Epoxy Resin – Reusable Mixing Tool£4.45This reusable mixing tool is designed for epoxy resin projects to help reduce bubbles and provide a professional finish.
 "Art Pro" – Clear Epoxy Resin for Artists and Surface CoatingPrice range: £31.15 through £388.85Art Pro clear epoxy resin provides a durable, high-gloss finish suitable for artists and crafters creating decorative surfaces.
Frequently Asked Questions
Can I use food moulds for resin grinders?
Food-grade silicone moulds are best for detailed, safe releases, but do not use them for food afterwards.
How long does a resin grinder take to cure?
Cure times vary: polyurethane sets in about 30 minutes, while epoxy resins may take up to 48 hours.
Can you sand and polish a resin grinder?
Yes, use fine wet-dry sandpaper followed by micro-polishing pads for a glassy, safe finish.
Are resin grinders durable?
Properly cured resin grinders are durable for regular use, but avoid exposing them to extreme heat or force.
What is the best type of resin for grinders?
Polyurethane is rapid and precise; clear epoxy is ideal for a glossy finish. Choose based on your project needs.
Can resin grinders be customised?
Yes, colouring, embedments, and creative finishes are all possible with resin-based grinders.