 Free shipping on orders over £29,85


How do you apply the resin?
Step-by-step guide to flawless epoxy resin application at home


If you’re ready to transform your creative, woodworking, or DIY projects with a clear, glossy, and durable epoxy resin coating, proper application is crucial. This detailed guide explains how to achieve a smooth finish, what tools and techniques deliver the best results, and ways to avoid bumps or bubbles. Whether you are a beginner or an experienced maker, follow this step-by-step process for professional outcomes every time.
What You’ll Need
- Tooth Shaped Spatula for Epoxy Resin Application – For spreading resin with precision and achieving uniform layers.
- Resin & Paint Application Rollers – Short-Pile, Large, and Sponge Types – Useful for covering large areas quickly and evenly.
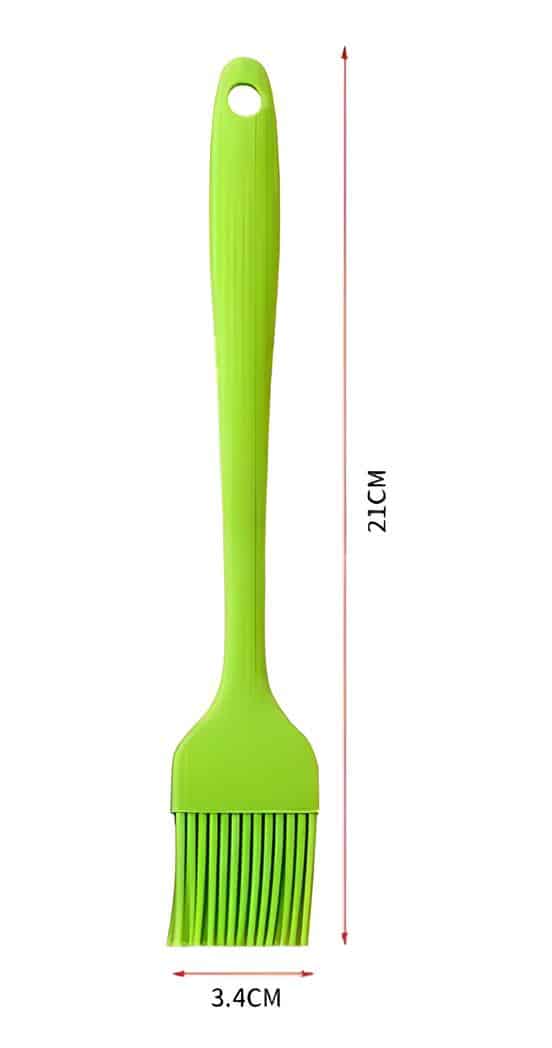
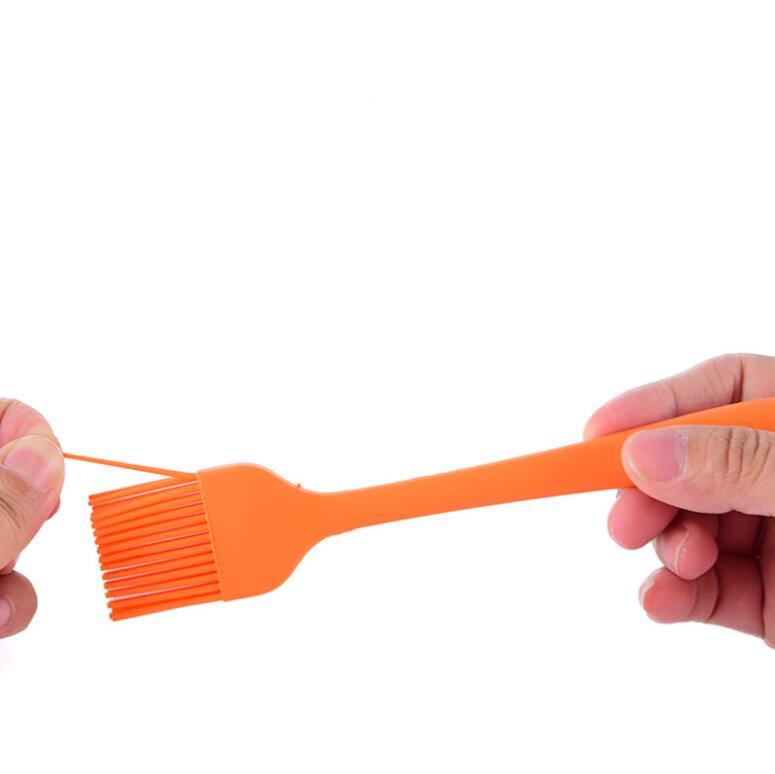
- Reusable Silicone Resin Brush for Epoxy Art and Wood Applications – For detailed or artistic resin application.
- Silicone Work Mat for Crafting and Epoxy Resin Projects – Easy-Clean Surface Protection – Protects your workspace from spills and simplifies cleanup.
- Disposable gloves, mixing cups, stirrers, and a dust-free environment.

Essential Application Tools in Action
See how resin application tools like spatulas, rollers, and reusable brushes deliver professional-level results. Each tool offers unique advantages for different project types and sizes, ensuring your resin projects are flawless and efficient from start to finish.

Step 1: Prepare Your Work Area
Start by ensuring your project surface is clean, dry, and free of dust or oils. If working indoors, select a well-ventilated space and cover the area with a Silicone Work Mat for Crafting and Epoxy Resin Projects – Easy-Clean Surface Protection to shield your table from spills. Lay out all your tools in advance for a steady workflow. Always wear disposable gloves for safety, and be sure your workspace is at a stable temperature to ensure optimal resin curing.
Step 2: Mix and Pour the Resin Carefully
Follow your specific resin’s instructions to measure and mix the two components. Stir steadily to minimise bubbles, scraping the sides and bottom to fully incorporate all material. Pour the mixed resin onto your prepared surface slowly, starting in the centre and allowing it to flow outwards. Work systematically, as rushing this step can trap air or cause uneven distribution.
Step 3: Spread the Resin Evenly Across the Surface
Once poured, use an application tool suited to your project’s size and precision needs. For broad surfaces such as tables or trays, a Tooth Shaped Spatula for Epoxy Resin Application helps achieve a uniform layer with its notched edge. On artwork or wood, a Reusable Silicone Resin Brush for Epoxy Art and Wood Applications is ideal for detailed work, reaching into corners and edges.
For covering larger areas, especially floors or expansive projects, use a Resin & Paint Application Roller to distribute resin quickly while maintaining a level coat. Always spread resin gently, avoiding overworking as this can introduce air bubbles or cause streaking. Allow the resin to self-level naturally when possible.
Step 4: Finishing Touches and Curing
Examine your surface for bubbles or imperfections immediately after application. Use a heat gun or torch briefly to gently remove any trapped air if required, being careful not to scorch or overheat the resin. Leave the project undisturbed on a level surface in a dust-free area for the full recommended curing time. Do not touch or move it during this process for best results.
Tips, Common Mistakes, and Troubleshooting
- Protect your workspace: Spillages are inevitable, so always use a silicone work mat beneath your project.
- Work methodically and avoid overworking the resin: Too much manipulation can introduce bubbles. Let self-levelling do its job.
- Choose the right tool for your project: Spatulas for flat surfaces, brushes for detail, rollers for speed.
- Fix small issues early: Pop bubbles with a quick pass of heat before the resin starts to set.
- Always check room conditions as humidity and temperature affect curing and finish.
Mastering the Resin Application Process
From the initial pour to the final cure, the right approach and careful attention to technique make all the difference. Slow, even spreading and prompt bubble removal will ensure your finished piece stands out for its clarity and smoothness.

- Tooth Shaped Spatula for Epoxy Resin Application£3.15The Tooth Shaped Spatula is designed for precise and even application of epoxy resin on various surfaces.
- Resin & Paint Application Rollers – Short-Pile, Large, and Sponge TypesPrice range: £3.45 through £4.85These rollers are designed for precise and uniform application on resin surfaces, suitable for various epoxy resin projects.
- Reusable Silicone Resin Brush for Epoxy Art and Wood Applications£3.45A reusable silicone brush for precise application in epoxy art and wood projects, supporting clean and eco-conscious crafting.
 Silicone Work Mat for Crafting and Epoxy Resin Projects – Easy-Clean Surface ProtectionThe Silicone Work Mat offers an easy-clean surface designed for crafting and epoxy resin projects within the theme of resin application.
Frequently Asked Questions
What are the best tools to apply epoxy resin?
Spatulas, rollers, and silicone brushes each excel for different resin projects and help achieve a smooth, even finish.
How do I stop bubbles forming when applying resin?
Stir resin gently and use a heat gun or torch over the wet surface for quick bubble removal before curing.
How do I ensure an even resin coat?
Pour resin in the centre and gently spread with a spatula, roller, or silicone brush to ensure uniform thickness across the surface.
What conditions are best for resin curing?
A dust-free, level workspace with a stable room temperature yields the best curing and smoothest result.
What should I do if the resin looks uneven or sticky?
Unevenness is often caused by improper mixing or application; sticky resin can result from inaccurate ratios or low temperatures.
When should I use a spatula, roller, or brush?
Use a spatula for flat surfaces, a roller for large areas, and a silicone brush for corners or detailed work.