 Free shipping on orders over £29,85

How are resin-coated stickers made?
Step-by-step to achieve glossy, durable domed sticker finishes

Resin-coated stickers, also known as domed or 3D stickers, are prized for their glossy surface, scratch resistance, and tactile dimension. Perfect for personalised gifts, branding, crafts and professional label production, mastering this technique lets you elevate both the look and durability of your stickers. This guide walks you through the complete process, from sticker prep to a flawless resin finish.
What You’ll Need
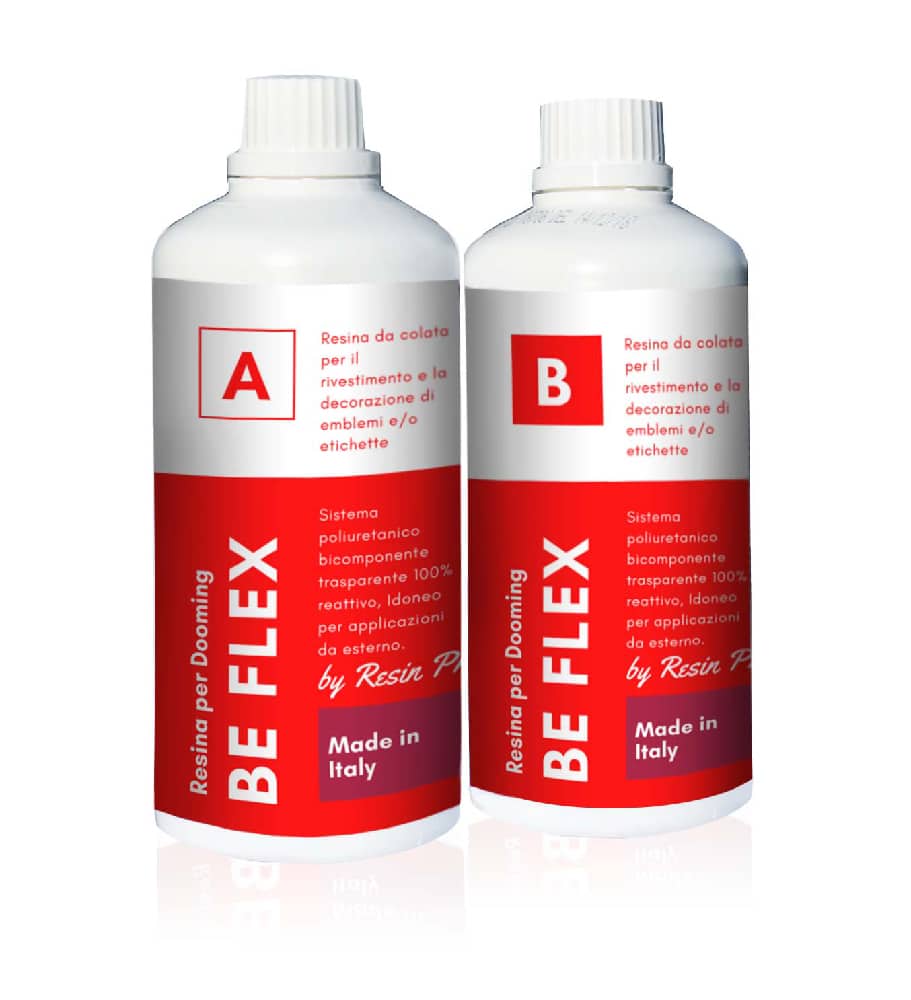
- “Be Flex” – Transparent Polyurethane Doming Resin – Scratch-Resistant – for a flexible, self-healing 3D effect
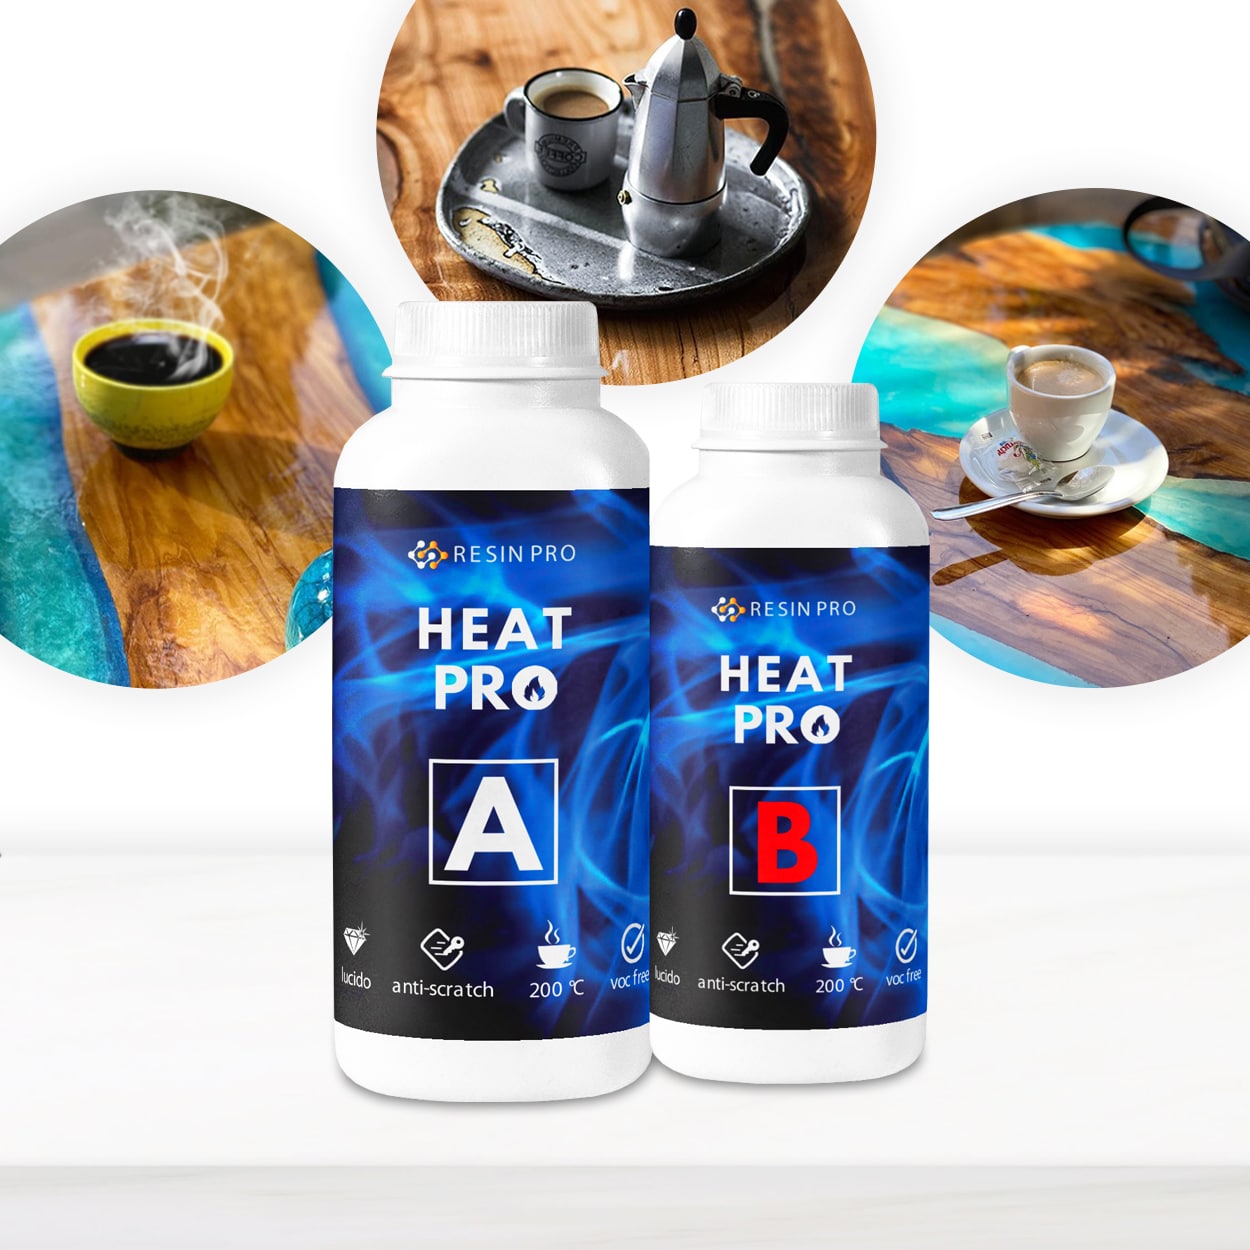
- “Heat Pro” – Flexible Heat-Resistant Glossy Coating – if extra heat resistance is beneficial
- “One-2-One” – Epoxy Resin for Handcraft, 1:1 Mixing Ratio – for beginners crafting smaller batches with easy mixing
- “Art Pro” – Clear Epoxy Resin for Artists and Surface Coating – for vibrant, glass-like clarity in artistic labels
- Inkjet or laser-printed stickers (vinyl, acrylic or compatible label base)
- Mixing cups, stir sticks, nitrile gloves
- Flat curing surface, drop cloth, tweezers, and a dust cover
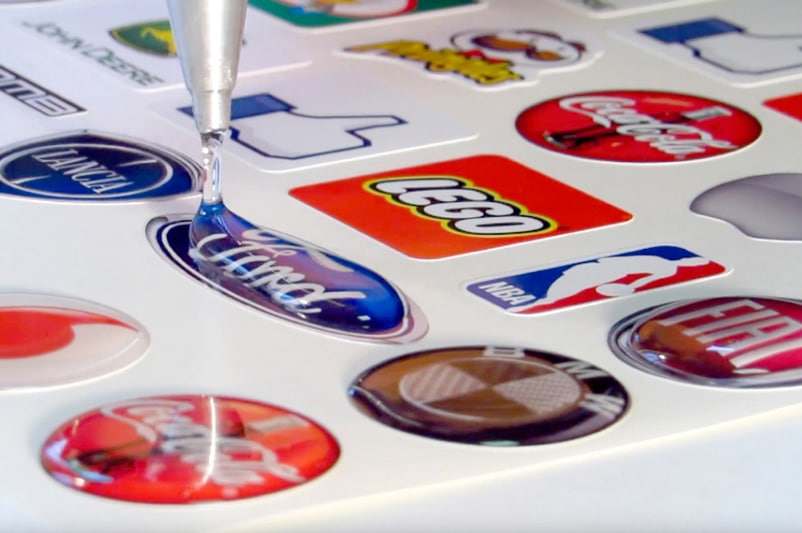
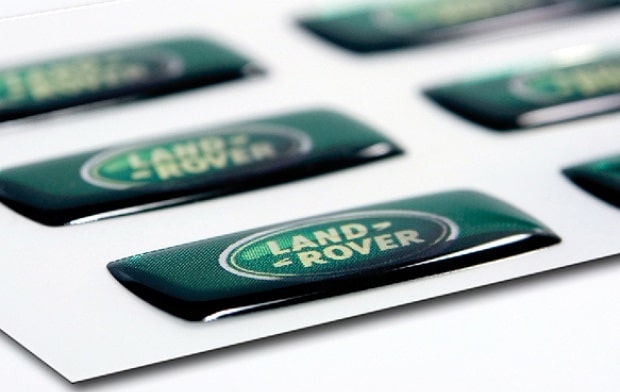
See the Resin Doming Process Up Close
Experience the transformation from ordinary flat stickers to captivating, domed designs. Notice how resin’s clarity and dimension bring logos, names, and artwork into bold relief. Professional doming resins effortlessly produce a smooth, glossy lens effect suitable for both crafts and commercial labels.
Want to see more inspiration? Explore project galleries and customer creations featuring domed sticker finishes.
Step 1: Prepare Your Stickers and Workspace
Start by printing and cutting your stickers on a suitable base like glossy vinyl, ensuring they are clean and dry. Place them on a flat, non-stick surface such as a silicone mat or craft sheet. Thoroughly clean your workspace, lay down a drop cloth, and ensure the area is free from dust.
You’ll want all tools to be ready at hand, as resin work is time-sensitive. Always use gloves and good ventilation; polymer resins can be sensitive to moisture and contaminants. Arrange the stickers spaced apart to prevent resin from flowing between them during coating.


Step 2: Mix and Prepare Your Resin
Resin selection is crucial for domed stickers. For top flexibility and a true 3D lensing effect, Be Flex – Transparent Polyurethane Doming Resin is specifically designed for this application. Carefully follow the manufacturer’s mixing instructions – accurate ratios and thorough mixing help prevent bubbles and incomplete curing.
Mix the resin in clean cups using slow, deliberate motions to minimise bubble formation. Allow the freshly-mixed resin to rest for a few minutes so any trapped air can rise and dissipate before use. Avoid humidity when working with polyurethane doming resins, as it can cause surface clouding.
Step 3: Apply the Resin to Each Sticker
Using a disposable pipette or stir stick, carefully deposit drops of resin onto the centre of each sticker. The resin will naturally dome and spread towards the edge—apply slowly with patience, adding more resin drop by drop if needed. Observe the surface tension, which should keep the resin from spilling over the sticker’s edge.
For curved surfaces or applications needing increased durability, use Be Flex or, if extra heat resistance is key, Heat Pro. Give each sticker its own space and time to self-level. Carefully pop any surface bubbles with a pin or gentle exhale; avoid direct heat as this risks warping your stickers.

Step 4: Cure and Finish
Cover the stickers to keep out dust while curing. Allow the resin to harden undisturbed as per your chosen product’s recommended curing time (usually 24–48 hours at room temperature). Do not rush this stage—handling too early can mar the surface.
Once cured, gently peel or lift your finished, resin-coated stickers off the mat. Examine for any edge drips and trim if necessary. The result will be a set of vivid, tactile, professional-quality domed stickers ready for display or application.
Tips, Troubleshooting and Common Mistakes
- Apply in a Dust-Free Environment – Dust particles ruin a glossy, glass-like finish.
- Avoid Excessive Resin Overflow – Work slowly, letting surface tension hold the dome.
- Allow Adequate Curing Time – Resist the urge to touch or move the stickers prematurely.
- Choose the Right Resin for the Job – Doming is best achieved with flexible polyurethane resins like Be Flex for curved, resilient stickers, but epoxies bring clarity and depth for decorative pieces.
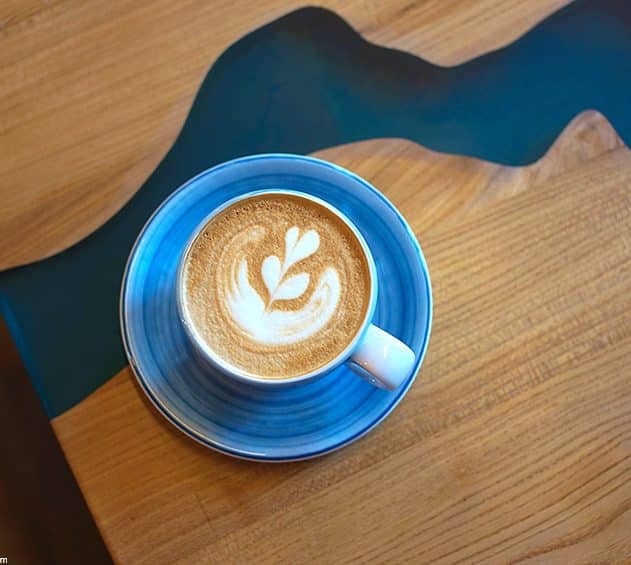
Gallery: Resin-Coated Stickers in Action
Discover real-world resin sticker projects created with polyurethane and epoxy doming resins. Each piece demonstrates vibrant colour retention, superior flexibility, and remarkable durability — perfect for branded decals, promotional badges, and bespoke embellishments.
Share your own resin sticker results using our featured products for a chance to be highlighted in our showcase.
- "Be Flex" – Transparent Polyurethane Doming Resin – Scratch-ResistantPrice range: £45.00 through £81.95"Be Flex" offers a flexible, transparent polyurethane resin suitable for stickers and labels with a durable, bubble-free finish.
- "Heat Pro" – Flexible Heat-Resistant Glossy CoatingPrice range: £26.45 through £185.45The Heat Pro coating is designed for epoxy resin projects, providing a flexible, heat-resistant, glossy finish suitable for crafts and small surfaces.
 "One-2-One" – Epoxy Resin for Handcraft, 1:1 Mixing RatioPrice range: £15.95 through £59.95ONE–TWO epoxy resin is a medium viscosity option suitable for beginners and experienced crafters using a 1:1 mixing ratio.
 "Art Pro" – Clear Epoxy Resin for Artists and Surface CoatingPrice range: £19.95 through £267.95Art Pro clear epoxy resin provides durable, high-gloss, transparent finishes suitable for artists and crafters within the theme of resin-coated…
Frequently Asked Questions
Can I use Be Flex resin for outdoor stickers?
Yes, Be Flex offers waterproof, non-yellowing, and UV resistant properties—perfect for durable outdoor sticker applications.
How do I stop the resin from running over the edge of my stickers?
Apply resin slowly and let it self-level—surface tension will keep it domed as long as you do not overfill.
Which resin is best for creating 3D domed stickers?
Flexible polyurethane doming resins like Be Flex are ideal for domed stickers, especially on curved or flexible surfaces.
How long do resin-coated stickers need to cure?
Most doming resins cure within 24–48 hours at room temperature. Always check manufacturer guidelines for optimal results.
Can I use epoxy resin instead of polyurethane for domed stickers?
Epoxy works for some applications but usually lacks the flexibility and self-healing surface of specialist polyurethane doming resins.
Is it safe to handle finished resin stickers?
Once fully cured, doming resins are safe to touch and handle. Always allow complete curing before use.
How do I remove bubbles that appear in the resin?
Pop bubbles gently with a pin or use a gentle exhale. Avoid using heat which may deform the sticker or resin coating.