 Free shipping on orders over £29,85


How do you make a resin bust?
A step-by-step guide for crafting detailed sculptures at home


Creating a resin bust is a rewarding process for artists, hobbyists, and anyone interested in sculpture. This comprehensive guide walks you through every crucial step required to craft a striking and durable resin bust, from preparation to finishing touches. Whether you’re new to resin or have experience with other materials, you’ll gain valuable insights and practical tips for achieving clean, detailed results.
What You’ll Need
- “Epoxytable 10-Ten” – Deep Pour Epoxy Resin for Tables, Up to 10cm Casting — for deep, clear busts up to 10cm thick
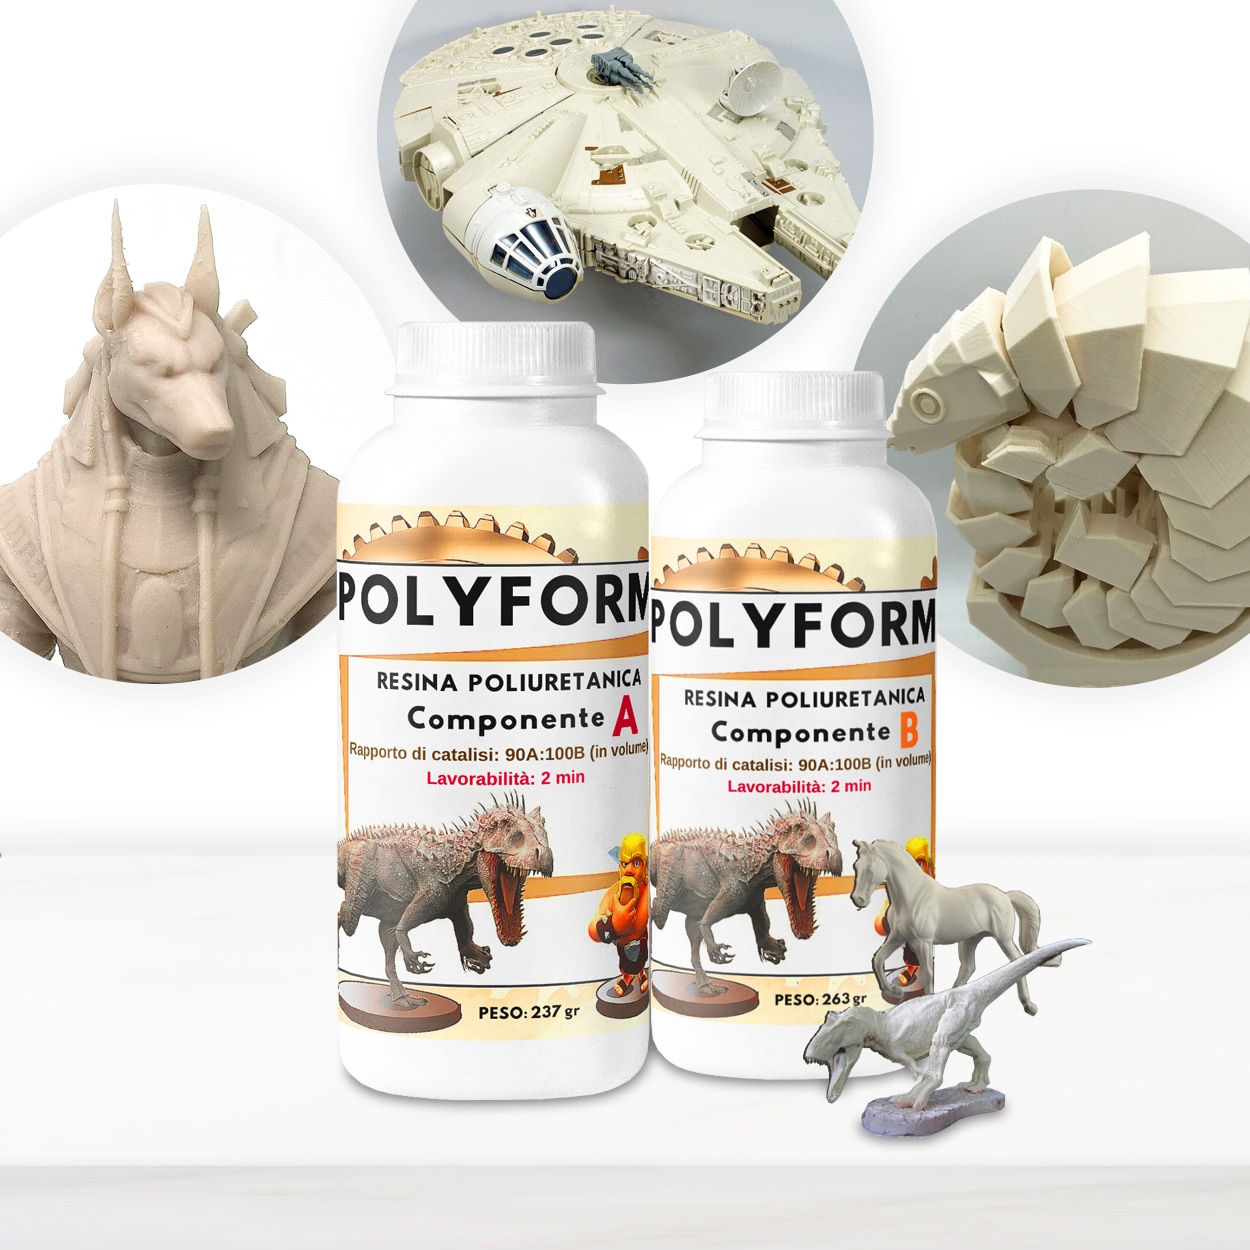
- “Polyform” – Polyurethane Casting Resin, Beige, Fast-Setting for Prototyping — for rapid, highly detailed castings
- “EpoxyTable 5-Five” – Deep Pour Epoxy Resin for Tables and Large Projects – Up to 5cm — for medium-sized or layered volumes
- Silicone or rubber mould of your chosen bust design
- Mixing containers and stirring sticks
- Protective gloves and mask
- Release agent (if required)
- Sandpaper and polishing materials for finishing

Essentials for a Professional Resin Bust
Gathering all your materials ahead of time streamlines your process and minimises the risk of missed steps. Always choose the appropriate resin system for your project’s scale and detail level, and ensure your workspace is clutter-free and well-protected for the best results.

Step 1: Prepare Your Workspace and Mould
Precision matters from the start: Choose a clean, well-ventilated area with a flat working surface. Lay down protective covers to avoid spills and equip yourself with gloves and a suitable mask. Ensure your silicone or rubber mould is clean and dry. If necessary, apply a release agent inside the mould to help with easy removal of the cured bust later. Secure the mould upright so it will not tip during pouring.
Double-check the mould for details: any dust, residue, or leftover release agent may impact the surface clarity of your resin bust. Take time here—meticulous preparation leads to the best results.
Step 2: Mix and Measure Your Resin
Perfect your mould for best results: Accurately weighing and mixing the resin components is vital. The choice of resin depends on your bust’s size and the level of detail needed. For deep, beautifully clear busts, use “Epoxytable 10-Ten” for castings up to 10cm. Opt for Polyform if your project requires rapid setting and intricate detail.
Follow the manufacturer’s guidelines for mix ratios—incorrect proportions can lead to sticky or brittle results. Stir gently but thoroughly to minimise air bubbles, scraping the sides and base of your container. Once ready, you should have a homogenous mix with no streaks.
Step 3: Pour the Resin into the Mould
Pouring is a patient process: Slowly pour the mixed resin into the mould, aiming for the lowest point to allow the resin to flow and fill all the crevices. If working with a deep mould or a large piece, pour in layers if your resin system requires—this is especially important with EpoxyTable 5-Five, which suits pours up to 5cm per layer.
To prevent air pockets, gently tap or vibrate the mould during and after pouring. If your resin has a long working time, take advantage of this to ensure full penetration and bubble release. Avoid overfilling and keep the work area free from dust while the resin sets.

Step 4: Demould and Refine the Sculpture
After the recommended curing period, carefully demould the bust. Polyurethane resins can be demoulded in as little as 30 minutes, while deep pour epoxies often require several hours or overnight. Be gentle—silicone moulds make this process safer, but rushing can cause defects or breakage.
Inspect your piece for surface imperfections or excess flash. Trim rough edges with a utility knife or fine sandpaper. Begin with lower grit and progress to finer abrasives for a smooth surface. Wash off any residue before finishing.
Step 5: Finish and Polish Your Resin Bust
Finishing elevates your sculpture: Sand the bust progressively with finer grits for an ultra-smooth finish. If a glossy look is desired, finish with a polishing compound suited for resin. Carefully buff the surface in circular motions, checking your progress as you go. Apply any paints or coatings only after the bust is fully cured and prepped.
Take your time on this last step—high-quality finishing distinguishes handmade art from the rest.
Tips, Common Mistakes, and Troubleshooting
Maintain the recommended mixing ratios for each resin system—too much hardener or base can prevent curing or make the bust brittle. Always mix slowly to avoid trapped air bubbles and consider using a heat gun or torch lightly to eliminate surface bubbles just after pouring. Pouring too quickly or into a cold mould can cause shrinkage, cloudiness, or improper curing. If you’re layering resin, allow each layer to reach gel stage before adding the next.
Patience, cleanliness, and measured steps result in a professional-looking and long-lasting resin sculpture.
Expert Advice for Crisp, Detailed Results
Plan your steps and avoid shortcuts—resin busts reward patience and careful execution. Always allow sufficient curing time between layers or before demoulding, and work in a dust-free space to help your finished sculpture achieve maximum clarity and aesthetic appeal.

- “Epoxytable 10-Ten” – Deep Pour Epoxy Resin for Tables, Up to 10cm CastingPrice range: £33.85 through £334.85“Epoxytable 10-Ten” is an epoxy resin designed for deep pour applications up to 10cm, commonly used for tables and artistic projects.
- “Polyform” – Polyurethane Casting Resin, Beige, Fast-Setting for PrototypingPrice range: £19.85 through £134.85Polyform polyurethane casting resin is reliable for prototyping and model making with fast setting and high detail suitable for the theme.
 "EpoxyTable 5-Five" – Deep Pour Epoxy Resin for Tables and Large Projects – Up to 5cmPrice range: £16.85 through £1,099.85EpoxyTable 5-Five is designed for deep pouring projects up to 5cm offering non-yellowing and scratch-resistant properties.
 "River-Table" – Complete Kit for Creating Your First Epoxy Resin TablePrice range: £188.85 through £444.85"River-Table" kit provides materials and instructions suited for creating wood and resin tables following the 'How do you make a resin bust?' theme.
Frequently Asked Questions
What resin is suitable for making a detailed bust?
Use deep pour epoxy for clear, thick busts or fast-setting polyurethane resin for fine details and rapid demoulding.
How do I avoid air bubbles when making a resin bust?
Mix slowly, pour steadily, and tap or gently vibrate the mould. Use a heat gun briefly on the surface if needed.
Can a resin bust be painted or polished after casting?
Yes, sand the surface smooth and polish with a suitable compound. Allow full curing before painting or applying finishes.
What are common mistakes made during resin bust casting?
Rushing mixing, not measuring ratios and demoulding too soon often cause defects or weak structures.
Is it necessary to pour large resin busts in layers?
Yes, deep epoxies often require layering for thicknesses above their single-pour limits to ensure full curing.
How long does it take for polyurethane resin to demould?
Polyform can usually be demoulded within 30 minutes after setting, making it ideal for fast workflows.
Is a release agent necessary for resin busts?
Use a release agent unless your mould is 100% silicone—otherwise, your cured bust may stick or tear on removal.