 Free shipping on orders over £29,85


How do you make a resin sphere?
Crafting a resin sphere is a satisfying and visually stunning project for creators of all skill levels. By carefully following proven casting techniques, you can achieve perfect, bubble-free spheres for use in jewellery, decorations, art pieces, or paperweights. This guide breaks down each step, helping you avoid common pitfalls and achieve flawless results every time.
A step-by-step guide to perfect resin casting results
What You’ll Need
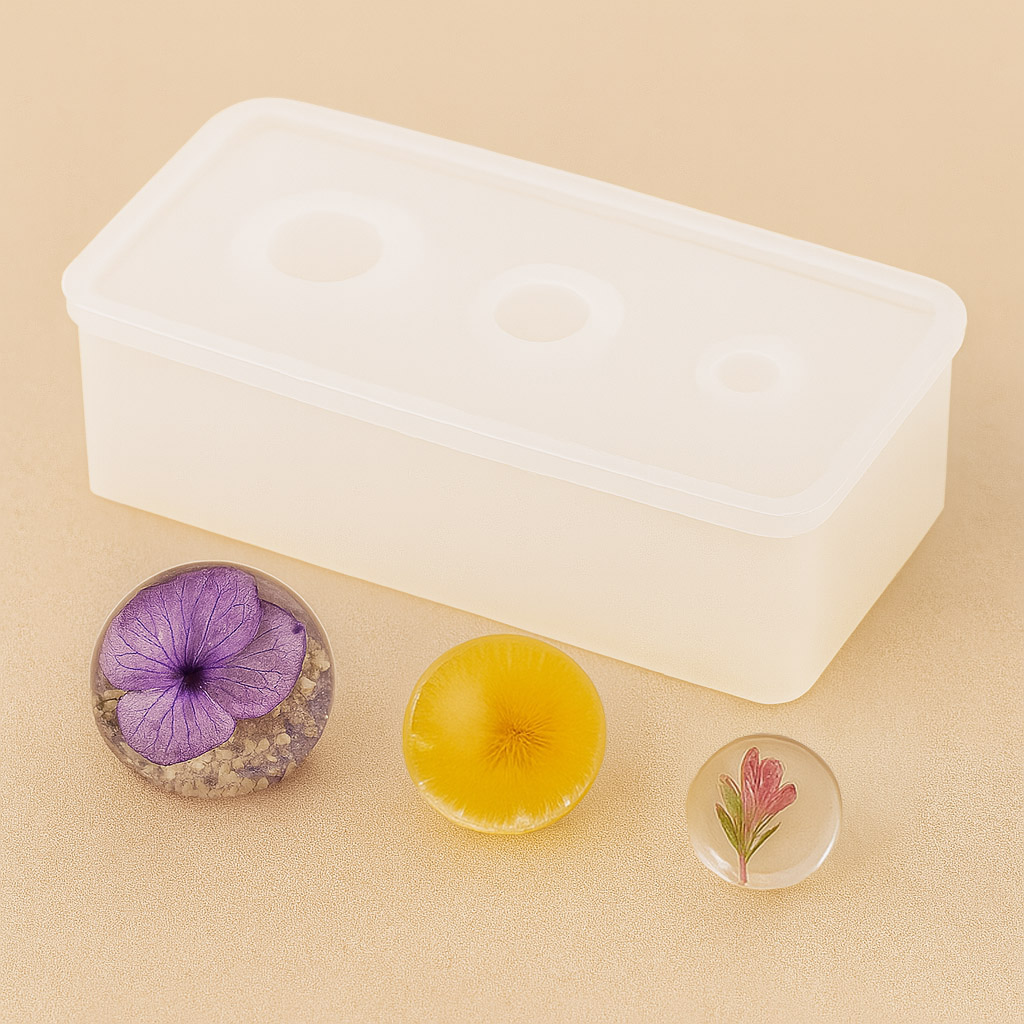
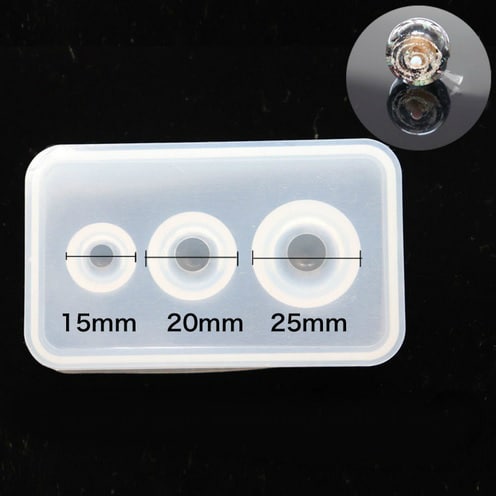
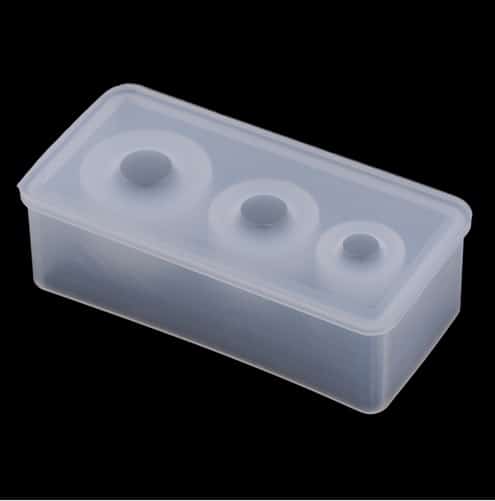
- “3 Sphere” – Silicone Mould for Jewellery and Crafts, 1cm-2.5cm Spheres – ideal for small, polished resin spheres.
- “EpoxyTable 5-Five” – Deep Pour Epoxy Resin for Tables and Large Projects – Up to 5cm – perfect for castings up to 5cm thickness with superior clarity.
- “Epoxytable 10-Ten” – Deep Pour Epoxy Resin for Tables, Up to 10cm Casting – best choice for larger, thicker spheres requiring deep pour strength.
- Mixing cups, wooden stirrers, gloves, and a dust-free working area.
Essential Tools and Workspace for Resin Sphere Casting
Set up your space before you begin– working on a clean, level surface reduces the risk of dust or uneven shapes. Gather all required safety gear and choose your mould and resin type for your specific sphere size.
Step 1: Prepare Your Workspace and Mould
Prepare your workspace and wear gloves to protect your hands and maintain debris-free surfaces. Clean and dry your silicone mould thoroughly, ensuring there’s no dust, moisture, or residual release agent from previous use. Position the mould on a stable, level surface to avoid uneven spheres.
If making multiple spheres or using deeper castings, check that your work area is ventilated and well-lit for safety and precision. Take note of your desired sphere sizes and select the appropriate cavity in your mould.
Step 2: Measure and Mix Your Resin
Choose a suitable epoxy for your desired sphere size. For spheres up to 5cm, opt for a deep pour resin such as “EpoxyTable 5-Five” – Deep Pour Epoxy Resin for Tables and Large Projects – Up to 5cm. For larger or thicker spheres, “Epoxytable 10-Ten” – Deep Pour Epoxy Resin for Tables, Up to 10cm Casting is recommended for a flawless result.
Measure resin and hardener accurately according to the product instructions. Pour both components into a clean mixing cup and mix slowly to avoid bubbles. Scrape the sides and bottom of the cup to ensure a uniform blend. Take your time—deep pour resins have a long working time, so there’s no need to rush and risk air entrapment.
Step 3: Pour the Resin into the Mould
Slowly pour your mixed resin into the mould cavity, allowing it to flow to the bottom and fill up without trapping air. If casting a sphere thicker than 5cm, pour in stages if needed to prevent excessive heat build-up and avoid warping or cracks in the finished piece. Pause briefly after each small pour to allow air to rise and escape.
Gently tap or flex the mould to release any surface bubbles. For intricate inclusions, position them in the cavity before pouring the resin or in between layers if casting in stages.

Step 4: Curing and Demoulding
Once poured, cover the mould to protect it from dust and leave it undisturbed in a level area. Curing times may vary depending on the resin used and the thickness of your pour; always follow the manufacturer’s guidelines for optimal results.
Allow full curing before demoulding—typically a minimum of 24–48 hours for smaller spheres and up to several days for large, thick castings. Gently flex the silicone mould to release the sphere. If you experience any resistance, avoid using sharp tools that could damage either the mould or your newly created resin sphere.

Tips, Common Mistakes, and Troubleshooting
Bubble formation is a common challenge—always mix and pour your resin slowly to minimise trapped air. Ensure ambient temperature is stable (between 20–25°C) for best curing and clarity. Do not disturb the mould during curing, as this can cause surface marks or unevenness. If a sticky or soft spot remains after demoulding, it likely results from inaccurate mixing ratios or insufficient cure time—give it more time or consider a warm, dry curing location.
Pro Advice for Clear, Bubble-Free Spheres
Work patiently and use slow, steady motions to mix and pour your resin. Avoiding vibrations and maintaining the right room temperature will help you achieve a brilliant, flawless finish for your resin spheres.

- "3 Sphere" – Silicone Mould for Jewellery and Crafts, 1cm-2.5cm Spheres£6.85Silicone mould designed for crafting spheres between 1cm and 2.5cm, suitable for resin and other DIY casting materials.
- "EpoxyTable 5-Five" – Deep Pour Epoxy Resin for Tables and Large Projects – Up to 5cmPrice range: £16.85 through £1,099.85"EpoxyTable 5-Five" resin is designed for deep pouring up to 5cm thickness, suitable for tables and large projects.
 “Epoxytable 10-Ten” – Deep Pour Epoxy Resin for Tables, Up to 10cm CastingPrice range: £33.85 through £334.85“Epoxytable 10-Ten” is suitable for deep casting up to 10cm, designed for tables and artistic projects with clear, non-yellowing finish.
Frequently Asked Questions
What type of mould is best for making resin spheres?
High-quality silicone moulds provide easy demoulding and smooth, glossy surfaces, making them ideal for resin spheres.
How do I avoid bubbles when casting a resin sphere?
Mix and pour resin slowly, use deep pour resins, and tap the mould gently to help bubbles rise and escape.
How long should I let the resin cure before removing it from the mould?
Small spheres usually cure in 24–48 hours, but thicker spheres may require several days for full hardness.
Which resin should I use for thick, clear resin spheres?
Choose specialised deep pour epoxy resins designed for thick castings to prevent overheating and ensure transparency.
Can I embed objects or pigment inside a resin sphere?
Yes. Add inclusions or pigment between pouring layers or before pouring, ensuring no movement during curing.