 Free shipping on orders over £29,85

How to apply resin on stairs?
Achieve a seamless, durable and decorative resin finish on stairs

If you want to transform your stairs with a smooth, seamless finish that is hard-wearing and visually appealing, applying resin is an excellent solution. Resin not only enhances the aesthetics of your staircase but also increases durability and makes cleaning easier. This guide walks you through each in-depth step to ensure a professional resin application on stairs, suitable for both indoor and concrete outdoor staircases.
What You’ll Need
- “Resinstone” – One-Component Methacrylic Resin for Concrete Floors and Driveways: For sealing and protecting concrete stair surfaces.
- “Trasparente” – Multipurpose Clear Epoxy Resin for Casting – Up to 2cm: To achieve a glossy, tough and crystal-clear finish on interior staircases.
- Resin & Paint Application Rollers – Short-Pile, Large, and Sponge Types: For easy, even resin distribution over both treads and risers.
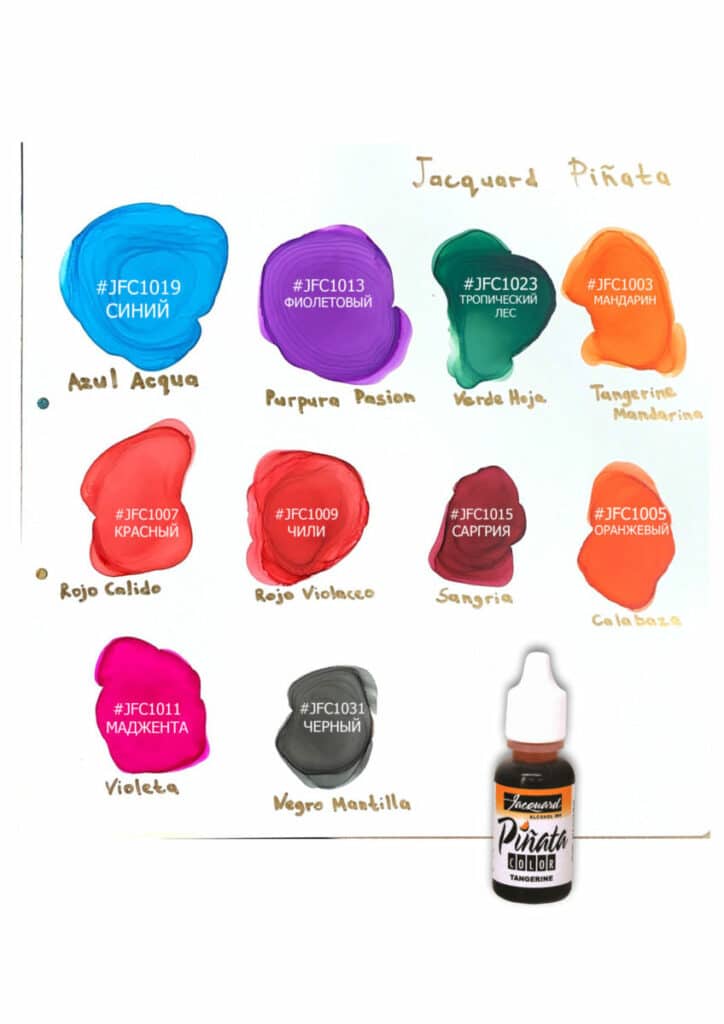
- “Jacquard Pinata” – Alcohol Ink Blast Effect 14ml: Optional, to create vibrant decorative effects or colour accents within resin layers.
- Protective gloves, mask, masking tape, cleaning solutions, sandpaper, and a mixing container.
Step-by-Step Resin Stair Makeover in Progress
See how resin is rolled and poured on real stairs. From clean preparation to the gloss of the final coat, these visuals show surface readiness, priming, uniform resin distribution, and colour customisation, offering inspiration and a clear look at the practical process.
Step 1: Prepare the Stair Surface
Ensure stairs are clean, dry, and free from grease or dust before commencing. Any existing coatings, old varnish, or loose paint should be sanded back to a firm base using appropriate sandpaper. For concrete stairs, fill cracks or chips with suitable filler and allow to cure completely.
Vacuum and wipe down all steps to remove residual dust. Mask the sides and adjoining floor areas using tape for neat edges. Ventilate the work area thoroughly to ensure safe working conditions when handling resin products.
Step 2: Prime and Seal the Surface
Priming minimises dust, strengthens the bond and ensures an even coat. On concrete stairs, use “Resinstone” – One-Component Methacrylic Resin for Concrete Floors and Driveways as your base layer. Use a roller for thin, uniform application, working from the top stair downwards. Apply masking tape along adjoining areas to prevent accidental over-rolling onto neighbouring finishes.
Let the primer/sealant dry thoroughly—usually a few hours, but always check the product’s instructions for specific guidance. This stage is essential to prevent trapped moisture and to provide an optimum surface for the resin top coat.
Step 3: Apply the Base Resin Layer
Prepare your choice of resin carefully, mixing in the correct ratio following the manufacturer’s advice. “Trasparente” – Multipurpose Clear Epoxy Resin for Casting – Up to 2cm is well-suited for creating a clear, tough finish on most staircases.
Pour a manageable amount on each step, then spread using a suitable Resin & Paint Application Rollers – Short-Pile, Large, and Sponge Types for a smooth, even layer. Apply the first base coat of resin and focus on obtaining consistent coverage, especially at edges and risers.
Allow the base coat to cure as per product instructions. This usually takes several hours to overnight depending on temperature and thickness.

Step 4: Build Up Layers and Add Decorative Effects
Pour or roll the resin evenly starting from the top step and progressing downwards for each new coat. Work swiftly to maintain a wet edge between steps and reduce mark lines. If bubbles appear, remove air bubbles using a spike roller or heat gun if required before curing begins.
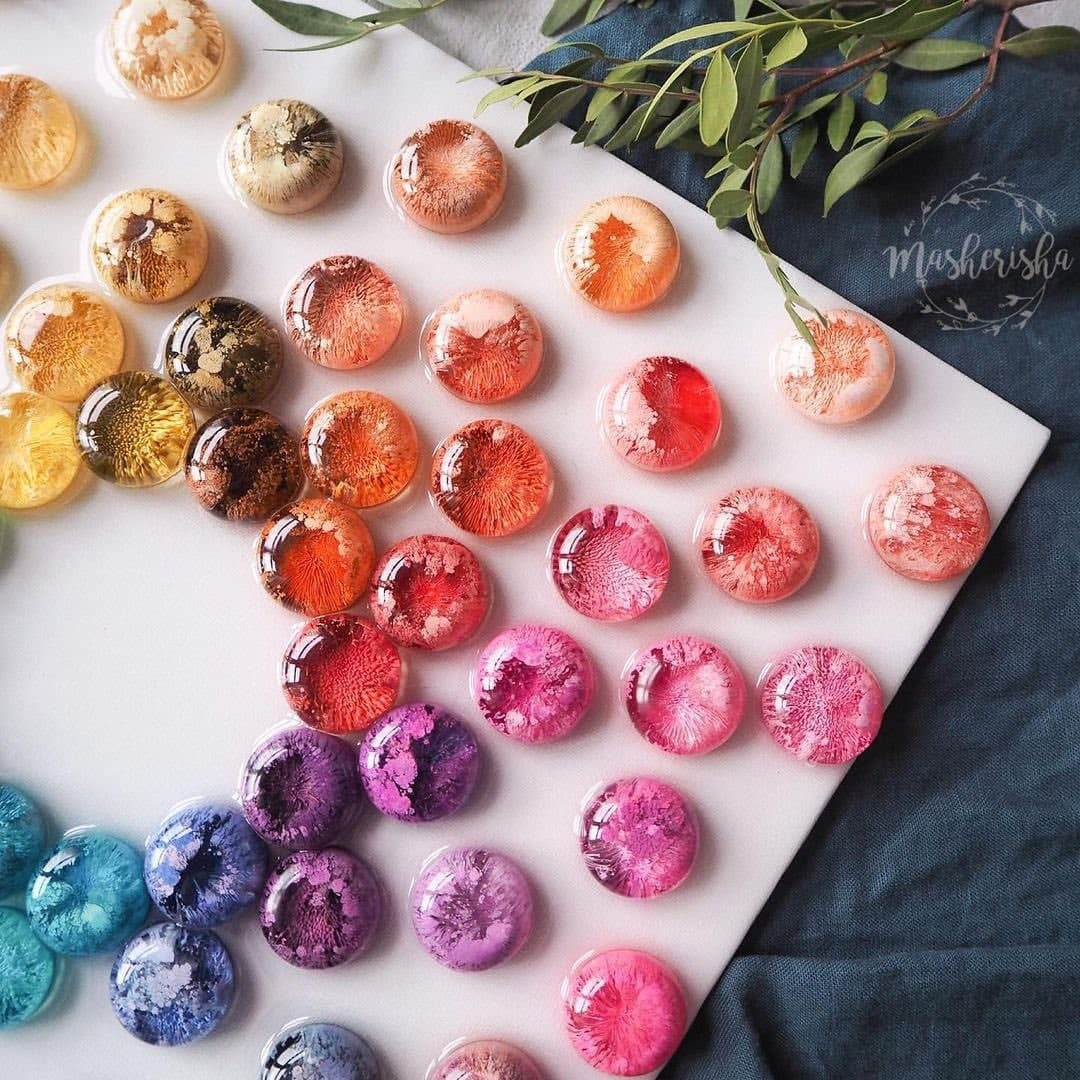
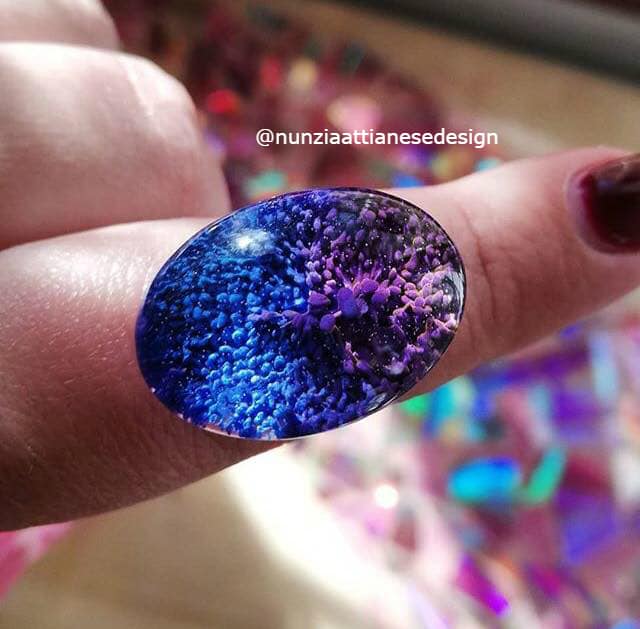
For a personal touch, you may wish to add colour or artistic effects to the resin. “Jacquard Pinata” – Alcohol Ink Blast Effect 14ml delivers intense, transparent hues and can be used sparingly within the still-wet resin for vibrant highlights or intricate veining.
Allow each layer to dry before applying another. Add a second coat for enhanced durability if the stairs will see heavy foot traffic or require a particularly glossy finish.

Step 5: Finishing and Curing
Check for drips and sand lightly between coats if needed to remove imperfections. Remove masking tape as soon as the resin becomes tack-free to ensure crisp lines. For outdoor or high-traffic stairs, consider adding non-slip materials for safety to the final coat—such as a sprinkle of fine aggregate or anti-slip beads.
Allow the stairs to cure fully—avoid heavy loads and moisture until fully cured as recommended in the product instructions. Once hardened, your stairs are ready for use, revealing a smart, durable resin finish.
Tips, Common Mistakes and Troubleshooting
Patience during prep pays off—thoroughly cleaning and masking will prevent defects later. Avoid pouring overly thick resin layers at once, which can lead to bubbles and uneven curing. Always ventilate well, mix products as instructed, and use the right roller type for the job. Sand between coats for superior adhesion and finish. If bubbles persist, use a spike roller or light heat (but not open flames). For slippery surfaces, always include anti-slip measures. Address any unevenness by sanding and recoating only when previous layers are fully set.
Close-Ups of Flawless Resin Stair Finishes
Discover detailed images highlighting exceptional resin results. Examine non-slip effects, seamless riser-to-tread coverage, and creative colour effects for both modern and traditional staircases. These showcase the final professional touch achievable in your stair project.

- "Jacquard Pinata" – Alcohol Ink Blast Effect 14ml£4.85"Jacquard Pinata" is designed for artists working with smooth, non-porous surfaces to create vibrant colour effects within resin.
- "Resinstone" – One-Component Methacrylic Resin for Concrete Floors and DrivewaysPrice range: £29.85 through £59.85"Resinstone" is a one-component methacrylic resin for sealing and protecting concrete floors and driveways, suitable for the theme on how to apply…
 "Trasparente" – Multipurpose Clear Epoxy Resin for Casting – Up to 2cmPrice range: £8.45 through £948.85"Trasparente" clear epoxy resin offers a self-levelling, ultra-clear finish suitable for casting layers up to 2cm in DIY and professional woodworking…
 Resin & Paint Application Rollers – Short-Pile, Large, and Sponge TypesPrice range: £3.45 through £4.85Rollers designed for precise and uniform application of epoxy resin, suitable for various surfaces with short-pile, large, and sponge types.
Frequently Asked Questions
Can you use epoxy resin on stairs?
Yes, epoxy resin is suitable for giving stairs a glossy, protective, and durable finish on wood or concrete surfaces.
Which resin is best for concrete stairs?
A methacrylic resin like Resinstone seals and protects concrete steps, providing a long-lasting, hardwearing surface.
How many coats of resin do you need on stairs?
Two coats are typical: the first for adhesion and sealing, the second for a uniform finish and superior wear resistance.
How do you prevent bubbles when applying resin on stairs?
Pour slowly, use a spike roller or gentle heat, and avoid over-mixing to reduce bubbles in the resin finish.
Is resin slippery when used on stairs?
Resin can be slippery when wet, so adding anti-slip beads or a textured layer to the final coat is recommended for safety.
Can you add colour to resin applied on stairs?
Yes, alcohol inks or suitable pigments can be mixed into the resin for decorative or custom finishes on stairs.
How long does resin take to cure on stairs?
Cure times vary, but most resins become touch-dry in 8–24 hours and reach full hardness in about 7 days.
How do you repair damaged resin coating on stairs?
Lightly sand the area, clean thoroughly, and apply a new layer of resin to restore the finish and protection.