 Free shipping on orders over £29,85


how to make resin creations by Lady Giorgia
If you are inspired by Lady Giorgia’s elegant style and want to craft unique resin art pieces, this guide will show you how to create stunning resin trays, coasters, decorative pieces, and ocean-inspired art. Whether you’re a complete beginner or looking to refine your skills, you’ll find actionable steps and free resources to help you succeed at home.
Step-by-step guidance for beautiful handmade resin art projects


What You’ll Need
- Online Video Course – Christmas Tree Decorations Masterclass (Instagram Access): Video course for techniques in festive resin decorations
- Free Step-by-Step Lesson – “Pomegranate Trays” by Natalia Natirum: Tutorial for making resin pomegranate trays
- Free Step-by-Step Lesson “Kiwi Coasters” by Natalia Natirum: Guide to crafting realistic resin kiwi coasters
- Free Step-by-Step Resin Ocean Art Lesson by Natalia Natirum: Learn how to make mesmerising resin ocean art
- Epoxy resin (low or medium viscosity, depending on project)
- Mixing tools and measuring cups
- Disposable gloves and protective covering for your workspace
- Moulds or suitable surfaces (such as serving trays, coaster blanks, or MDF boards)
- Pigments, dyes, and decorative inclusions as desired

Inspiration for Resin Art Projects
Look through online galleries and video courses to discover new resin art ideas, including holiday ornaments, nature-inspired trays, and ocean wave designs. Learning from artists like Lady Giorgia and Natalia Natirum helps you visualise beautiful results and develop your own style.

Step 1: Prepare Your Workspace and Materials
Start by organising your work area in a well-ventilated space. Lay down protective sheeting to catch spills and wear disposable gloves to protect your skin from resin contact. Make sure your moulds, trays, or boards are clean and dry before beginning, as dust or moisture can mar the final result. Have all your tools, pigments, and mixing accessories ready to hand for a smooth workflow.
Step 2: Mix and Colour Your Resin
Following the safety guidelines, measure and mix your epoxy resin and hardener precisely according to the manufacturer’s instructions. Pour slowly into a mixing cup and stir gently to minimise the formation of bubbles. At this stage, you can incorporate colourants or effect powders to suit your chosen project.
For festive projects like ornaments, the Online Video Course – Christmas Tree Decorations Masterclass (Instagram Access) is an excellent resource for creative colouring techniques and special effects such as Petri Art, Cloud, and Silk styles.
Step 3: Pour and Shape Your Design
Carefully pour the mixed and coloured resin into your selected mould or directly onto your surface. For items like pomegranate trays or kiwi coasters, pour in stages if needed, allowing layers of colour or inclusions to develop depth and visual interest. Use a torch or heat gun if recommended, to gently pop any surface bubbles, and keep the surface level to avoid spills or uneven thickness.
To develop your technique for creating trays and coasters with realistic fruit effects or layered patterns, refer to the generously provided tutorials such as the Free Step-by-Step Lesson – “Pomegranate Trays” by Natalia Natirum and Free Step-by-Step Lesson “Kiwi Coasters” by Natalia Natirum.

Step 4: Cure and Finish Your Resin Creation
Allow your resin work to cure fully, which can take from several hours up to a day depending on temperature, humidity, and resin type. Avoid handling or moving your project during this time to prevent surface imperfections or dust settling. Once fully cured, demould your piece or, if working on boards or trays, smooth any rough edges with fine sanding paper.
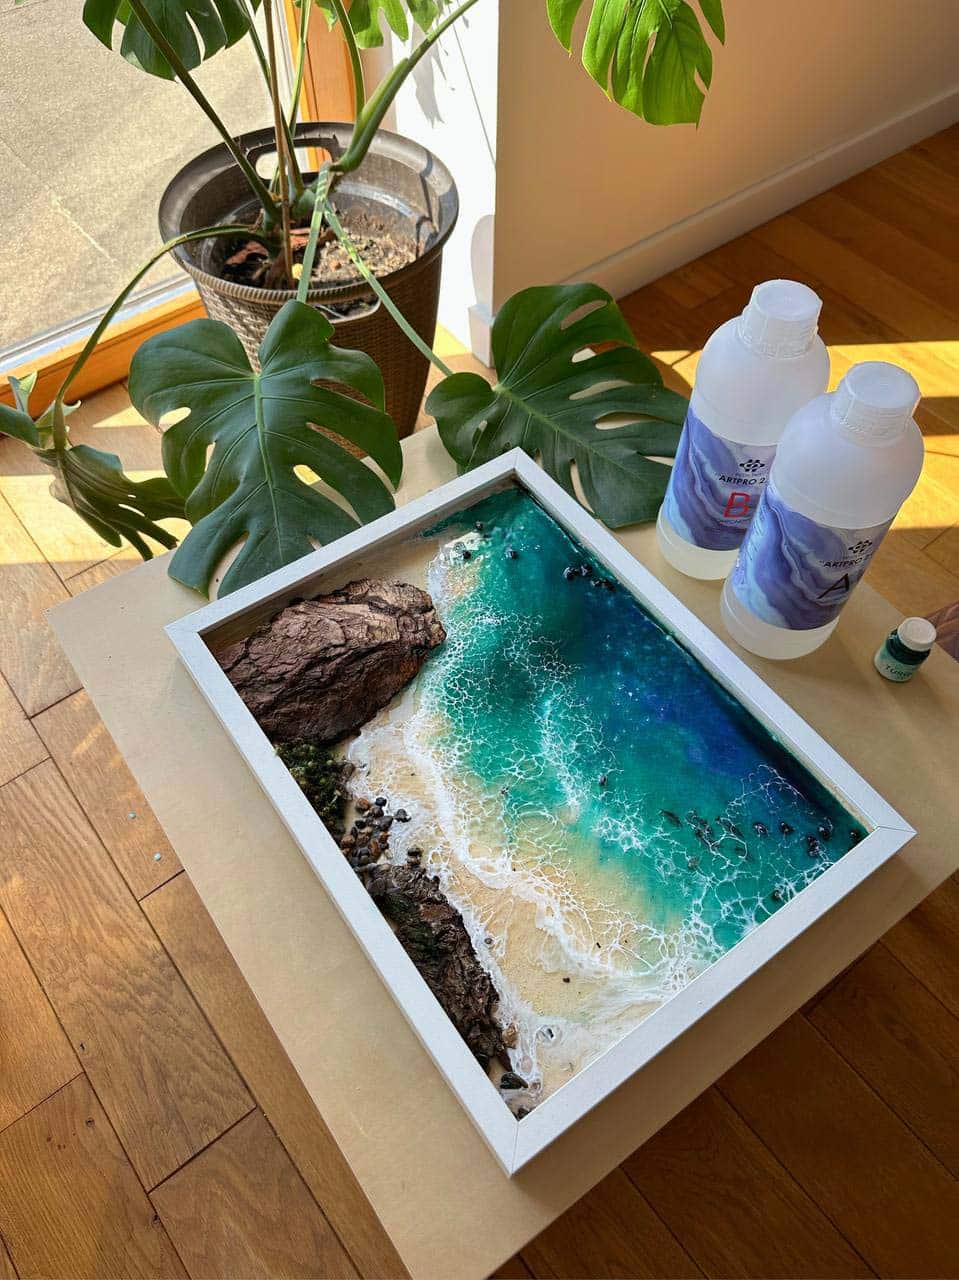
If aiming for ocean wave effects or layered art, get inspired by the Free Step-by-Step Resin Ocean Art Lesson by Natalia Natirum, which demonstrates using different viscosities and layering techniques for striking artistic results.
Tips and Common Mistakes When Making Resin Art
Always protect your workspace and use gloves when working with resin. Resin can be sticky and difficult to clean if spilled or handled directly. Mix resin slowly and thoroughly to reduce bubbles; most resin mishaps involve improper blending of hardener and base. Allow sufficient curing time between resin layers for projects requiring multiple pours, or risk soft, tacky surfaces. Experiment with small projects before starting larger creations to master technique and avoid costly waste. Avoid adding too much pigment or inclusions, as this can impact the curing process or cause aesthetic flaws.
Creative Finishing Touches
Add final touches to your resin pieces with gilding, additional pigments, or surface polishing for a glossy finish. Watch professional tutorials to pick up ideas for advanced decoration and safe hand-finishing techniques.

- Online Video Course – Christmas Tree Decorations Masterclass (Instagram Access)£19.85This online video course offers step-by-step instructions on making Christmas tree decorations using four pouring techniques.
- Free Step-by-Step Lesson – "Pomegranate Trays" by Natalia NatirumOriginal price was: £99.00.£0.00Current price is: £0.00.Free video tutorial for creating resin pomegranate trays using recommended materials suitable for resin art projects.
- Free Step-by-Step Lesson "Kiwi Coasters" by Natalia NatirumOriginal price was: £99.00.£0.00Current price is: £0.00.Video tutorial for making resin kiwi-themed coasters and trays with guidance on materials for resin crafting.
- Free Step-by-Step Resin Ocean Art Lesson by Natalia NatirumOriginal price was: £99.00.£0.00Current price is: £0.00.Free video tutorial for making resin ocean art by Natalia Natirum, suitable for creators following Lady Giorgia's resin creation theme.
Frequently Asked Questions
What basic tools do I need for resin art?
A mixing cup, stirrer, resin, gloves, protective covering, and suitable moulds are essential tools for starting resin art.
How can I reduce bubbles in my resin?
Mix resin slowly and carefully, and gently use a torch over the surface to pop air bubbles after pouring.
How long should I let resin cure?
Curing time varies by product, but most pieces need 12–24 hours undisturbed for the resin to harden completely.
What’s the best way to prepare surfaces?
Ensure moulds or boards are clean, dry, and dust-free before pouring resin to avoid flaws or adhesion issues.
Can I add objects to my resin art?
Yes, you can add decorative items or pigments, but ensure they are dry and non-porous to avoid curing problems.
Which resin projects are best for beginners?
Simple coasters, trays, or shallow-cast items are ideal to build confidence before tackling more complex creations.
How do I demould finished resin art?
Wait until the resin is fully hardened, then gently flex the mould. Avoid forcing the piece out to prevent damage.