 Free shipping on orders over £29,85


How to make rubber using silicone glue?
If you need a flexible mould or custom rubber part, making rubber with silicone glue is both accessible and rewarding. This guide will take you through each stage, from planning your mould to mixing and curing, ensuring you produce reliable silicone rubber results at home or in the workshop.
A clear step-by-step guide for reliable silicone rubber moulds

What You’ll Need
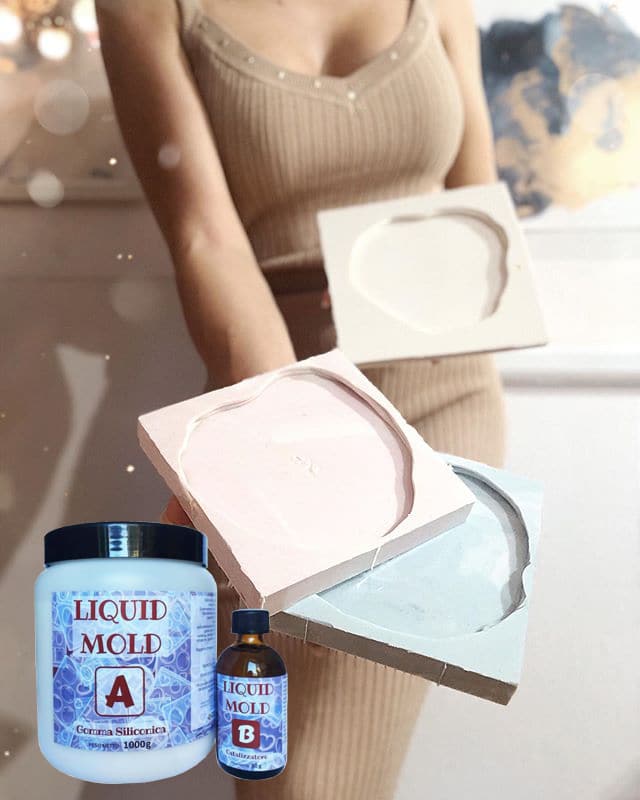
- “Liquid Mould” – Casting Liquid Silicone Rubber, 5-40 Shores, Bi-Component A+B: A bi-component liquid silicone rubber excellent for replicating fine details.
- “Pure Mould” – Translucent Liquid Silicone Rubber for Mould Making: Translucent platinum-based silicone suitable for seeing air pockets and flow.
- “I–Gum” – Non-Toxic Silicone Putty for Mould Making: A non-toxic silicone putty, ideal for smaller objects or direct application by hand.
- Flexible Silicone Cup for Mixing and Pouring Resin: For measuring and mixing your silicone components cleanly and accurately.
- Stirring sticks or spatula
- Scale for accurate measurements
- Protective gloves and a clean working surface
- Original object/model to duplicate
- Release agent (optional)
Tool Focus: Mixing for Consistency
Consistent mixing is crucial for successful silicone mould making. Use a clean, flexible container to combine the two components and mix gradually to avoid air pockets. A flexible silicone cup speeds up clean-up and extraction after mixing.

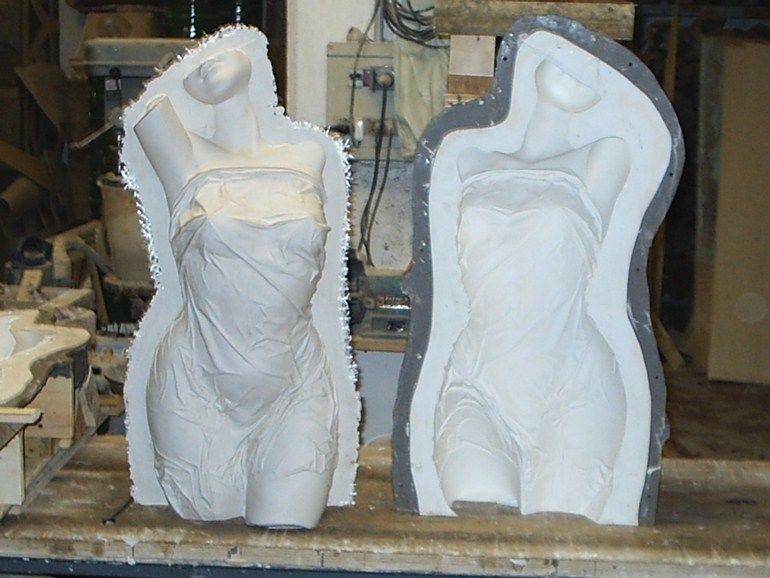
Step 1: Prepare Your Model and Workspace
Start by selecting the object you want to duplicate and ensure it is clean and free of debris or oils. Place it in a container or construct a mould box slightly larger than your model. If your model material can bond with the silicone, consider applying a suitable release agent to prevent sticking. Always use gloves and ensure good ventilation when handling silicone products. A clutter-free workspace minimises dust and makes the process smoother.
Step 2: Measure and Mix the Silicone Components
Consult the packaging of your chosen silicone for the recommended mixing ratio (commonly 1:1 by weight or volume). For instance, the “Pure Mould” – Translucent Liquid Silicone Rubber for Mould Making and “I–Gum” – Non-Toxic Silicone Putty for Mould Making use a 1:1 mix ratio that simplifies this step. Measure each component accurately to ensure your rubber cures properly. Pour the required amounts into the Flexible Silicone Cup for Mixing and Pouring Resin, then begin combining the mixture. Mix thoroughly and scrape the sides to achieve even consistency. Incomplete mixing can lead to sticky, uncured spots.
Step 3: Pour or Apply the Silicone
Depending on your chosen product, either pour or press the silicone mixture around your model. If using a liquid type, such as “Liquid Mould” – Casting Liquid Silicone Rubber, 5-40 Shores, Bi-Component A+B, slowly pour the silicone from one corner of the container, letting it flow naturally around and over the object. Pour slowly from one corner to avoid trapping air bubbles. If using a putty like “I–Gum” – Non-Toxic Silicone Putty for Mould Making, press and shape it directly onto your original, ensuring complete surface contact and coverage. For best results with liquids, gently tap the mould box or use a vibrating table to encourage trapped air to rise and escape.

Step 4: Allow the Silicone to Cure
Once applied, the silicone rubber needs time to cure. Follow the manufacturer’s guideline for curing times, which can range from 3 hours for rapid formulas up to overnight for standard types. Minimise movement and vibration during this stage. Keep moulds away from moisture and dusty environments as they cure. Once cured, carefully demould your rubber. Trim any excess or flash with a sharp blade if necessary.

Tips, Common Mistakes, and Troubleshooting
Always read the safety and usage instructions for your silicone product. Common mistakes include inaccurate measuring, incomplete mixing, and pouring too quickly, all of which can trap air or cause premature setting. For intricate objects, brush a thin layer of silicone onto the surface before pouring the rest. If residue or stickiness appears, uncured areas likely result from improper mixing or measurements. Work at a moderate, consistent pace to avoid rushing the process.
Result Highlight: Flexible, Detailed Silicone Moulds
Silicone rubber moulds recreate remarkable surface and detail definition while offering flexibility and durability. Moulds made using this process are reusable and suitable for resin, plaster, wax, or even low-melt metals, ensuring long-term creative potential on your projects.
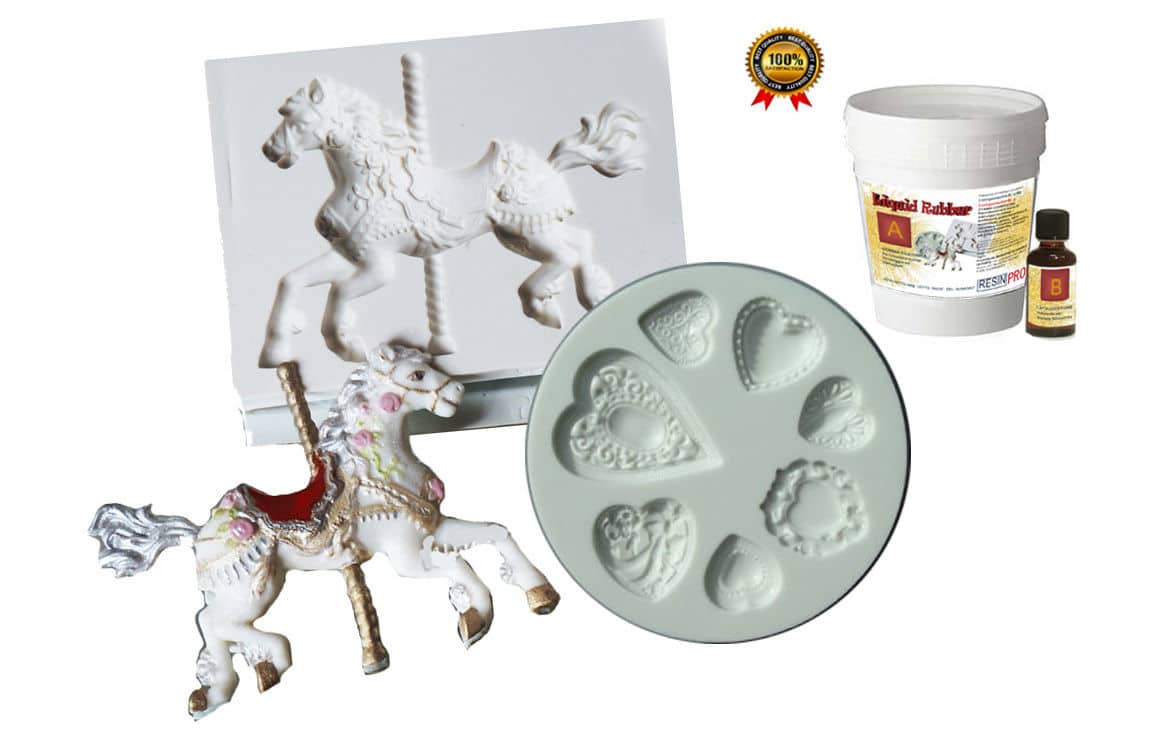
- "Liquid Mould" – Casting Liquid Silicone Rubber, 5-40 Shores, Bi-Component A+BPrice range: £13.45 through £368.85"Liquid Mould" is a casting liquid silicone rubber bi-component product designed for making detailed moulds compatible with resin, soap and polymer…
- "Pure Mould" – Translucent Liquid Silicone Rubber for Mould MakingPrice range: £22.85 through £158.85"Pure Mould" is a translucent, platinum-based liquid silicone rubber designed for mould making compatible with various materials including resins and…
 "I–Gum" – Non-Toxic Silicone Putty for Mould MakingPrice range: £22.85 through £99.85"I–Gum" is a non-toxic silicone putty designed for mould making with a 1:1 mix ratio and a working time suited for crafting applications.
 Flexible Silicone Cup for Mixing and Pouring Resin£5.85Flexible silicone cup designed for epoxy resin mixing and pouring, suitable for artists and crafters.
Frequently Asked Questions
Which type of silicone is best for making rubber moulds?
Choose a bi-component liquid or putty silicone designed for mould making, such as those listed in this guide, to achieve optimal flexibility and detail.
How do I prevent silicone glue from sticking to my original model?
Apply a compatible release agent to the model so the cured mould pulls away cleanly without damaging details.
How long does silicone rubber take to cure?
Curing times vary: rapid formulas set in 3–8 hours; standard silicones may require up to 24 hours. Always check your product guidelines.
Why are some areas of my cured silicone rubber sticky or soft?
Sticky areas are usually caused by incomplete mixing or incorrect ratios. Take care to measure and mix thoroughly.
What should I do if my silicone mould does not fully cure?
Double-check your ratios and mixing process. Contact your supplier if problems persist with a new batch.
How can I avoid air bubbles or imperfections when making rubber with silicone glue?
Mix slowly, pour gently, and tap the container or use vibration to encourage air bubbles to escape before curing.
How should I store leftover silicone glue and components?
Store silicone components in airtight containers at room temperature, away from direct sunlight and moisture.
What materials can be cast into a finished silicone rubber mould?
Silicone rubber moulds are suitable for casting resins, wax, plaster, cement, and select low-melt metals.