 Free shipping on orders over £29,85


How to make silicone rubber molds?
Step-by-step guide for flawless mould making results


Creating your own silicone rubber moulds opens up endless creative possibilities — from casting resin, plaster or wax shapes to reproducing intricate details for artwork, jewellery, candle making or model prototyping. This guide walks you through every key step, making sure both beginners and experienced crafters can confidently produce clean, precise silicone moulds tailored to their project needs.

What You’ll Need
- “Pure Mould” – Translucent Liquid Silicone Rubber for Mould Making – for detailed transparent moulds; excellent for observing the casting process
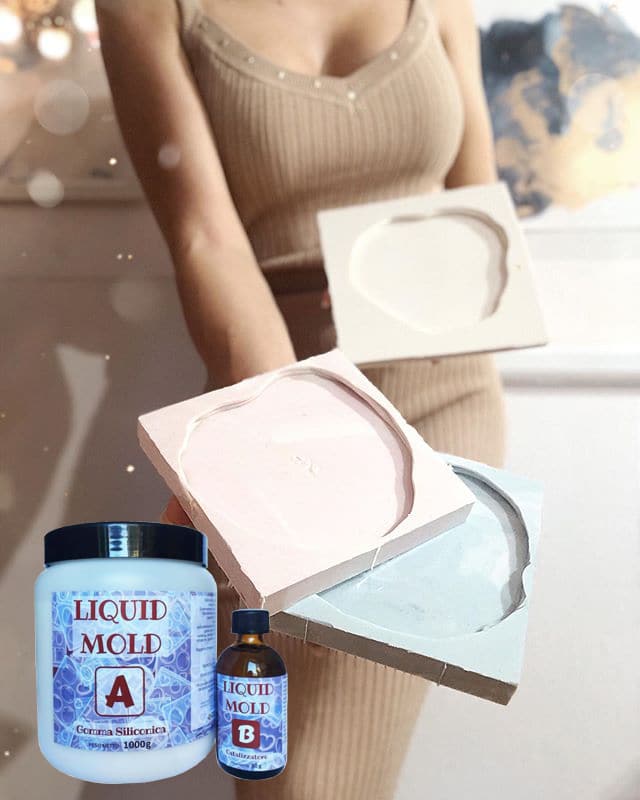
- “Liquid Mould” – Casting Liquid Silicone Rubber, 5-40 Shores, Bi-Component A+B – ideal for intricate shapes and small-scale objects
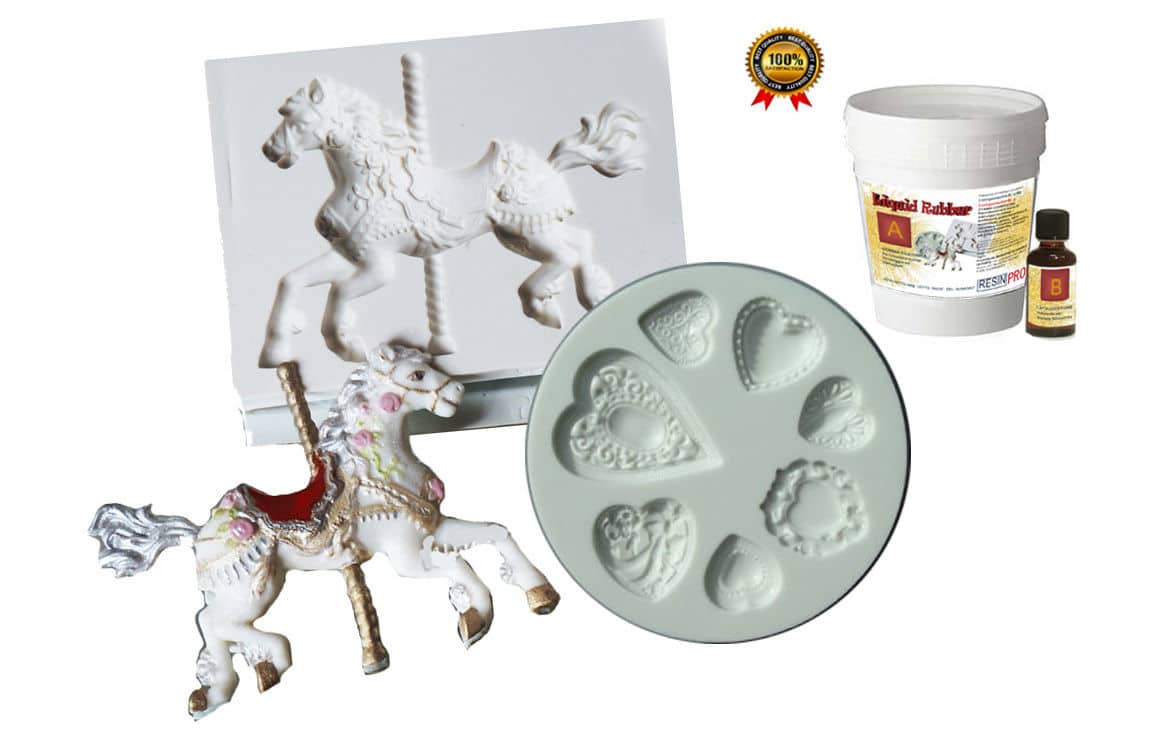
- “Liquid Mould” – Casting Liquid Silicone Rubber, 15 Shores 20.8 kg – suitable for detailed moulds and multiple reproductions
- “I–Gum” – Non-Toxic Silicone Putty for Mould Making – easy for quick impressions and non-toxic applications without gloves
- Mould box or container for holding the silicone and item to replicate
- Mixing cups, spatulas, digital scale
- (Optional) Release agent for demoulding
- (Optional) Gloves and apron for cleanliness

Essential Tools and Workspace Setup
Arrange all required materials before you start: silicone rubber, measuring tools, a clean mixing area and personal protective equipment. Good preparation ensures a smooth mould making process and minimises mistakes.
Step 1: Prepare the Model and Work Area
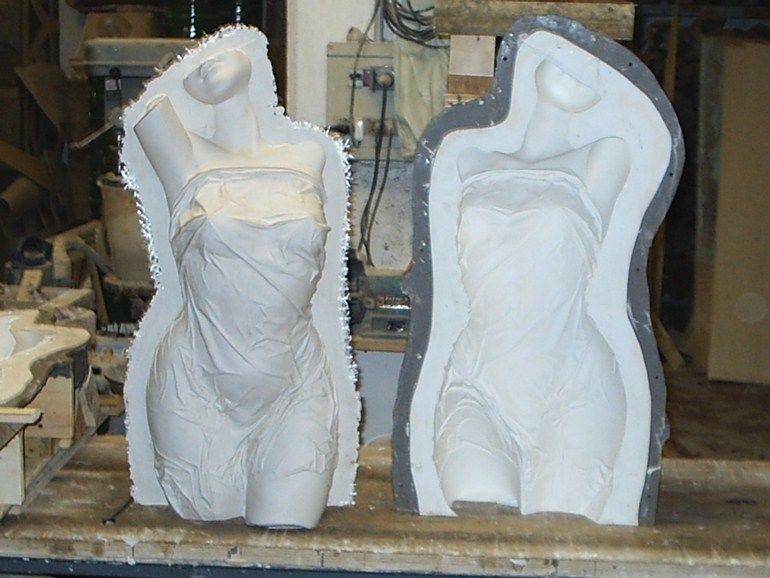
Begin by selecting the object you wish to duplicate (known as the “master”). Clean it thoroughly to remove dust or residue, which could affect mould detail. Place your item inside a mould box or container, ensuring a snug fit. If your object is porous or highly detailed, applying a thin layer of release agent can help achieve easy demoulding later. Arrange your materials and tools on a flat surface in a well-ventilated space to prevent accidental spills or contamination.


Step 2: Measure and Mix the Silicone Components
Accurate measuring is critical. Always measure the mixing ratio carefully to avoid curing issues. For liquid silicone rubbers such as “Pure Mould” and “Liquid Mould”, follow the manufacturer’s guidance — most require a 1:1 ratio by weight or specific catalyst addition. Pour the required amounts into a clean mixing cup. Mix slowly and consistently, scraping the sides and bottom, until the colour is uniform and free of streaks.
For quick impressions, “I–Gum” – Non-Toxic Silicone Putty for Mould Making offers a simple 1:1 hand mix, ideal for smaller objects and direct application without gloves, thanks to its non-toxic composition.
Avoid rapid stirring, which can introduce unwanted air bubbles inside your mould.
Step 3: Pour or Apply the Silicone Over Your Model
With the silicone thoroughly blended, gently pour it over your master in the mould box. For best results, pour from one corner and let the liquid flow naturally, filling crevices and details. This technique helps minimise air entrapment. Use a release agent when working with complex or porous items. If using silicone putty such as “I–Gum”, press and shape the mixed putty directly over the object, ensuring it captures every detail.
Tap the mould box lightly on the surface to help air bubbles escape. If possible, use a vacuum chamber or pressure pot to eliminate bubbles, especially for highly detailed work.
Step 4: Curing and Demoulding
Allow the silicone rubber to cure for the recommended time — typically between 3 to 12 hours depending on the specific product and environmental conditions. Allow full curing time before demoulding to prevent tearing. Check that the mould surface feels firm to the touch before removal. Gently flex and peel away the silicone from the master, taking care not to stretch or damage fine details. If the mould resists, double-check the curing time and try small movements to ease it off.
Step 5: Inspect and Use Your Silicone Mould
Carefully inspect your finished silicone mould for bubbles, tears or imperfections. Clean any residues and test the mould’s flexibility before using it for casting resin, wax, plaster or other materials. If the outcome reveals small flaws or you noticed air entrapment, adjust your mixing or pouring technique for future attempts.

Tips and Common Mistakes in Silicone Mould Making
Mixing technique and patience are essential for precise results. Mix slowly and thoroughly to prevent air bubbles. Be sure to avoid under-mixing, as streaks or unmixed portions can cause sticky spots. For intricate items, always use a suitable release agent to avoid damaging the original or the new mould. Overlooking the mixing ratio or de-moulding too soon are common pitfalls. If you encounter issues like incomplete curing or sticky surfaces, revisit your ratio and mixing habits for your next project.
Troubleshooting and Fine Details
Encountered air bubbles or curing problems? Slow mixing and the use of release agents and pressure pots help achieve flawless, detailed moulds. Always inspect finished moulds before use to avoid surprises.

- "Pure Mould" – Translucent Liquid Silicone Rubber for Mould MakingPrice range: £23.95 through £166.95"Pure Mould" translucent silicone rubber is designed for mould making, compatible with various materials including resins and plaster.
- "Liquid Mould" – Casting Liquid Silicone Rubber, 5-40 Shores, Bi-Component A+BPrice range: £14.45 through £387.45"Liquid Mould" is a casting liquid silicone rubber suitable for making detailed moulds of small objects with fine details, compatible with resin and…
- "Liquid Mould" – Casting Liquid Silicone Rubber, 15 Shores 20.8 kg£348.85"Liquid Mould" is a casting liquid silicone rubber suited for making detailed moulds, supporting various materials in the theme of how to make…
- "I–Gum" – Non-Toxic Silicone Putty for Mould MakingPrice range: £24.00 through £104.95"I–Gum" is a non-toxic silicone putty designed for mould making, suitable for resin, polyurethane, wax, and other materials.
Frequently Asked Questions
What is the best way to mix silicone rubber for moulds?
Mix slowly and thoroughly at the recommended ratio, scraping the container sides, until the mixture is completely uniform in colour.
How can air bubbles be prevented in silicone moulds?
Pour silicone slowly from one spot, tap the container gently, and consider using a vacuum chamber or pressure pot where possible.
How soon should I demould after pouring silicone?
Wait for the full recommended curing time, usually 3–12 hours; de-moulding too soon can cause rips or incomplete cures.
When should I use a release agent for silicone moulds?
A release agent is helpful when casting over porous, delicate, or complex objects, or when working with non-silicone-safe masters.
How do I clean and maintain silicone moulds?
Wash with mild soap and water, and store moulds in a cool, dry place away from direct sunlight when not in use.
What if my silicone mould is still sticky after curing?
Sticky areas typically mean incomplete mixing or incorrect ratios; recast with careful attention to preparation.
Can silicone moulds be reused and for how long?
Yes, quality silicone moulds can be reused multiple times as long as they are properly handled and cared for.