 Free shipping on orders over £29,85


How to make transparent resin cubes
Creating transparent resin cubes is an impressive way to showcase embedded objects, preserve memories, or make modern home décor. This guide will walk you through every stage, from preparation to demoulding, ensuring clear and professional results whether you’re a beginner or a seasoned crafter.
Step-by-step guide for crystal-clear resin cube projects at home

What You’ll Need
- “Trasparente” – Multipurpose Clear Epoxy Resin for Casting – Up to 2cm: For cubes up to 2 cm thick, gives a high-gloss, bubble-free finish.
- “EpoxyTable 5-Five” – Deep Pour Epoxy Resin for Tables and Large Projects – Up to 5cm: For cubes between 2–5 cm thick, ensures clarity without overheating.
- “Epoxytable 10-Ten” – Deep Pour Epoxy Resin for Tables, Up to 10cm Casting: For extra-thick cubes up to 10 cm, designed for ultra-clear deep casting.
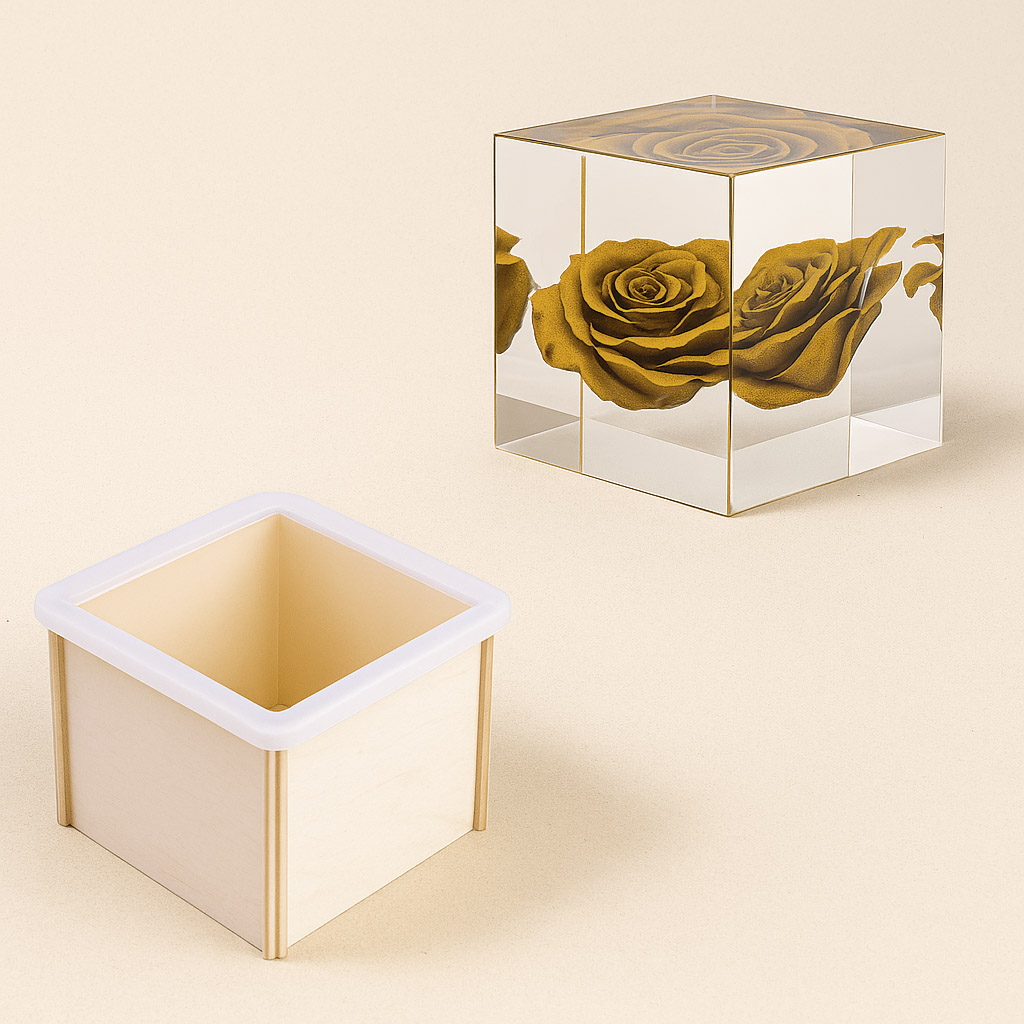
- “Cube Mould” – Square Silicone Mould for Resin, 8.5×8.5cm: A non-stick, professional silicone mould ideal for perfect cube shapes.
- Nitrile gloves and protective apron
- Accurate kitchen scales
- Mixing containers and sticks

Essential Materials for Clear Resin Cubes
Choose a transparent, non-yellowing epoxy and a professional-grade silicone mould to ensure your resin cubes turn out smooth and glasslike. Always gather all mixing and safety equipment in advance for a smooth workflow.

Step 1: Prepare Your Workspace and Mould
Begin by Always work in a dust-free environment to prevent particles from landing in your resin while curing. Lay out a protective covering for your surface and gather all materials for easy access. Before use, clean your “Cube Mould” – Square Silicone Mould for Resin, 8.5×8.5cm to ensure it’s free from dust and oil; a quick wipe with isopropyl alcohol is effective. Ensure your workspace is well-ventilated and at a stable temperature (ideally 20–25°C), as temperature can affect the curing and clarity of your resin cubes.
Step 2: Measure and Mix Your Resin
Select the most appropriate resin for your cube’s intended thickness: use “Trasparente” – Multipurpose Clear Epoxy Resin for Casting – Up to 2cm for smaller cubes, “EpoxyTable 5-Five” – Deep Pour Epoxy Resin for up to 5cm, and “Epoxytable 10-Ten” – Deep Pour Epoxy Resin for super-deep applications. Measure and mix resin precisely by weight, following the manufacturer’s guidelines—typically a 2:1 or 1:1 ratio by weight. Stir the mixture slowly and thoroughly, scraping the sides and bottom of the container for at least 3–5 minutes to avoid unmixed spots, which can result in cloudiness or soft patches. Avoid whipping air into the mix to keep bubbles to a minimum.
Step 3: Pour the Resin and Remove Bubbles
Once your resin is mixed, Pour slowly to minimise bubbles directly into the centre of your clean mould. For deep cubes, consider pouring in layers to maintain clarity and control heat; pour the next layer after the previous one has set to a gel stage. To remove trapped air bubbles, gently exhale over the surface or use a toothpick for stubborn bubbles. Small handheld torches or heat guns may be used briefly at a distance, but be careful not to overheat or scorch the resin.

Step 4: Curing and Demoulding Your Resin Cube
Allow the resin to cure undisturbed for the entire recommended time, typically 12–48 hours depending on layer thickness and room conditions. Do not demould too early or too late; for most silicone moulds, the ideal time is within 8–12 hours after full set to avoid the resin adhering to the mould or getting deformed. If you’ve used the “Cube Mould” – Square Silicone Mould for Resin, this should ease the removal process and preserve the cube’s perfect edges. Once demoulded, handle the cube gently as the resin continues to harden over the following days.

Tips and Common Mistakes
For best results, cast when humidity is low, as high moisture can cause cloudiness. Always check your resin’s expiry date—old resin may not cure clear. Avoid touching or moving the mould during curing, which can lead to uneven surfaces. If embedding objects, make sure they are dry and sealed to prevent bubbles. Should surface imperfections occur, light sanding and a finishing resin coat can restore clarity.
Expert Insights for Flawless Results
Maintain the right room temperature and avoid excess humidity for impeccable clarity in your resin cubes. Patient demoulding and careful curing stages are the final keys to success.

- "Cube Mould" – Square Silicone Mould for Resin, 8.5×8.5cm£8.45Square silicone mould for resin projects to create clean, durable cube shapes using professional materials.
- "EpoxyTable 5-Five" – Deep Pour Epoxy Resin for Tables and Large Projects – Up to 5cmPrice range: £16.85 through £1,099.85"EpoxyTable 5-Five" is designed for deep pour casting up to 5cm, offering a transparent, bubble-free finish suitable for tables and large projects.
 “Epoxytable 10-Ten” – Deep Pour Epoxy Resin for Tables, Up to 10cm CastingPrice range: £33.85 through £334.85“Epoxytable 10-Ten” is suitable for creating tables and deep castings up to 10cm with low viscosity and UV resistance.
 "Trasparente" – Multipurpose Clear Epoxy Resin for Casting – Up to 2cmPrice range: £8.45 through £948.85"Trasparente" is a clear, self-levelling epoxy resin suitable for detailed castings up to 2cm, fitting the theme 'How to make transparent resin…
Frequently Asked Questions
What is the best type of mould for transparent resin cubes?
A silicone cube mould provides non-stick, precise edges and easy removal for truly clear resin cubes.
Which resin should I choose depending on my cube’s thickness?
For cubes up to 2 cm use "Trasparente"; up to 5 cm "EpoxyTable 5-Five"; up to 10 cm use “Epoxytable 10-Ten”.
How can I prevent visible bubbles in clear resin cubes?
Mix resin slowly, pour gently, and use a heat gun or exhale over the surface to eliminate bubbles.
What is the recommended curing time for resin cubes?
Curing times vary by resin, but most cubes need 24–48 hours to fully harden before safe demoulding.
How can I demould the cube without damaging the edges?
Wait until the resin is set but not too hard, then gently flex the silicone mould to release the cube cleanly.
Why does my resin cube become yellow over time?
Exposure to UV light or using resin without UV protection can cause yellowing—always choose resins with strong UV filters.