 Free shipping on orders over £29,85


How do you make a mould with phase silicone rubbers?
Simple steps for flawless silicone rubber mould creation at home


Mastering the technique of mould making with phase silicone rubbers opens up exciting possibilities for home crafters and professionals alike. This guide will show you, step-by-step, how to prepare, mix, and apply silicone rubber for producing detailed and robust moulds—essential for projects ranging from resin casting to artistic jewellery making.
What You’ll Need
- “Pure Mould” – Translucent Liquid Silicone Rubber for Mould Making — ideal for transparent, detailed applications
- “Liquid Mould” – Casting Liquid Silicone Rubber, 5-40 Shores, Bi-Component A+B — suitable for intricate projects requiring crisp detail
- “I–Gum” – Non-Toxic Silicone Putty for Mould Making — best for small items or when direct application is preferred
- “Five” – 5-Piece Silicone Mould Set for Jewellery Making 9x8cm
- Mixing cups and stirring sticks
- Model or item to be moulded (thoroughly cleaned)
- Mould box or barrier (e.g., plastic container)
- Gloves and protective equipment as needed

Choosing the Right Silicone Rubber
Different silicone rubbers suit different projects—select liquid options for maximum detail, or putty for quick, direct applications on small shapes. Always consult your project scale and complexity before deciding.

Step 1: Prepare the Model and Workspace
Carefully plan your mould before you begin. Select the item you wish to reproduce and ensure it’s thoroughly cleaned and dry. Any debris or dust will be permanently captured in the silicone, impacting the finish. Build a sturdy mould box or use an off-the-shelf container large enough to allow at least 1 cm clearance around the model. Use a clean, dust-free workspace to prevent contamination.
If your model is porous (e.g., wood, plaster), seal it with a suitable lacquer or sealer and allow it to dry. This prevents the silicone from adhering unintentionally and helps with demoulding later. Place the sealed model securely in the mould box; you can use glue, clay or double-sided tape to hold it in position if needed.
Step 2: Measure and Mix the Silicone Rubber
Accurate measuring and mixing are key to success. Read the silicone rubber product instructions carefully—different types require slightly different mixing ratios and methods.
For pouring liquid silicone rubber, such as “Pure Mould” or “Liquid Mould”, weigh out equal parts of the two components unless specified otherwise (usually a 1:1 by weight or volume). Pour both parts into a mixing cup, ensuring there’s enough combined volume to cover the model and fill the mould box.
Mix the silicone thoroughly to prevent soft spots, scraping around the sides and bottom of your cup. Work steadily, but try to minimise air bubbles entering the mixture. If you’re using putty, like “I–Gum”, knead equal parts together until the colour is uniform and free of streaks.
Step 3: Pour or Apply the Silicone to Make the Mould
Ready your mould box and model, then gently pour the mixed silicone rubber into one corner of the box, allowing it to flow slowly and surround the shape—this helps reduce trapped air. If the project is delicate, pour a thin stream from high above to burst any remaining bubbles.
For the putty method, apply the thoroughly mixed “I–Gum” – Non-Toxic Silicone Putty directly onto the surface of the item, pressing firmly to capture every detail, and then shape the remainder around it for a complete covering.
Refer to your product instructions for setting times: liquid silicone rubbers typically require several hours to cure, whereas putties may be ready to demould in 20–40 minutes.

Step 4: Removing and Using Your Silicone Mould
Once fully cured, gently flex the mould box or container to release the silicone block. Take care not to tear delicate sections. Peel the silicone from the original item slowly; a good phase silicone rubber should provide excellent flexibility for safe demoulding of complex shapes and undercuts.
You can now use your fresh silicone rubber mould for casting resins, wax, concrete, or for creative crafts. The pliability and detail retention of phase silicone rubbers ensure high-quality results with multiple reproductions.

Tips, Common Mistakes and Troubleshooting
Seal porous models to avoid sticking—never pour silicone directly onto unfinished wood or dry plaster.
Always measure precisely and mix thoroughly for reliable curing. Incomplete mixing may leave sticky, uncured patches.
Mix and pour carefully to prevent unwanted air bubbles; tapping the filled mould box gently can help bubbles rise and escape. Patience during curing is vital—do not attempt to demould before the recommended time.
If you work with intricate jewellery or shapes, you may benefit from using mould sets like the “Five” – 5-Piece Silicone Mould Set for Jewellery Making 9x8cm for reliable, reusable templates.
Insider Advice for Mould Makers
For best results, keep tools and containers free of dust and oils. Patience during curing leads to superior surface quality and longer mould life—never force demoulding or skip the prepping step.

- "Pure Mould" – Translucent Liquid Silicone Rubber for Mould MakingPrice range: £22.85 through £158.85"Pure Mould" translucent liquid silicone rubber is suited for mould making with various casting materials; suitable for professional and hobby use.
- "Liquid Mould" – Casting Liquid Silicone Rubber, 5-40 Shores, Bi-Component A+BPrice range: £13.45 through £368.85Casting liquid silicone rubber suitable for highly detailed moulds including small objects and complex shapes.
 "I–Gum" – Non-Toxic Silicone Putty for Mould MakingPrice range: £22.85 through £99.85"I–Gum" silicone putty is a two-component, non-toxic product suitable for mould making with resin and other materials.
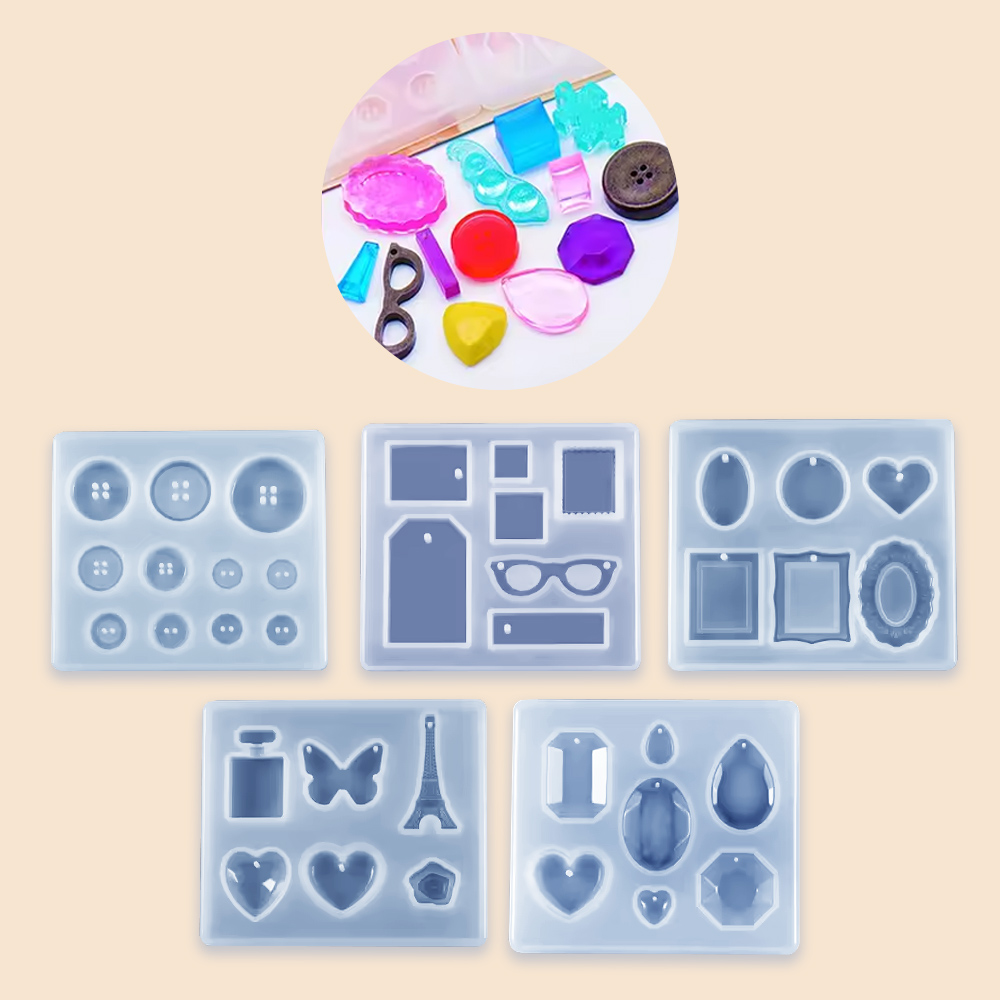 "Five" – 5-Piece Silicone Mould Set for Jewellery Making 9x8cmOriginal price was: £12.85.£9.15Current price is: £9.15.This 5-piece silicone mould set suits jewellery making projects, designed for DIY enthusiasts and resin artists.
Frequently Asked Questions
Which silicone rubber gives the best detail?
Liquid phase silicone rubbers, such as Pure Mould or Liquid Mould, are best for capturing very fine details and intricate textures.
Can I speed up the cure time?
Follow product instructions closely. Higher temperatures may shorten curing, but avoid overheating which can affect mould quality.
How can I prevent air bubbles in my mould?
Pour silicone slowly in a thin stream and tap the mould box gently to help bubbles escape before curing.
Do I need to seal my model before pouring silicone?
Yes, seal porous items like wood or plaster to prevent silicone from sticking and ensure easy removal after curing.
How do I clean and care for silicone moulds?
Wash silicone moulds with warm soapy water, rinse thoroughly, and store them dry and out of direct sunlight.
Can I reuse silicone moulds for different materials?
Yes, most silicone moulds are reusable with various materials, but check compatibility to avoid residue or damage.