 Free shipping on orders over £29,85

How are resin cabochons made?
Step-by-step process for stunning resin cabochon jewellery.

Crafting your own resin cabochons opens up colourful, creative possibilities for jewellery, embellishments, and gifts. This guide walks you through the complete process — from preparing your workspace to curing flawless, shiny cabochons. Whether you’re a beginner or a seasoned crafter, follow these steps for polished, professional results every time.
What You’ll Need
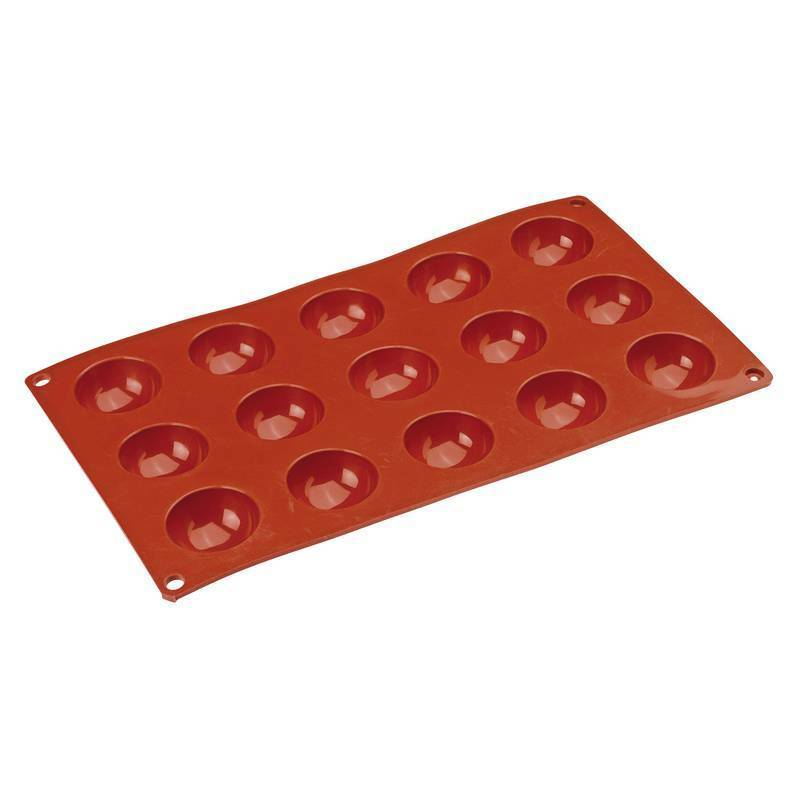
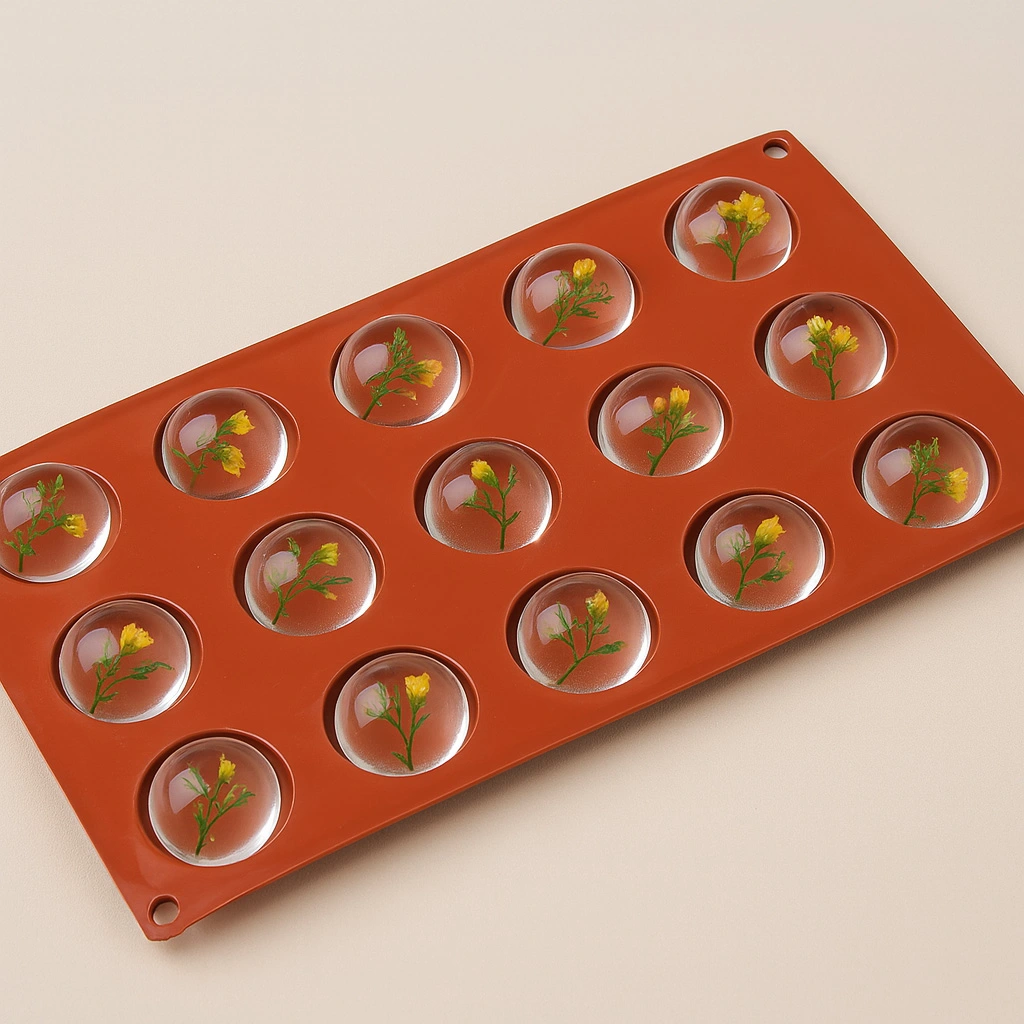
- “Cabochon-15” – Silicone Mould for Resin, Chocolate, Soap, Plaster – Ø40mm: A silicone mould specifically designed for casting cabochons.
- “Liquidissima” – Epoxy Resin For Creations & Jewellery: Clear, low-viscosity epoxy ideal for detailed and transparent cabochons.
- “UV–Creation” – Fast Acrylic Resin, 3 Minute UV Cure: A UV-cured acrylic resin for rapid, glossy results.
- “One-2-One” – Epoxy Resin for Handcraft, 1:1 Mixing Ratio: Non-toxic, easy-mixing epoxy for beginners and experienced crafters alike.
- Mixing cups and sticks
- Protective gloves and cover for your workspace
- Optional: colouring pigments, glitter or decorative inclusions
- UV lamp (if using UV resin)
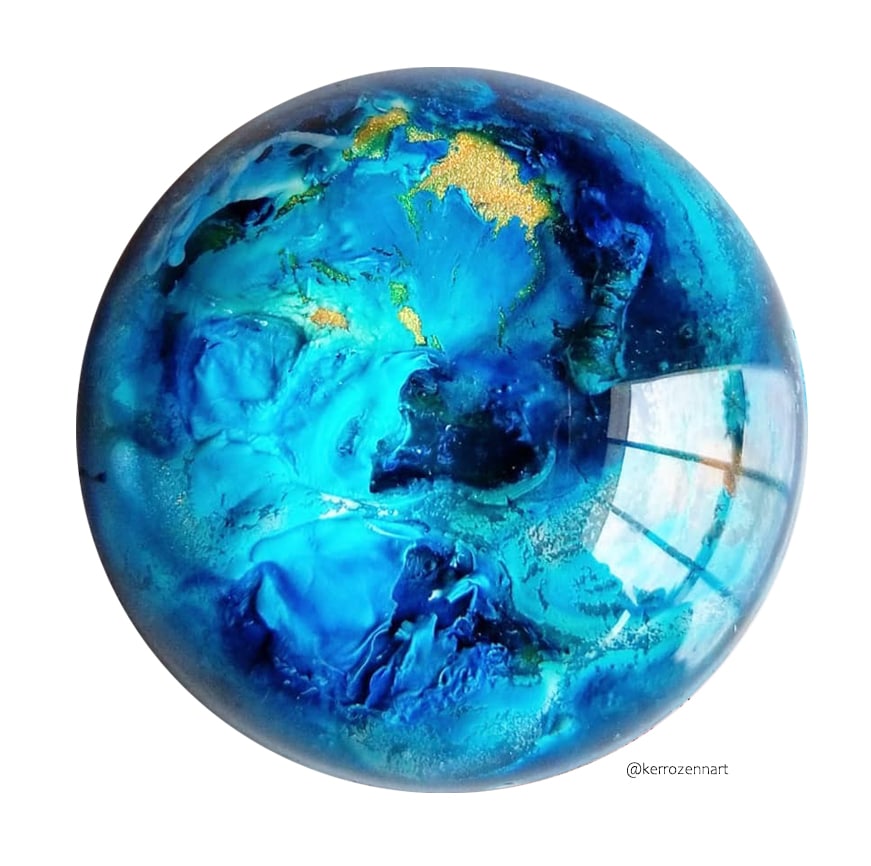
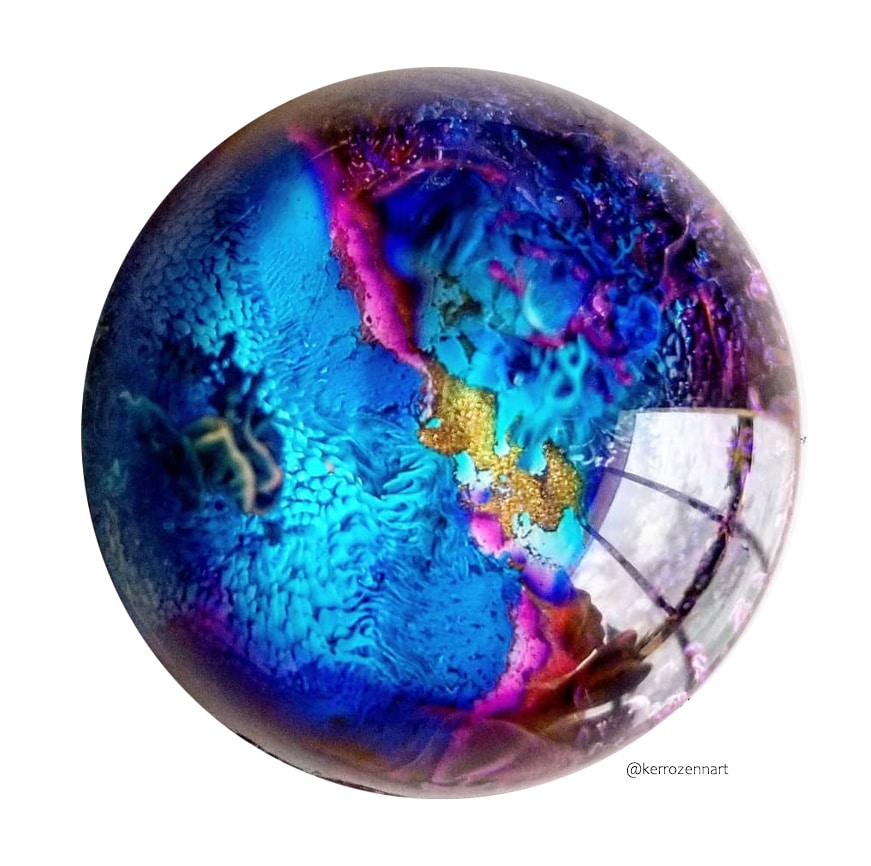
Examples of Resin Cabochon Projects
Explore colourful resin cabochon jewellery, pendant designs, and decorative items. Notice the clarity and customisation possible with the right resin and silicone moulds.
Step 1: Prepare Your Workspace and Mould
Choose a well-ventilated area and cover your work surface to protect it from spills. Put on gloves to avoid skin contact with resin. Select a clean, dry silicone mould specifically designed for cabochons, such as the “Cabochon-15” – Silicone Mould for Resin, Chocolate, Soap, Plaster – Ø40mm. Carefully inspect that the mould has no dust or debris, as these can affect the clarity of your cabochons.


Step 2: Mix and Colour Your Resin
Measure your chosen resin according to the manufacturer’s instructions. For epoxy-based options, such as “Liquidissima” – Epoxy Resin For Creations & Jewellery, mix the two components thoroughly to ensure a clear and bubble-free result. Beginners may prefer “One-2-One” – Epoxy Resin for its easy 1:1 mixing ratio by volume. If working with “UV–Creation” – Fast Acrylic Resin, simply dispense the resin directly as no mixing is required. Now is the time to add colourants, glitter, or embed decorations if desired, gently stirring until evenly incorporated while taking care to minimise bubbles.
Step 3: Pour and Cure
Slowly pour the resin mixture into the prepared cabochon mould, filling each cavity to the desired level. Pouring slowly helps to avoid trapping air bubbles, which can compromise clarity. For UV resin, once filled, place the mould under a UV lamp and cure according to the product instructions, usually around three minutes. For epoxy resins, allow the cabochons to cure at room temperature, undisturbed, for the recommended period (often several hours to overnight). Avoid moving the mould during curing, as this can cause surface imperfections.


Step 4: Demould and Finish
When fully cured, gently remove each cabochon by flexing the silicone mould. If the resin feels tacky, allow additional curing time. Inspect your cabochons for sharp edges or overflow, which can be carefully sanded for a perfectly smooth, glossy finish. Clean your mould after use and store it away from direct sunlight to maintain its longevity for future projects.
Tips, Troubleshooting and Common Mistakes
For the best clarity, always use the recommended mixing ratios and avoid over-mixing, which can introduce bubbles. Work in a dust-free area to prevent contamination, and make sure your mould is meticulously clean before pouring. If bubbles appear, a gentle pass with a heat gun or a pin can help remove them before curing. Be patient — rushing the curing process may result in cloudy or uneven cabochons.

Troubleshooting Gallery for Resin Cabochons
See real examples of common cabochon issues—bubbles, uneven surfaces, and colour mixing errors—with tips on how to achieve a flawless finish every time.
- "Cabochon-15" – Silicone Mould for Resin, Chocolate, Soap, Plaster – Ø40mmOriginal price was: £14.95.£11.85Current price is: £11.85."Cabochon-15" silicone mould suitable for resin and other crafts. It is designed to create cabochons and small decorative shapes.
- "Liquidissima" – Epoxy Resin For Creations & JewelleryPrice range: £12.85 through £31.85"Liquidissima" epoxy resin is suitable for jewellery and creations with intricate moulds and offers a clear finish and self-levelling properties.
 "UV–Creation" – Fast Acrylic Resin, 3 Minute UV CurePrice range: £8.45 through £62.95This fast acrylic resin cures within 3 minutes under UV light, suitable for jewellery makers seeking a clear, glossy finish.
 "One-2-One" – Epoxy Resin for Handcraft, 1:1 Mixing RatioPrice range: £15.95 through £59.95"One-2-One" epoxy resin offers a medium viscosity and 1:1 mixing for clear, suitable resin cabochon and jewellery crafting.
Frequently Asked Questions
What type of mould is best for making resin cabochons?
A silicone mould made for cabochons provides smooth release and glossy finishes, ideal for jewellery work.
Is UV resin suitable for making cabochons?
Yes, UV resin cures quickly and works well for small cabochons, giving a clear, glossy finish.
How can air bubbles be avoided in resin cabochons?
Mix resin slowly, pour gradually, and use a heat source or pin to remove bubbles before curing.
How long does it take for resin cabochons to fully cure?
Epoxy resin typically cures overnight, while UV resin cures within minutes under a UV lamp.
Is it possible to add colourants or glitter to resin cabochons?
Absolutely. Add colour pigments or glitter while mixing your resin for custom designs.
Are resin cabochons safe around water?
Cured epoxy resin is water-resistant, making cabochons suitable for most jewellery uses.
Is it necessary to polish resin cabochons?
If the cabochon surface is not perfectly glossy, a gentle polish with a suitable compound will enhance shine.