 Free shipping on orders over £29,85


How do you apply resin to dry buds?
Preserving dry buds in resin is a creative way to display natural beauty in jewellery, art, and home décor. This guide takes you through every step—from prepping delicate flowers to sealing them within crystal-clear resin—so your finished piece remains vibrant and professional. Whether you want to craft pendants, decorative coasters, or simply showcase keepsakes, careful technique will help you achieve flawless results and lasting clarity.
Master the technique of preserving dry buds beautifully in resin.


What You’ll Need
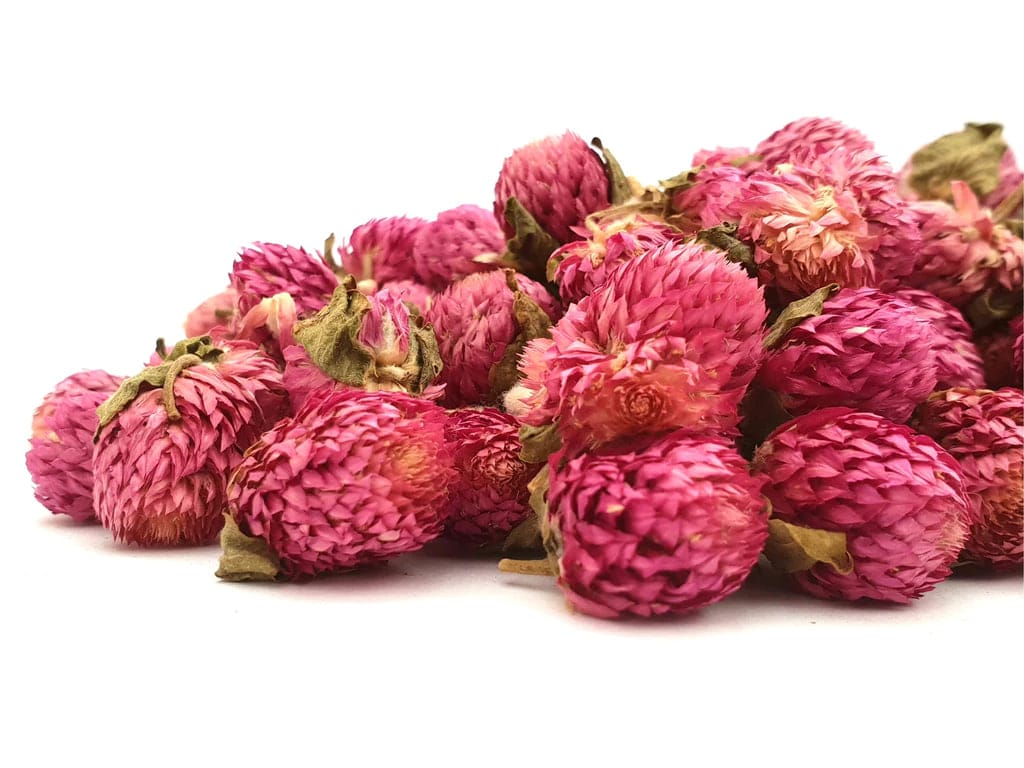
- Natural Dried Flowers for Art Projects and Epoxy Resin Casting – For best results, choose prepped, dry floral elements suitable for embedding.
- “One-2-One” – Epoxy Resin for Handcraft, 1:1 Mixing Ratio – An easy-mix, clear epoxy ideal for jewellery or crafts.
- “UV–Creation” – Fast Acrylic Resin, 3 Minute UV Cure – For projects needing quick setting under UV light.
- “Trasparente” Epoxy Resin Kit 800g + Mica Powder 10g – 10 Colour Variations – For larger castings or if colouring your resin.
- Silicone moulds or bezel settings (according to your project)
- Mixing cups and wooden sticks
- Nitrile gloves and a dust-free workspace
- UV lamp (if using UV–Creation resin)

Key Tools and Materials for Resin Casting with Dry Buds
Choose your resin and dried material carefully. Prepped, naturally dried buds and a suitable resin are essential for clarity and long-term preservation. Use a dust-free workspace, measuring cups, gloves, and quality silicone moulds to protect your work and hands. UV lamps help if using fast-cure acrylic types. Preparation is everything for radiant results.

Step 1: Prepare Your Workspace and Materials
Set up a clean, well-ventilated area free from dust. Use a silicone mat or wax paper to protect your surface. Always wear nitrile gloves to prevent skin contact with resin.
Examine your dried buds and ensure they are completely moisture-free, as any residual dampness can cause discolouration or bubbles. If needed, allow them to air dry for several extra days in a dry location. Arrange everything within easy reach to make the casting process smooth and efficient.
Always dry buds thoroughly before embedding – moisture will interfere with the resin’s curing and clarity.
Step 2: Mix and Pour the Resin
Choose the appropriate resin for your project’s size and curing needs. For jewellery or small decor, a low viscosity product such as “One-2-One” – Epoxy Resin for Handcraft, 1:1 Mixing Ratio makes preparation straightforward.
Carefully follow the recommended resin-to-hardener ratio, mixing slowly to minimise bubbles. Pour a thin layer into the mould or bezel and allow it to partially set—this helps hold the buds in position once added.
Use thin layers of resin for best clarity and to prevent materials from floating or shifting during curing.
Step 3: Place and Secure the Dry Buds
Using tweezers, delicately position each dry bud onto the semi-set resin. For best results, gently press the bud so it sits flush with the resin layer, avoiding any trapped air pockets. Take your time; correct placement at this stage ensures a beautiful final result.
Once all buds are arranged, pour additional resin to cover them completely—if working with deep moulds, do this in several stages to avoid overheating or incomplete curing. Some users might prefer rapid-setting products like “UV–Creation” – Fast Acrylic Resin, 3 Minute UV Cure for small pieces that need quick handling.
Avoid moving buds after initial placement to maintain clarity and avoid internal bubbles.
Step 4: Cure and Finish Your Piece
Allow the resin to cure as per the manufacturer’s instructions. For most epoxy resins, cover your mould to protect from dust and let it rest at room temperature. Do not attempt to demould or handle before the resin is fully set, as premature movement can cause fingerprints or surface defects.
If using UV resin, place your cast piece under a UV lamp, ensuring all parts are exposed until fully hardened. To enhance your artwork further, polish any rough edges or add colour effects with the mica powder included in kits such as “Trasparente” Epoxy Resin Kit 800g + Mica Powder 10g – 10 Colour Variations, ensuring the bud remains the focal point.

Techniques and Tips for Clear Results
Work in layers to achieve optimal clarity and prevent overheating, particularly in deeper moulds. Always de-gas your resin if possible by gently tapping or using a heat source to release trapped air bubbles before and after placing the buds. Ensure the room is free from excessive humidity, as this can cloud the resin’s finish.
Avoid handling the piece until it is fully cured, as touching or jolting can introduce surface marks. For advanced effects, try adding a subtle background layer of coloured resin before embedding the bud. With patience and good preparation, you will preserve the bud’s vibrancy for years to come.
Pro Tips for Resin Application on Natural Buds
Temperature and humidity control make all the difference. Maintain a stable environment and allow each layer to cure undisturbed. For ultra-clear results, use anti-bubble techniques and let pieces cure in covered moulds. Explore resin options adapted to your individual project for success.

- Natural Dried Flowers for Art Projects and Epoxy Resin CastingPrice range: £5.45 through £7.85These natural dried flowers are prepared for immediate use in resin and craft projects within the theme of resin application on dry buds.
- "One-2-One" – Epoxy Resin for Handcraft, 1:1 Mixing RatioPrice range: £14.85 through £56.85"One-2-One" epoxy resin offers an easy 1:1 mixing ratio and clear, glossy finish, suitable for crafting and decorative applications.
- "UV–Creation" – Fast Acrylic Resin, 3 Minute UV CurePrice range: £7.85 through £59.85UV–Creation is a UV acrylic resin curing in 2–3 minutes with a crystal-clear, non-yellowing finish, designed for jewellery and crafting.
 "Trasparente" Epoxy Resin Kit 800g + Mica Powder 10g – 10 Colour Variations£19.85"Trasparente" epoxy resin kit is an ultra-clear multipurpose product suitable for castings, table making and DIY projects.
Frequently Asked Questions
Can I use any dried buds in resin casting?
Yes, as long as the buds are completely dry and free from moisture or oils that could affect curing and clarity.
Why do my buds turn brown in resin?
Buds may brown due to remaining moisture or exposure to air during curing. Proper drying and sealing minimise colour changes.
How can I prevent bubbles when casting dry buds?
Mix resin slowly, pour in thin layers, and use a toothpick or gentle heat to release trapped air around the buds.
Which resin is best for small floral jewellery?
A low viscosity resin with a clear finish, such as epoxy or UV-cure resin, works best for jewellery embedding small buds.
Will the resin yellow over time?
Most modern resins include UV filters to reduce yellowing. Display pieces out of direct sunlight for maximum clarity.
Can I add other objects with buds in resin?
Yes, dried petals, glitter, or small accents can be combined with buds, so long as all items are compatible and moisture-free.