 Free shipping on orders over £29,85

How to create resin crystal?
Step-by-step guide for stunning crystal-shaped resin crafts

Crystal-shaped resin pieces make stunning jewellery, home decor, or gifts. With the right technique, anyone can achieve a glass-like finish and sharp facets for mesmerising effects. This guide walks you through the essential actions needed to create professional-looking resin crystals using silicone moulds.
What You’ll Need
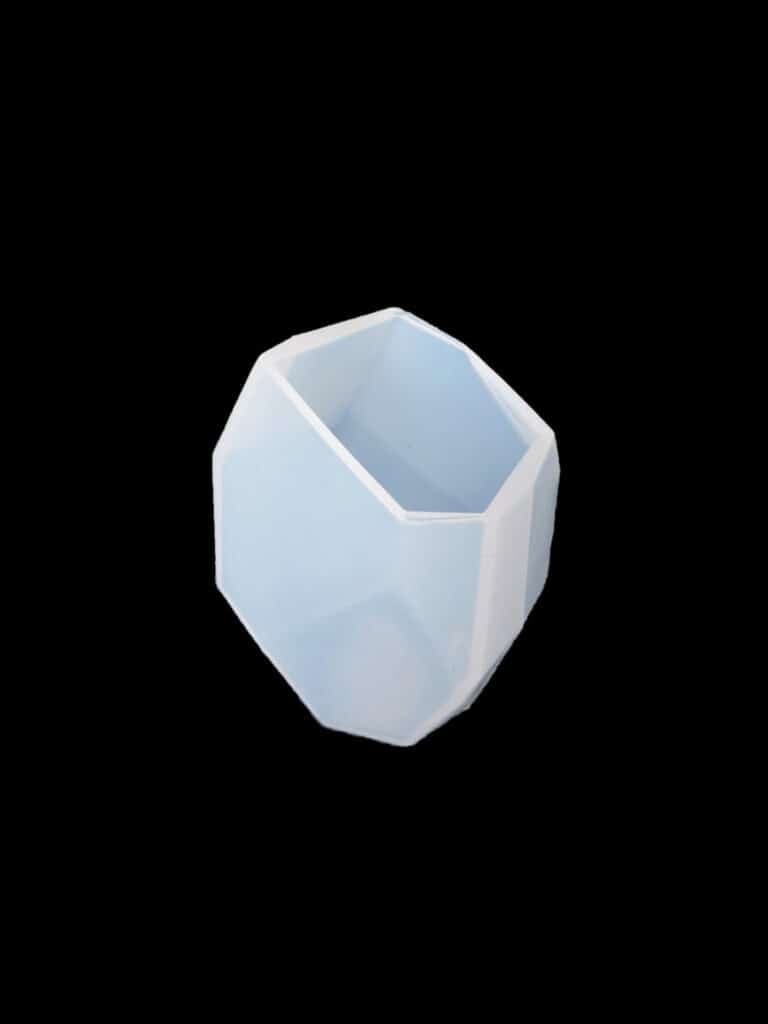
- “Large Crystal” – Silicone Mould, 5.0×3.5cm, Semi-Transparent, Reusable: Reusable for medium-sized crystals.
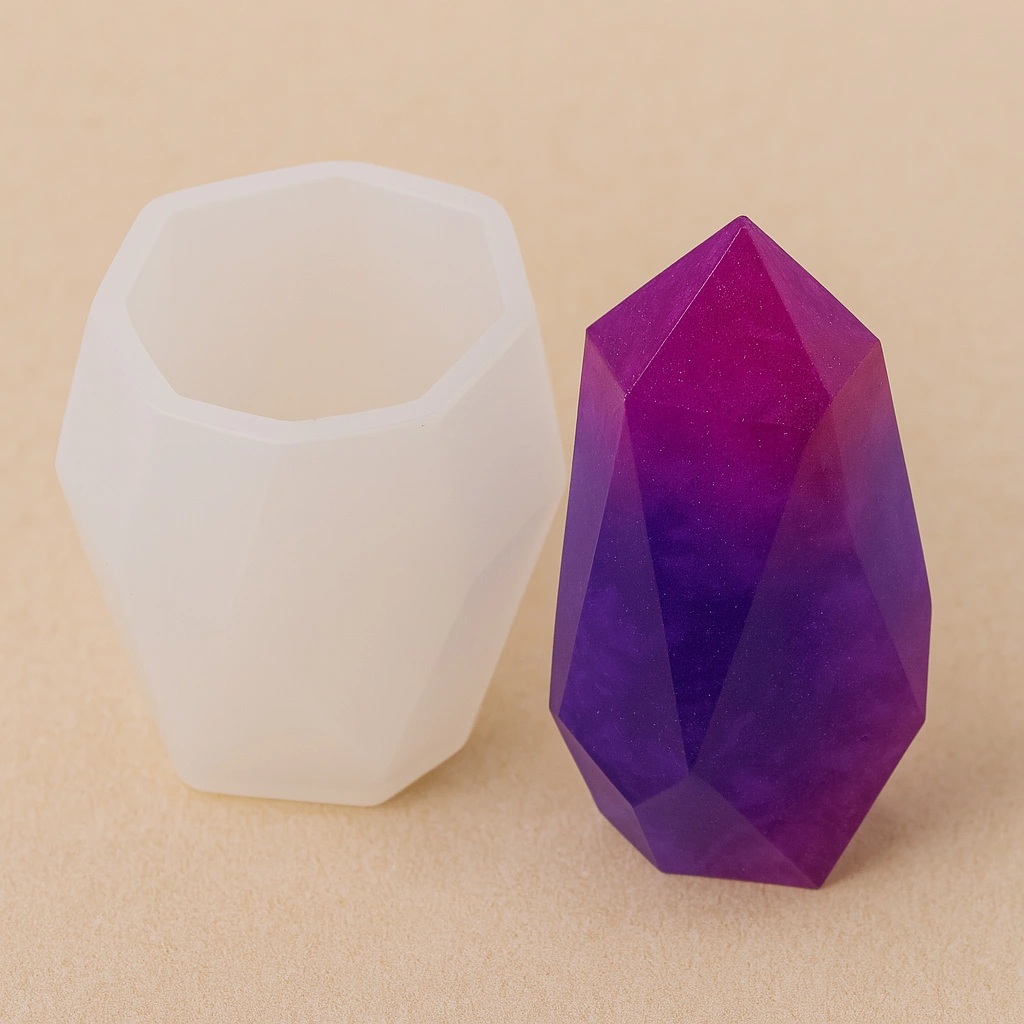
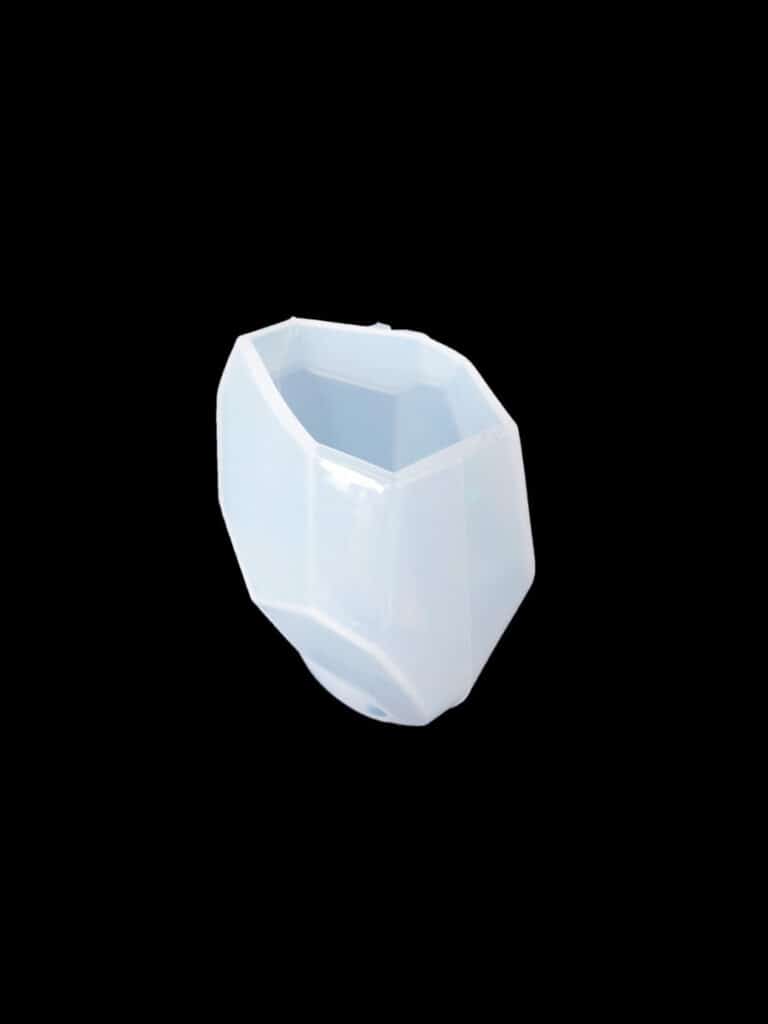
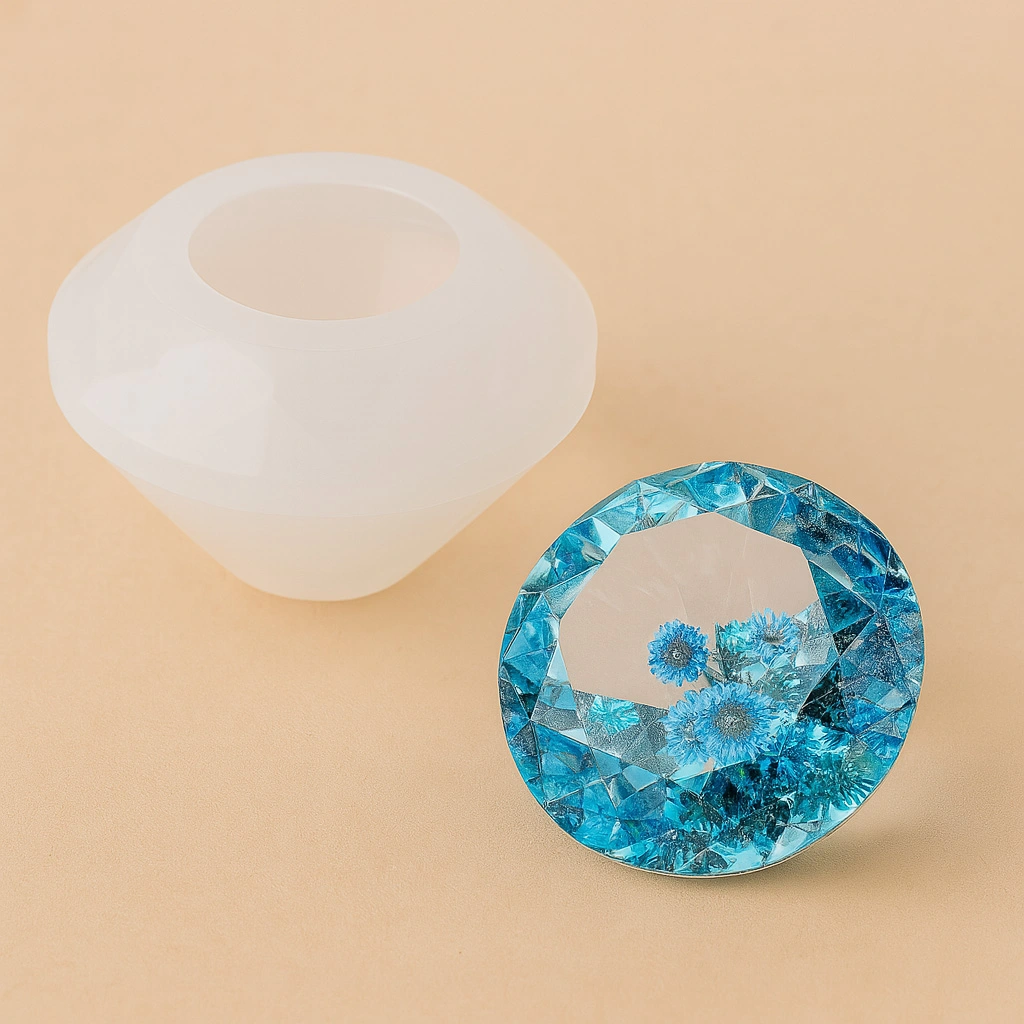
- “Diamond” – Crystal Shaped Silicone Mould 5×3.5cm: For creating resin pieces with a faceted, gemstone-like finish.
- “Icrystal” – Clear Epoxy Resin – Odourless Formula – Up to 1.5cm: Ideal for highly transparent, crystal-clear results.
- “Trasparente” – Multipurpose Clear Epoxy Resin for Casting – Up to 2cm: Suitable for deeper single-pour moulds or slightly larger projects.
- Mixing cups, sticks, gloves, and a dust cover.
- Pigments, glitters, or inclusions (optional).
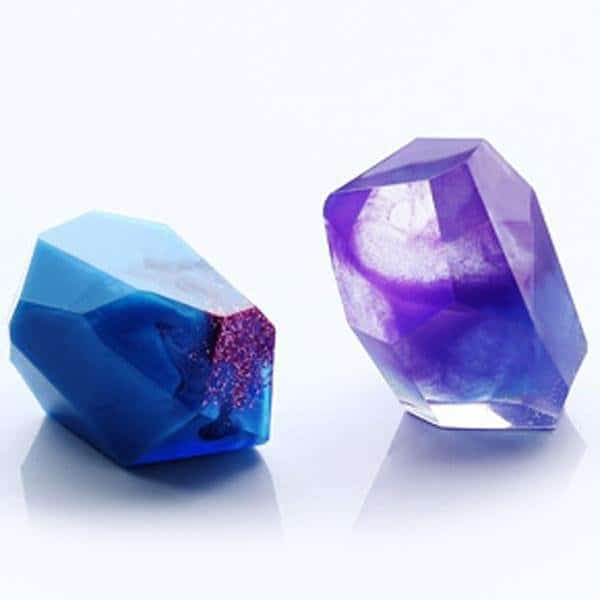
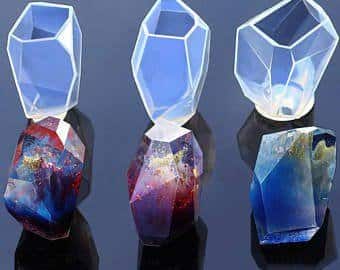
Inspiration: Stunning Resin Crystals
See examples of finished resin crystals in various colours, with transparent and coloured effects—ideal for jewellery, gifts, or elegant ornaments. Using high-clarity moulds and resins allows for sharp facets and brilliant light refraction that mimic real gemstones.
Step 1: Prepare the Mould and Workspace
Start by thoroughly cleaning your silicone mould to remove any dust or residues. Ensure the interior is completely dry; moisture can cause imperfections or cloudiness in the resin. Work in a dust-free environment and set up a level workspace to avoid lopsided crystals. Place your moulds on a protective surface ready for pouring.
Step 2: Mix Your Epoxy Resin
Carefully read and follow the mixing instructions on your resin’s packaging. Measure the resin and hardener exactly, usually by volume (such as a 2:1 ratio for “Icrystal” – Clear Epoxy Resin). Mix for several minutes in a slow, circular motion, scraping the sides and bottom to ensure even blending. Stir gently to minimise air bubbles, which can affect the appearance of your finished crystal. If desired, add a drop of pigment or a sprinkle of glitter to the mixture at this stage, being careful not to overmix.
Step 3: Pour and Let Settle
Slowly pour the mixed resin into your chosen mould, filling it from the lowest point to avoid trapping air. Tap the sides or gently vibrate the mould to help bubbles rise and escape. Cover the mould with a dust cover such as an upturned box. Allow proper curing time as detailed by your resin’s specifications, keeping the workspace undisturbed during this stage. For casts up to 1.5cm, “Icrystal” – Clear Epoxy Resin is suitable; for slightly deeper pours, try “Trasparente” – Multipurpose Clear Epoxy Resin.
Step 4: Demould and Finish Your Resin Crystal
Once the resin has fully cured, carefully flex the silicone mould to release your crystal. Don’t rush demoulding—removing resin too early can result in deformation or a sticky surface. If needed, lightly sand any rough edges once the piece is completely hard. For extra shine, polish with a suitable resin polish and a soft cloth.
Tips and Common Mistakes
Avoid overfilling your moulds, as excess resin will create uneven bases that need trimming. Keep away from heat sources to prevent rapid curing and possible yellowing. If bubbles persist, use a cocktail stick to coax them out or apply brief, gentle heat with a heat gun.
Always check your resin’s maximum pour depth; exceeding this can cause overheating or cloudy results.
Quick Reference: Resin Crystal Troubleshooting
Cloudy results often mean moisture or incorrect mixing. Sticky surfaces usually signal under-cured resin or measuring errors. Allow full cure time and double-check ratios for best results.
- "Large Crystal" – Silicone Mould, 5.0×3.5cm, Semi-Transparent, Reusable£6.00"Large Crystal" mould is semi-transparent silicone designed for creation techniques. Suitable for reuse and careful cleaning.
 "Diamond" – Crystal Shaped Silicone Mould 5×3.5cmOriginal price was: £4.90.£4.85Current price is: £4.85."Diamond" mould designed for crafts use with resin and other materials; easy to use and suitable for making jewellery and decorations.
 "Icrystal" – Clear Epoxy Resin – Odourless Formula – Up to 1.5cmPrice range: £11.65 through £954.85"Icrystal" Clear Epoxy Resin offers good quality with odourless formula, designed for transparent coatings up to 1.5cm layers.
 "Trasparente" – Multipurpose Clear Epoxy Resin for Casting – Up to 2cmPrice range: £8.45 through £948.85"Trasparente" is a clear casting epoxy resin suitable for layers up to 2cm, designed for detailed and varied DIY applications.
Frequently Asked Questions
What kind of mould is best for resin crystals?
High-quality silicone moulds are recommended, as they're reusable, flexible and produce sharp details with easy release.
How do I avoid bubbles in my resin crystal?
Mix and pour the resin gently, tap the mould after pouring, and use a dust cover to prevent dust which attracts bubbles.
When should I remove the cured crystal from the mould?
After the resin has fully cured as per product instructions, usually in 12–24 hours, for best results and clarity.
Which resin should I use for crystal-clear results?
Clear epoxy resins like "Icrystal" or "Trasparente" are designed for transparency and minimal yellowing, ideal for crystal shapes.
How can I fix a cloudy resin crystal?
Cloudiness is often caused by moisture or unmixed resin; allow full curing and always mix thoroughly in dry conditions.
Can I add colour or effects to my resin crystal?
Yes, add compatible pigments, dyes or glitters to your resin mix to customise the look of your crystal pieces.