 Free shipping on orders over £29,85


How to make a small box with resin?
A practical guide for custom resin jewellery and keepsake boxes
Creating a small box with resin is a rewarding project, perfect for making custom jewellery boxes, keepsake holders, or decorative gifts. This step-by-step guide will walk you through each stage—from preparing your materials to achieving a flawless finish—ensuring your resin box stands out for both quality and beauty.
What You’ll Need
- Small Glass Jewellery Box Silicone Mould – 5cm x 3.5cm: Ideal for compact, elegant designs.
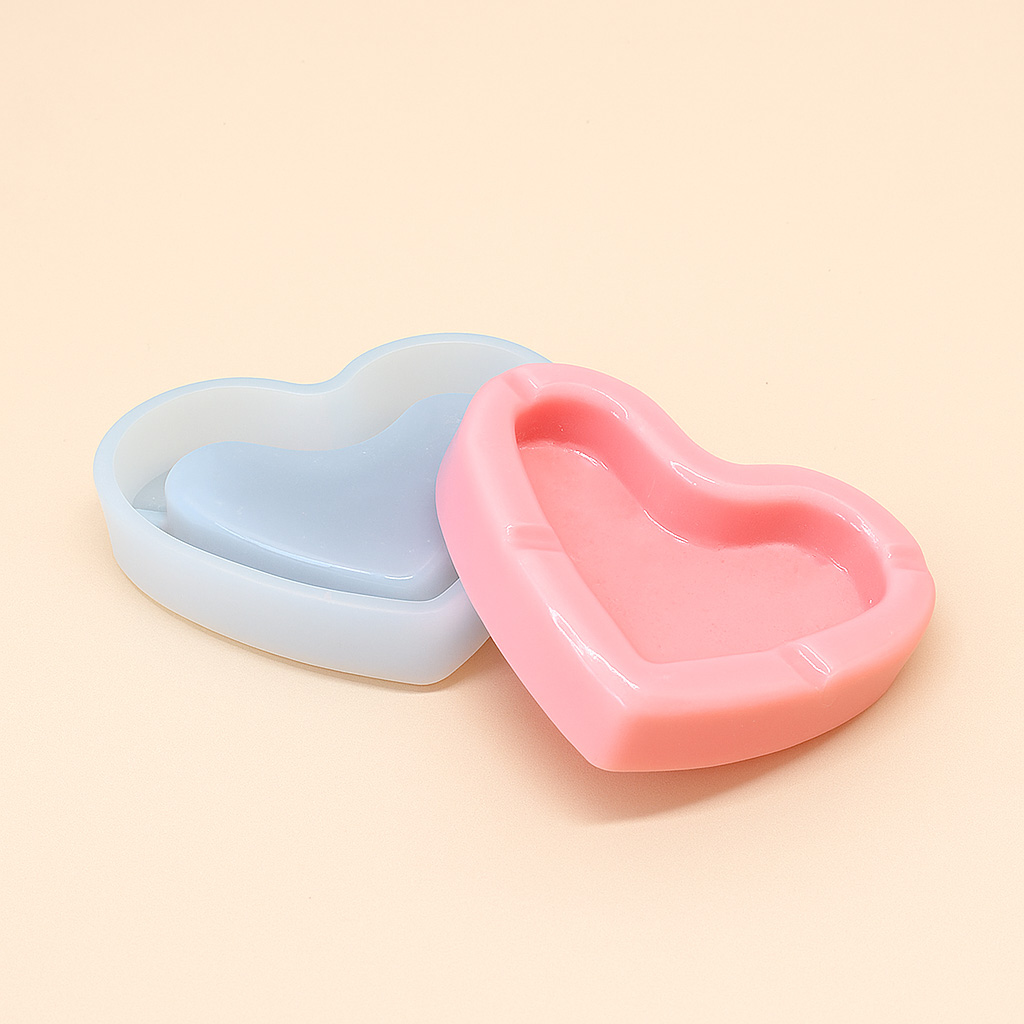
- Heart-Shaped Jewellery Box Silicone Mould – 13x11x3cm: Perfect for heart-themed gifts or personal keepsakes.
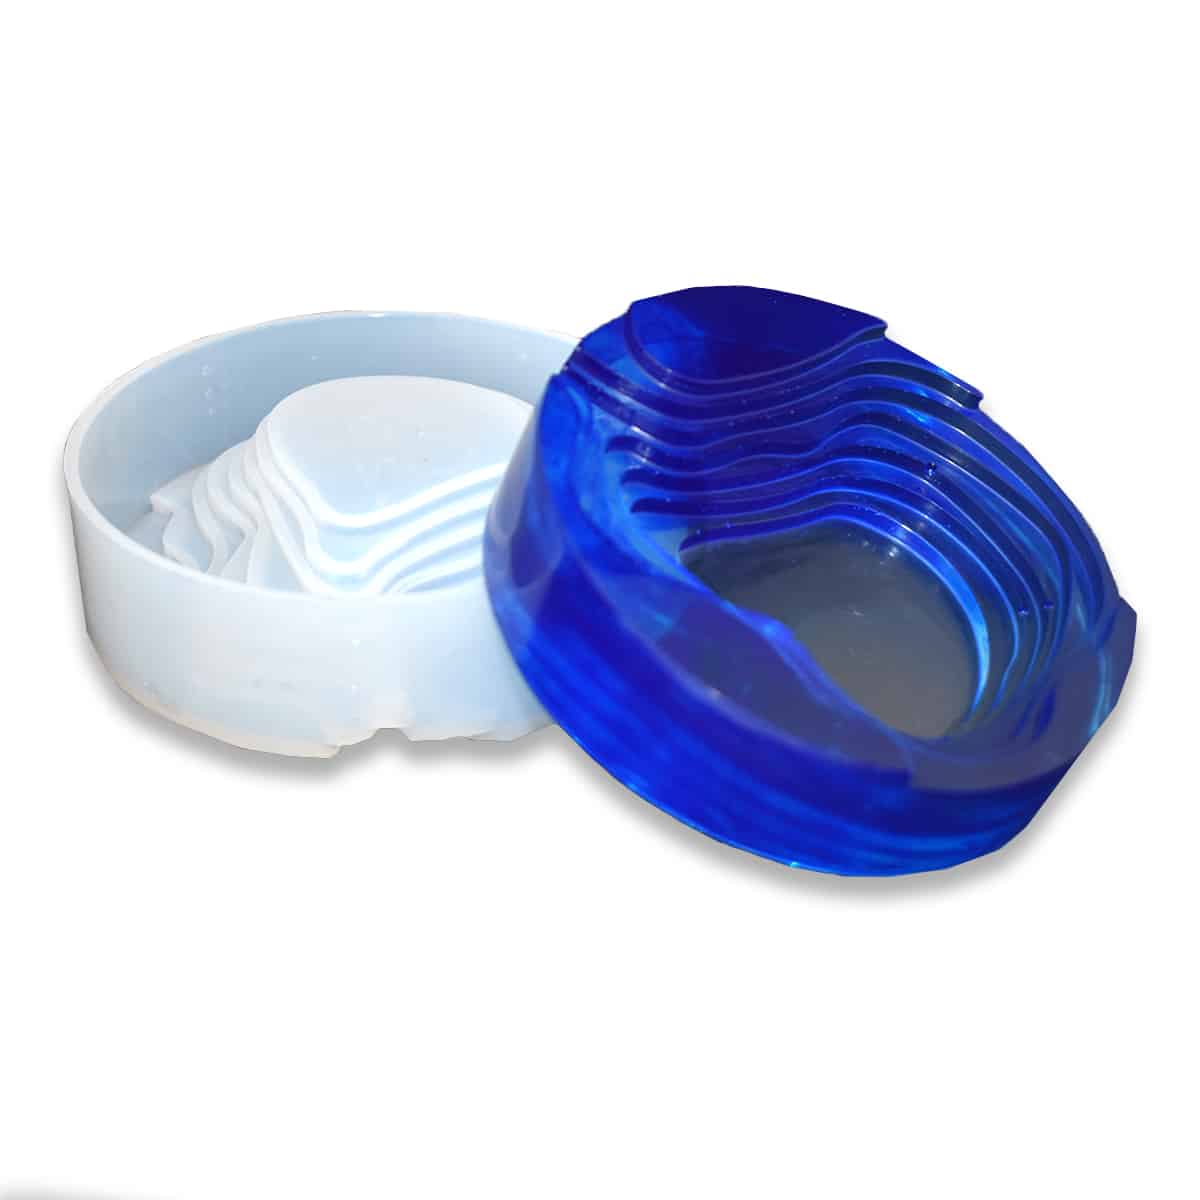
- “Round Jewellery Box” – Silicone Mould 12.5×3.6cm: For rounded, decorative forms.
- “Cube Mould” – Square Silicone Mould for Resin, 8.5×8.5cm: Provides a classic cube shape for versatile box designs.
- Epoxy resin system (as per your preferences and project scale)
- Mixing cups and stirrers
- Pigments or inclusions (optional)
- Protective gloves and cover sheet for your work surface

Choosing the Right Mould for Your Resin Box
Silicone moulds offer flexibility, durability and easy release, making them the preferred choice for resin casting. Select a mould shape that complements your design ideas, such as heart, cube or round shapes, for unique, personalised results in your small box project.
Step 1: Prepare Your Workspace and Safety
Ensure the workspace is clean and level to prevent dust from settling into the resin and to allow your box to cure evenly. Lay down a protective sheet to catch spills.
Use personal protective equipment such as gloves and a mask if recommended. Resin should be worked with in a well-ventilated area to avoid inhaling fumes. Good lighting is also essential for checking for dust, bubbles, or imperfections.

Step 2: Measure and Mix the Resin
Use measuring cups to accurately measure the resin and hardener according to the ratios specified by the manufacturer. Stir the two parts together slowly but thoroughly to avoid introducing bubbles.
Mix resin according to manufacturer’s specifications—incorrect ratios can result in soft or sticky boxes. Scrape the sides and bottom of your mixing cup regularly to ensure a consistent blend.
Step 3: Pour the Resin into the Mould
Choose your desired mould shape, such as the Small Glass Jewellery Box Silicone Mould – 5cm x 3.5cm for compact boxes or the “Cube Mould” – Square Silicone Mould for a classic box. Slowly pour the mixed resin into the mould to help avoid the formation of air bubbles. Gently tap the mould on the work surface to further encourage trapped bubbles to rise and pop.
Avoid bubbles by pouring resin slowly and refrain from overfilling—the resin should sit just below the top edge of the mould for a clean, level finish after curing.
Step 4: Allow the Resin to Cure
Once the mould has been filled, set it aside in a dust-free area with a stable temperature. Consult your resin’s instructions for recommended curing times. Many resins set within a few hours but achieve full strength in 24–48 hours. Avoid moving or disturbing the mould during this period to ensure crystal-clear results.
Allow resin to cure as recommended; premature demoulding can result in deformation or surface marks. Only touch the piece when it is fully solid.

Step 5: Demould and Finish Your Small Box
Carefully flex the silicone mould to release your resin box. Professional quality silicone, such as that used in the Heart-Shaped Jewellery Box Silicone Mould, makes demoulding straightforward. If needed, hand-polish any edges for a glossy, refined look.
Wash the mould with mild soap and water and store it out of direct sunlight for future projects. Personalise your finished box with paint, decals, or felt lining to suit your creative vision.
Tips and Troubleshooting for Resin Box Making
Work in small batches if this is your first resin project, as resin cures at differing rates depending on the environment, and mistakes are easier to manage on a smaller scale. Always use the correct resin ratios and avoid using strong solvents to clean your tools or moulds. If bubbles appear after pouring, use a pin or a heat gun on a low setting, keeping it moving to avoid overheating the resin. Select silicone moulds designed for resin casting, such as those from our recommended list, to achieve the best possible finish and durability for your boxes.
Creative Variations for Resin Boxes
Enhance your resin box by adding pigment, glitter, or embedded decorations. Consider using clear or tinted resin and layer inclusions for a bespoke look. Explore different mould shapes to expand your range of custom keepsakes or gifts.

- Small Glass Jewellery Box Silicone Mould – 5cm x 3.5cm£5.38This silicone mould is suitable for crafting small glass jewellery boxes and decorations using various DIY casting materials.
- Heart-Shaped Jewellery Box Silicone Mould – 13x11x3cm£7.20Silicone mould for crafts, suitable for resin and other casting materials, designed for making decorative jewellery or small boxes.
- "Round Jewellery Box" – Silicone Mould 12.5×3.6cmOriginal price was: £10.85.£8.15Current price is: £8.15."Round Jewellery Box" silicone mould is easy to use for creating small decorative craft items with resin and other materials.
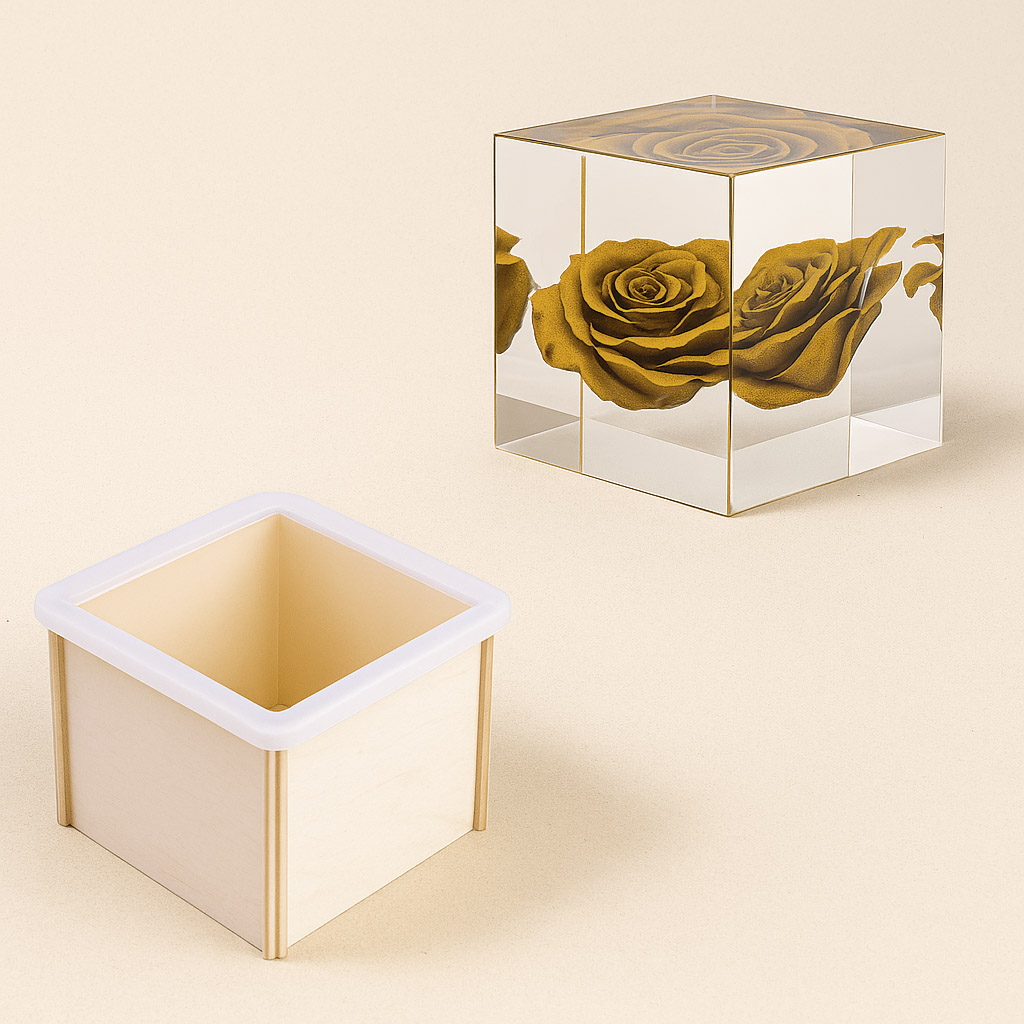 "Cube Mould" – Square Silicone Mould for Resin, 8.5×8.5cm£8.45Square silicone mould designed for resin creations, suitable for making small boxes as per the theme.
Frequently Asked Questions
Can I use any silicone mould for resin casting?
Choose moulds specifically designed to withstand resin’s curing process and temperature. Professional silicone moulds ensure easy demoulding and superior results.
How do I avoid air bubbles when making a resin box?
Pour resin slowly and tap the mould lightly to release trapped air. You can also use a pin or gentle heat to eliminate bubbles before curing.
When should I demould my small resin box?
Demould when the resin is fully cured and no longer sticky. Most projects should be demoulded within 12–24 hours according to resin instructions.
Can I use a mould for food after resin casting?
No, moulds used with resin should not be used for food to avoid contamination. Keep food and craft moulds separate for safety.
What should I do if the resin sticks in the mould?
Gently flex the mould to release the resin. If issues persist, check that the mould is clean and free from aggressive solvents, and avoid leaving resin in the mould too long.
How do I clean a silicone mould after resin casting?
Wash the mould gently with warm soapy water and let it air dry. Avoid using strong solvents to protect the silicone’s surface.
Can I reuse silicone moulds for resin boxes?
Yes, quality silicone moulds can be reused multiple times if cleaned promptly and stored away from sunlight and heat.