 Free shipping on orders over £29,85

how to shape epoxy resin
Step-by-step guide for moulding epoxy resin safely and beautifully


Shaping epoxy resin opens up a world of creative possibilities, from unique coasters to statement art pieces. This guide walks you through the essential steps for transforming liquid resin into beautiful, durable shapes that will elevate your home decor or make the perfect gift. Whether you’re a beginner or looking to refine your technique, you’ll achieve shaped resin projects with precision, safety, and style.
What You’ll Need
- Tooth Shaped Spatula for Epoxy Resin Application – A notched spatula designed for even coating and smooth application of epoxy resin on various surfaces.
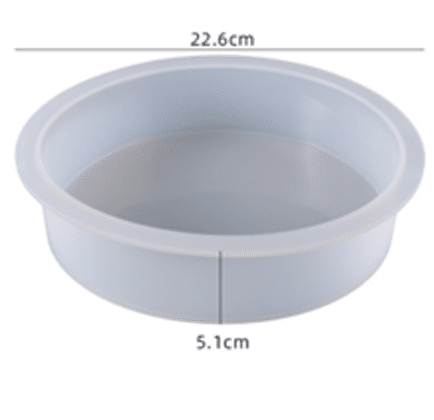
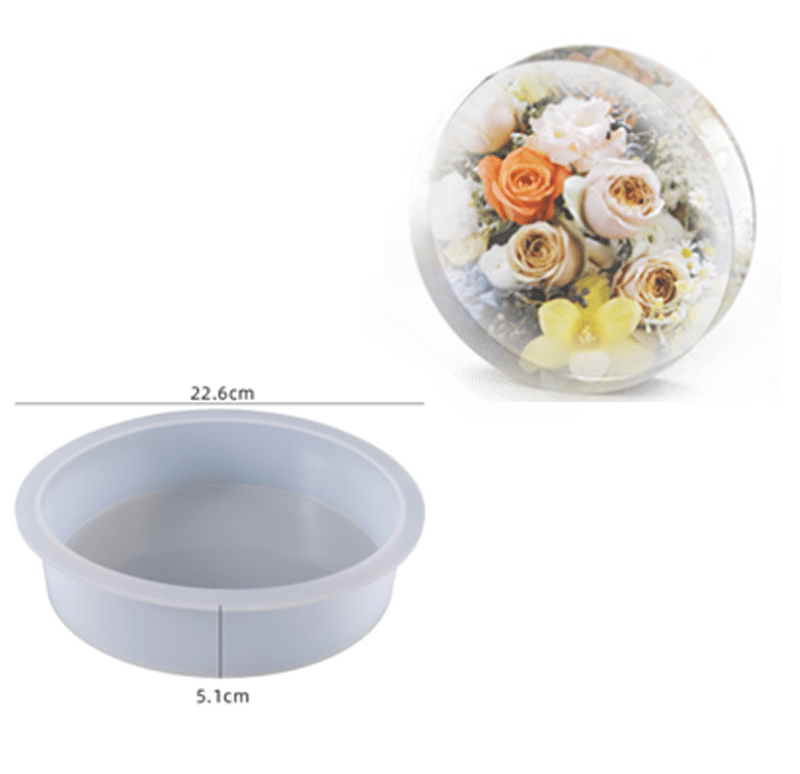
- “Silicone Circle Mould” – For Creating with Epoxy Resin, Ø 20cm – A reusable, flexible silicone mould suitable for creating decorative epoxy resin objects with ease.
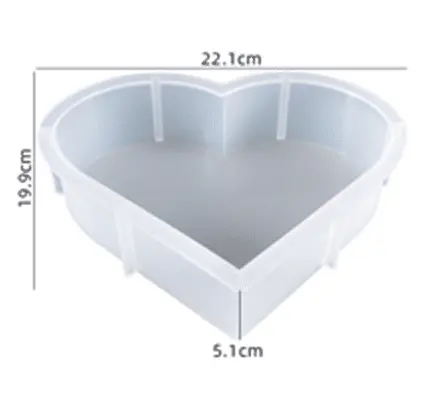
- “Silicone Heart Mould” – For Creating with Epoxy Resin, 19.5 x 16.5cm – A flexible silicone mould designed for creating decorative epoxy resin objects in a heart shape.
- Triangle Tray Silicone Mould – 32x22x1cm – Silicone mould for making coasters with a smooth interior and reusable, non-stick design.
- Mixing cups and sticks
- Protective equipment (gloves, apron, and mask)
- Ethanol or a mild cleaner for cleaning moulds
See Shaping Epoxy in Action
Explore our gallery to view creative resin pieces shaped with silicone moulds and specialist spatulas. Notice the smooth edges, glossy surface, and unique forms you can achieve with careful preparation and the right tools. Each project highlights the versatility of high-quality epoxy resin moulds.
Step 1: Organise Your Workspace and Prepare for Safety
Organise your workspace and gather your safety equipment before handling epoxy resin. Resin can be sticky and somewhat messy; work on a well-ventilated, flat surface protected by a disposable covering. Wear nitrile gloves, an apron, and a respirator mask to shield your skin and lungs from fumes and accidental splashes.
Organise all tools in advance. Silicone moulds should be clean, dry, and free of lint. Wipe with a little ethanol if needed. Resin should only be mixed and poured in environments with low humidity and stable temperature (ideally 18–25°C).
Step 2: Measure and Mix Your Epoxy Resin Precisely
Measure and mix your epoxy resin precisely according to the manufacturer’s ratio. Use separate, clean cups for resin and hardener, then combine and stir slowly to reduce the introduction of air bubbles. Scrape the sides and bottom of the container to ensure a uniform mix that will cure correctly. Mistakes here can result in sticky or improperly set pieces.
Let the mixture settle for a minute to allow bubbles to rise, and plan your pour promptly, as work time is limited before the resin begins to cure.
Step 3: Pour into Your Chosen Mould
Pour the resin into your preferred mould slowly and steadily, starting in one spot to avoid trapping air. Use a flexible silicone mould, such as the “Silicone Circle Mould” – For Creating with Epoxy Resin, Ø 20cm, for round shapes, or the “Silicone Heart Mould” – For Creating with Epoxy Resin, 19.5 x 16.5cm, for a heart-shaped design. Make sure the mould is level and not overfilled. Tap your mould gently to help bubbles surface and release trapped air.
If you wish to add decorative elements (such as dried flowers or glitter), place them in the mould before pouring or embed them in layers for a three-dimensional effect.

Step 4: Shape and Spread the Resin for a Flawless Finish
Shape and spread the resin for a flawless finish using the Tooth Shaped Spatula for Epoxy Resin Application. The notched edge helps distribute resin evenly over flat or textured mould surfaces, ensuring consistently thick layers and minimising bubbles or pooling. Work slowly, and do not press down too firmly—let the tool guide the resin naturally for best results.
Slightly agitate the mould or use a toothpick to coax any remaining bubbles to the surface, but avoid overworking the resin as this may introduce new bubbles.
Step 5: Allow Resin to Cure Completely Before Removing
Allow for full curing before removing your piece from the mould. Let your resin cure undisturbed, following the recommended time (typically 24–72 hours, depending on the resin used and room conditions). Premature demoulding can distort shapes and damage the finish. Once fully set, gently flex the silicone mould to release your finished item, revealing crisp edges and a professional sheen.
After demoulding, any rough edges can be carefully sanded if needed. Clean your silicone moulds with mild soap and water, avoiding harsh solvents to ensure their longevity.
Tips and Troubleshooting for Shaping Epoxy Resin
Work in a controlled environment: temperature and humidity affect resin behaviour. Always mix resin thoroughly and resist the urge to over-agitate while pouring to avoid excess bubbles. Make sure all equipment, especially moulds, are free from dust and oil. If your piece comes out with imperfections, you can polish the surface or apply a thin topcoat of resin. Avoid using aggressive cleaning agents on your silicone equipment to maintain elasticity and durability.
Project Ideas and Advanced Shaping Techniques
From geometric trays to personalised memorabilia, you can shape epoxy resin into countless forms. Experiment with Triangle Tray Silicone Mould for angular pieces or embed keepsakes in your castings for a bespoke touch. Every shape begins with the right mould and careful mixing—unleash your creativity with ResinPro tools.

- Tooth Shaped Spatula for Epoxy Resin Application£3.15The Tooth Shaped Spatula is designed for precise application to achieve a smooth, even spread on epoxy resin surfaces.
- "Silicone Circle Mould" – For Creating with Epoxy Resin, Ø 20cm£12.85Flexible silicone mould designed for shaping epoxy resin into decorative, original items such as coasters or keepsakes.
- "Silicone Heart Mould" – For Creating with Epoxy Resin, 19.5 x 16.5cm£12.85Flexible silicone mould suitable for shaping epoxy resin into decorative objects and commemorative pieces.
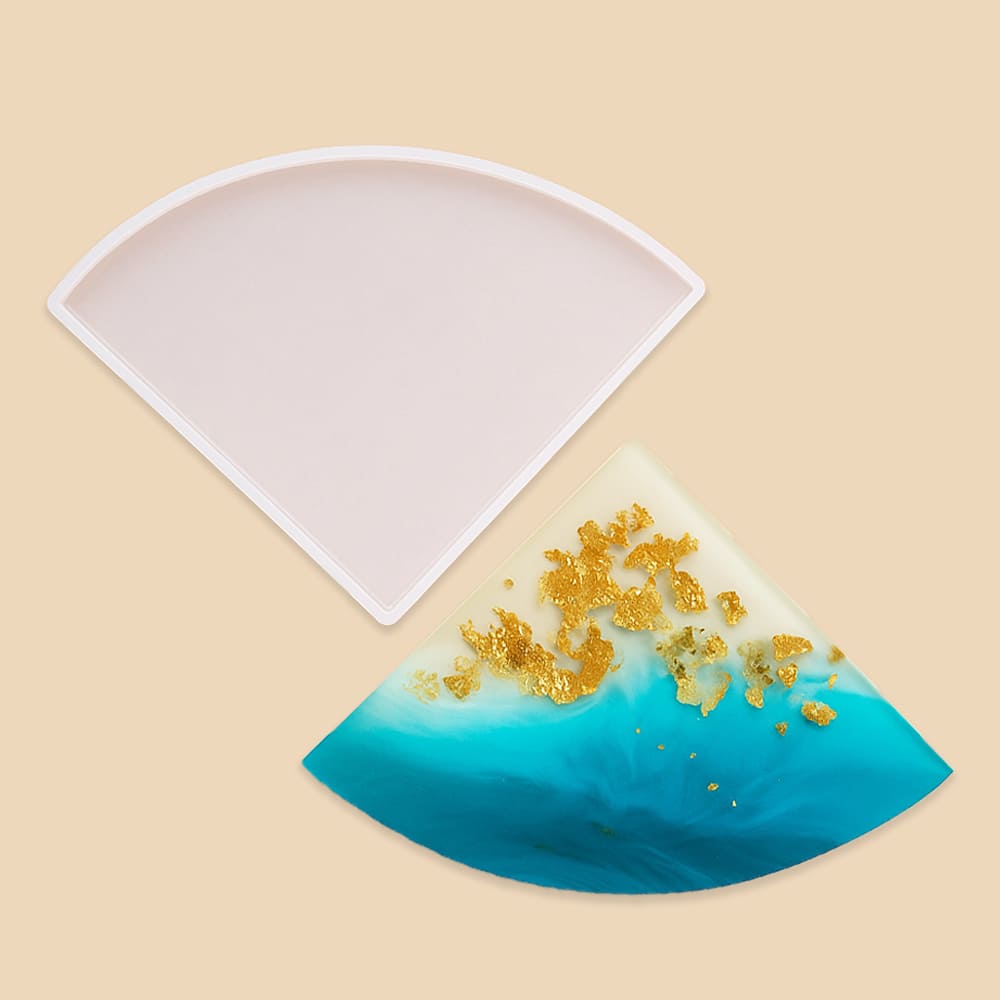 Triangle Tray Silicone Mould – 32x22x1cmOriginal price was: £12.00.£10.85Current price is: £10.85.Triangle Tray Silicone Mould is a semi-transparent silicone mould designed for handcrafts, suitable for shaping epoxy resin coasters.
Frequently Asked Questions
Can silicone moulds be reused when shaping epoxy resin?
Yes, high-quality silicone moulds are designed for repeated use. Make sure to clean and store them properly for best results.
How do I prevent bubbles in epoxy resin when shaping?
Mix resin slowly and pour steadily into clean, dry moulds. Use a spatula to help bubbles rise and gently tap the mould’s sides.
Why does my epoxy piece get stuck in the mould?
Most issues are due to improper curing or oily, unclean moulds. Ensure your resin is fully cured and the mould is clean and dry before use.
What safety steps are essential for shaping epoxy?
Wear gloves, use a well-ventilated space, and avoid skin contact or inhalation of fumes when handling uncured resin.
Can you shape epoxy resin without special silicone moulds?
While you can improvise with other objects, purpose-made silicone moulds offer the best results and easy demoulding for shaped resin projects.
How long should epoxy resin cure in the mould before removal?
Cure times vary by brand, but most projects require 24–72 hours for a solid, undistorted finish before removing from the mould.