 Free shipping on orders over £29,85


How do you make moulds for resin?
Step-by-step guide to crafting custom resin silicone moulds.


Creating custom moulds for resin allows you to craft unique decorative pieces, jewellery, and more, tailored exactly to your vision. Whether you’re an artist, crafter, or designer, learning to make your own moulds opens endless creative possibilities and ensures a professional finish for every project. This guide covers everything from planning your mould to the physical steps of casting, demoulding, and care.
What You’ll Need
- “Pure Mould” – Translucent Liquid Silicone Rubber for Mould Making: Ideal for creating custom silicone moulds with fine detail and quick curing.
- “Silicone Circle Mould” – For Creating with Epoxy Resin, Ø 20cm: Use as a pre-made option for round resin crafts or as inspiration for DIY shapes.
- “Silicone Hexagons Mould” – For Creating with Epoxy Resin – 24x21cm: Perfect reusable base for geometric projects or as a reference for custom forms.
- Mixing tools (e.g., spatulas, cups)
- Protective gloves and workspace covers
- Model or item you wish to replicate in resin
- Release agent (optional for complex shapes)

Materials in Action: Preparing and Pouring Silicone
Visualise each step of the mould-making process, from careful placement of your model to the smooth pouring of translucent liquid silicone. Accurate mixing and patient pouring are the key to flawless, bubble-free results.

Step 1: Prepare the Model and Workspace
Select the object (master) you want to replicate. The item should be clean, completely dry, and free from dust or oils, as even minor imperfections can transfer into the mould. For intricate or porous surfaces, consider applying a thin coat of release agent to make unmoulding easier.
Set up your workspace by laying down protective covers and gathering all necessary materials. Position the model securely within a mould box or a container slightly larger than your item. Ensure there are no gaps at the bottom or around the sides to prevent silicone leakage.
Step 2: Mix and Pour the Silicone Rubber
For best results, use a high-quality silicone such as “Pure Mould” – Translucent Liquid Silicone Rubber for Mould Making. Measure and mix both components of the silicone according to the manufacturer’s instructions; typically, this product uses a simple 1:1 ratio by weight or volume. Mix thoroughly, scraping the sides and bottom of your vessel to avoid unmixed portions that could leave uncured spots in the mould.
Slowly pour the mixed silicone into the mould box, starting from one corner to minimise air bubbles. Allow the liquid to flow over and around your model rather than pouring directly onto it, which could trap air. Tap or gently vibrate the container to help remove any remaining air bubbles. Leave the mixture to cure as directed—products like Pure Mould silicone typically cure within 3–8 hours.
Step 3: Demould and Inspect Your Silicone Mould
After curing, carefully remove the solidified silicone from the mould box. Take your time to gently peel the silicone away from the model—flexible formulations ensure that delicate details are captured but can require patience during demoulding. Inspect your new mould for any surface imperfections or air bubbles that could affect your final resin cast.
Wash the mould with mild soap and water if necessary. Make sure it’s fully dry before casting resin, as moisture can affect the curing process. When handled properly, quality silicone moulds can be reused multiple times for consistent results.

Step 4: Cast Your Resin and Maintain the Mould
Pour your chosen resin into the completed silicone mould, ensuring that the surface is clean and dry. Most silicone moulds, such as “Silicone Circle Mould” and “Silicone Hexagons Mould”, offer easy demoulding, preserving fine detail and shape. Allow the resin to fully cure before removing it from the mould.
To maximise the lifespan of your mould, avoid cleaning it with harsh solvents. Store out of direct sunlight in a cool, dry place between uses. Regular maintenance helps retain flexibility and ensures many successful casting sessions.

Tips and Troubleshooting for Making Resin Moulds
Always measure silicone components accurately and mix thoroughly to prevent soft spots or incomplete curing. Pour slowly to avoid air bubbles, especially when working with intricate models. Ensure your workspace is dust-free to prevent surface blemishes in your silicone and resin casts.
If your mould appears cloudy or sticky, re-examine your mixing ratio and curing conditions. A gentle tap or vibration can help eliminate small bubbles before curing starts. Cleaning your moulds with mild soap and rinsing thoroughly will maintain their performance for future projects.
Troubleshooting & Pro Project Examples
See professional moulds in action—note the unmatched detail and flexibility quality silicones provide. Maintaining your moulds ensures longevity and consistent, high-quality resin pieces.

- "Pure Mould" – Translucent Liquid Silicone Rubber for Mould MakingPrice range: £22.85 through £158.85"Pure Mould" is a fast curing translucent silicone rubber designed for making moulds compatible with resins and other materials.
- "Silicone Circle Mould" – For Creating with Epoxy Resin, Ø 20cm£12.85Flexible silicone mould for making coasters and decorative objects with epoxy resin.
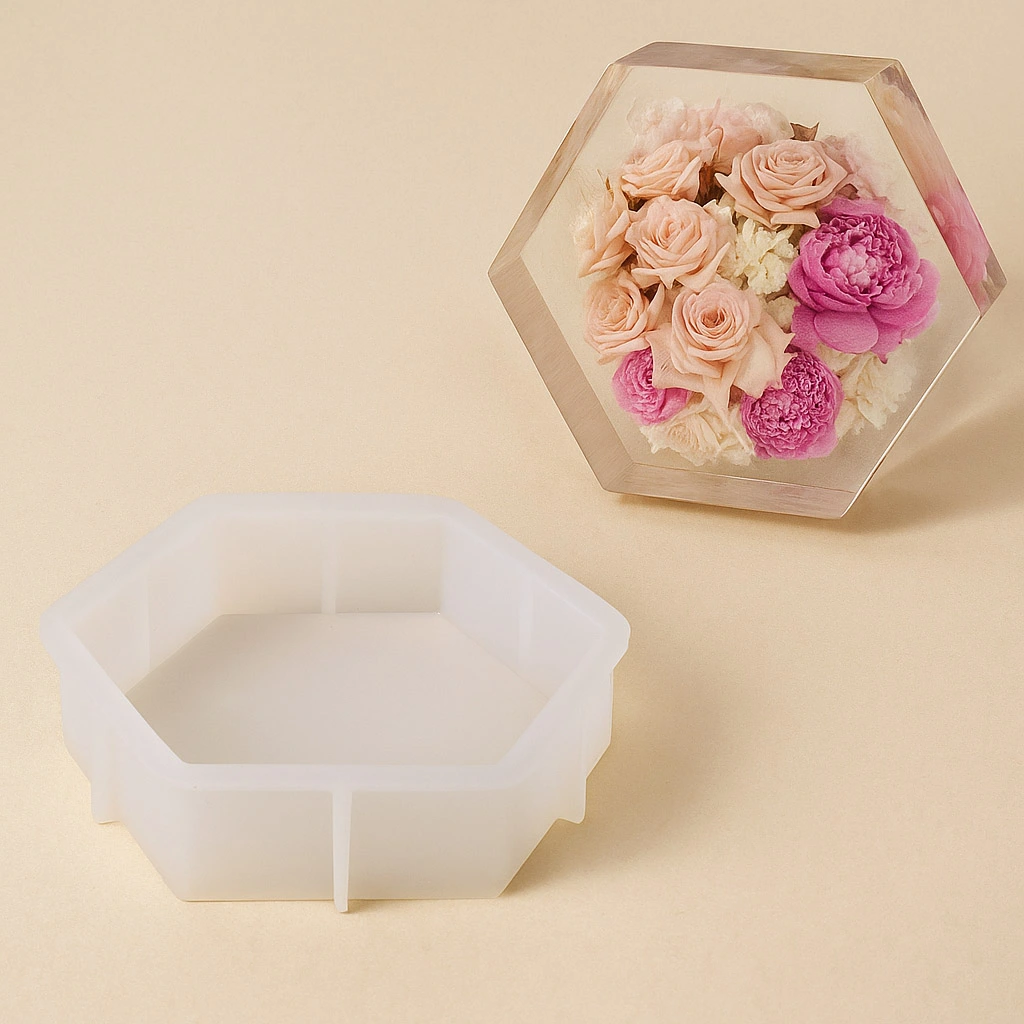 "Silicone Hexagons Mould" – For Creating with Epoxy Resin – 24x21cm£12.85This flexible silicone mould is suitable for making coasters and decorative resin objects, fitting the theme of resin mould creation.
Frequently Asked Questions
Can any object be used to make a mould?
Most non-porous, clean objects are suitable. However, extremely fragile or absorbent items may not release cleanly from silicone.
What makes silicone the preferred material for resin moulds?
Silicone moulds have excellent flexibility, non-stick properties, and capture fine details, making demoulding easy and reliable.
How do I avoid bubbles when pouring silicone?
Mix slowly to minimise bubbles, pour from a low height, and gently tap or vibrate the mould box to release trapped air.
How long do homemade silicone moulds last?
With proper care, quality silicone moulds can typically be reused dozens of times with little loss of detail.
How should I clean and store silicone moulds?
Use mild soap and water for cleaning. Store moulds flat, away from direct sunlight or heat, to prolong life and prevent warping.
What should I do if my silicone mould is sticky or soft?
This is usually due to improper mixing or an incorrect ratio. Double-check instructions and try again with fresh materials.