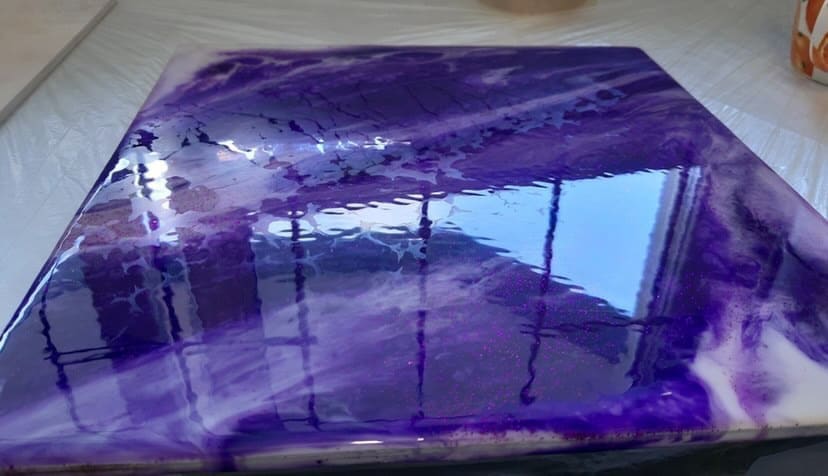
Today we will talk about one of the most unpleasant phenomena for a resin artist – amine blush. This cunning little “beast” appears at the most awkward moment and spoils your work, deadlines are missed and nerves are lost 🙁 ⠀ Let’s take a look at what causes this defect!⠀
Causes of the phenomenon
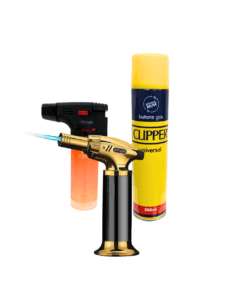
1. High humidity is the most common factor. It is not recommended to work with resin in high humidity conditions, as well as during rain, fog with open windows and near water bodies. Ideally, you should work in a dry and warm, closed but ventilated area at a humidity of no more than 30-40%. ⠀ 2. Low temperature. This factor also often causes the amine blush. It is recommended to work with resin and leave it to cure at a temperature even higher that average room one (for example, near heaters). Acceptable temperature range: +22 to +27 °C. ⠀ 3. The use of dyes and additives (water-based dyes can’t be used with resin!), sprays and alcohols for deaeration. Always be careful with the additives you use for the first time: it is always advisable to test with a small amount of resin first to see the reaction of the material to a particular agent. ⠀ 4. The use of large gas heat guns with replaceable gas cylinders. These burners emit more carbon dioxide during using, which can also cause an amine blush to appear on the resin product. It is recommended to use small hand torches/heat guns: they are both more convenient and safer.
Select options
This product has multiple variants. The options may be chosen on the product page
5. The material you are coating with epoxy resin is wet. Even if you cleaned the base from dust with wet wipe, you must wait until the surface is completely dry. This also applies to paintings that you cover with resin: the paint must be completely dry, otherwise (especially in the case of water-based acrylic paints) you risk getting the blush on the resin layer.
6. One of the common causes is also poor mixing of the resin: a hardener that is not thoroughly mixed with the resin is more susceptible to the influence of a humid environment, and, as a result, the chance of blush ruining your work is greatly increased.
What can you do if high humidity or low temperatures are frequent guests in your area?
How to deal with it?
1. Equip the workshop with air conditioning or use other methods to control the temperature and humidity in the room. ⠀ 2. Use a pre-catalysis technique or work with resin and leave it to cure near heat sources. The pre-catalysis technique consists in leaving the mixed resin in the container until it becomes warm, and then you ca pour it: this way the humidity or low air temperature will be less likely to spoil your work.
What to do if the blush has already appeared?
If you find this defect on the creation, do not worry – your project can be saved. And here’s how:
Sand the surface of the project with fine grit sandpaper to remove the blush.
Polish the surface with polish cream to give it a glossy effect, or create a new thin layer of clear resin using the technique above (pre-catalysis) – it will adhere well to a lightly sanded surface.
Unfortunately, due to the Royal Mail strike, we have to expect a delay in delivery.
The Communication Workers Union (CWU) has called on its members who collect, sort and deliver parcels and letters to take strike action on 26 and 31 August and the 8 and 9 September 2022.
We will keep you up to date at all times. We will try our best to minimise any inconvenience.
How to get an express delivery? Choose “Express delivery 1-2 days – £6.48“at checkout, we’ll dispatch your items with DHL express delivery.
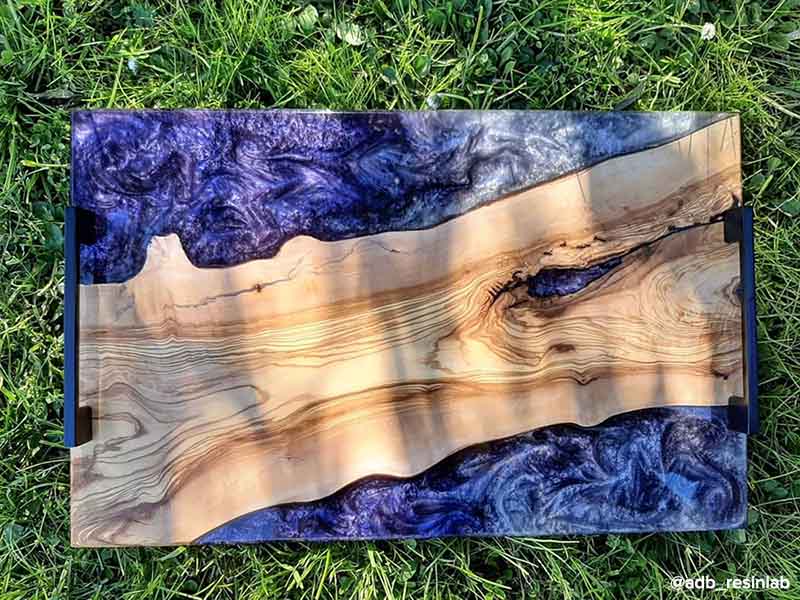
In this article, we will talk about how to create a mesmerising effect in the thickness of the resin using Sahara metallic pigments.
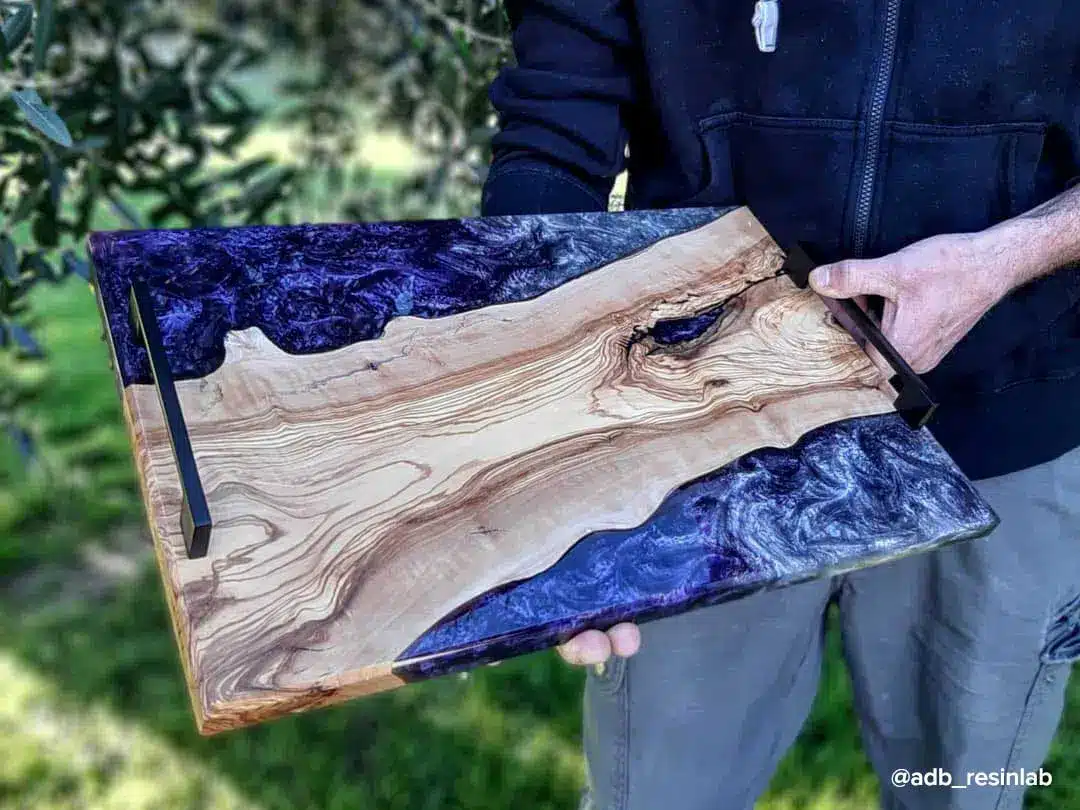
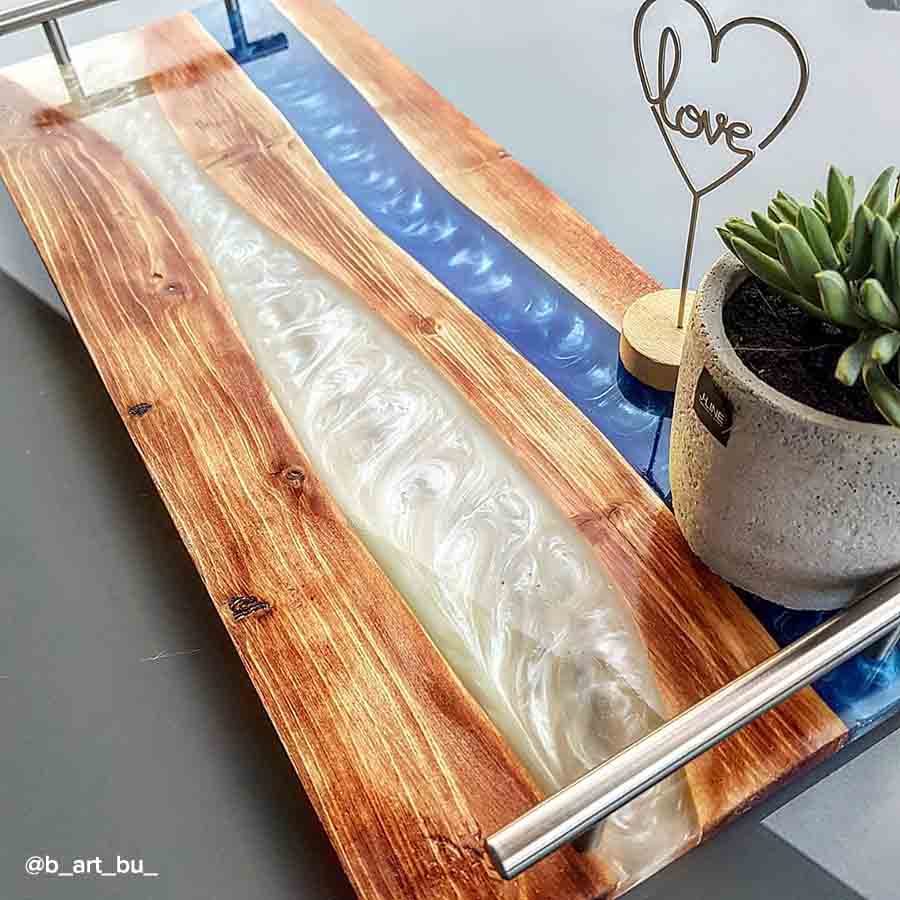
It is likely that you often see designer countertops and other products made of resin and wood with a magical pattern inside, like lava flows down the slope of a volcano, bending around stone ledges, the blue sea is rippling or extraterrestrial matter is seething, sparkling and shimmering in the sun – whatever it is associated with , it just looks amazing! Clocks, cutting boards, jewellery, coasters, and furniture are just some of the items that can be created with this effect.
But in order to get such patterns, it is necessary to take into account two main aspects regarding materials:
colour selection
epoxy resin density
Attention! This article only talks about the above effect. If you want to know how to work with resin in general or create countertops, read the articles below:
Select options
This product has multiple variants. The options may be chosen on the product page
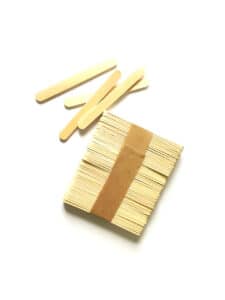
Accessories for working with resin: scales (resin components are weighed strictly in grams), cups and wooden sticks (in what and how the resin is mixed). Optionally, you can buy a small burner to remove air bubbles from the surface of the product.
Select options
This product has multiple variants. The options may be chosen on the product page
Colour saturation
Before you get started, you need to figure out what pigment saturation you want in your product. Usually 0.1 to 1% of the total amount of resin is added, which means that you can colour 1-10 kg of resin with one bottle of Sahara pigment (we do however advise you to order two at once in the event that you want a deeper colour or need a reserve!).
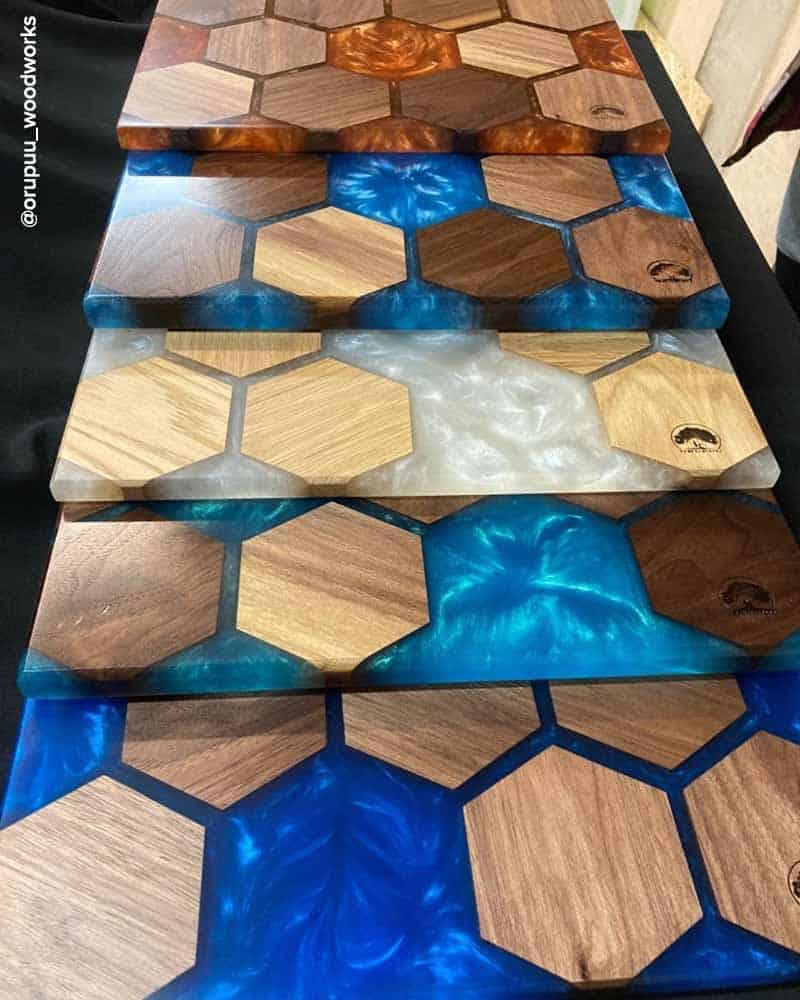
By increasing or decreasing the percentage of pigment in the resin, you can get a different effect: in the photo you can see that the sample on the right has a rich color and a clearer pattern, while the sample on the left is more transparent and the effect is visible only from certain angles.
Another important factor is the thickness of the product: the thinner it is, the more pigment must be added to obtain a rich colour.
Technique
Once we had established the intricacies of working with pigment, it was necessary to understand how these “waves” are made in the thickness of the resin. It turns out that everything is quite simple – you just need to wait a certain amount of time!
Each resin has a special feature, which is called “pot life”, or even more simply – “work time”. This term refers to the time after mixing the components until the resin begins to thicken and heat up (which means that the curing process has already begun). Manufacturers indicate this time so that craftsmen and artists understand how much time they have to work with the resin before it starts to harden and it will be difficult to modify it.
But in this technique – this time period is the key, because it is he who needs to wait in order to start creating the wave effect:
Mix the epoxy in the proportions indicated in the instructions
Add metallic pigment to the concentration you like best (saturation can be checked by dipping a stick into the resin and letting it drain back into the container – in this jet the real saturation will be visible)
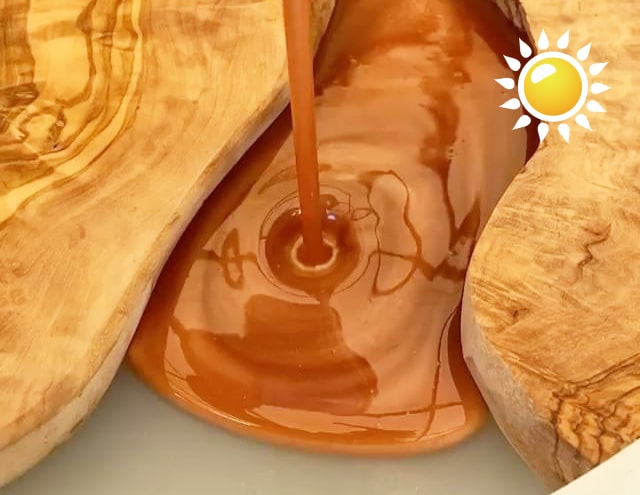
Carry out pouring into the mould/formwork.
Wait for the “life time” (For example, our “Trasparente” resin is 1 hour 20 minutes).
With a stick, carry out the test described in paragraph 2., but this time check how quickly the resin drains from it – if it is quite fast and it is clear that the resin is still liquid in consistency, it is worth waiting longer, but if the resin is similar in viscosity to liquid honey and the stream slowly “stretches” back into the filling, draining for a very long time (and at the very end there is a very thin thread, if at all) – then this is exactly the state of the resin that we need! The main thing is not to overdo it, because the resin can thicken too much.
Move your wand through the resin to create the pattern you like the most – due to the fact that the resin is already quite thick, the pattern will last until the resin is solid 🙂
@adb_resinlab
@b_art_bu_
@orupuu_woodworks
The RESIN PRO team is always ready to answer all your questions in the comments 🙂
To do list for Summer 2022: 🌊-Go to the coast 🌱-Cut the grass 🥪-Have a picnic 🌇-Watch the sun set 💥-Participate in the Resin Pro contest💥
How to do that? Easy-peasy! Just follow the next steps: 🔥A) Make a purchase on our web-site “Resin-pro.co.uk”.* 🔥B) You will receive an invitation from Trustpilot to share your experience (check SPAM or JUNK folder). ** 🔥C) Leave a review about our service or products OR BOTH via invitation link .*** 🔥D) Be in with a chance of winning one of the 5 kits by 8kg epoxy on the 1st October 2022.****
*Resin-pro.co.uk – amazing epoxy resin shop. **It may take up to 7 days to get the invitation. Please make sure that you used the correct email address. ***It is important to leave a review via the invitation link so that we are able to identify you as our customer. Yes, you can increase your chances of winning by placing more orders and leaving additional reviews of our services and our products too. ****On the 1st of October 2022 – 1) we’ll upload our feed with all the reviews which were made via invitation link between 25th of JUL 2022 and 30th of SEPT 2022, 2) we’ll apply a number to every review (in order), 3) we’ll pick 5 winners by using a random number generator, 4) Of course, we’ll do it online via our Instagram page (@resinpro_uk) and then publish the winners and all the information about that on our website (www.resin-pro.co.uk) and social media channels. Yes, there are all the chances to win more than one kit, if you left more than one review.
P.s. please pay attention to the fact that Trustpilot has special system which automatically deletes reviews they think may be spam! In this case, you will need to contact them directly (if you think it was a mistake). Unfortunately, we have no impact on their decisions and will only use verified and published reviews.
Summer time is not only a time for grilled meat on the barbeque, trips to the seaside and evening walks, it is also the season of a huge number of complaints about the overheating of epoxy resin.
We remind you the main points on how to avoid this:
Do not mix a large amount of resin at one time! If it is more than 1 kg, you have no more than 4 minutes to mix and pour directly. It is better to mix several times, but with a smaller amount, than to overheat the resin and potentially throw away a lot of money.
During the summer period, we do not recommend excessive use of heat guns, hair dryers, and so on.
If you are doing a large project (more than 100 cm), pour the fill in several layers, even if a layer of up to 5 cm is indicated on the jar. It’s better to spend more time than to throw away a ruined project.
It is better to work in the evening, when the sun goes down and the evening coolness appears.
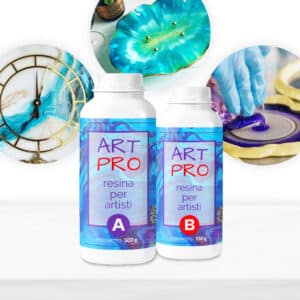
Trying to get a better result in Ocean Art (epoxy resin sea/ocean art), but the waves effect is not good enough or even disappears after you created it with a hair dryer/heat gun? Let’s solve these problems with the our legendary duo – super-thick epoxy resin for Resin Art “Art Pro Deluxe” and powder pigment for creating sea waves effect “Wave Pro”. The main task here is to apply them correctly in your work 🙂
Materials you need
Ultra-high viscosity epoxy resin «Art Pro Deluxe»:
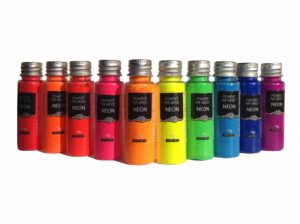
Dyes and pigments* of sea/ocean colours and“Wave Pro”sea waves effect powder:
Select options
This product has multiple variants. The options may be chosen on the product page
* the dyes of sea colors may not be needed if you have already painted a marine background with acrylics. However, be sure that the paints are completely dry before you work with epoxy resin.
This is important
Key points you should keep in mind when creating resin sea waves:
Resin viscosity: the epoxy resin must be of the right viscosity to make perfect sea waves. You should use the thickest resin you can find: We have medium-thick “Art Pro” resin and super-thick “Art Pro Deluxe” resin – the latter is the best choice.
Time: even the viscousity of the resin you’ve bought is not enough to create sea waves. Therefore, from the moment of mixing the components of resin to the step of creating a wave effect (using a hair dryer/heat gun) a certain amount of time must pass: for resin “Art Pro Deluxe” – it is 30-40 minutes (for “Art Pro” – 50-70 minutes). This is so the resin becomes even more viscous, because it slowly begins to harden. The main thing here is not to wait to much time, otherwise it will be almost impossible to create the waves. Attention! If air temperature is about 30° C, this time for the Art Pro Deluxe resin should be strictly no more than 30 minutes, because at high temperatures this resin hardens faster.
Liquid layer: you won’t get your desired result if you create resin sea waves on a dry surface. There must be the liquid layer of resin on you base (art-board and etc): it can be a sea effect gradient resin background that you just poured, or, if you already have a hardened background, just a transpatent layer of liquid resin that you mixed both for ground and mixture with “Wave Pro”. Attention! The liquid layer/background resin and the waves effect resin (to be mixed with the waves effect powder) must be of the same consistency: they must be taken from the same mixture of resin components that you prepared for the whole Ocean Art work.
Waves effect mixture colour: to create the perfect waves, the resin and Wave Pro mixture must be of a rich white color. Add the wave powder to the resin little by little and stir the mixtire until you get a perfect white color. For the powder to dissolve well in the resin, the mixture must be stirred intensively and thoroughly.
Type of dryer: a lot depends on the functionality of your dryer. If you are using a regular hair dryer, it should take no more than 30 minutes for “Art Pro Deluxe” and about 50 minutes for “Art Pro” from mixing the components to the step of waves creation. In case you are using a heat gun (it gives hotter air), this time increases to 40 minutes for “Art Pro Deluxe” and 60-70 minutes for “Art Pro”.
Making sea waves step by step
1. Mixing resin components
Thoroughlymix componentsA and B of “Art Pro Deluxe” and watch the time (or better yet, set the timer for 30 minutes): all the following steps should be done keeping in mind the fact that the time period between this mixing and creation of sea waves with dryer/heat gun must be 30-40 minutes. For “Art Pro” resin this time increases to 50-70 minutes.
You need about 150-170 grams of total resin and hardener mixture for a 30 cm diameter art-board. You can mix 100 g “A” and 70 g “B” of Art Pro Deluxe or 100 g “A” and 66 g “B” of “Art Pro”.
Mix the resin components and set the timer for 30 minutes
2. Colouring the resin
Pour the resin mixture into small cups (equal to the number of dye colors you have chosen + a cup for waves mixture and, if you want to create a beach, then 2 more cups: 1 for mixing with sand/pebbles and 1 with a transparent resin). Colour part of the cups with the selected dyes (1-2 drops of dye are enough) and mix well. Add Wave Pro powder into one of the cups: stirring intensely to dissolve it well in the resin, add it little by little until you get a dense rich white color, as in the photo below.
If you want to create a beach, add sand to one of the cups and mix well to get a thick wet-sand mixture.
One cup for sand, several cups for dyes and one cup for waves powder
3. Creating sea background
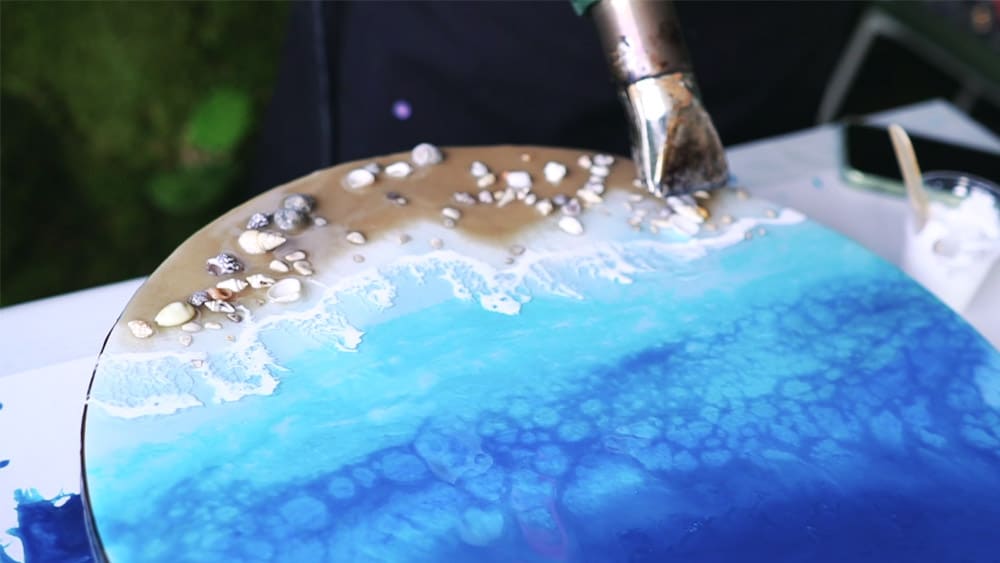
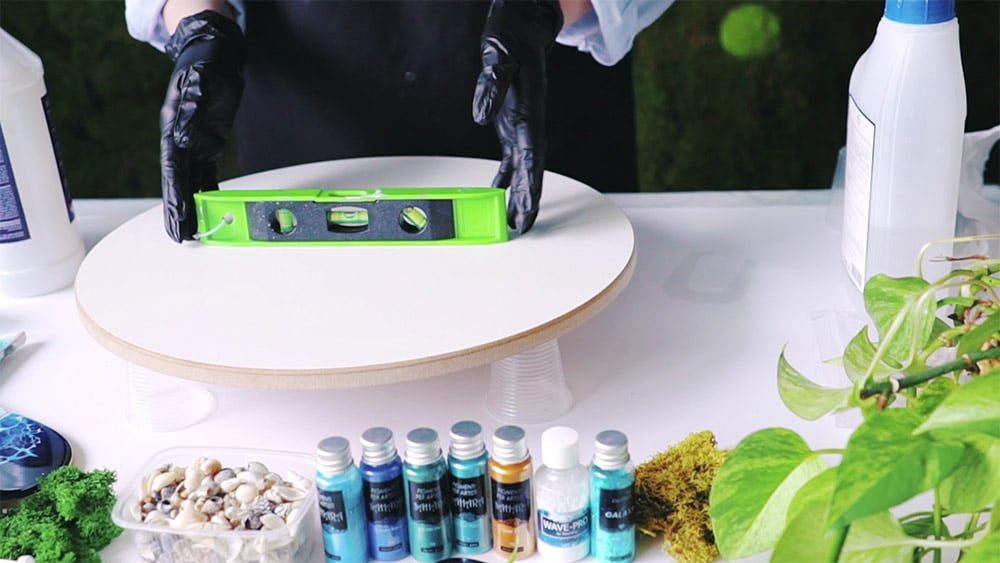
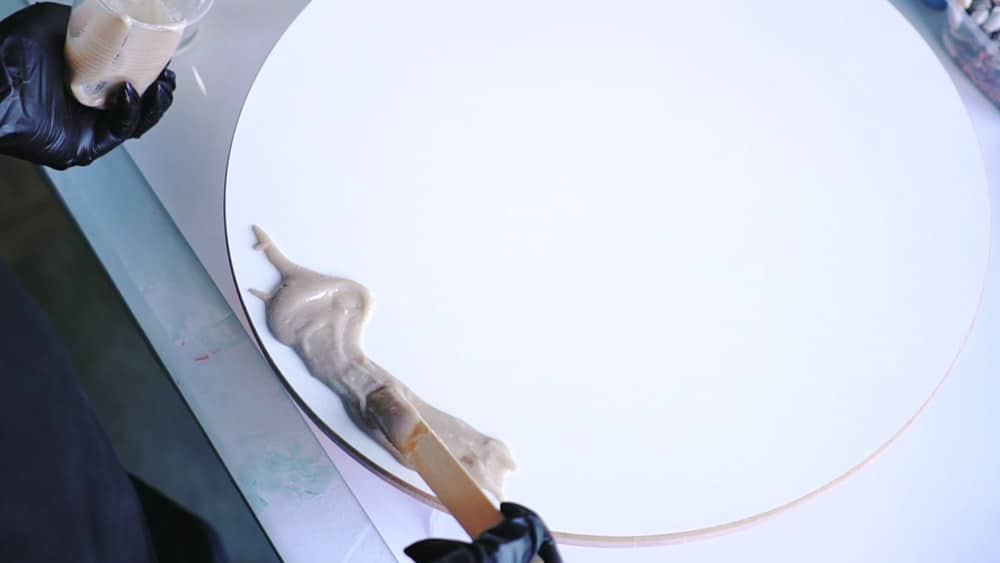
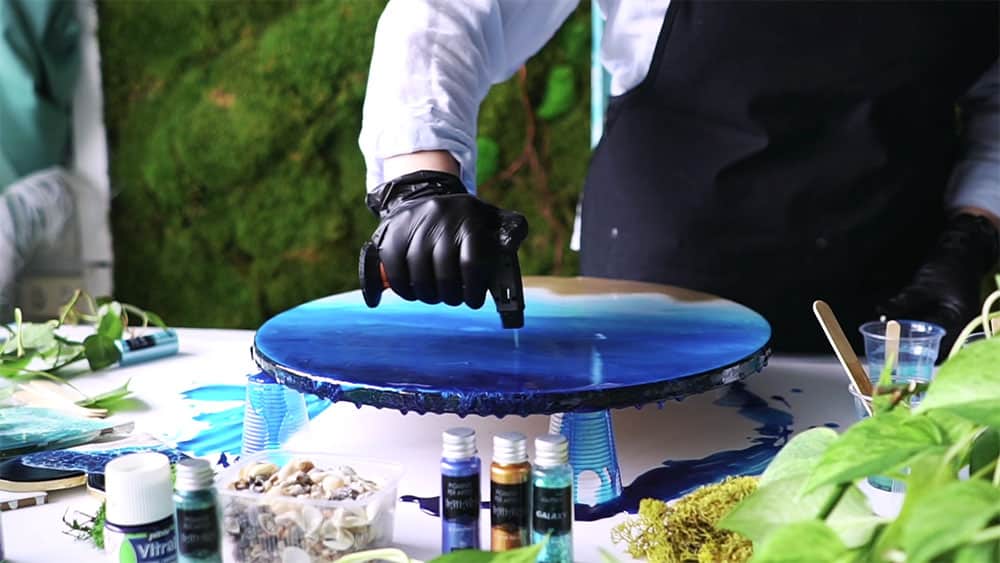
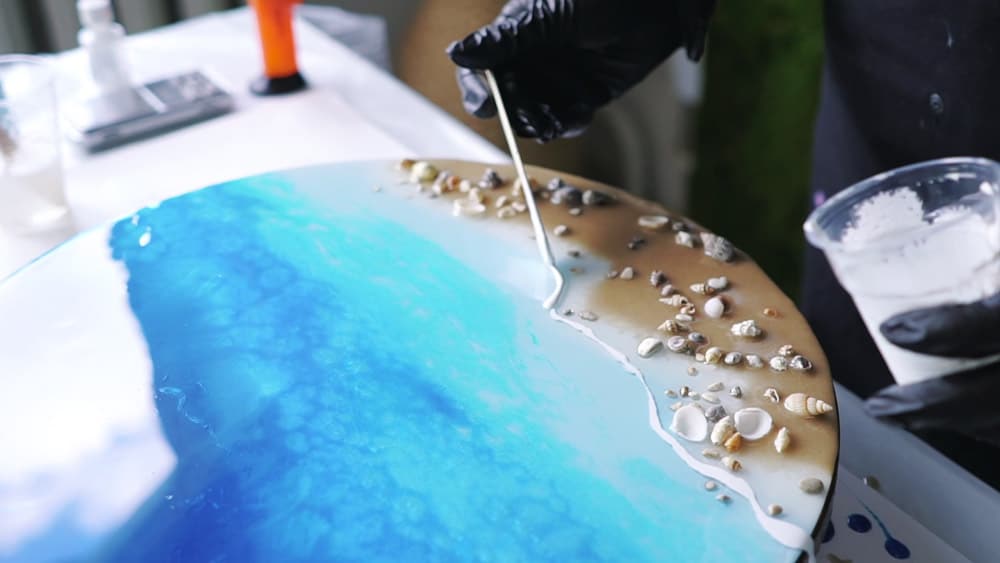
Cover the table with the protective film, place the art-board flat on the empty cups (you can use waterpass to check the level). Pour the resin on the art-board in stripes one by one: first comes the sand beach (if you have it), followed by a thin strip of transparent resin (still, if you have the beach), and then all the colors in large strips from the lightest to the darkest colour. You can tilt the board slightly for a couple of seconds for the colours to blend a bit. If some areas are not filled with resin, you can spread the resin with a wooden spatula (the resin itself can slowly fill in the empty areas, but you can help it). At this same stage, you can also use seashells, pebbles and other sea decorations by pressing them into the sand on the “beach”.
Use a small gas heat gun quickly moving the flame over the coloured background part to get rid of air bubbles that got into the resin during mixing or pouring. Do it with fast motions, because the flame can damage the resin if you hold it in one place for too long.
1. Place the art-board flat
2. Lay out the resin + sand mixture
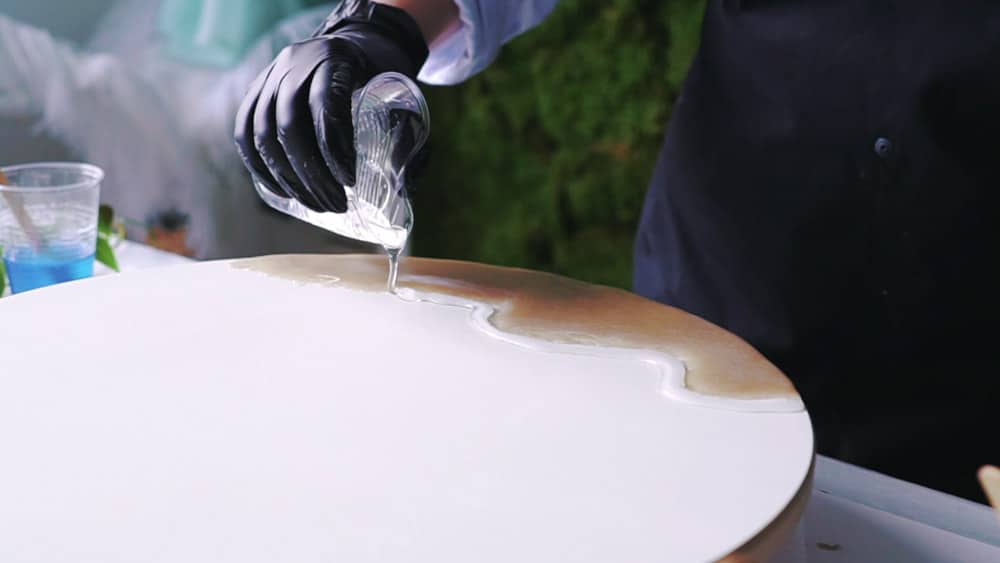
3. Make a thin transparent resin strip along the beach
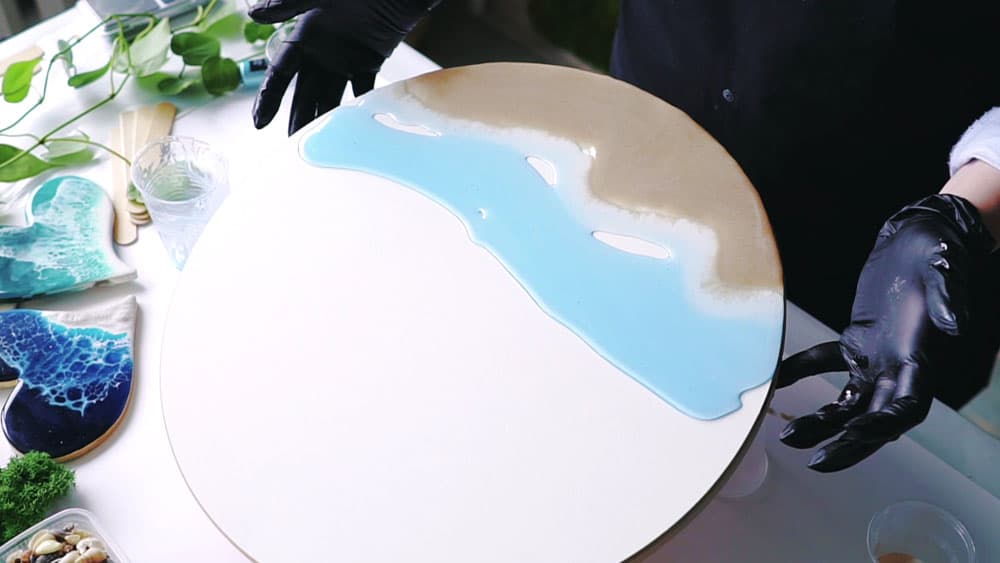
4. Pour large stripes from light to dark colour
5. Slightly tilt board so that the colours blend a little
6. Move small gas heat gun flame very quickly over the resin
4. Waiting for the right consistency of resin
Now it’s time to check the timer: it should take about 30 minutes from the first step, when you mixed “Art Pro Deluxe” resin components, to the moment of making waves (for “Art Pro” – about 60-70 minutes), but the main indicator of whether the resin is ready to make waves is its consistency. Use a wooden spatula/ plastic spoon to scoop up some resin in the cup with the waves powder mixture and let it drain back out. If you get a result similar to the video below, you can move on to making waves.
Use a spatula or spoon to apply the first thin stripe along the beach (0.5-1 cm from it) or on the lightest background color if you don’t have it.
Position a hair dryer/heat gun at an angle of about 30° from the artboard and start blowing the stripe from the “beach” into the “sea”, slowly moving from one side to the other. If it goes too tight, move dryer even slower, switch on the heating mode (if it has one) or use a small gas heat gun a little, but do not linger in one place too long (the flame will soften the resin and make it easier to blow the waves).
Using the same approach, you can make the second and third waves further from the “beach”. The main thing is to watch the time, because after 40 minutes from the moment you mixed the Art Pro Deluxe resin at the beginning, it will be almost impossible to blow the wave.
Quickly go over the waves with the flame of a gas heat gun: this will increase the effect.
Create a thin stripe along the beach
Slowly blow it with dryer at 30 ° angle
Making waves if background has hardened
If you initially created a sea background (with resin or acrylic paints) and it has already hardened, you still need a base liquid layer to create the waves. You can take a little less quantity of the transparent resin mixture than it was noted in the example in point 1. In that case, take a small portion of it and mix it with the waves powder according to the instructions in points above. Spread the rest of the mixture over the created background – this will be the liquid “base” for blowing waves. Be sure to wait 30 minutes (Art Pro Deluxe) from the time the components are mixed to the step of waves creation, considering the consistency of the mixture with the powder.
If you just painted a sea background with acrylics, firstly you need to wait for them to dry completely, and secondly, it is better to make an additional transparent layer of resin on top (also completely hardened) of the acrylic painting. With hardened top layer you will not get into a situation where the attempt to get rid of unsuccessful waves with a napkin/rag will lead to you simply wiping the unprotected sea pattern. Already after these instructions, you can start mixing the resin for the base liquid layer and the mixture with the powder for the waves.
Problems and questions:
“The waves went well at first, but than disappeared.“
The problem is probably due to the fact that the resin was not thick enough before the waves were blown – it should be thick (and of same consistency) both in the background/transparent base layer and in the waves powder mixture. This consistency can be achieved after 30-35 minutes (for “Art Pro Deluxe” resin) or 60-70 minutes (for “Art Pro” resin). Also remember that the period between mixing A + B and creating the waves is little longer if you work with a heat gun instead of regular hair drier. If you use “Art Pro Deluxe” resin, it is 30 minutes for the regular hair drier and 35-40 minutes for the heat gun. This difference in time is because the heat gun drier is more powerful and gives more heat, which makes the resin a little softer and more liquid in texture, but you will not achieve good waves with resin that is too thin.
“Resin mixed with wave pigment is too pale or the pigment does not dissolve well in the resin.“
To get the best result, the powder/resin mixture must be a rich white color – add more Wave Pro (and in small portions!) and stir more vigorously to dissolve it well. You can also add the powder to the component “A” first, stir well, and then add the component “B”. If component “A” is warmed up in hot water (only in a bottle with a tightly closed lid), the resin will become more liquid and the powder will also dissolve better, but if you heat the component too much, the resin may start to thicken faster and you may not achieve good waves.
Will regular white dye work for making a wave?
Yes, but be sure that it’s a special resin dye (not water-based). However, you will not get the perfect wave effect by using regular dye compared to Wave Pro powder.
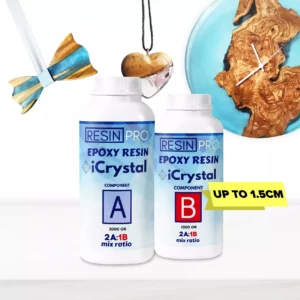
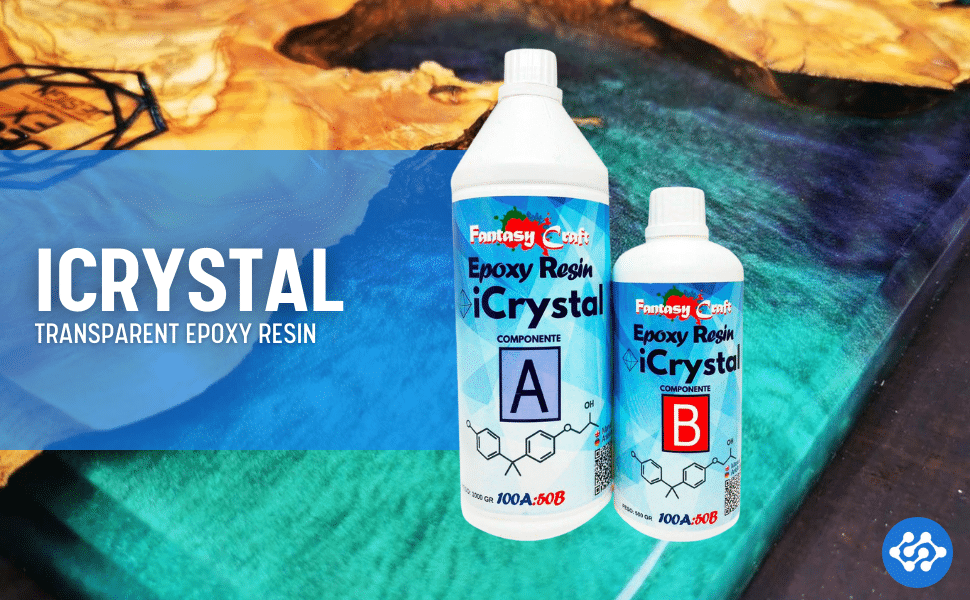
Our experts, who have already got to know our new iCRYSTAL transparent resin for castings up to 2 cm, share a few tips when working with this resin.
In their reviews they illustrate which applications this new resin lends itself to:
For wood and worktops: high transparency (water effect) and ideal for casting up to 2 cm, with an excellent quality-price ratio..
For artistic creations, jewellery, coasters, decorative works, shelves, cutting boards, dried flowers, pebbles, shells, coins, wine corks – the thinner the pour, the fewer bubbles you will have! Shiny surface and excellent self-leveling properties – the resin most recommended for beginners by experienced artists and craftsmen.
For Masterclasses: You will save yourself and your student’s time – the 2: 1 ratio is easy to use. Being an inexpensive resin, it is perfect for masterclasses, where a lot of resin is usually required! It is also suitable for other applications, and you will find all the necessary information in the review below
Here is a list of the main properties:
Resin processing time of approximately 1.5 hours
Complete hardening after 18-26 hours, and partial – after 12 hours (with higher temperatures, polymerization will be faster and vice versa)
Heat resistance up to 70 ° C
It is advisable to work at an ambient temperature of 20-24 ° and with a low humidity rate
A little secret from the ResinPro team for those who want to get a perfectly glossy surface:
After mixing the two components, it is recommended to wait 10-15 minutesuntil a temperature of about 40 ° Cis reached before casting.
This step will cause any bubbles to rise to the surface, and the pre-curing process will help avoid the influence of moisture on the resin and the appearance of dull areas or imperfections on the surface.
We have worked hard to create this ICrystal version with an unbeatable quality-price ratio!
The simple use ratio (2: 1) and the crystalline transparency of the resin are a real joy for all artists!
iCrystal: Transparent epoxy resin Crystal effectQuality at the Best Price
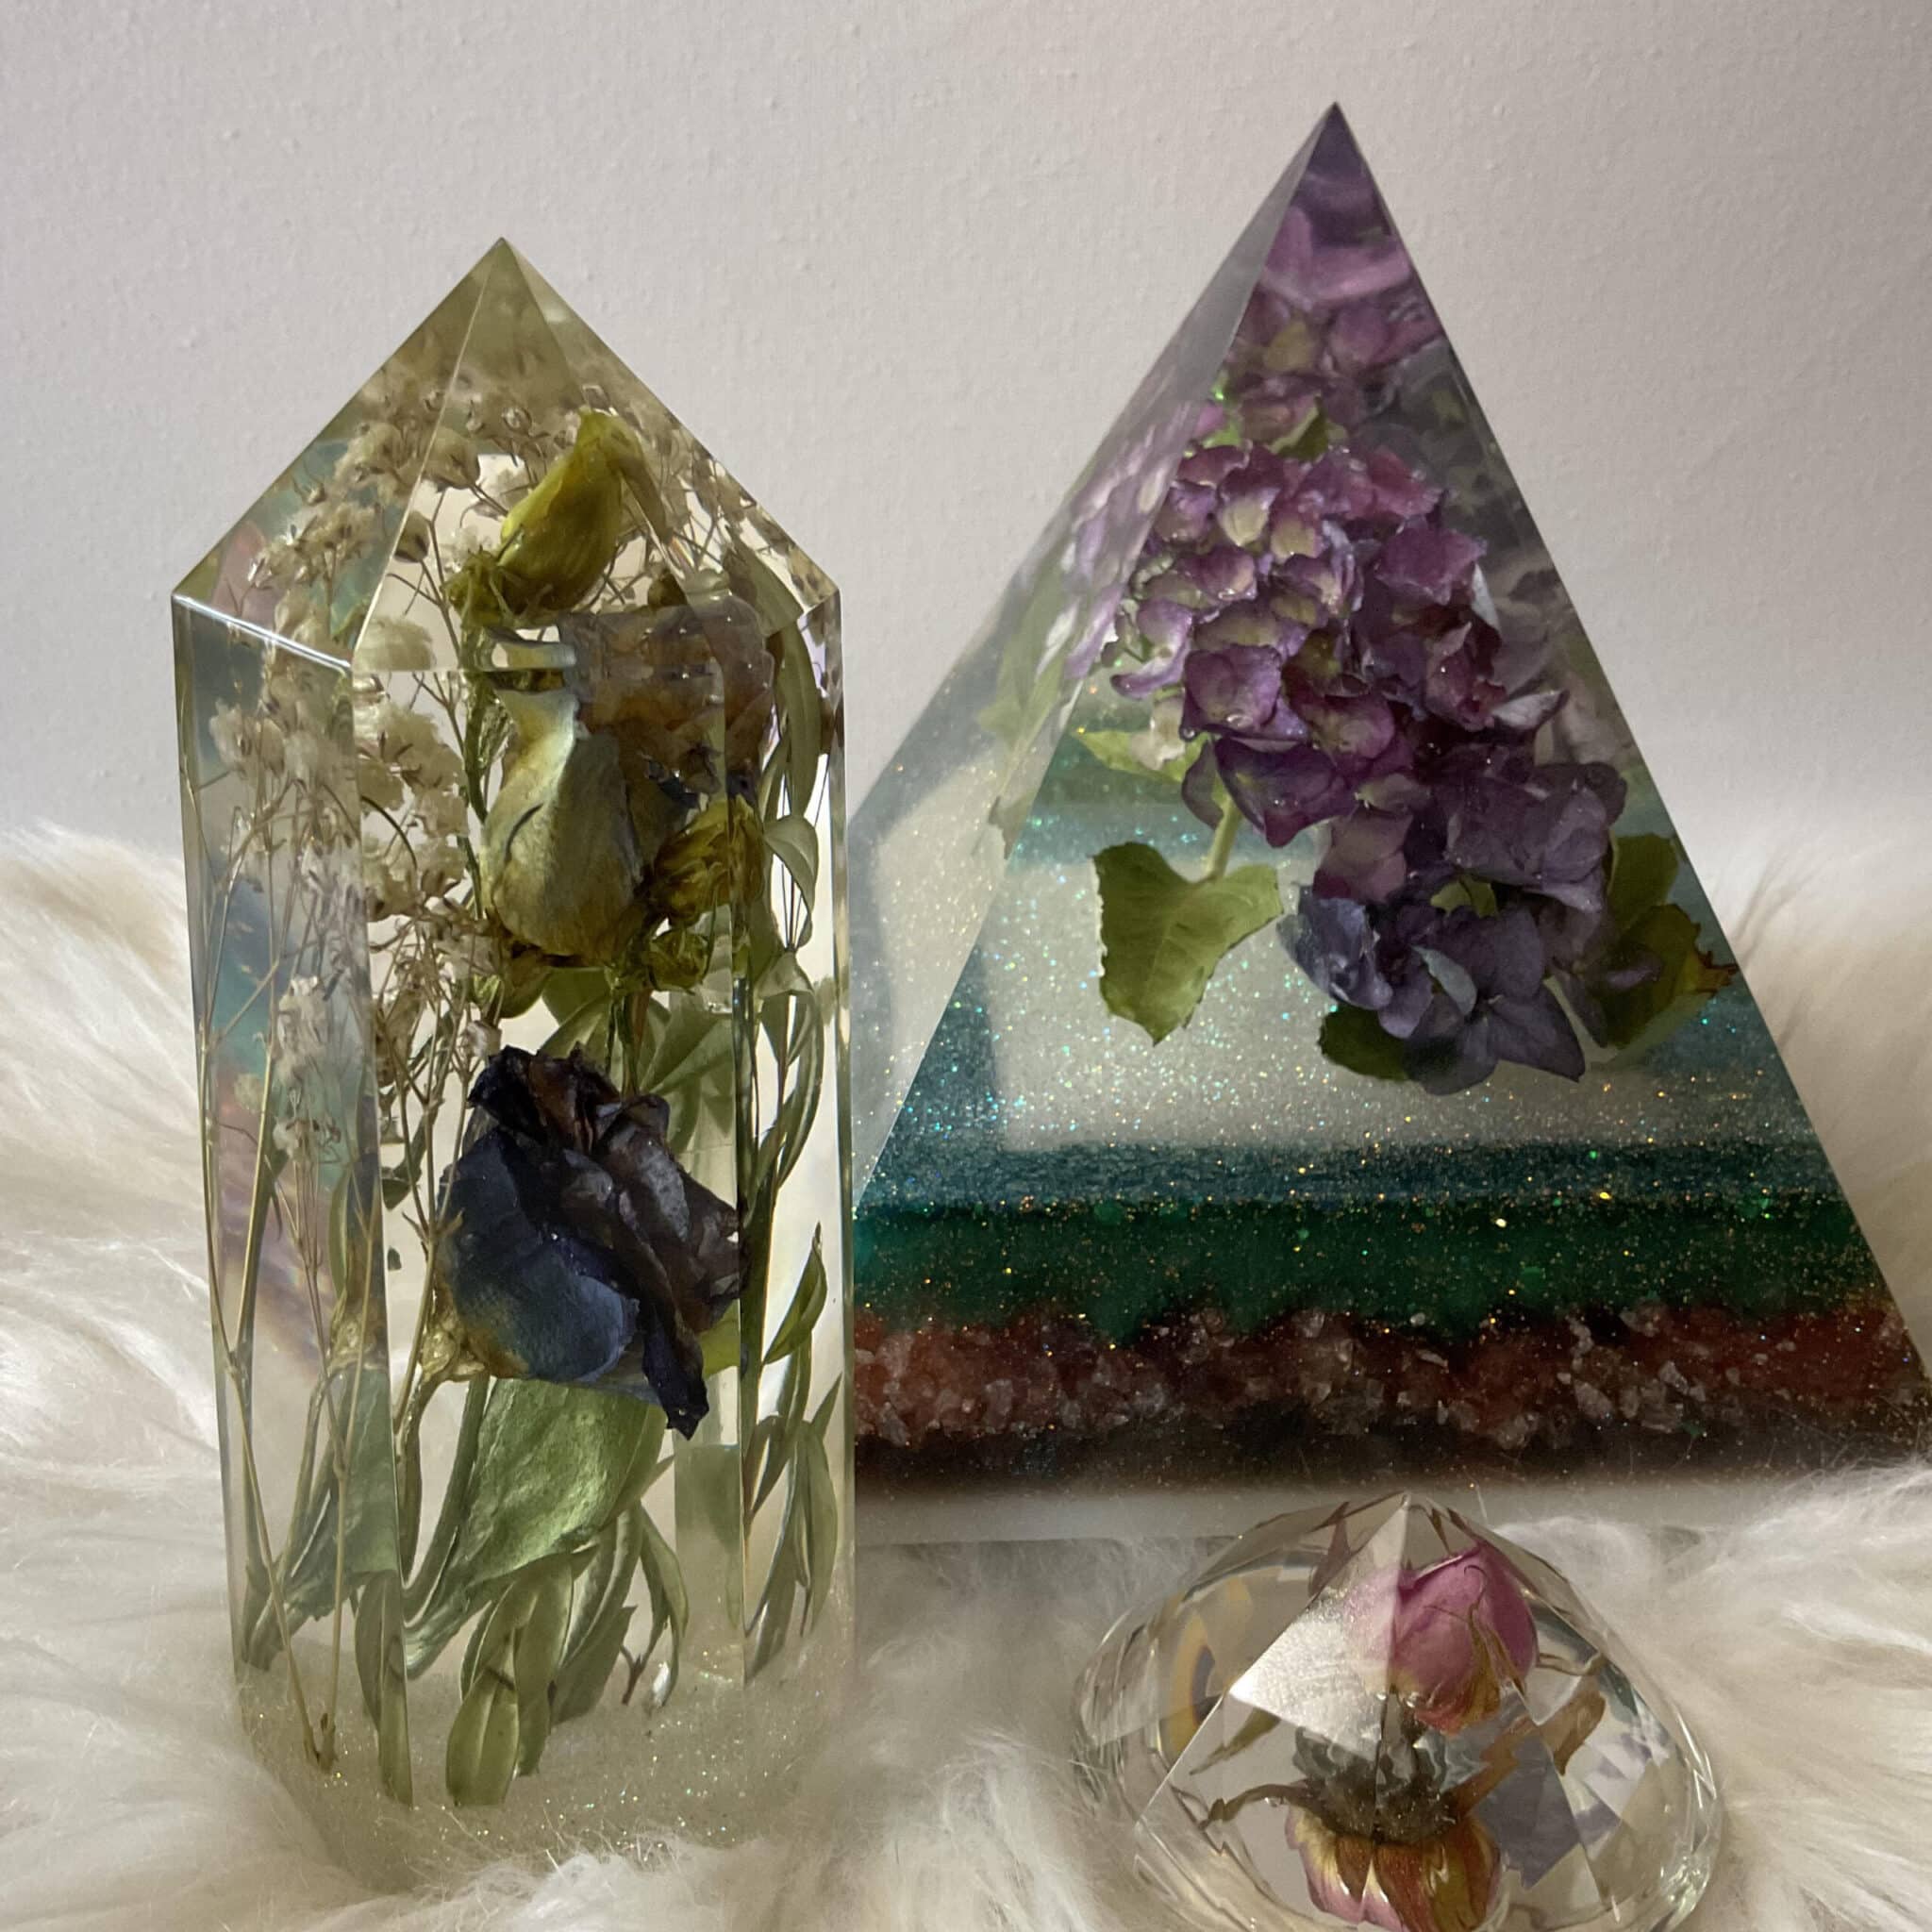
Casting dried flowers in epoxy resin can be a problem for many resin artists. Flowers, even when dried can be an annoying source of unexpected micro bubbles which can be frustrating and disappointing.
Fortunately, there is an answer to this problem and in Louise video will demonstrate to you how, by cleverly pre-coating your flowers and then immersing them in Epoxytable resin you really can achieve glass like flower castings with or without a pressure pot.
Louise Says:
I was stunned by the clarity of Epoxytable and I think you will be too.
Here are the simplified steps from the video:
Thoroughly dry your flowers and foliage before immersing in resin. I recommend Silica gel crystals from Wisedry.
Flowers, even when dry can create micro bubbles in resin so the following steps will be a great help. Mix up some resin in a tall plastic cup (about half full). Next dip your flowers into the resin until completely coated then hang them up over a plastic sheet to protect your surface. When the coated flowers have cured you can begin your casting.
Insert your flowers into your mould, mix and pour enough Epoxytable resin to reach a maximum dearth of 5cm. If your flowers are not completely covered allow the resin to cure and repeat the process.
Once the deep layer has cured, trim the flower stems and pour 2cm layers of Transparent resin – allow curing time between layers. These layers can be coloured with pigments of your choice or, for a magical touch you can addGalaxy Starlite glitters.
Repeat your shallow, coloured layers until the mould is full.
If you would like a hollow space inside so you can add a light it is possible to create a square, acrylic barrier and place it into your first shallow layer then pour the following layers around the sides of the barrier.
For a more detailed explanation please see Louise video tutorial .
Sick and tired of not achieving perfect resin waves? You have come to the right place to get useful tips!
1. First of all you need to use the right materials! We recommend this duo: Art Pro Deluxe resin (the thickest resin ever) and Wave-Pro powder.
2. Mix the amount of resin enough to cover your base + a little more. You can paint the sea background with acrylics in advance, or you can color the resin with special dyes and create a sea gradient at this step, however, we recommend waiting until the sea background has completely dried or hardened before creating the waves. This way you can remove the waves if they were not successful.
Marine background made of epoxy resin + decor
3. Pour most of the clear resin you mixed over a dry, clean background – this feature will help you to create sea waves and foam.
4. Add Wave-Pro powder to the rest of the resin and mix vigorously: you need to get a snow-white color.
5. The next step needs your patience! Wait until the resin gets very thick: It is 20-30 minutes since mixing for Art Pro Deluxe.
6. Pour the white resin in strips over a liquid transparent background and blow it at a 45 ° angle with a hairdryer or heat gun from the “shore” into the depths of the “sea”.
 Free shipping on orders over £29.85