 Free shipping on orders over £29,85


How do you make a spherical resin mould?
Creating a flawless spherical resin mould is a rewarding skill that opens up countless creative possibilities. Whether you want to cast jewellery, decorations, or unique gifts, mastering this process ensures your resin spheres come out perfectly round and clear every time. This guide offers a step-by-step approach suitable for beginners and experienced makers alike, covering every detail from planning to finishing.
A complete guide to crafting perfect round resin moulds

What You’ll Need
- “Pure Mould” – Translucent Liquid Silicone Rubber for Mould Making: A platinum-based silicone, perfect for capturing fine detail in custom moulds.
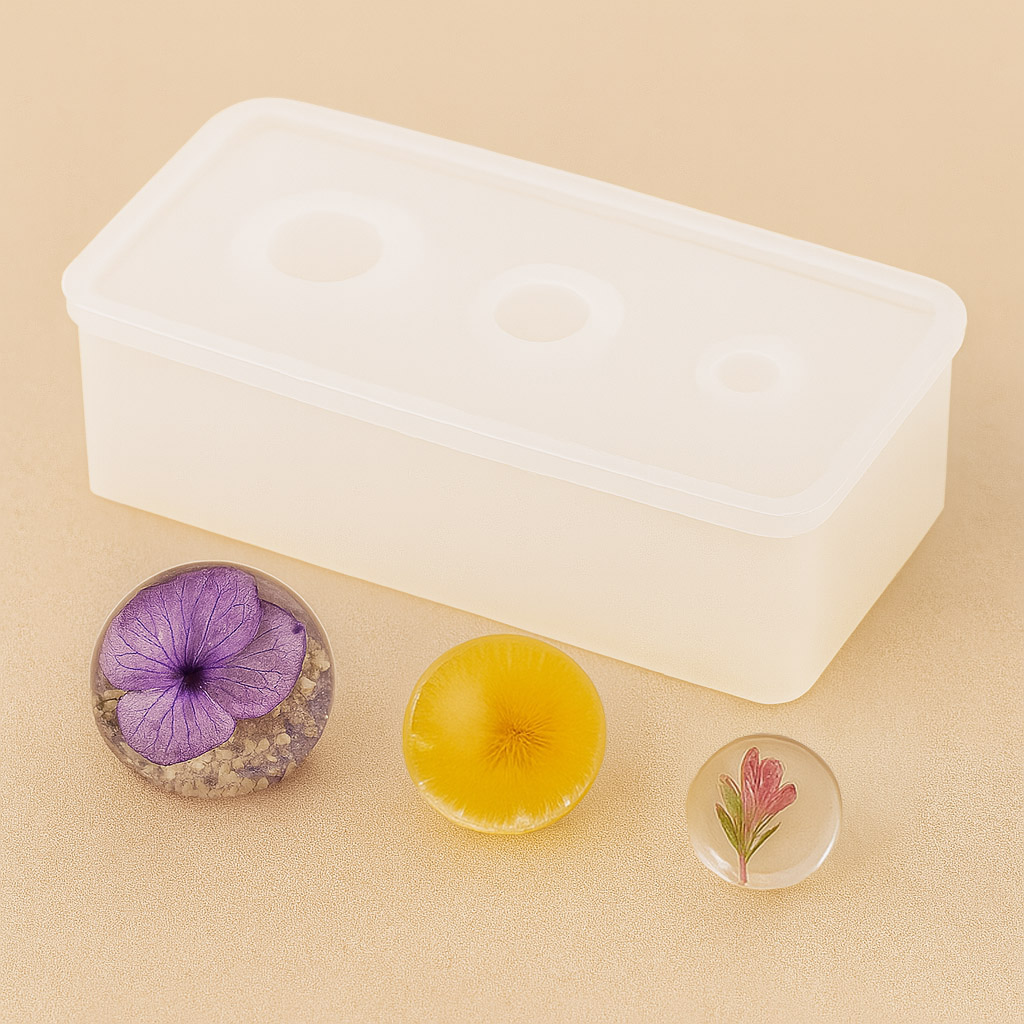
- “3 Sphere” – Silicone Mould for Jewellery and Crafts, 1cm-2.5cm Spheres: Ready-made silicone mould for casting smaller spheres.
- “Cabochon-15” – Silicone Mould for Resin, Chocolate, Soap, Plaster – Ø40mm: Hemispherical silicone mould for larger or decorative spherical projects.
- A positive (model or original object in the sphere size you want)
- Mixing cups and sticks
- Release agent (optional but helps demould complex shapes)
- Cutting tool or scalpel
- Protective gloves and workspace covering

Choosing the Right Spherical Mould Solution
Pre-made silicone sphere moulds save time and provide consistent results for common sizes, while a custom silicone mould ensures you get the exact dimensions and finish you need for unique projects.

Step 1: Plan Your Mould and Prepare the Positive
Before mixing any silicone, plan your mould carefully based on the final resin casting you want. Choose a positive made from sturdy, non-porous material in the desired sphere size. Clean the positive thoroughly, ensuring it is free from dust, grease, or debris, as this will directly impact the final finish inside the mould.
If you want a full round sphere, consider how the mould halves will join, and include a pouring spout and air vent if possible. Use a two-part mould box for a full sphere to maintain the shape’s integrity throughout the process.
Step 2: Mix and Pour Your Silicone Mould Material
Weigh out equal parts of platinum-based silicone according to your kit’s instructions, like the “Pure Mould” – Translucent Liquid Silicone Rubber for Mould Making. Stir gently but thoroughly, avoiding introducing bubbles. The translucency of this silicone allows you to watch how it flows over the positive, helping to spot trapped air.
Pour the silicone in a thin stream from a height to help break bubbles and fill all details. Avoid air entrapment during pouring by tilting the mould box to let silicone flow slowly over the positive. Tap or vibrate the mould box gently to encourage remaining bubbles to rise to the surface.
Step 3: Allow the Mould to Cure Fully
Let the silicone set according to the recommended time for your specific product. For example, “Pure Mould” silicone cures in around 3 to 8 hours, depending on temperature and thickness. Resist the urge to demould early—an under-cured mould may tear or distort, making it unusable. Allow sufficient curing time before demoulding for longevity and accurate shape retention.
Once cured, gently remove the positive, taking care around any delicate undercuts. Silicone’s flexibility helps with complex shapes, but cutting along a seam (if needed) with a scalpel will help extract the model neatly.

Step 4: Test and Use Your Spherical Resin Mould
Wash the mould with mild soap and dry it completely before casting resin. For small spheres, consider the convenient “3 Sphere” – Silicone Mould for Jewellery and Crafts, 1cm-2.5cm Spheres or for hemispheres, the “Cabochon-15” – Silicone Mould for Resin, Chocolate, Soap, Plaster – Ø40mm saves time for repetitive or batch casting.
Always pour resin according to its instructions, avoiding aggressive solvents that may damage silicone. Once cured, gently flex the mould to release your finished resin sphere. Clean and store your mould in a cool, dry place for repeated use.

Tips and Troubleshooting for Flawless Results
Keep silicone and resin work areas dust-free for best clarity. Use release agents sparingly—excess can cause pitting. To reduce bubble risks, pour both silicone and resin slowly, and consider degassing for larger volumes. If your resin sphere sticks or has a cloudy surface, check for unmixed resin or moisture in the mould.
Remember: patience during curing and careful preparation make all the difference. If issues persist, revisiting your silicone mixing or casting technique may provide solutions.
Ensuring Seamless Spheres and Easy Demoulding
Release agents can help, but using a non-stick platinum-based silicone mould is key for smooth demoulding and long mould life. Keep your workspace and tools as clean as possible for the best clarity in your resin spheres.

- "Pure Mould" – Translucent Liquid Silicone Rubber for Mould MakingPrice range: £22.85 through £158.85"Pure Mould" translucent silicone rubber is designed for creating detailed, reusable moulds. Suitable for resin, plaster, and cement.
- "3 Sphere" – Silicone Mould for Jewellery and Crafts, 1cm-2.5cm Spheres£6.85"3 Sphere" mould offers semi-transparent, reusable silicone spheres suitable for jewellery and craft projects.
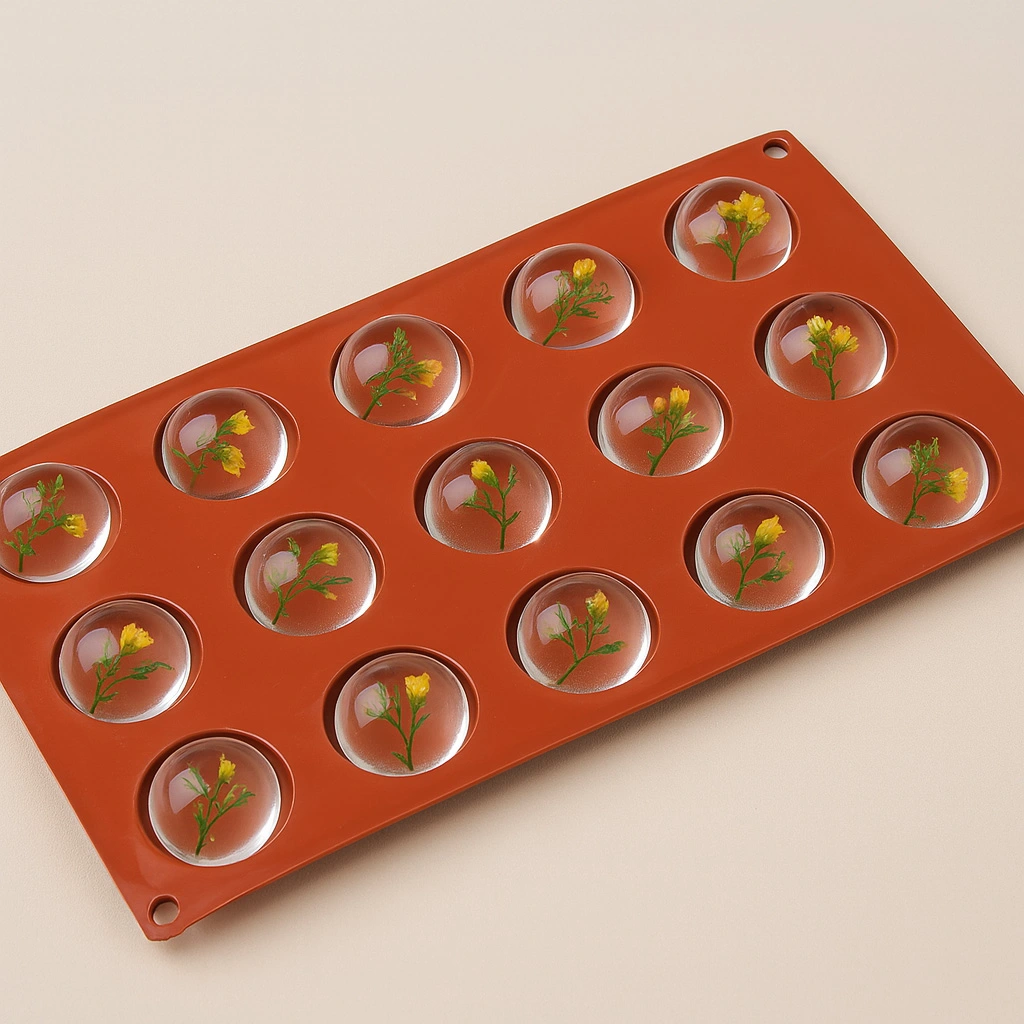 "Cabochon-15" – Silicone Mould for Resin, Chocolate, Soap, Plaster – ø40mm£13.85"Cabochon-15" is a silicone mould suitable for crafts like resin and chocolate, designed for jewellery and decorative uses.
Frequently Asked Questions
Which silicone is recommended for making spherical resin moulds?
A platinum-based, translucent silicone like Pure Mould is ideal for detailed, reusable spherical moulds.
How long should I allow a silicone mould to cure before pouring resin?
Cure time varies but typically ranges from 3 to 8 hours depending on silicone type and room temperature.
Are there pre-made silicone moulds for making resin spheres?
Yes, ready-to-use moulds like 3 Sphere or Cabochon-15 are available for common sphere sizes and save time.
What is the best way to avoid air bubbles in my mould or resin casting?
Pour materials slowly, use a thin stream, and gently tap the mould to release air bubbles.
Is a mould release agent necessary when making or using silicone sphere moulds?
Mould release is not always needed with non-stick silicone, but it can help with complex shapes.
How should I clean and store my silicone mould after using it for resin casting?
Wash gently with mild soap, dry thoroughly, and store in a cool, dry place away from sunlight.