 Free shipping on orders over £29,85


How do you polish camper resin?
Step-by-step guide to achieving a mirror finish on camper resin


Transforming dull, scratched camper resin surfaces into gleaming highlights is achievable with the right approach. Whether you’re restoring an older van or finishing a new resin coating, polishing not only restores clarity and gloss but also extends the lifespan of your project. This page will walk you through the best practices for polishing camper resin so you can achieve professional-looking results at home or in your workshop.
What You’ll Need
- “Ebonite Abralon” – Sanding Pads 360-4000 Grit for Resin and Wood: Excellent for progressive sanding and matting the surface, suitable for wet or dry use.
- 1200W Polisher for Sanding and Buffing – Variable Speed, D-Handle: For fast, even buffing and optimum shine.
- “Epoxy Polish” – Epoxy Resin Polishing System: Removes fine scratches and dullness, restoring deep gloss on clear or coloured resin areas.
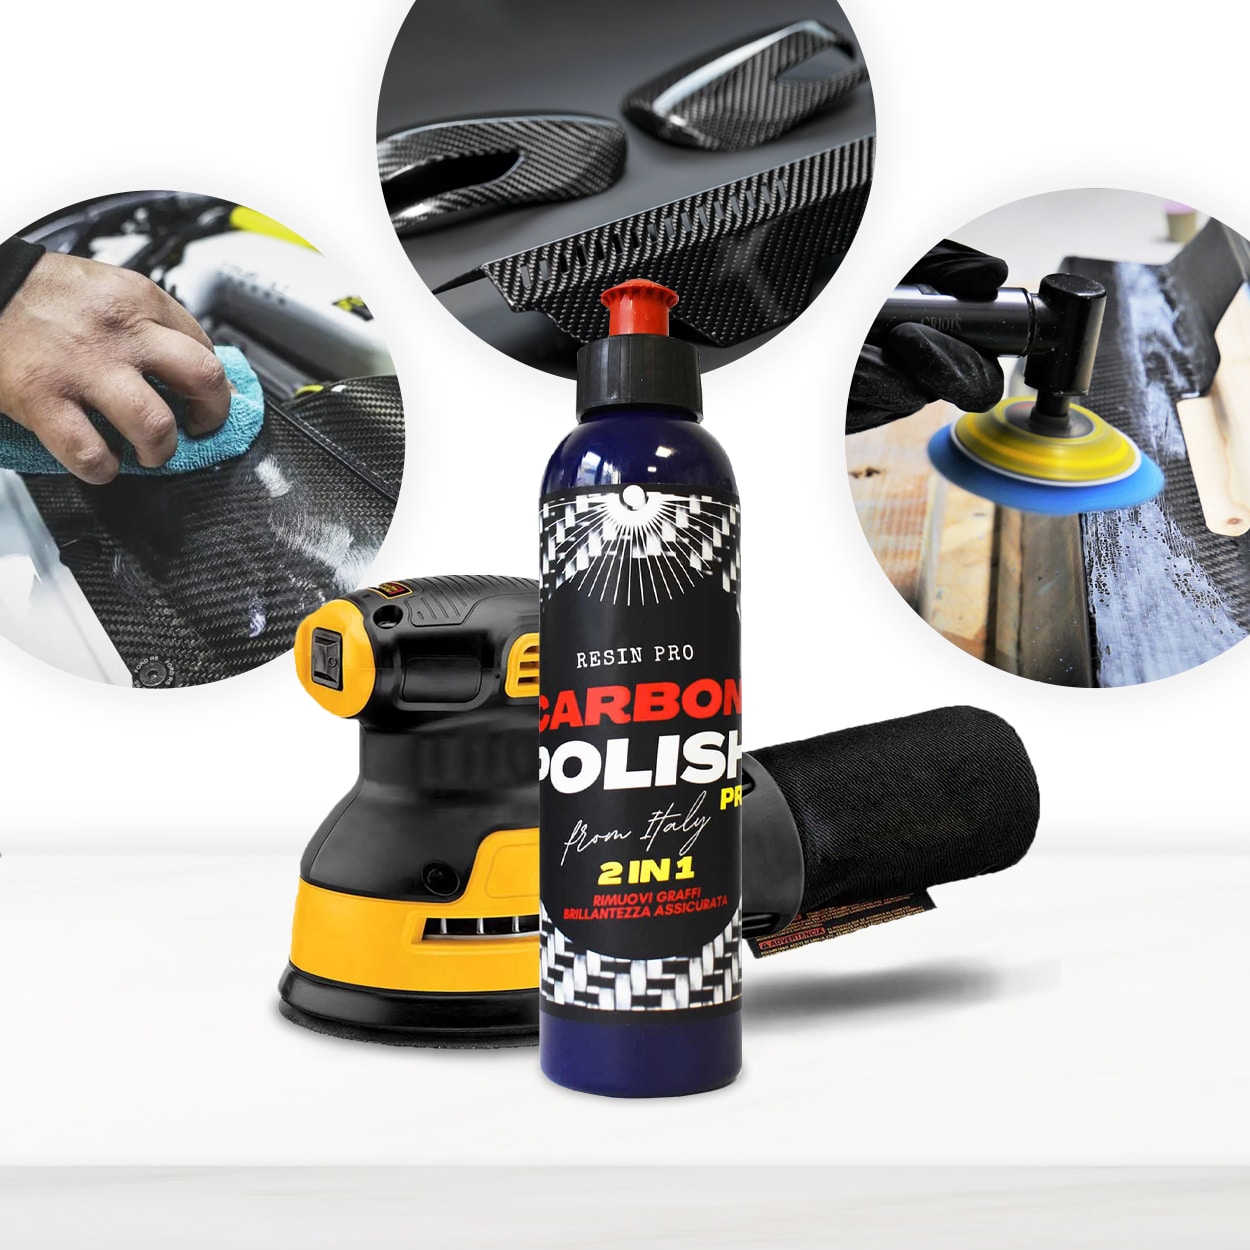
- “Carbon Polish” – Polishing System for Dark and Black Surfaces, 250ml: Ideal for dark resin sections or carbon fibre finishes, avoiding white residue.

Essential Polishing Tools in Action
See how sanding pads, polishers, and compounds combine for a professional finish on resin. Upgrading your tools ensures not only faster results but greater control over surface quality. Using dedicated resin supplies, especially on camper projects, helps achieve even sheen and lasting durability.

Step 1: Inspect and Clean the Resin Surface
Begin by thoroughly examining your camper resin for dust, grease and surface imperfections. Any contaminants left behind will interfere with the polishing process and could cause scratches. Clean the resin area using a lint-free cloth slightly dampened with clean water or a suitable resin-safe cleaner. Allow the surface to dry completely to prevent any disruption in sanding or buffing.
Pay special attention to edges, corners or pockets where debris may hide. A clean working area sets the foundation for a flawless finish.
Step 2: Sand Smooth Using Progressive Grit Pads
To remove imperfections and level out dull or uneven areas, sanding is essential. Always start with the lowest grit that will eliminate scratches and imperfections, typically 360–800 grit. Using “Ebonite Abralon” – Sanding Pads 360-4000 Grit for Resin and Wood, work evenly in overlapping, circular motions. Wet sanding is recommended to minimise dust and keep the resin cool, helping prevent clogs and streaks.
Gradually progress through higher grits (up to 2000 or 4000) for an ultra-smooth finish. Rinse the surface and allow to dry between grit changes. An even, haze-free base is crucial for a mirror-like gloss.
Step 3: Buff the Surface with a Quality Polisher
After sanding, use a variable speed polishing machine to quickly and evenly buff the surface. The 1200W Polisher for Sanding and Buffing – Variable Speed, D-Handle offers excellent control, allowing you to avoid heat build-up and achieve a streak-free result. Start with a soft polishing pad, applying minimal pressure and moving steadily across the entire resin section.
Keep the pad clean and avoid lingering over one spot to prevent surface overheating or swirl marks. Effective buffing paves the way for the final high-gloss finish.

Step 4: Polish with the Right Compound
Choose your polishing compound to match the resin colour and transparency. For most camper resin finishes, “Epoxy Polish” – Epoxy Resin Polishing System is ideal for clear or coloured resin. For dark, black or carbon fibre areas, switch to “Carbon Polish” – Polishing System for Dark and Black Surfaces, 250ml to achieve a scratch-free, residue-free gloss.
Apply a small amount of polish directly to the work area or the pad. Polish in measured sections, working the compound in with gentle, controlled strokes. Once a brilliant gloss appears, buff away excess polish with a clean microfibre cloth. Repeat as necessary to achieve a uniform, glass-like result.
Tips, Troubleshooting and Common Mistakes
Work in Clean Conditions: Avoid working in dusty workshops or outdoors on windy days to prevent debris from embedding in the resin.
Always Use Progressive Grits: Skipping grits can leave persistent scratches, making it difficult to achieve true clarity.
Do Not Overheat the Resin: Excessive heat can cause surface distortion or clouding. Let tools and surfaces cool after each pass if needed.
Remove All Residue Before Polishing: Any sandy or dusty particles left behind may scratch the resin during the final polish.
Should you encounter cloudiness, re-sand the affected area with a finer pad and repeat the polish in gentle, overlapping movements. Surface preparation is always key for a lasting shine.
Frequently Overlooked Steps for Lasting Gloss
Attention to preparatory work and tool choice will set your camper resin apart from the rest. Consistent sanding grit progression and using resin-specific polishes are crucial for a resilient, high-gloss finish that stands up to the demands of travel and outdoor exposure.

- "Epoxy Polish" – Epoxy Resin Polishing SystemPrice range: £17.85 through £44.85"Epoxy Polish" is designed for polishing resin surfaces, offering a straightforward method to achieve a glossy finish relevant to camper resin…
- "Carbon Polish" – Polishing System for Dark and Black Surfaces, 250mlPrice range: £17.85 through £44.85"Carbon Polish" is designed for polishing dark and black surfaces, suited to epoxy resin projects for an enhanced finish.
 1200W Polisher for Sanding and Buffing – Variable Speed, D-Handle£85.95The 1200W Polisher is designed for sanding and polishing tasks, suitable for both hobbyists and professionals working with epoxy resin.
 "Ebonite Abralon" – Sanding Pads 360-4000 Grit for Resin and Wood£3.95Sanding pads designed for polishing epoxy resin and wood, suitable for wet or dry use with consistent surface pressure.
Frequently Asked Questions
Can I polish camper resin by hand?
Manual polishing is possible for small areas, but using a polishing machine achieves much better consistency, gloss, and efficiency.
How do I avoid cloudiness after polishing camper resin?
Cloudiness usually results from incomplete sanding or trapped residue. Use fine grit pads and thoroughly clean before final polishing.
What is the best polish for dark or black camper resin?
A dedicated dark surface polish prevents white residue and brings out depth, such as Carbon Polish formulated for black or carbon fibre resin.
Do I need to use all grits for sanding?
Stepping through multiple grits is important. Skipping grits can leave persistent scratches visible after polishing.
Is polishing camper resin safe for DIYers?
Yes, with basic protective gear and attention to tool operation, both professionals and hobbyists can safely polish camper resin.
What if small scratches remain after polishing?
Repeat sanding with a finer pad, then reapply polish. Persistent scratches typically need extra surface preparation.