 Free shipping on orders over £29,85

How to build a mould for resin?
Step-by-step guide for custom resin mould making


If you want to cast unique resin pieces or bring custom shapes to life, learning how to build a mould is your essential first step. Building your own mould lets you design one-of-a-kind items, ensures a professional finish for your castings, and opens up creative possibilities whether you’re a hobbyist or working on commercial projects. This guide will take you through everything required to confidently construct reliable, reusable resin moulds.
What You’ll Need
- “Pure Mould” – Translucent Liquid Silicone Rubber for Mould Making: Platinum based silicone rubber ideal for detailed, custom moulds
- “Silicone Hexagons Mould” – For Creating with Epoxy Resin – 24x21cm: Reusable silicone mould for geometric shapes and decorative items
- “Silicone Circle Mould” – For Creating with Epoxy Resin, Ø 20cm: Versatile commercial mould for circular projects and mementoes
- “Rectangular Mould” – Silicone Formwork 19.5×13.5cm: Ready-made rectangular formwork for quick crafts
- Object to replicate (for custom moulds)
- Mixing containers, stirring sticks, gloves, and a clean workspace
- Mould release agent (if required for your project)

Essential Tools and Silicone Products for Resin Mould Making
Using the right silicone rubber or mould is key to successful resin casting. A platinum-based translucent silicone like “Pure Mould” – Translucent Liquid Silicone Rubber for Mould Making ensures you capture every detail, while reusable silicone forms make creative projects accessible and consistent. Select based on your project’s complexity and the finish you desire.
Step 1: Choose the Right Mould Type
Start by deciding whether to use a ready-made silicone mould or to make a fully custom mould for your resin project. Commercial options like hexagon, circle or rectangular silicone moulds are perfect for beginners or for consistent geometric results. However, for intricate items, objects with undercuts or personal designs, use a liquid silicone rubber kit to create a tailored mould that fits your chosen model precisely.
Assess factors such as the level of detail required, the size of your object, and intended number of uses. Custom silicone rubber moulds are highly durable and reusable, making them excellent for repeated castings.

Step 2: Prepare Your Moulding Area Thoroughly
Lay out all your materials in a dust-free zone and protect surfaces with disposable coverings. Ensure your base (the box or form around your original model) is level and sealed to prevent leaks. Secure your object to the base so it doesn’t float. If using a ready-made mould, simply ensure it is clean and dry before pouring resin.
For custom shapes, consider applying a mould release spray to your model unless the silicone itself is specified as non-stick. This step helps guarantee easy demoulding and preserves detail.
Step 3: Mix and Pour the Silicone Accurately
Carefully read the instructions for your silicone product before mixing. For liquid silicone rubber with a 1:1 ratio, weigh or measure both components in equal amounts for accurate catalysis. Stir slowly to avoid introducing air bubbles; consider pouring in two stages to further reduce bubbles on the mould surface. Gently tap the container and let it rest briefly to help bubbles escape.
If you use the “Pure Mould” – Translucent Liquid Silicone Rubber for Mould Making, note its transparency is helpful for monitoring during the curing process.
Step 4: Allow Proper Time for Curing
Leave your mould undisturbed as it sets. Silicone rubbers may need from 3 to 8 hours for full curing, depending on the product and environmental conditions. For best results, avoid movement and temperature fluctuations during curing as these may impact the shape or surface finish of your mould.
Resist the urge to demould too soon; a fully cured mould will flex without tearing and capture all details of your master model. Most commercial silicone moulds are ready to use immediately but still benefit from an initial wash and air dry before pouring resin.

Step 5: Demould with Care and Attention
Once cured, gently remove the original object and trim any excess silicone with a sharp blade. Take time to inspect the mould for any imperfections before using it with resin. If you are using a flexible commercial mould, demould your resin item within the recommended window (often within 12 hours) to prevent sticking or surface issues.
Proper handling at this stage ensures your mould can be reused many times without tearing or warping, and your resin casting emerges clean and crisp.
Tips, Common Mistakes and Troubleshooting
Choose the Right Mould Type: Custom projects benefit from liquid silicone for a perfect fit, while premade silicone forms are great for standard shapes.
Prepare Your Moulding Area Thoroughly: Dust or oils can mar the surface. Always work on a stable, clean base and use gloves to avoid contamination.
Mix and Pour the Silicone Accurately: Inaccurate ratios or over-mixing cause weak or bubbly moulds. Take care with weights and stirring pace.
Allow Proper Time for Curing: Rushing leads to deformed or sticky moulds. Wait for full cure before use.
Demould with Care and Attention: Forcing the mould or removing before curing can damage detail and warp the shape. Always demould slowly and support flexible areas.
Maintaining Your Resin Moulds for Longevity
Caring for your silicone moulds extends their lifespan and performance. Always demould gently, store them flat away from direct sunlight or heat, and avoid harsh cleaning solvents. A simple rinse and air dry is generally sufficient to keep your moulds in perfect condition for repeated resin casting.

- "Pure Mould" – Translucent Liquid Silicone Rubber for Mould MakingPrice range: £22.85 through £158.85"Pure Mould" is a translucent liquid silicone rubber suitable for making detailed moulds compatible with various materials including resin.
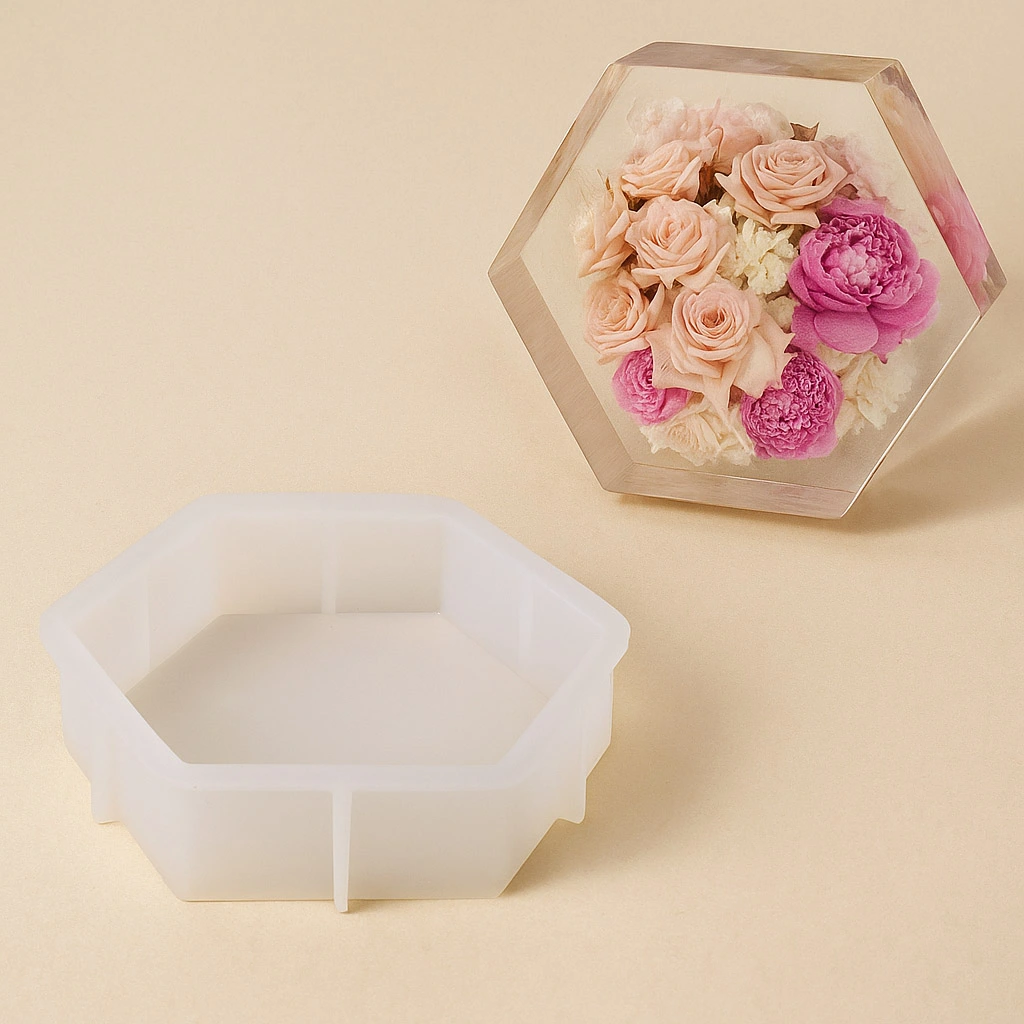 "Silicone Hexagons Mould" – For Creating with Epoxy Resin – 24x21cm£12.85Flexible silicone mould suitable for creating decorative objects and coasters with epoxy resin.
- "Silicone Circle Mould" – For Creating with Epoxy Resin, Ø 20cm£12.85Flexible silicone mould suitable for creating decorative resin pieces such as coasters and mementoes.
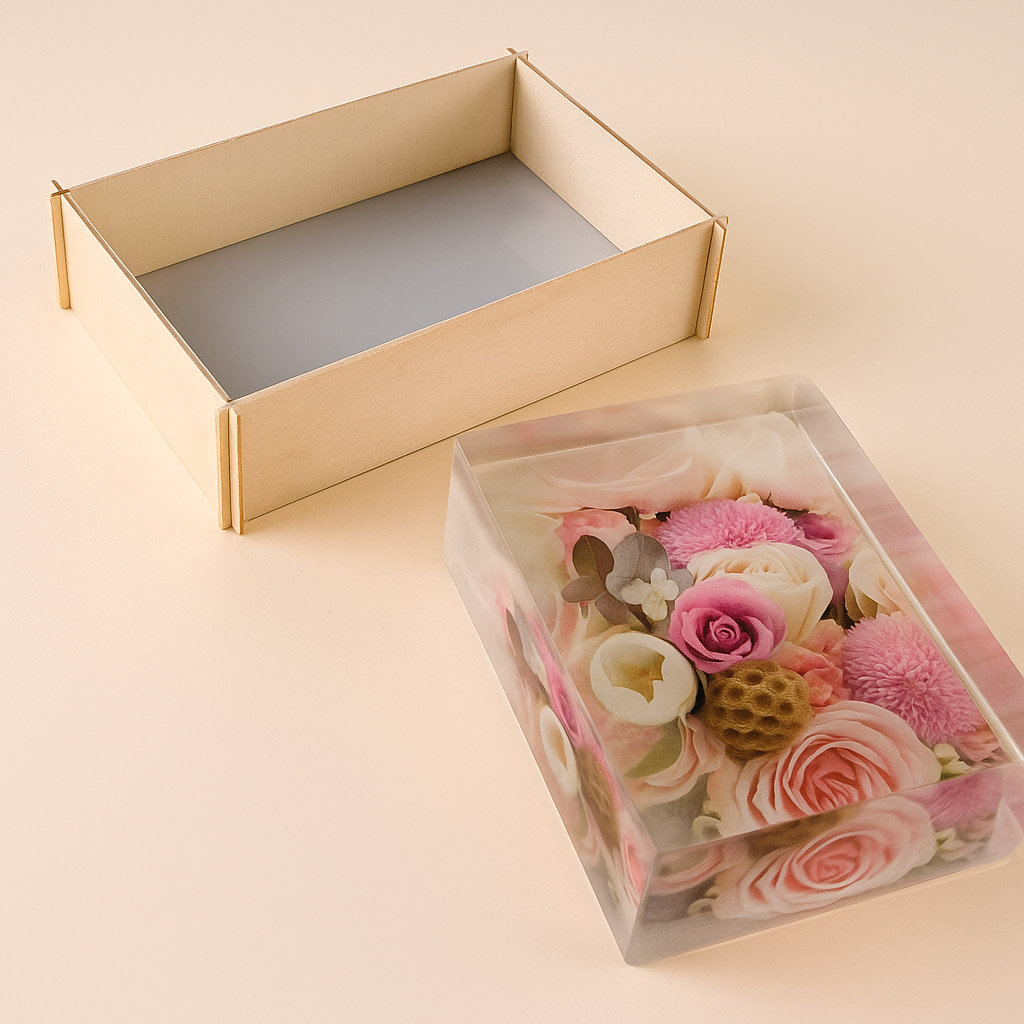 "Rectangular Mould" – Silicone Formwork 19.5×13.5cm£10.85Formwork designed for square-shaped resin creations, made from professional silicone and chipboard within a practical size.
Frequently Asked Questions
What silicone is best for custom resin moulds?
A platinum-based translucent silicone like "Pure Mould" captures fine detail and offers high durability for resin casting.
Do I need a mould release agent with silicone?
A release agent is sometimes required, especially with complex originals, but many silicone moulds are non-stick by nature.
How long should silicone mould cure before use?
Curing can take 3–8 hours depending on silicone type and temperature. Wait for full cure before demoulding or pouring resin.
How do I avoid bubbles in my silicone mould?
Mix slowly, pour gently, and allow silicone to stand briefly. Tapping the container helps release trapped air.
How do I clean silicone resin moulds between uses?
Rinse with warm water and mild soap, then air dry. Avoid vigorous scrubbing or harsh chemicals.
Can I use commercial silicone moulds for resin?
Yes, ready-made silicone moulds are ideal for uniform decorative pieces and quick projects.