 Free shipping on orders over £29,85


How to Create a Resin Mould?
Easy step-by-step process for custom resin moulds


Creating your own resin mould offers unlimited creative possibilities for crafters, artists, and makers. With a purpose-built mould, you can produce unique shapes for artwork, decor, jewellery, and more — all tailored to your vision. This guide walks you through a reliable, stepwise approach to making custom resin moulds, ensuring precise results for both beginners and seasoned creatives.
What You’ll Need
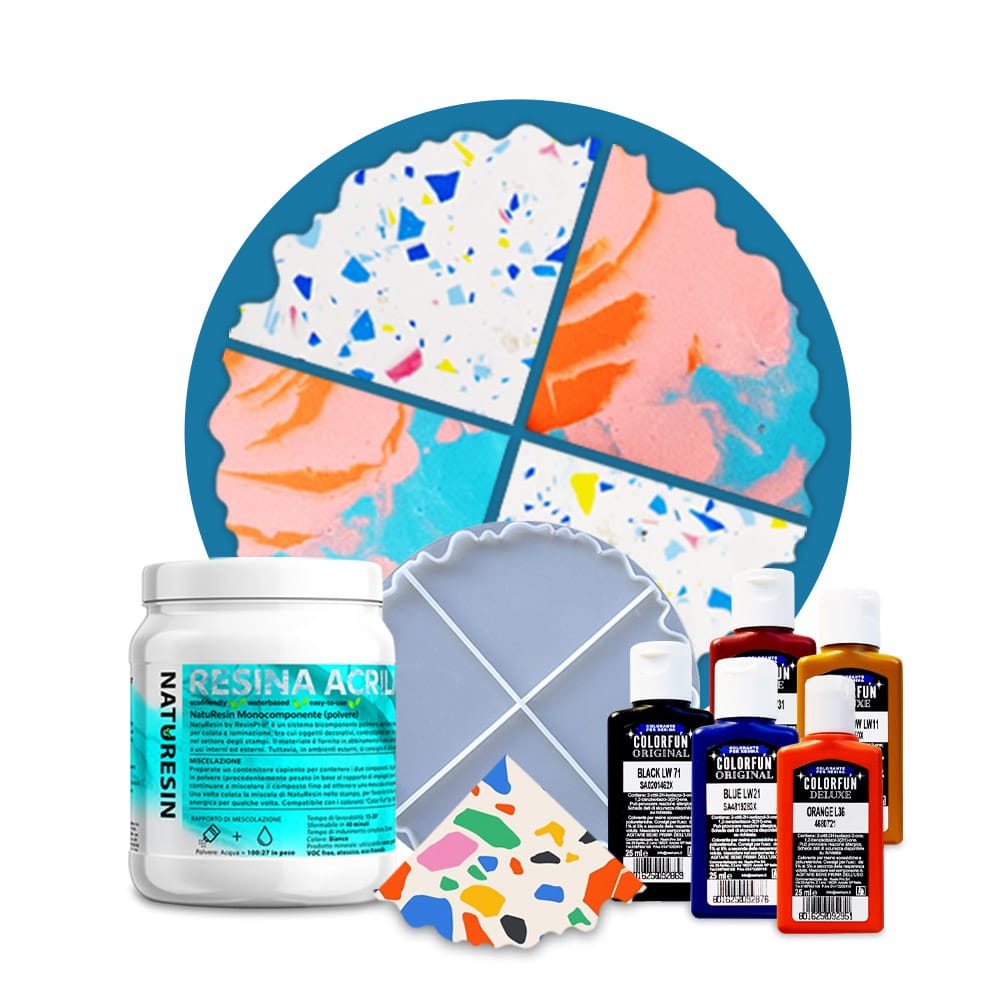
- “Pure Mould” – Translucent Liquid Silicone Rubber for Mould Making: A professional-grade platinum-based silicone, ideal for detailed and stable moulds.
- “Tray” – Complete Resin Tray Kit with Silicone Mould and Colour Dyes (optional): For practising with ready-made moulds and resin projects.
- “Coasters” – Creative Kit with Mineral Resin and Silicone Mould (optional): Ideal if you want quick projects with mineral resin.
- UV Resin Kit with 5 Christmas Silicone Moulds for Festive Crafting (optional): For projects involving UV resin and themed moulds.
- Original model (the item you wish to replicate)
- Mixing container and stirrer
- Mould housing (e.g., a plastic container or custom frame)
- Disposable gloves and apron
- Release agent (if needed for complex shapes)

See the Silicone Mixing Process in Action
Observe how translucent silicone is blended and poured to capture every detail of the model, highlighting the clarity and quality achievable with a professional product like Pure Mould. This step is crucial for ensuring accurate moulds.

Step 1: Prepare the Model and Workspace
Start with a completely clean, dry, and dust-free model — this can be anything from a figurine to a piece of jewellery or a simple geometric solid. The workspace should be level and protected from spills; cover your working area and keep necessary tools within reach. Always read the instructions for any materials you are using to ensure safety and the best outcome.
If your model has undercuts or fine detail, consider using a mould release agent. Secure the model to the base of your mould housing, ensuring it does not touch the container’s sides (unless making a two-part mould).
Step 2: Measure and Mix Your Silicone Rubber
Following your product’s guidance is key when mixing the silicone. For instance, “Pure Mould” – Translucent Liquid Silicone Rubber for Mould Making features a straightforward 1:1 ratio by volume or weight, making the process user-friendly whether you are a beginner or hobbyist. Stir thoroughly until you achieve a uniform mixture, scraping the sides and bottom to prevent unmixed patches.
Work at a steady but efficient pace, as silicone can begin to cure within a few minutes. Ensure your workspace is well-ventilated and wear gloves to avoid skin contact. Tap the mixing container gently to help release air bubbles before pouring.
Step 3: Pour the Silicone and Cure
Slowly pour the mixed silicone into the mould housing, starting from the lowest point, allowing the liquid to rise and cover the model completely. Pouring in a thin stream can help reduce bubbles and ensure all intricate details are captured.
Once poured, leave the mould undisturbed in a dust-free environment. The curing time will depend on your chosen rubber; with “Pure Mould” silicone, expect approximately 3–8 hours for full set. Do not rush the curing process — patience at this stage means better accuracy and durability later on.

Step 4: Demould and Inspect the Silicone Mould
After the specified curing time, gently flex or peel the silicone away from the mould housing. Remove the original model with care, working slowly to avoid tearing any fine details. The result should be a flexible, translucent mould ready for resin casting. Look for air bubbles or missed details and address these in future pours or touch-ups.
Your silicone mould can now be used with epoxies, mineral resins, or even UV resin for jewellery or artistic items. If you are keen to jump straight into a project, an all-in-one kit like the “Tray” – Complete Resin Tray Kit with Silicone Mould and Colour Dyes provides everything for immediate creative casting.

Tips, Common Mistakes, and Troubleshooting
• Use a translucent silicone such as Pure Mould to monitor air bubbles as you work.
• Cleanliness is essential; dust or debris in the model will transfer to your mould.
• For deep or complex shapes, apply a release agent and pour the silicone in stages to minimise trapped bubbles.
• When using UV resins, remember a UV lamp is essential for curing.
Following this workflow ensures durability and precise detail in your custom moulds while allowing you to experiment with a range of resins for every creative ambition.
Finished Resin Moulds for all Creative Projects
Explore completed resin moulds ready for casting—perfect for jewellery, trays, coasters, or seasonal crafts. Discover how the right materials give sharp detail and durability, supporting ongoing creative work.

- "Pure Mould" – Translucent Liquid Silicone Rubber for Mould MakingPrice range: £22.85 through £158.85"Pure Mould" is a translucent liquid silicone rubber suitable for mould making compatible with resins and other materials.
- "Tray" – Complete Resin Tray Kit with Silicone Mould and Colour Dyes£54.85This kit offers a ready-to-use set with resin, mould, and dyes for creating resin trays with user-friendly instructions.
 "Coasters" – Creative Kit with Mineral Resin and Silicone Mould£38.85The COASTERS resin craft kit includes mineral resin and silicone moulds, designed for creative coaster making with a matte, natural stone texture.
 UV Resin Kit with 5 Christmas Silicone Moulds for Festive CraftingPrice range: £14.85 through £25.85This kit includes fast-curing clear UV resin and five Christmas-themed silicone moulds for seasonal craft projects.
Frequently Asked Questions
How long does silicone take to cure for resin moulds?
Most platinum-based silicones cure within 3–8 hours, depending on product and temperature. Always follow package instructions for best results.
How can I avoid air bubbles in resin moulds?
Mix slowly, pour from a low height, and tap the container gently to release any trapped air.
Do I need a release agent for resin moulds?
A release agent is useful for models with undercuts or unusual shapes, helping removal and preventing sticking.
Can I use UV resin in my silicone mould?
Yes, as long as your mould is translucent, UV resin is compatible and cures efficiently under a UV lamp.
Will my resin mould shrink with use?
Quality platinum silicones have minimal shrinkage, offering a longer service life even after multiple uses.
What types of resin can I use with my mould?
Silicone moulds work well with epoxy, polyurethane, polyester, mineral resins, and UV resin.