 Free shipping on orders over £29,85

How to create the wave effect with resin?
Master ocean-inspired art with flowing, realistic resin waves

Creating the wave effect with resin is a popular trend in ocean and seascape art, producing breathtaking, realistic wave patterns and lacy foam for a coastal finish. This step-by-step guide will show you how to achieve professional-quality wave effects for wall art, trays, coasters, or beach-inspired décor. Ideal for beginners and advanced resin artists alike, this method focuses on technique, timing, and material selection for stunning results every time.
What You’ll Need
- “Art Pro Deluxe” – Ultra-High Viscosity Epoxy Resin for Artists – A thick, self-levelling resin providing control for precise wave patterns.
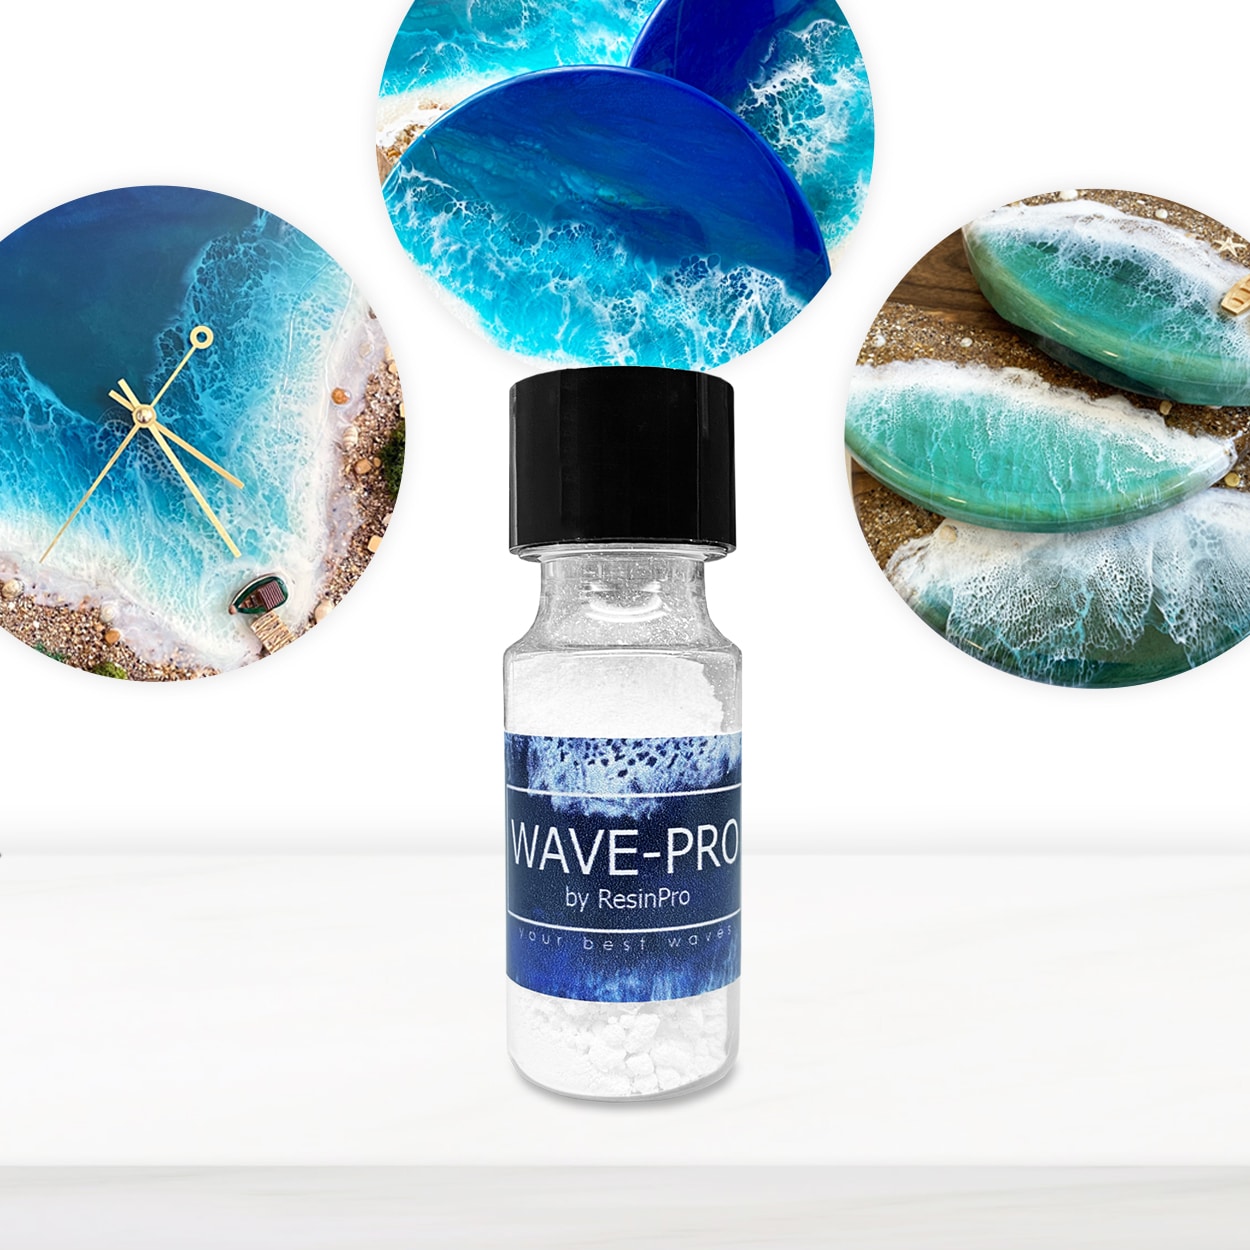
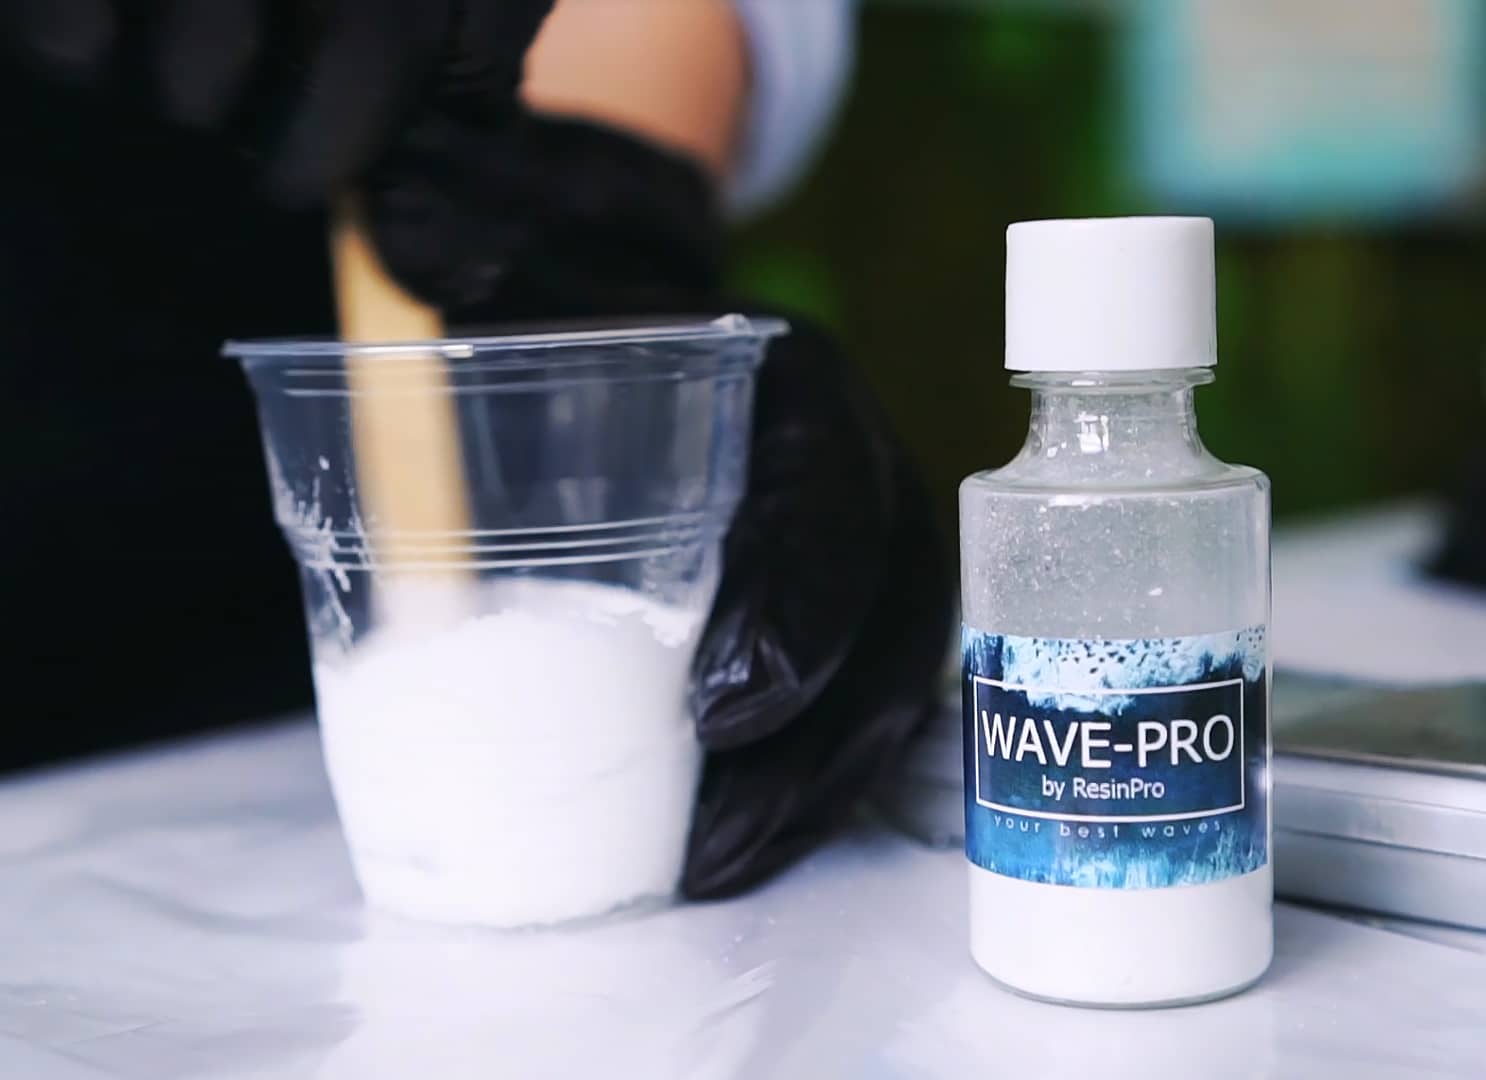
- “Wave-Pro” – Pigment Additive for Sea Wave Effect in Epoxy Resin – For dynamic lacy and foamy wave lines.
- Epoxy-safe pigment pastes (white and blues recommended)
- Mixing sticks and disposable cups for accurate measuring
- Nitrile gloves and a dust-free workspace
- Primed panel, canvas, or board as your base
- Protective covering for your work surface
Visualising Beach Resin Art Setup
Prepare your workspace by laying out your resin, pigments, gloves, and mixing tools neatly and safely. This is the foundation for a smooth creative process and helps avoid contamination or errors.
Step 1: Prepare the Surface and Workspace
Surface must be clean, dry, and free from dust or oils to ensure the resin adheres perfectly. Wipe your base down with a lint-free cloth if necessary. Lay out all materials in advance. Work in a dust-free area and use gloves both for hygiene and to avoid contaminating your piece. If using a pre-primed canvas, tape off edges for a neat border. Secure your panel with painter’s tape underneath to catch any resin drips.
Step 2: Mix Your Resin and Pigments
Use high viscosity resin for controlled waves such as Art Pro Deluxe for best results in wave effect layering. Follow the recommended mixing ratio, blending Part A and Part B slowly for several minutes so no streaks remain. Mix pigments thoroughly—avoid overmixing! Pour a small portion of resin into separate cups, tinting one with blue (for water) and one with white (for waves).
Step 3: Pour the Base Layer and Create Waves
Start by pouring the blue-tinted resin diagonally or horizontally across your base to form the ocean background. Tilt the panel gently to move and settle the resin evenly, creating soft movement. Once positioned, use a clean stick or brush to line the areas where you want waves. Carefully create wave lines using a stick or brush along the horizon or shore. Then, use white-tinted resin to trace over these lines for initial foamy crests.

Step 4: Apply the Wave Additive for Realistic Effects
This is where the magic happens: add a small amount of Wave-Pro – Pigment Additive for Sea Wave Effect in Epoxy Resin into your white pigment cup before pouring, according to package instructions. Add a wave additive to achieve lacy, foamy edges without torching. Gently blow with a straw or tilt the panel to let the additive disperse, generating authentic cell and lace effects reminiscent of ocean foam. Pour resin in thin layers to prevent over-blending.

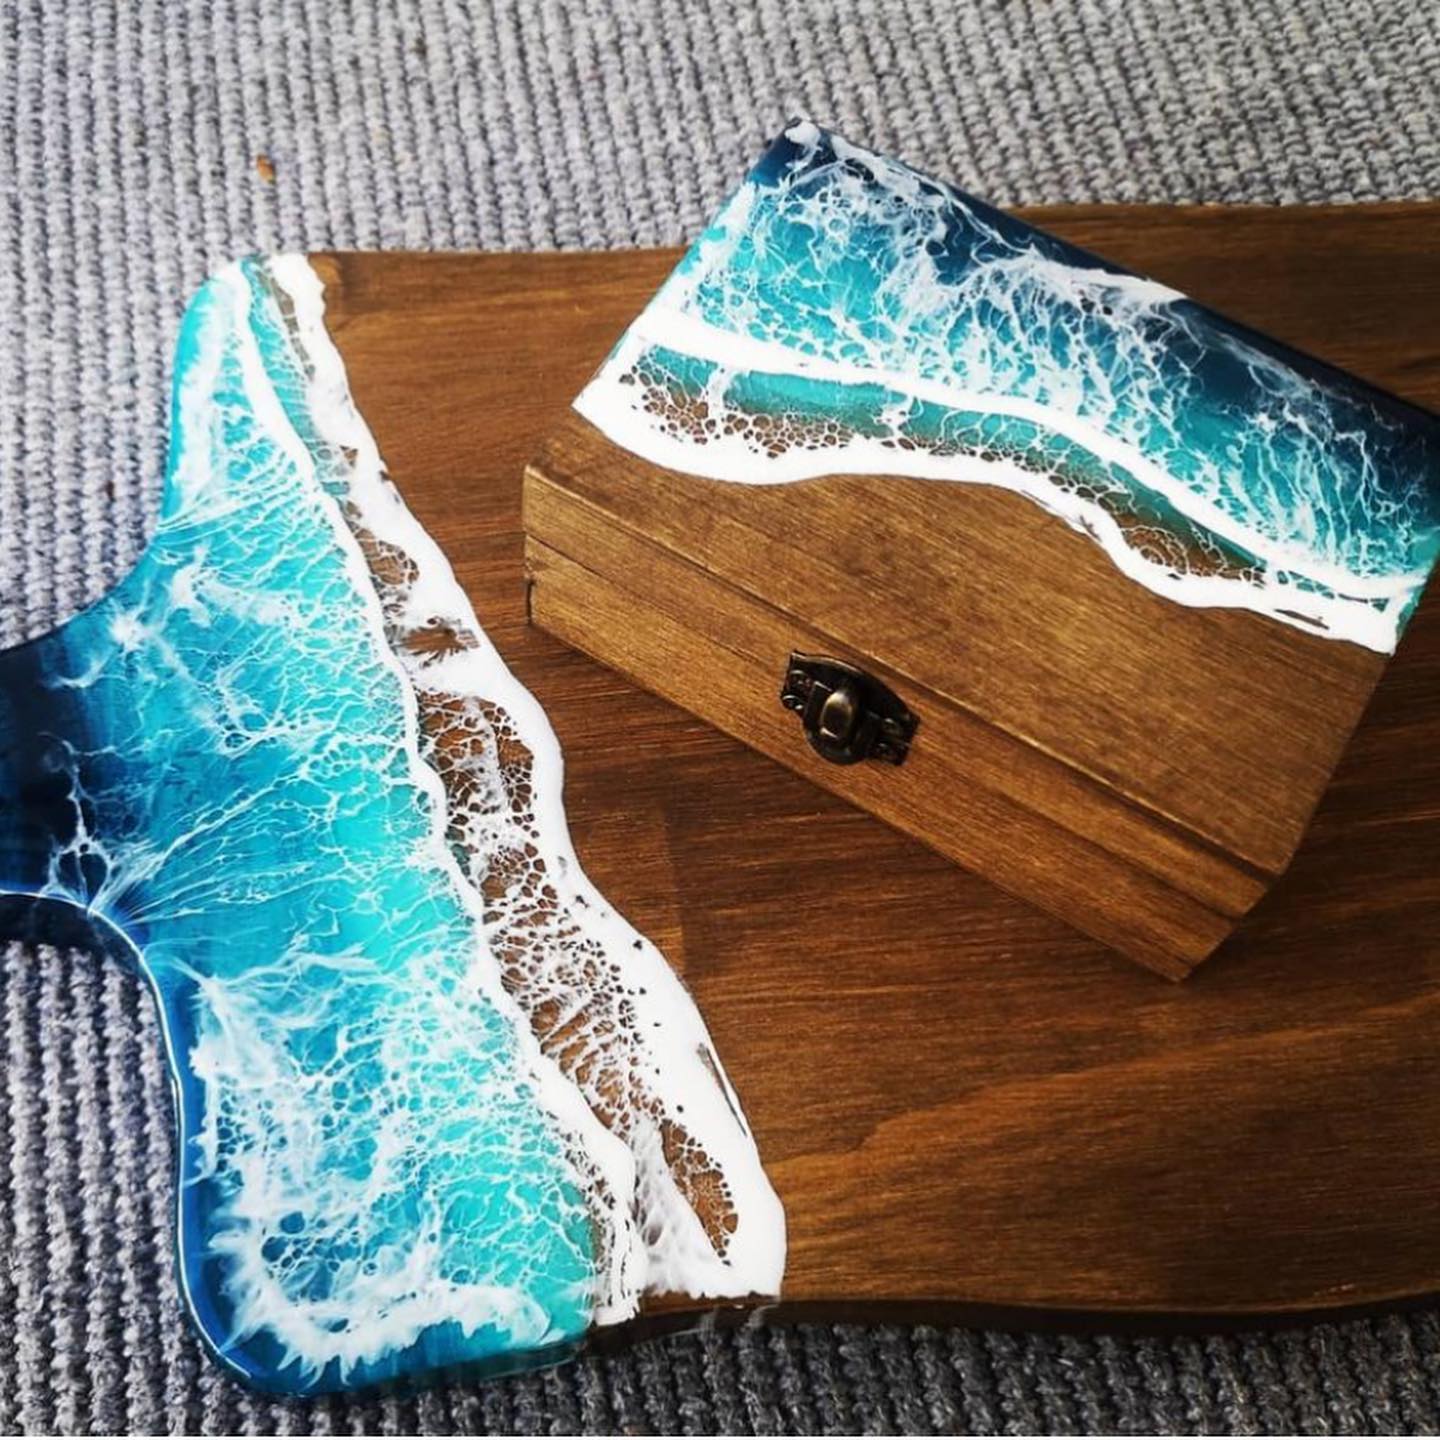
Step 5: Layering and Curing for Depth
To boost realism, you may wish to add additional clear or coloured layers. Allow each layer to partially cure before adding more detail—typically wait 8–12 hours until tacky but not fully solid. Repeat the wave technique using thinner lines or varying white pigment intensity for added dimension. Once satisfied, let your artwork cure in a dust-free environment as recommended.
Demonstrating the Wave Effect Techniques
Realistic wave effects rely on blending the right resin consistency with wave additives and strategic pouring. See how subtle layering and careful tilting can replicate water flow in your artwork.

Tips, Common Mistakes and Troubleshooting
Always ensure your resin is at room temperature to prevent bubbles and uneven spreading. Avoid overmixing the pigment or wave additive, which can dilute the effect or cause cloudiness. Work efficiently—once mixed, resin begins to cure rapidly. If your cells are not forming, check that you have the correct ratio of Wave-Pro additive in the white resin. Uneven surfaces or unwanted drips can be sanded and coated with a clear finishing layer once cured. For layered depth, use high-viscosity resin to avoid colours blending too much or running together.
- "Wave-Pro" – Pigment Additive for Sea Wave Effect in Epoxy ResinPrice range: £4.15 through £10.85A reactive pigment additive designed for creating realistic wave and cell effects in epoxy resin suitable for ocean art.
- "Sea" – Resin Kit for Creating Ocean Art, 1.7kg Epoxy, Pigments & Canvas£44.85"Sea" resin kit includes epoxy, pigments and additives suitable for creating ocean-inspired art with wave effects.
 "Art Pro" – Clear Epoxy Resin for Artists and Surface CoatingPrice range: £31.15 through £388.85Art Pro epoxy resin offers clear, durable finishes suitable for surface coatings and artistic projects within the wave effect theme.
 "Art Pro Deluxe" – Ultra-High Viscosity Epoxy Resin for ArtistsPrice range: £33.85 through £287.85Art Pro Deluxe is an ultra-high viscosity epoxy resin designed for artists to achieve precise line control in resin art and wave effects.
Frequently Asked Questions
Which resin should I use for the wave effect in ocean resin art?
A high viscosity epoxy such as Art Pro Deluxe is ideal for creating well-defined, foamy wave lines and precise details.
Do I need a special product to create lacy wave patterns in resin?
Specialised wave-effect pigment additives help produce realistic foam and cell structures in your white resin, enhancing the overall effect.
How do I stop the colours from over-blending when making resin waves?
Work in thin layers, use high-viscosity resin, and let each layer partially cure before adding more pigments to keep colours distinct.
Can I create natural-looking waves in my resin art without using a torch or heat gun?
Yes, using a wave additive like Wave-Pro allows you to achieve cell and foam effects without applying heat.
Why aren't the lacy cells appearing when I add white resin for waves?
Ensure you use the correct amount of wave-effect powder and do not use too much pigment, as this can block cell formation.
Can I pour multiple colour or clear resin layers to achieve more depth?
Yes, waiting until each layer is tacky before adding the next enhances depth and keeps details crisp in ocean resin art.