 Free shipping on orders over £29,85

How to paint with resin
Achieve striking finishes and expressive visuals with resin art

Learn to create captivating resin paintings by mastering the essential techniques for preparing, painting, and finishing with epoxy resin. Whether you’re aiming for striking ocean waves, vibrant crystal effects, or decorative coasters, this guide is for crafters and artists ready to explore resin as an expressive painting medium.
What You’ll Need
- “Art Pro Deluxe” – Ultra-High Viscosity Epoxy Resin for Artists: For precise line definition and crisp finishes.
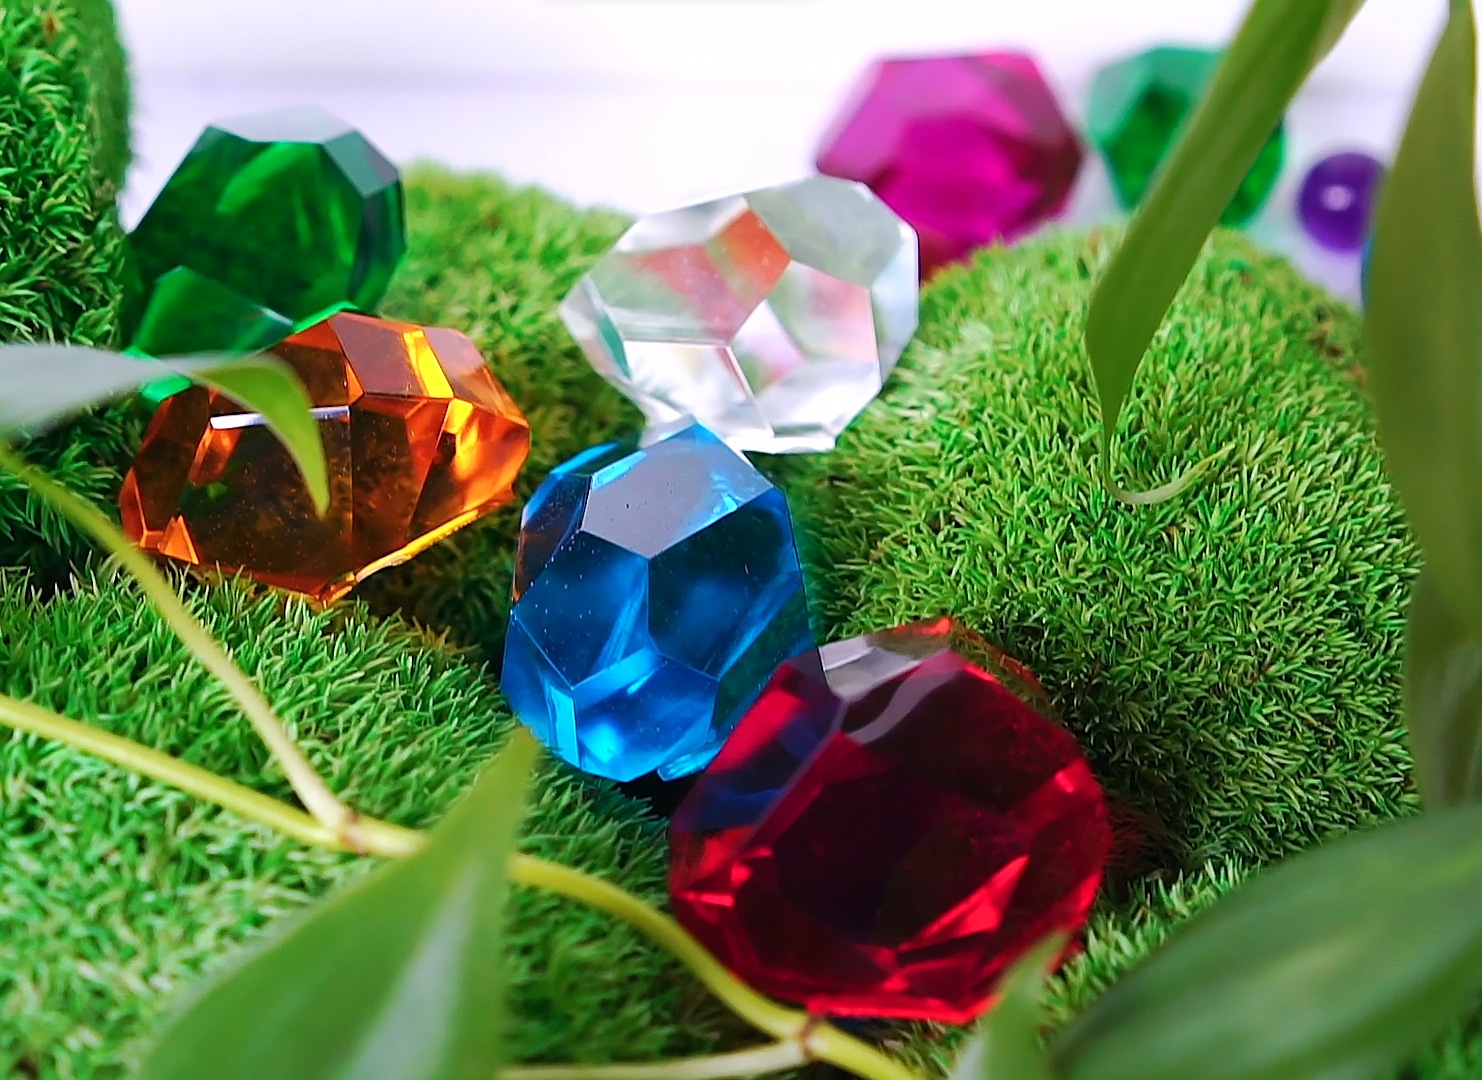
- “Magic Crystal” – Transparent Resin Colour 45ml: To achieve vibrant, transparent tints in your resin artwork.
- Mixing tools: separate cups, wooden sticks or spatulas
- Protective gloves, apron, and mask
- Painter’s tape and drop cloths
- Clean, dust-free work surface or panel

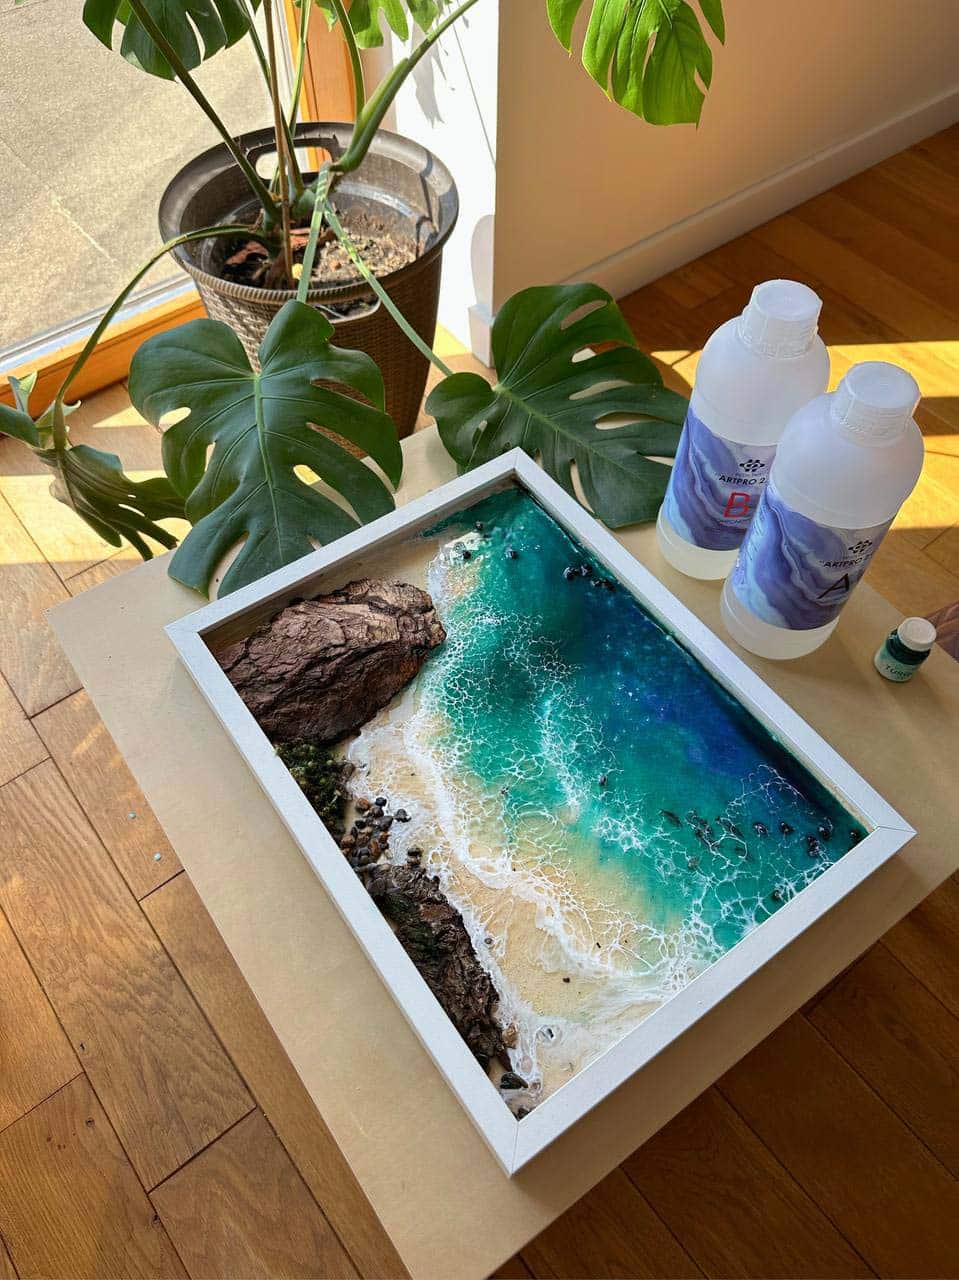
Inspiring Resin Painting Examples
Explore completed resin paintings that demonstrate layered colours, geode textures, and ocean effects as seen in resin art tutorials. Notice how different viscosities and transparent dyes create vivid, glass-like aesthetics perfect for modern artistic expression.
Step 1: Prepare Your Work Area and Surface
Before you begin painting with resin, set up a workspace that is free of dust, ideally with a level surface to ensure even resin distribution. Always work in a well-ventilated area and use gloves. Clear the area of unnecessary items, and protect surfaces with drop cloths. Select a firm painting base, like a wooden panel or primed MDF. If working on a surface that could absorb resin, apply a primer or sealing coat first and allow it to dry.
Use painter’s tape to cover edges you do not want to paint. This prevents resin drips and keeps your artwork tidy. Ensure your panel is completely dry and free of dust or oil for optimal resin adhesion.
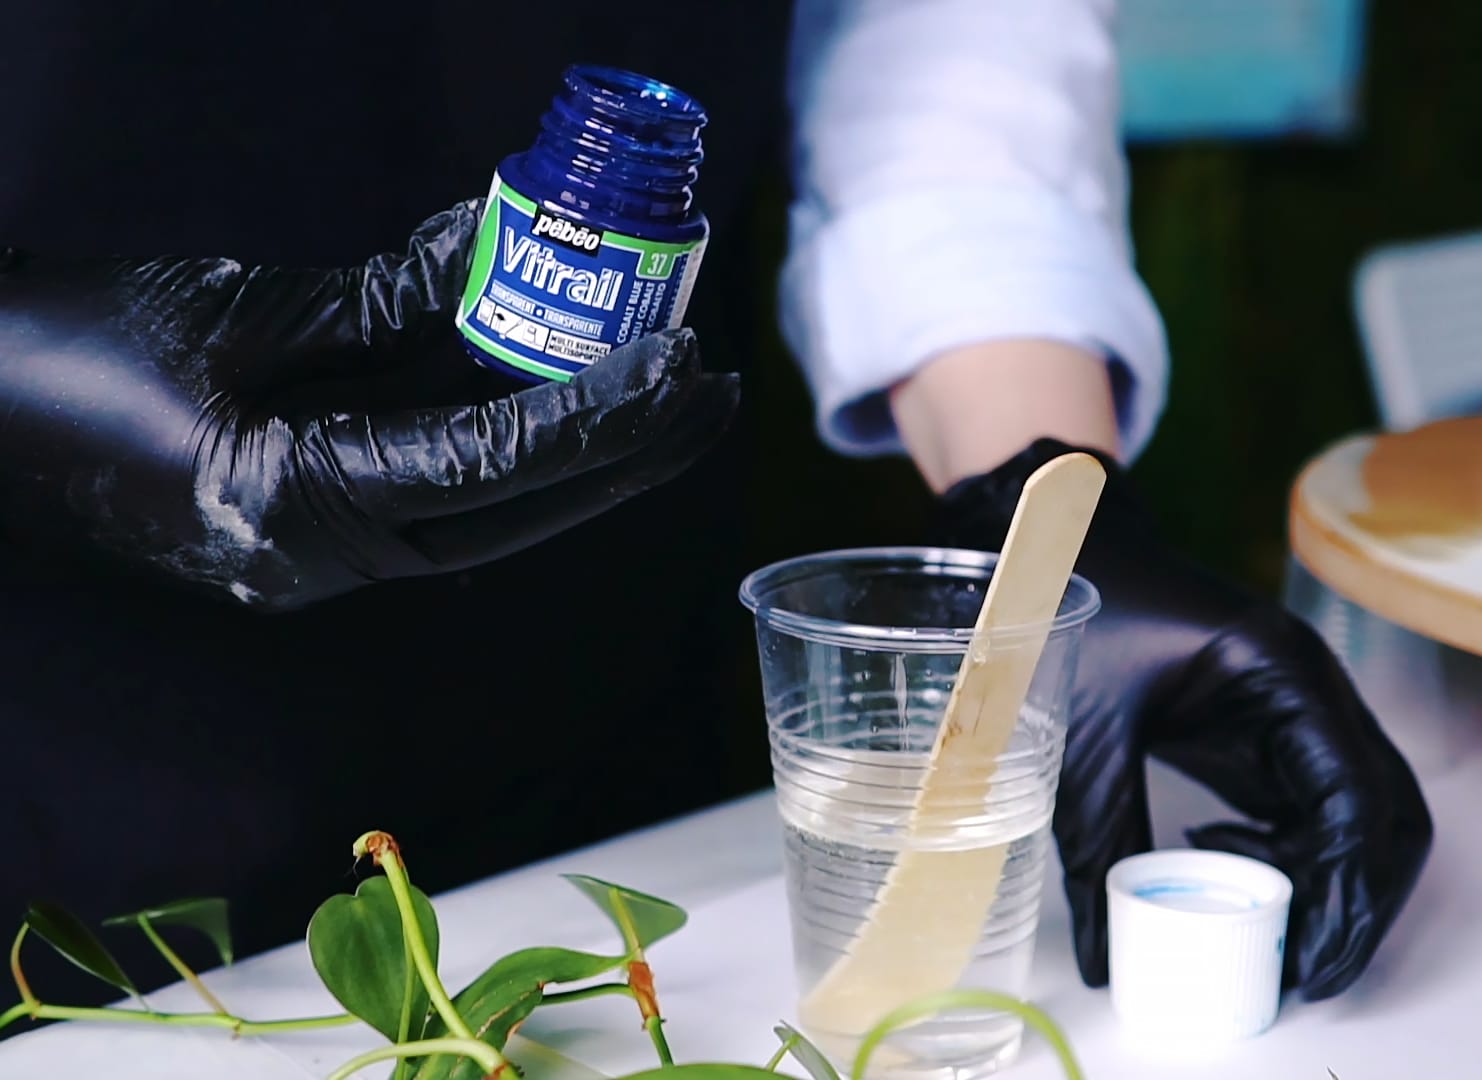
Step 2: Mix Resin and Add Colour
Choose a resin designed for artistic use; a high viscosity option like Art Pro Deluxe allows for better controllability when painting or layering colours. Always check the manufacturer’s recommended mixing ratios. Do not mix water-based paints or wet materials with resin. Instead, opt for epoxy-compatible resin dyes or pigments. For a gorgeous transparent effect, add a few drops of “Magic Crystal” – Transparent Resin Colour to your mixed resin.
Carefully stir your resin and hardener mixture for several minutes, ensuring the sides and base of your mixing container are thoroughly blended. Pour small amounts into separate cups if you plan to use multiple colours, adding pigment to each as desired.
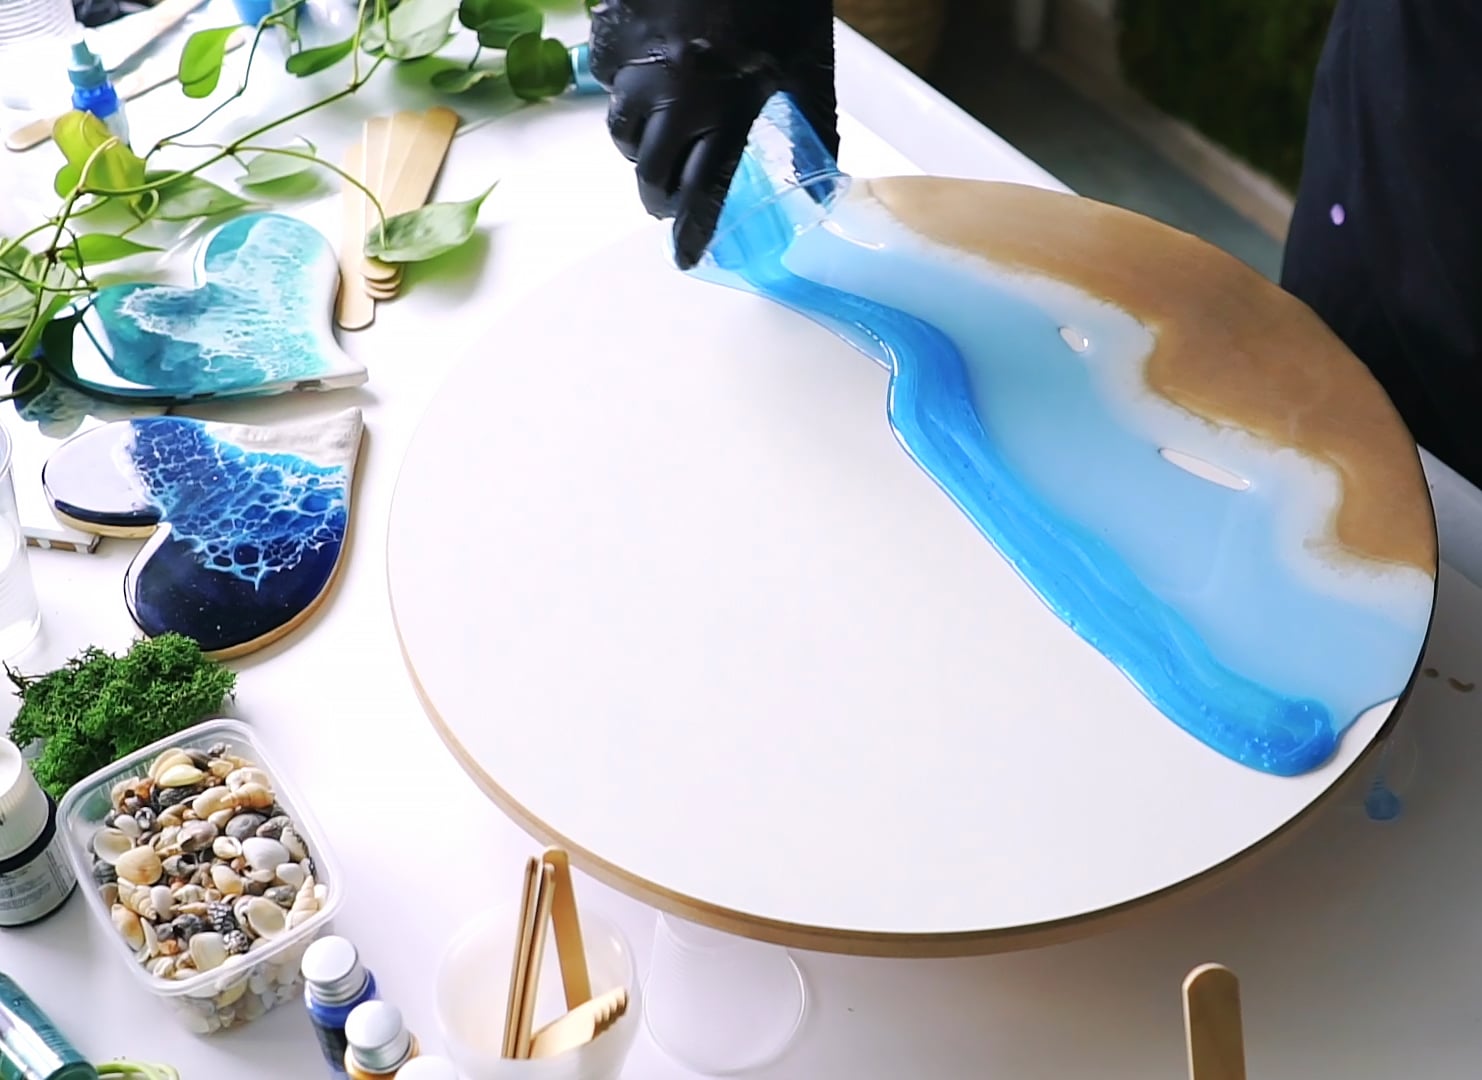
Step 3: Pour, Spread, and Manipulate Resin Paint
Once your coloured resins are ready, pour them onto your prepared surface according to your design. Use spatulas, sticks, or a heat gun to guide resin flows and blend colours. For distinct lines or geode effects, work slowly and pour high viscosity resin in contained streams. Layer additional shades or create gradients while resin remains fluid.
Avoid overworking once the resin starts to cure, as this can dull or disturb your intended pattern. Experiment with tilting the panel or using a toothpick for fine details. Work efficiently—most resins offer a 30-minute open time before thickening.
Step 4: Cure, Finish, and Protect Your Artwork
Allow your resin painting to remain undisturbed and covered (to prevent dust settling) through the full curing period. Refer to your resin’s instructions; measure both resin and hardener accurately for best results. Once cured, peel off painter’s tape and inspect the finish. Sand any rough edges if needed.
You can add further resin layers for a higher gloss or build special effects. Always check compatibility and allow lower layers to set before recoating. Display your finished piece away from direct sunlight to prolong colour clarity.
Tips and Common Mistakes in Resin Painting
Plan your colours and composition before mixing resin—the curing window can be short. Keep the workspace and surface free from dust, as debris can mar your finish. Never exceed recommended pigment loads as this can inhibit curing or create cloudiness. Do not use resin on damp or oily surfaces to avoid separation or peeling. If you see bubbles, use a heat gun to gently pop them, but avoid overheating which can cause craters or yellowing.
Troubleshooting: Achieving a Flawless Finish
Bubbles, uneven cure, or cloudy finishes often result from hurried mixing, dirty surfaces, or excess pigment. Art Pro Deluxe minimises these issues with its high viscosity and self-levelling formula—ideal for clear, professional results in resin art.
- Free Step-by-Step Resin Ocean Art Lesson by Natalia NatirumOriginal price was: £99.00.£0.00Current price is: £0.00.Free video tutorial guides on creating Resin Ocean Art, suitable for learning painting techniques with resin.
- Free Step-by-Step Lesson "Kiwi Coasters" by Natalia NatirumOriginal price was: £99.00.£0.00Current price is: £0.00.Free video tutorial on creating resin trays and coasters resembling real kiwi, suitable for the theme How to paint with resin.
- "Magic Crystal" – Transparent Resin Colour 45ml£4.65"Magic Crystal" transparent resin colour offers clear, vibrant shades ideal for creating crystal and gemstone effects with resin.
 "Art Pro Deluxe" – Ultra-High Viscosity Epoxy Resin for ArtistsPrice range: £33.85 through £287.85Art Pro Deluxe is an ultra-high viscosity epoxy resin suitable for controlled resin art and finish layers with a clear, scratch-resistant surface.
Frequently Asked Questions
What resin colours are best for painting art?
Transparent dye ranges such as Magic Crystal provide vibrant, glass-like effects suitable for artistic resin painting.
Can I use water-based paints with resin?
No, water-based colours do not mix with resin and may ruin the cure. Use only epoxy-compatible dyes or pigments.
How can I prevent bubbles in resin art?
Mix slowly, pour in thin layers, and use a heat gun or torch to pop surface bubbles before the resin begins to set.
Why did my resin art turn cloudy?
Cloudiness often results from excess pigment, contamination or using non-epoxy-compatible colourants. Work with clean tools and recommended loads.
What surfaces are best for resin painting?
Rigid, non-porous surfaces like MDF, primed wood panels, or acrylic sheets offer the best adhesion and results for resin painting.
How long should resin art cure?
Curing time varies by product but is typically 24-48 hours for full hardness. Follow resin-specific instructions for best results.
Can I layer multiple resin coats?
Yes, you can add additional resin coats after the previous layer has cured. Ensure compatibility and clean surfaces between layers.