 Free shipping on orders over £29,85

How to create liquid silicone rubber?
Step-by-step guide for crafting durable silicone moulds

If you want to make custom moulds for resin casting, model making, or crafts, learning to create liquid silicone rubber is an invaluable skill. This guide walks you through the essential steps, techniques, and best practices for mixing and curing liquid silicone rubber safely and effectively to achieve accurate, detailed results every time.
What You’ll Need
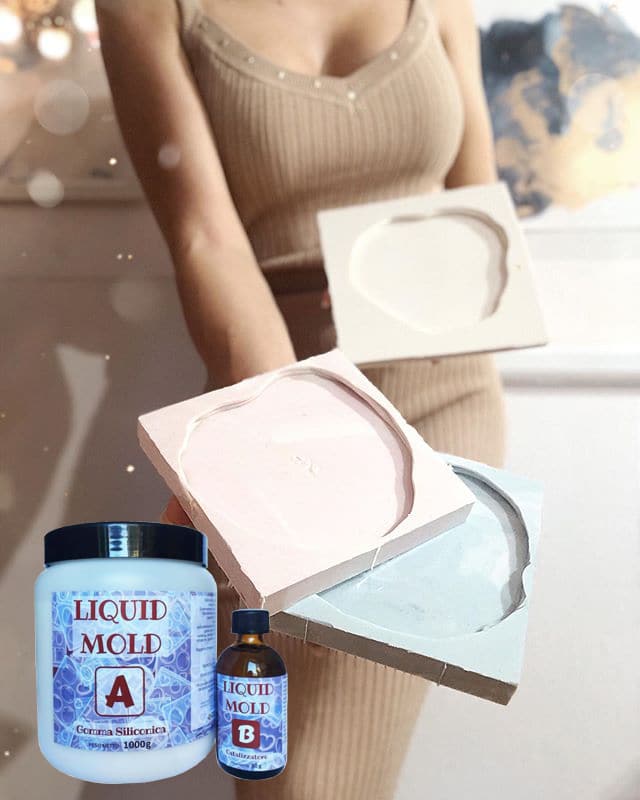
- “Liquid Mould” – Casting Liquid Silicone Rubber, 5-40 Shores, Bi-Component A+B: A bi-component liquid silicone rubber for highly detailed and undercut moulds.
- “Pure Mould” – Translucent Liquid Silicone Rubber for Mould Making: Translucent for visibility and good for a range of casting materials.
- “I–Gum” – Non-Toxic Silicone Putty for Mould Making: Ideal for custom, hand-shaped moulds with simple mixing.
- Mixing containers and stirring sticks (plastic or silicone recommended)
- Digital scales or measuring cups (to ensure accurate ratios)
- Protective gloves and apron
- Release agent if casting against non-silicone surfaces
- A mould box or frame to contain the silicone
- The object you wish to mould
Essential Silicone Rubber Tools and Setup
Before starting, arrange all tools and safety gear within easy reach, including your chosen silicone rubber, mixing spoons, measuring devices, the object to be moulded, and the mould frame or box. A supportive setup helps ensure a controlled, professional result.

Step 1: Prepare Your Workspace and Materials
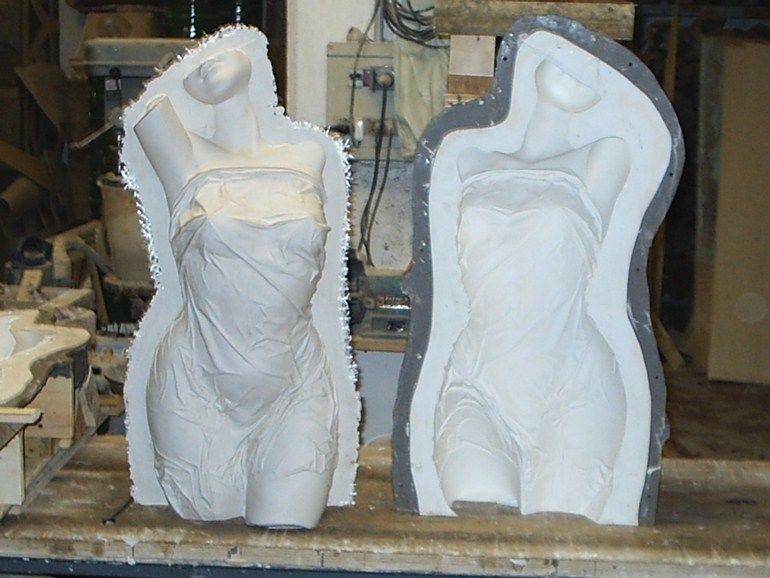
Start by clearing a flat workspace that is free from dust and draughts. Silicone is sensitive to environmental factors and works best in a clean area. Set out all your tools, as well as your mould box or frame. Place your object to be moulded securely within the box, ensuring there is enough space all around to allow for a strong, supportive mould wall.
At this stage, measure out the required amounts of each silicone component. For two-component products like “I–Gum” – Non-Toxic Silicone Putty for Mould Making, prepare equal amounts of part A and part B to ensure an even cure.
Step 2: Accurately Measure and Mix the Silicone
Carefully weigh or measure the silicone base and catalyst as directed, using a digital scale for precision. Pour both components into your mixing container. Begin stirring with a slow, steady motion, scraping the sides and bottom to fully incorporate the materials. Avoid rapid stirring, which can introduce excess air bubbles.
Always follow the manufacturer’s mixing instructions for your chosen product—each silicone rubber may have unique ratio and mixing requirements. Proper mixing is crucial for both performance and cure.
Step 3: Pour the Mixture and Degas if Necessary
Once the silicone is fully mixed, it’s time to pour it into your prepared mould box. Begin pouring from one corner and allow the rubber to flow naturally over and around the object, which helps minimise air entrapment. For best results, pour in a thin, steady stream from a height, which further reduces bubbles forming.
If very precise detail is required or the mould is large, consider using a vacuum chamber or pressure pot to degas the silicone. This step is especially beneficial when using “Liquid Mould” – Casting Liquid Silicone Rubber, 5-40 Shores, Bi-Component A+B for fine details or complex shapes.

Step 4: Allow to Cure and Demould
Let the silicone cure as specified by the manufacturer, generally between 3 to 12 hours at room temperature. Longer cure times often lead to a more robust and flexible mould. Avoid moving or disturbing the mould during this stage, as this can affect the final quality.
Allow enough time for the silicone to cure fully before attempting to demould. Once cured, carefully remove the mould from the box and release the original object, revealing a flexible, detailed silicone mould ready for use.

Tips and Common Mistakes
Work in a clean, dust-free environment to prevent contamination. Measure components precisely for a reliable cure—too much or too little catalyst can result in a sticky or brittle finish. Always use appropriate personal protective equipment, such as gloves and an apron. If you notice bubbles in the finished mould, review your mixing and pouring technique for possible improvements.
Expert Hints for Best Results
Keep your workspace tidy and double-check your component ratios before each mix. Using a fresh mixing container for every batch helps avoid contamination and improves the accuracy of your silicone rubber results.
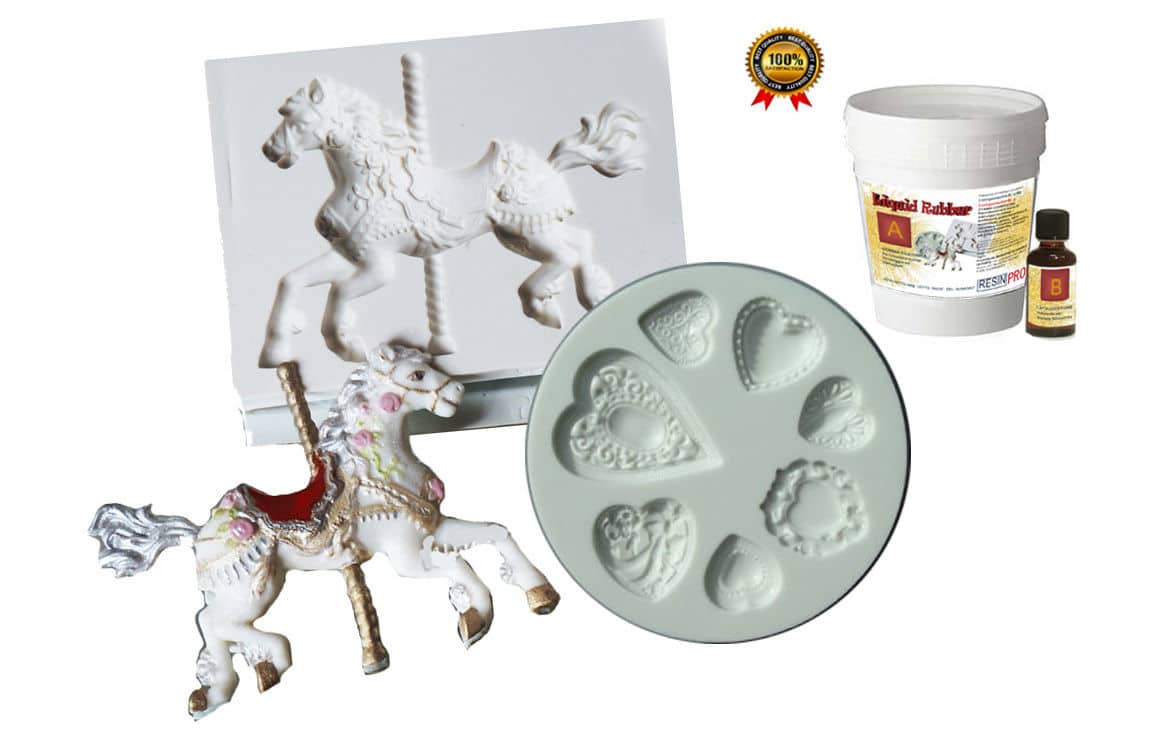
- "Liquid Mould" – Casting Liquid Silicone Rubber, 5-40 Shores, Bi-Component A+BPrice range: £13.45 through £368.85"Liquid Mould" is a liquid silicone rubber designed for moulds, suitable for creating detailed reproductions and casting various materials.
- "Pure Mould" – Translucent Liquid Silicone Rubber for Mould MakingPrice range: £22.85 through £158.85"Pure Mould" is a translucent liquid silicone rubber for making moulds, compatible with resins, plaster and cement, suitable for crafts and model…
 "I–Gum" – Non-Toxic Silicone Putty for Mould MakingPrice range: £22.85 through £99.85Non-toxic two-component silicone putty designed for making moulds and frames with a 1:1 mix ratio and long working time.
Frequently Asked Questions
Does silicone rubber shrink after curing?
Most liquid silicone rubbers have minimal shrinkage. Slight shrinkage may occur in larger or thicker moulds, especially with translucent formulations.
How long does silicone rubber take to set?
Typical cure times range from 3 to 12 hours, depending on the product and temperature. Always check the manufacturer's specifications for accurate timings.
Can I use silicone putty for detailed moulds?
Silicone putty works well for small or simple moulds. For highly intricate details or undercuts, liquid silicone rubbers are generally recommended.
Do I need a release agent for silicone moulds?
A release agent is usually not required when casting silicone against non-porous surfaces, but it may be useful for complex or porous objects.
Why is my silicone rubber sticky after curing?
Sticky silicone typically results from improper mixing or incorrect ratio of components. Recheck your measurements and mix thoroughly next time.
Can liquid silicone rubber be used for food moulds?
Some liquid silicone rubbers are certified for food contact. Always check the product’s safety and certification before using with edible materials.
How can I minimise air bubbles in silicone moulds?
Pour silicone in a thin stream from a height, mix gently, and use a vacuum chamber or pressure pot for critical applications.