 Free shipping on orders over £29,85


How to make an eraser using silicone?
Step-by-step guide for safe, custom silicone erasers

Crafting a personalised eraser from silicone is a rewarding process for both hobbyists and educational projects. This guide takes you through each key step, from selecting the right silicone, shaping your idea into a flexible mould, and casting your own eraser at home with reliable, safe results.
What You’ll Need
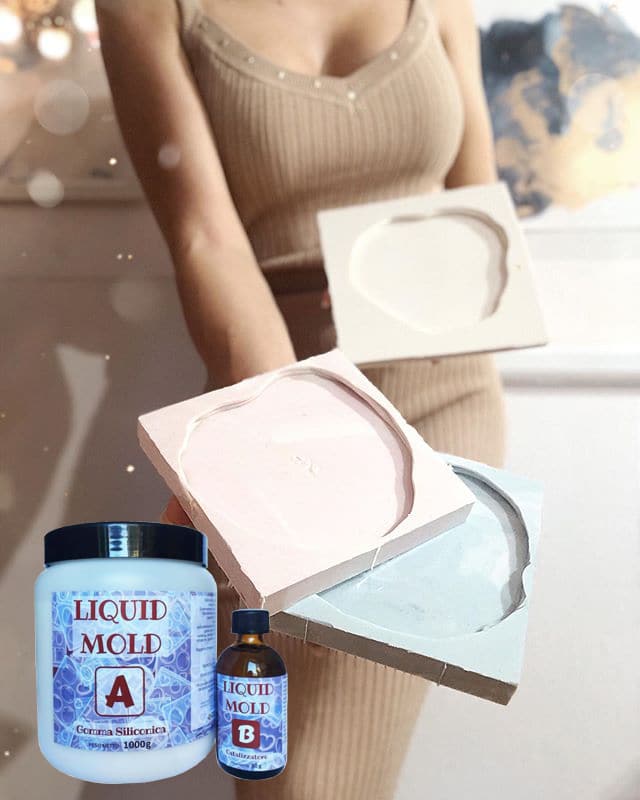
- “Liquid Mould” – Casting Liquid Silicone Rubber, 5-40 Shores, Bi-Component A+B – For detailed and flexible mould making
- “Pure Mould” – Translucent Liquid Silicone Rubber for Mould Making – Ideal if you want to observe the casting process through the mould
- “I–Gum” – Non-Toxic Silicone Putty for Mould Making – For quick, hands-on impression moulds
- Mixing containers, stirrers and gloves
- A master model or shape to be copied
- Household scales or measuring spoons (for accurate ratios)
Get Inspired by Silicone Eraser Projects
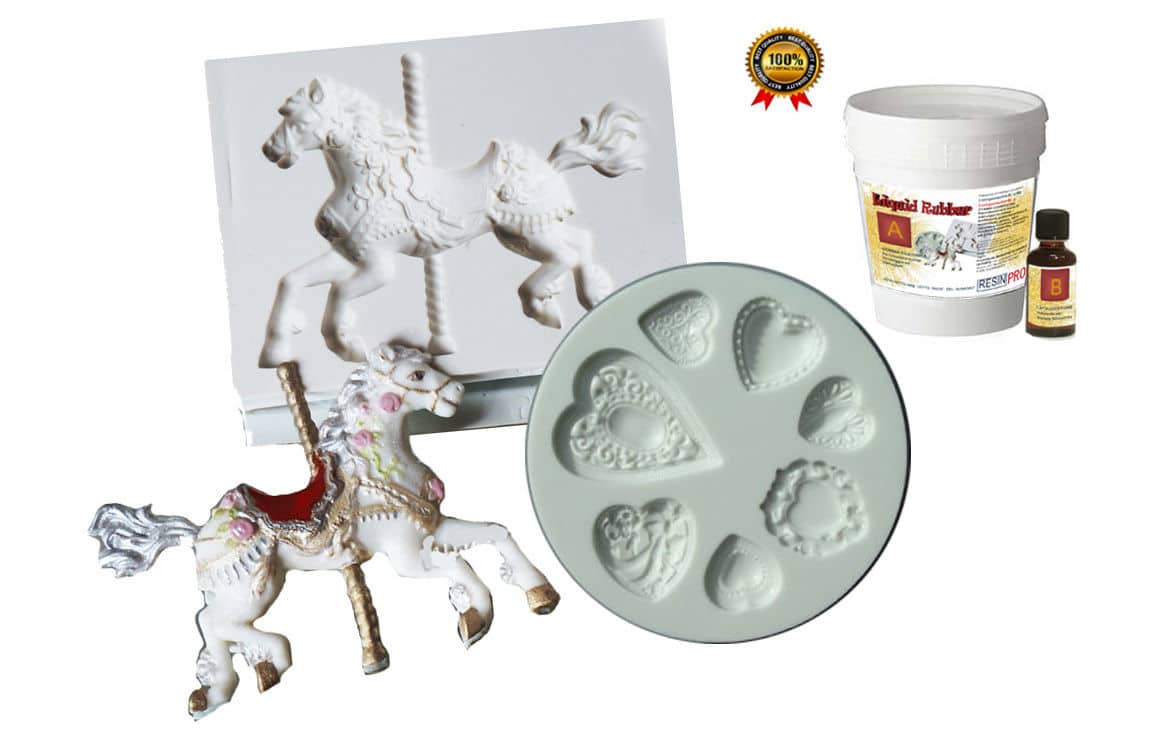
See a variety of custom-crafted erasers and moulds made with silicone, showing the possibilities for creative shapes and detailed results. Whether for personal stationery, gifts, or school projects, silicone offers flexibility and easy customisation.

Step 1: Prepare Your Workspace and Master Model
Begin by setting up a clean, dust-free workspace. Any debris can stick to the silicone and affect your final result. Choose your master model—this can be any small, clean object or a custom-sculpted shape. Make sure your model is dry and free from oils, as residue may prevent proper curing or result in surface flaws in your eraser.
Position your model on a flat, stable surface, and if necessary, lightly dust it with cornflour or use a release agent to help the finished silicone eraser pop out easily later.
Step 2: Select and Mix Your Silicone
Choose a silicone suited for detailed, small castings. If reproducing intricate features, a liquid silicone such as “Liquid Mould” – Casting Liquid Silicone Rubber, 5-40 Shores, Bi-Component A+B is ideal. For translucent moulds or to watch curing, “Pure Mould” – Translucent Liquid Silicone Rubber for Mould Making is a good choice. If you prefer direct hand application or simple forms, “I–Gum” – Non-Toxic Silicone Putty for Mould Making allows for easy manipulation.
Carefully measure each component according to the manufacturer’s instructions—most liquid silicones require a specific weight ratio, while putties are usually mixed 1:1 by volume or weight. Use separate, clean utensils for each part to avoid premature curing. Blend thoroughly until the mixture is uniform and streak-free.
Step 3: Mould Making and Curing
Pour or press the mixed silicone over your master model, ensuring complete coverage and avoiding any air pockets. For liquid silicones, slowly pour into one corner of the mould box to minimise trapped air; for putty types, gently press around the model until fully surrounded.
Allow the mould to cure undisturbed for the time stated by the silicone you are using—this may range from 20 minutes (putty) to several hours (liquid/transparent options). Warmer environments speed up curing, but avoid excessive heat which can cause distortion.

Step 4: Demould and Test Your Eraser
Once fully cured, gently flex the mould to release your eraser. If using a detailed silicone, slight twisting can help without damaging the cast. Inspect the eraser for surface flaws, undercuts, or unfilled areas. If it’s too soft or sticky, allow extra curing time or revisit your mixing ratios. The eraser is now ready for use or custom trimming as desired.
Always wash your finished eraser in mild soapy water to remove any residual release agent or dust before first use.

Tips and Common Mistakes
- Choose a non-toxic, skin-safe silicone to avoid irritation—especially important for erasers handled frequently.
- Accurate mixing matters: Mis-measured components can lead to incomplete curing or sticky results.
- Air bubbles lead to imperfections: Pour slowly and consider tapping the mould box to dislodge trapped air.
- Allow for full curing: Demoulding too early may tear details or deform the shape.
- When in doubt, test with a small batch to refine your process before scaling up.
Enhance Your Eraser Making Experience
Try experimenting with additions such as coloured pigments (if compatible), glitter, or embeds to personalise your erasers further. Always check the compatibility of pigments with your chosen silicone for best results.
- "Liquid Mould" – Casting Liquid Silicone Rubber, 5-40 Shores, Bi-Component A+BPrice range: £13.45 through £368.85"Liquid Mould" is a casting liquid silicone rubber designed for making detailed moulds and reproductions suited to the given theme.
- "Pure Mould" – Translucent Liquid Silicone Rubber for Mould MakingPrice range: £22.85 through £158.85"Pure Mould" silicone rubber is a translucent, fast-curing product suitable for mould making with various materials, matching the theme 'How to make…
 "I–Gum" – Non-Toxic Silicone Putty for Mould MakingPrice range: £22.85 through £99.85"I–Gum" is a non-toxic silicone putty designed for making moulds and frames, suitable for use with resin and other materials.
Frequently Asked Questions
Which silicone is best for making an eraser?
Liquid silicones designed for detailed mould making are most suitable, especially non-toxic or skin-safe options.
Do I need a release agent when making a silicone eraser?
A release agent helps prevent sticking and prolongs the life of your mould, especially for intricate shapes.
How long does silicone take to cure?
Curing times can vary between 20 minutes for putty and up to 8 hours for liquid silicones, depending on the product and environment.
Can I add colour or glitter to my silicone eraser?
Yes, as long as the additives are compatible with the silicone you are using. Test with a small amount first.
Why does my eraser feel sticky after curing?
A sticky surface usually means the silicone was not mixed accurately or has not cured completely. Check your ratios and cure time.
Are silicone erasers safe for use by children in schools?
If you use compounds marked as non-toxic and skin-safe, they are suitable for school use under supervision.