Make Your Summer Brighter with Free Resin Pro Products!
If you already have at least one or two of our main products that you really like, and you’re not afraid of the camera, we have an exciting opportunity for you! Resin Pro invites you to make a video review of your favorite products and earn a £40 Resin Pro voucher. There is a limited number of participants, so be sure to apply soon!
How to Participate:
Email Request: Send us an email request with the products you have and what you plan to discuss in your video review: in**@******ro.eu It’s important to contact us first and create the video review only after our confirmation!
Video Content: You are free to decide what aspects of the experience you want to highlight, but the feedback must be positive! In your review, you can talk about:
Why you liked our specific product.
How it solved a problem that materials from other brands could not.
The properties of the product you want to highlight.
Your overall experience with Resin Pro, for example:
Speed of order delivery.
Helpfulness of our team’s consultation (if applicable).
Quality of the packaging of your order.
Other aspects, at your discretion!
Why Participate?
This is a fantastic way to share your positive experiences and insights with the Resin Pro community while earning a valuable reward. Plus, your feedback helps us improve and continue providing top-notch products!.
Start filming and brighten your summer with Resin Pro!
Epoxy resin art has taken the creative world by storm, offering endless possibilities for stunning wall panels, home decor, Petri Art, jewellery, coasters, trays, and other unique mould castings. The right epoxy resin is crucial for achieving the desired artistic effects and ensuring the longevity of your pieces. This article will explore the essential characteristics of epoxy resin for art and introduce the top products perfect for creating mesmerizing resin art pieces.
Characteristics of the Ideal Epoxy Resin for Art
Crystal Clear Clarity: Ensures your art pieces have a pristine, glass-like finish that enhances colors and details.
Strong Yellowing Resistance: High-quality resins with UV stabilizers prevent yellowing over time, maintaining the original appearance of your artwork.
Smooth and Perfect Surface: The resin should cure to a smooth, shiny surface, minimizing the need for additional finishing work.
High Viscosity: Higher viscosity resins are ideal for creating stunning color effects in wall panels, coasters, trays, and other artistic applications. They allow for better control over color movement and blending.
Durability: The resin should provide a durable, long-lasting finish that protects your artwork from wear and damage.
Applications for Epoxy Resin Art
Resins for art is incredibly versatile and can be used in various artistic applications, including:
Creating Wall Panels: Large resin art pieces for wall displays.
Art Pieces and Home Decor: Sculptural pieces, petri art, and decorative items.
Art Coatings on Surfaces: Enhancing the look of tables, trays, and other surfaces.
Techniques: Ocean art, marble effect, space art, geodes, and more.
Recommended Epoxy Resins for Resin Art
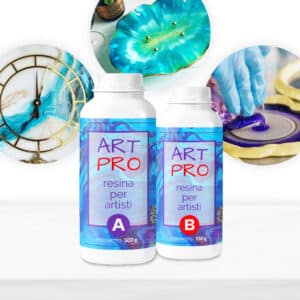
1. Art Pro – Medium Viscosity Resin
Art Pro is perfect for art coatings like abstract art, marble, geodes, and others. Its medium viscosity is ideal for coasters, trays, and other flat mould castings with colorful effects. This resin ensures a smooth and shiny surface with strong UV protection, making it perfect for various artistic endeavors.
Key Features:
Medium viscosity for colorful effects
Smooth and shiny surface
Strong UV protection
Ideal for art coatings, as well as coasters, trays, and other flat mould castings
Select options
This product has multiple variants. The options may be chosen on the product page
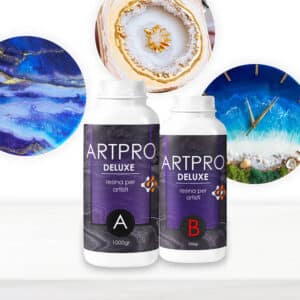
2. Art Pro Deluxe – Super Viscous Resin
Art Pro Deluxe is a super viscous version of Art Pro, designed mainly for art coatings like ocean art, space art, geodes and others. Its high viscosity allows for stunning color effects and intricate designs, making it perfect for artists seeking to create detailed and vibrant resin art.
Select options
This product has multiple variants. The options may be chosen on the product page
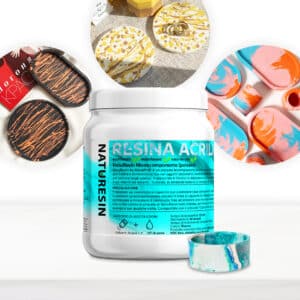
3. Naturesin – Mineral Powder for Ceramic-like Castings
Naturesin is a unique mineral powder that is mixed with water to create castings resembling ceramics. It is perfect for creating coasters, plates, and other home decor items with a distinct ceramic-like finish.
Select options
This product has multiple variants. The options may be chosen on the product page
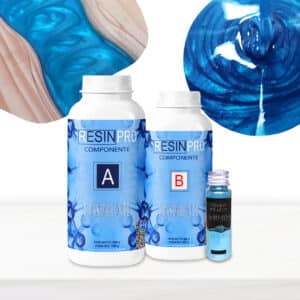
4. Trasparente – Best-Seller for Transparent Castings
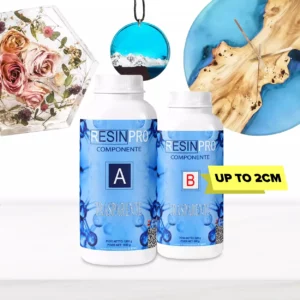
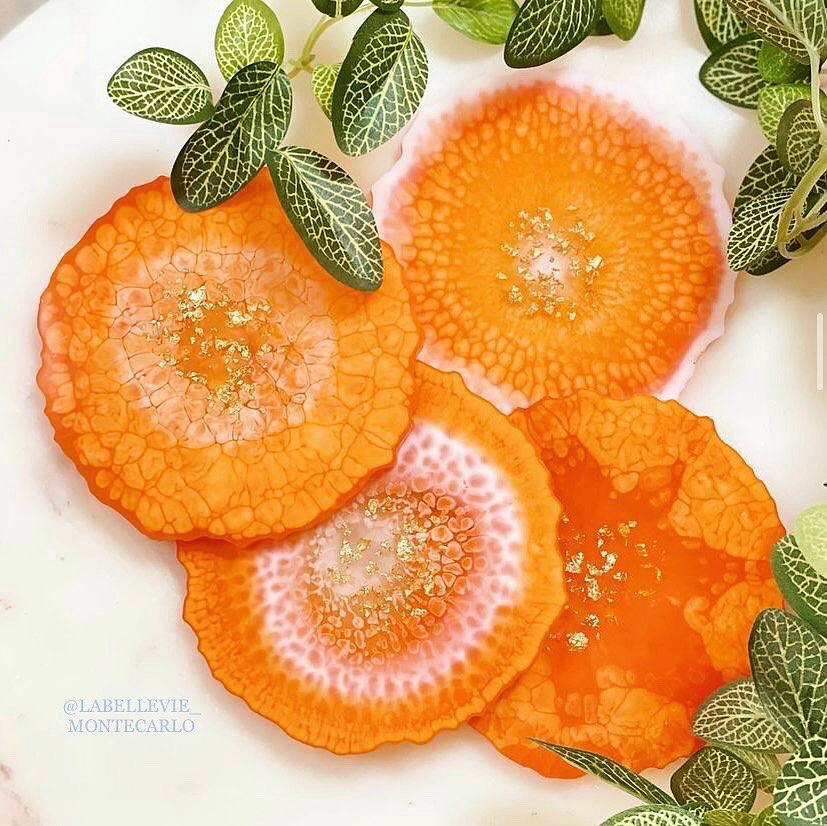
Trasparente is Resin Pro’s best-seller, known for its crystal clear transparency, yellowing protection, and shiny, durable surface. It is perfect for transparent castings up to 2 cm thick, ideal for incorporating decorative elements like dried flowers, gold leaf flakes, and glitter.
Key Features:
Crystal clear transparency
Strong yellowing protection
Shiny and durable surface
Ideal for transparent castings with decorative elements
Select options
This product has multiple variants. The options may be chosen on the product page
Conclusion
Choosing the right epoxy resin for resin art is essential for achieving professional-quality results. Whether you are working on wall panels, home decor, Petri art, jewellery, coasters, trays, or other resin mould castings, selecting a resin with the right characteristics ensures durability, clarity, and stunning visual effects. Art Pro, Art Pro Deluxe, Naturesin, and Trasparente each offer unique benefits tailored to different artistic needs, providing the perfect solution for any resin art project. Invest in high-quality epoxy resin to elevate your creations and enjoy beautiful, long-lasting results.
Epoxy resins are essential for creating stunning jewellery, brooches, as well as coasters, trays, and other home decor items. The right resin ensures your projects have a professional finish, durability, and clarity. This article will guide you through the characteristics of the ideal epoxy resin for small and medium-sized castings and introduce six exceptional products perfect for various applications.
Characteristics of the Ideal Epoxy Resin
Crystal Clear Clarity: For jewellery and home decor, a crystal clear resin ensures a pristine, glass-like finish.
Strong Yellowing Resistance: High-quality resins incorporate UV stabilizers to prevent yellowing over time.
Smooth and Perfect Shiny Surface: The resin should cure to a smooth, shiny surface, minimizing the need for additional finishing work.
No Odor: A low or odor-free resin ensures a more pleasant working environment.
Low Viscosity: This characteristic ensures easy mixing and pouring, reducing the risk of bubbles and improving the final appearance.
Fast Curing Time: For some projects, a resin with a quick curing time can be highly beneficial.
Applications for Casting Epoxy Resins
These epoxy resins are versatile and can be used in various applications, including:
Jewellery Making: Perfect for earrings, pendants, rings and other small castings.
Brooches: Ideal for creating intricate and personalized brooches.
Transparent Coasters: Clear resin coasters add elegance and protection to surfaces.
Trays: Epoxy trays are both functional and decorative.
Home Decor: From small figurines to decorative pieces, resin adds a unique touch.
Small Tabletops and Furniture: For minor projects requiring durability and a high-quality finish.
Recommended Epoxy Resins
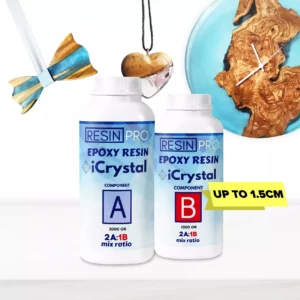
1. iCrystal – Castings up to 1.5 cm Thick
iCrystal offers great quality at a competitive price, making it ideal for jewellery and small castings like coasters, trays, and other home decor items. It features excellent clarity and a smooth finish.
Key Features:
Great quality at an affordable price
Perfect for jewellery, small castings, and home decor
Select options
This product has multiple variants. The options may be chosen on the product page
2. Trasparente – Castings up to 2 cm Thick
Trasparente is a Resin Pro best-seller, known for its first-class quality. It provides a perfect, smooth, and shiny surface with great hardness, durability, and yellowing resistance. It is ideal for jewellery, home decor, and small to medium-sized tabletops.
Key Features:
First-class quality
Perfect for jewellery, home decor, and small to medium-sized tabletops
Superior hardness, durability, and yellowing resistance
Select options
This product has multiple variants. The options may be chosen on the product page
3. Icreation – Fast Curing for Small Mould Castings
Icreation is a unique resin with a fast curing time, suitable only for jewellery and very small mould castings. Demoulding can be done in as little as 6-8 hours.
Key Features:
Fast curing time, ideal for quick projects
Suitable for jewellery and very small mould castings
Select options
This product has multiple variants. The options may be chosen on the product page
4. Liquidissima – Lowest Viscosity for Jewellery
Liquidissima features the lowest viscosity among all our resins, ensuring no bubbles in mould castings. It is perfect for intricate jewellery projects.
Key Features:
Lowest viscosity, eliminating bubbles
Ideal for jewellery and detailed mould castings
Crystal clear finish
5. Art Pro – Medium Viscosity for Creative Effects
Art Pro is designed for art projects but is also excellent for making coasters and trays. Its medium viscosity allows for amazing color effects.
Select options
This product has multiple variants. The options may be chosen on the product page
6. One-to-One – Versatile for Coatings and Jewellery
One-to-One is perfect for coatings, offering protection against air humidity. It is also suitable for jewellery making due to its clarity and durability.
Select options
This product has multiple variants. The options may be chosen on the product page
Conclusion
Choosing the right epoxy resin for jewellery and castings is essential for achieving professional-quality results. Whether you are working on intricate jewellery pieces, elegant coasters, or decorative trays, selecting a resin with the right characteristics ensures durability, clarity, and beauty. Our range of resins, including iCrystal, Trasparente, Icreation, Liquidissima, Art Pro, and One-to-One, offers solutions for various casting needs. Invest in high-quality epoxy resin to elevate your creations and enjoy stunning, long-lasting results.
Epoxy resins are essential in various creative and functional projects, from crafting small lamps to amazing wood and resin tabletops. Choosing the right epoxy resin for deep pours is crucial to achieving a high-quality, durable, and visually appealing result. This article will guide you through the characteristics of the ideal epoxy resin for deep pours and introduce three exceptional products tailored for different pouring depths.
Characteristics of the Best Epoxy Resin for Deep Pours
Crystal Clear Clarity: For projects like tabletops and countertops where aesthetics are paramount, a crystal clear resin ensures that your work has a pristine, glass-like finish.
Strong Yellowing Resistance: Over time, exposure to UV light can cause yellowing. High-quality resins incorporate UV stabilizers to maintain their clarity and appearance.
Smooth and Perfect Surface: The ability to cure to a smooth, bubble-free surface is essential for professional-looking results. This means minimal sanding and polishing post-cure.
High-Thickness Pours without Overheating: Deep pours generate significant heat as they cure, which can lead to cracks and imperfections. The ideal resin should allow for thick pours without overheating or requiring excessive layering.
Low Viscosity: This characteristic ensures easy mixing and pouring, reducing the risk of bubbles and improving the final appearance.
Applications for Deep Pour Epoxy Resins
Deep pour epoxy resins are incredibly versatile and can be used in various applications, including:
Creating Tabletops: Custom resin tabletops are a popular choice for their unique and beautiful designs.
Countertops: Epoxy resin countertops offer durability and aesthetic appeal, making them a popular choice for kitchens and bathrooms.
Furniture Making: From epoxy river tables to decorative furniture pieces, deep pour resins provide endless possibilities.
Woodworking Projects: Embedding objects, and other intricate woodworking designs are made possible with the right resin.
Recommended Epoxy Resins for Deep Pours
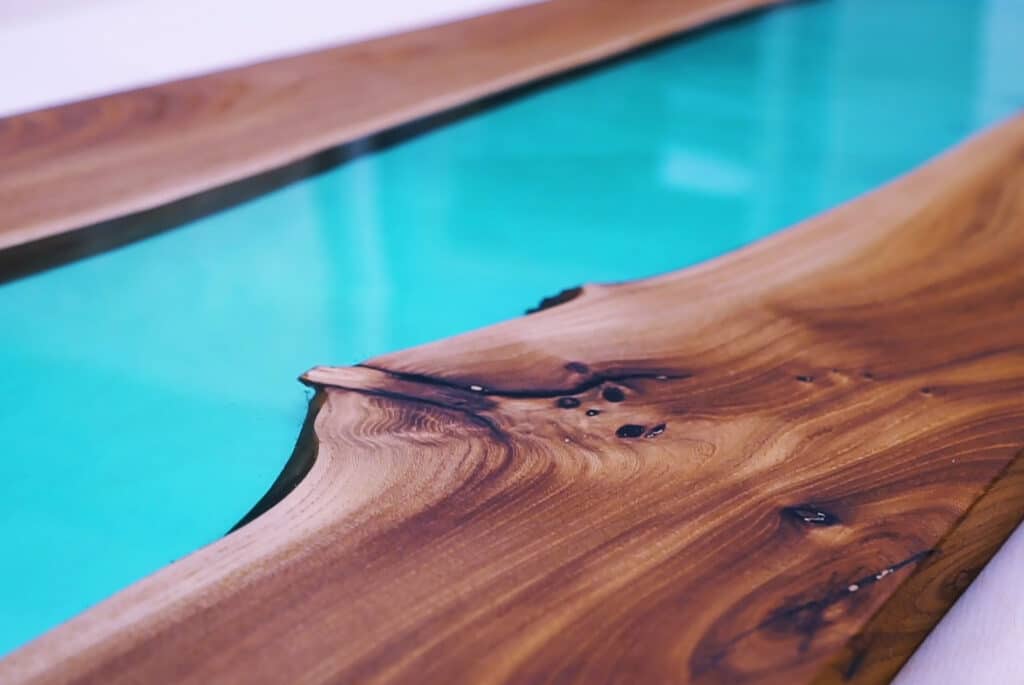
1. Resin for Pours up to 2cm: “Trasparente” by Resin Pro
Resin “Trasparente” is perfect for projects requiring up to 2cm of depth. This resin features excellent clarity and UV resistance, ensuring your projects remain crystal clear and free from yellowing. Its low viscosity formula makes it easy to work with, providing a smooth and bubble-free finish.
Key Features:
Crystal clear clarity
Strong UV resistance
Smooth, bubble-free finish
Ideal for coasters, trays, small tabletops & river tables, and intricate woodworking projects
Select options
This product has multiple variants. The options may be chosen on the product page
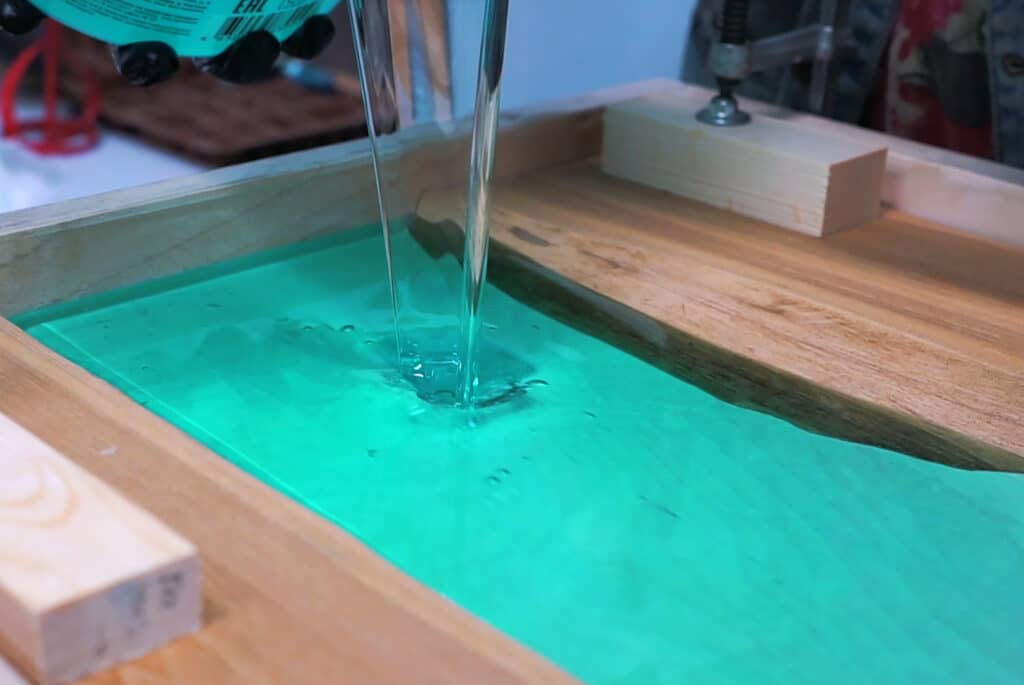
2. Resin for Pours up to 5cm: “Epoxytable-5” by Resin Pro
“Epoxytable-5” resin is designed for medium-depth pours up to 5cm. It boasts superior clarity, excellent yellowing resistance, and can be poured in thicker layers without overheating. This makes it perfect for creating larger river tables, countertops, and other medium-depth projects.
£188.85–£444.85Price range: £188.85 through £444.85
Select options
This product has multiple variants. The options may be chosen on the product page
3. Resin for Pours up to 10cm: “Epoxytable-10” by Resin Pro
For the most ambitious projects, “Epoxytable-10” allows for deep pours up to 10cm. This resin is formulated to minimize heat buildup, preventing cracks and ensuring a flawless finish even in thick applications. Its exceptional clarity and durability make it ideal for large river tables, substantial woodworking projects, and custom furniture pieces.
Select options
This product has multiple variants. The options may be chosen on the product page
Conclusion
Choosing the right epoxy resin for deep pours is essential for achieving professional-quality results in your projects. Whether you are working on tabletops, countertops, or other furniture pieces, selecting a resin with the right characteristics ensures durability, beauty, and functionality. “Trasparente”, “Epoxytable-5” and “Epoxytable-10”, manufactured by Resin Pro brand, adored by craftsmen and resin artists around the world for more than 8 years, each offers unique benefits tailored to different project depths, providing the perfect solution for any deep pouring needs. Invest in high-quality epoxy resin to elevate your creations and enjoy stunning, long-lasting results!
At Nogard Creations, our passion lies in transforming your cherished flowers into lasting keepsakes. What began as a heartfelt journey to preserve personal memories has blossomed into a thriving business, dedicated to capturing the beauty of life’s most significant moments.
Exceptional Flower Preservation
Using professional “EPOXYTABLE 5-FIVE”resin for deep pouring, we create stunning keepsakes from your wedding or funeral flowers, turning them into lasting art pieces such as frames, hearts, cubes, and more. Our meticulous drying and layering process minimises bubbles, ensuring a flawless finish.
£16.85–£1,099.85Price range: £16.85 through £1,099.85
Select options
This product has multiple variants. The options may be chosen on the product page
Personalised Cremation Jewellery
Our cremation jewellery, also crafted with ResinPro, allows you to keep loved ones close. We offer a variety of colors and designs, ensuring each piece is unique and personal.
Why ResinPro?
ResinPro’s superior clarity and durability makes it the perfect choice for our preservation techniques. It allows for a crystal-clear finish that enhances the natural beauty of the flowers and ashes, ensuring that your memories remain vibrant and intact for years to come.
The Creation Process
Flower Preparation: We carefully dry and press the flowers to preserve their colour and shape.
Resin Application: Layers of epoxy resin “EPOXYTABLE 5-FIVE” are applied for deep castings, which ensures minimal bubbles and maximum clarity.
Custom Design: Each piece is tailored to the client’s specifications, from the type of product to the arrangement of the flowers.
Curing: The resin is left to cure, creating a hard, durable finish.
Life Hacks and Tips
Flower Drying: Use silica gel to dry flowers quickly and maintain their vibrant colours.
Layering Resin: Pour resin in thin layers to avoid bubbles and achieve a smooth finish.
Personal Touches: Incorporate small mementos, like charms or initials, into the resin for a personalised touch.
Client-Centered Approach
We pride ourselves on providing a personalised experience, from custom designs to transparent process updates. Each piece is crafted with care, reflecting your individual story and sentiments. Discover the beauty of preserved memories with Nogard Creations and ResinPro. Visit https://www.nogardcreations.co.uk to explore our offerings and start your preservation journey today.
In the world of crafting and woodworking, selecting the right type of resin can significantly impact the outcome of your projects. While standard epoxy resin serves its purpose well, there are situations where opting for deep pour epoxy resin can take your creations to the next level. Let’s delve into why incorporating deep pour epoxy resin into your projects could be the ideal choice.
Let`s start from the most popular applications of the deep pour resins!
River Tables:
Deep pour resin is particularly well-suited for creating river tables due to its ability to create thick, crystal-clear coatings. With its extended curing time and minimal shrinkage, deep pour resin allows you to pour large volumes of resin in a single application, resulting in seamless river-like designs with stunning depth and clarity. Its durability and resistance to scratches and stains make it ideal for table tops that are both functional and aesthetically pleasing.
Preserving Flowers:
When it comes to preserving flowers and botanicals in resin, deep pour epoxy resin offers unparalleled clarity and depth. Its low viscosity and long curing time allow you to encapsulate delicate flowers without trapping air bubbles or causing discoloration. Whether you’re creating resin jewellery, paperweights, or decorative pieces, deep pour resin ensures that your floral arrangements remain vibrant and beautifully preserved for years to come.
By utilizing epoxy resin for large castings in these projects, you can achieve professional-quality results that showcase the natural beauty of your materials while ensuring long-lasting durability and visual impact.
Why it is so good for large projects?
Ideal for Thick Coatings: Deep pour epoxy resin is specifically formulated to create thicker coatings compared to standard resin. This makes it perfect for applications where you need to pour at depths ranging from 1/2 inch to several inches in a single pour. Whether you’re encapsulating objects or creating river tables, deep pour resin offers unparalleled versatility.
Enhanced Clarity and Depth: When it comes to achieving stunning visual effects, epoxy resin for large castings excels. Its advanced formulation minimizes air bubbles and provides exceptional clarity, enhancing the depth and dimension of your artwork. Whether you’re embedding objects or creating intricate designs, deep pour resin ensures a flawless finish.
Durability and Strength: Deep pour epoxy resin cures to a durable and resilient finish, making it perfect for high-traffic areas such as tabletops and countertops. Its superior resistance to scratches, stains, and UV damage ensures that your creations maintain their beauty over time.
Versatility in Applications: While deep pour epoxy resin is commonly used for river tables and countertops, its versatility extends to a wide range of applications. From jewelry making and art projects to flooring and marine applications, deep pour resin offers endless possibilities for creative expression.
Ease of Use: Despite its ability to create thick coatings, epoxy resin for large castings is incredibly user-friendly. With a longer pot life and extended curing time, you have ample time to pour and manipulate the resin to achieve your desired results. Additionally, it can be tinted, pigmented, or mixed with additives to create custom effects.
Professional-Quality Results: Whether you’re a seasoned artisan or a DIY enthusiast, deep pour epoxy resin allows you to achieve professional-quality results. Its high-gloss finish and ability to capture intricate details elevate your creations to a whole new level of excellence.
In conclusion, deep pour epoxy resin offers a host of benefits that make it an excellent choice for a wide range of projects. From its versatility and durability to its enhanced clarity and ease of use, deep pour resin unlocks endless possibilities for creativity and innovation. Whether you’re crafting furniture, artwork, or decorative pieces, incorporating deep pour epoxy resin into your projects is sure to yield exceptional results.
Making hand-made soap is not only a practical skill but also an enjoyable and artistic endeavor. With a few simple steps and a dash of creativity, you can produce beautiful and personalized soap bars. In this guide, we’ll walk you through the basic soap-making process and provide some creative ideas to elevate your soap-making game.
Materials
Before you embark on your soap-making adventure, gather the necessary products to ensure a smooth and enjoyable process. Here’s a comprehensive list of the items you’ll need:
1. Soap base Choose between a white or translucent soap base depending on your desired soap colour and transparency. The soap base serves as the foundation for your creation, so select a high-quality option for the best results.
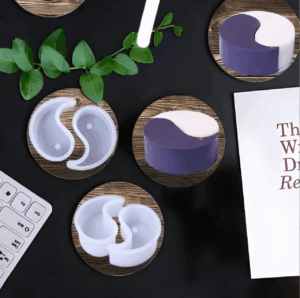
Before you dive into the world of soap crafting, set up a dedicated workspace. Lay down a plastic drop cloth or old newspapers to protect your work surface. Ensure that your silicone mould is clean, and all materials are within easy reach. This preparation will make the process smoother and more enjoyable.
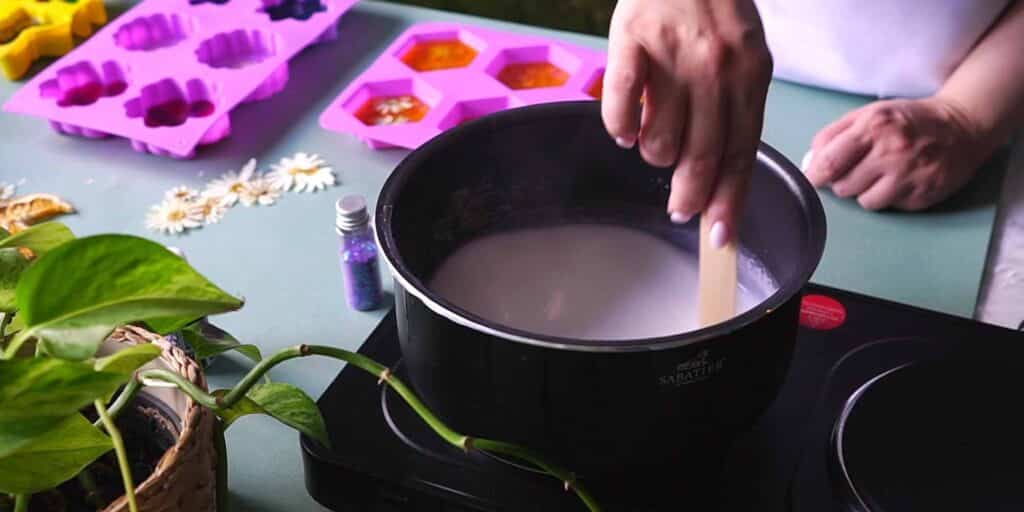
1. Prepare the Soap Base: Cut the soap base into small, uniform chunks to facilitate even melting. Place the chunks in a microwave-safe container or use a double boiler for melting. Gradually heat the soap base in short intervals, stirring between each one. Aim for a temperature of around 50°C to prevent overheating and air bubble formation.
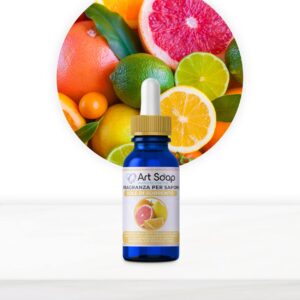
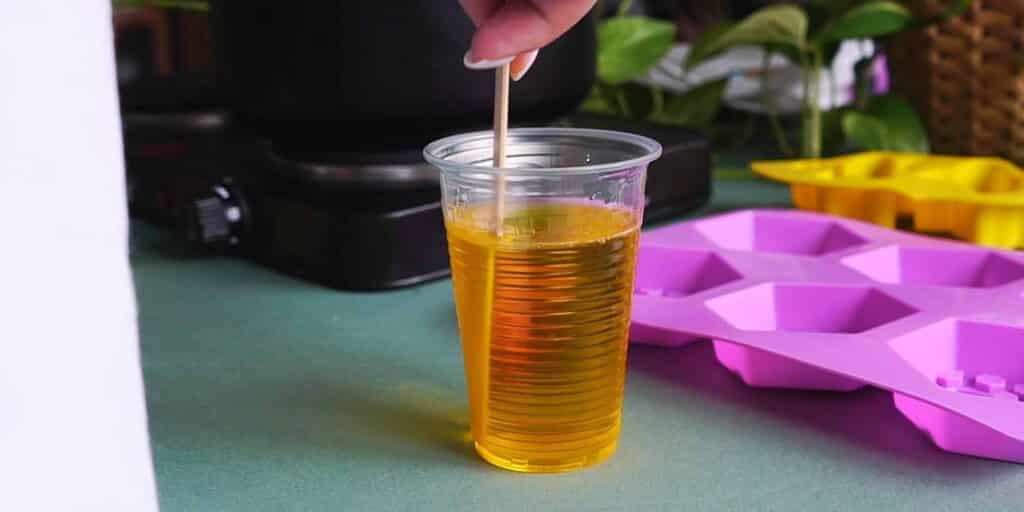
2. Enhance with Fragrance and play with Colours: Once the soap base is fully melted, it’s time to add fragrance. Add approximately 0.5-1.5% of the total soap base weight in fragrance oil. This step not only provides a pleasant aroma but also adds a personal touch to your soap. Divide the melted soap base into separate containers for each colour you want to use. Add soap colourants to achieve your desired hues. Stir well to evenly distribute the colour throughout the soap base.
3. Create Beautiful Designs: Pour the coloured soap into the silicone mould. Whether you opt for multi-coloured layers, solid colours, or a combination, this is where your creativity shines. Experiment with different pouring techniques to achieve unique patterns. Lightly tap the mould on your work surface to release any trapped air bubbles. For a smooth finish, spray rubbing alcohol on the soap’s surface. You can also add any decorative objects you want. For example, dried flowers, herbs, glitter etc.
4. Patience is a Virtue: Allow the soap to cool and harden. This process may take a few hours, so resist the temptation to check on it too soon. Leave it undisturbed until it’s completely solid. Once the soap has fully hardened, carefully pop it out of the silicone mould. Use a knife to trim any rough edges or excess soap.
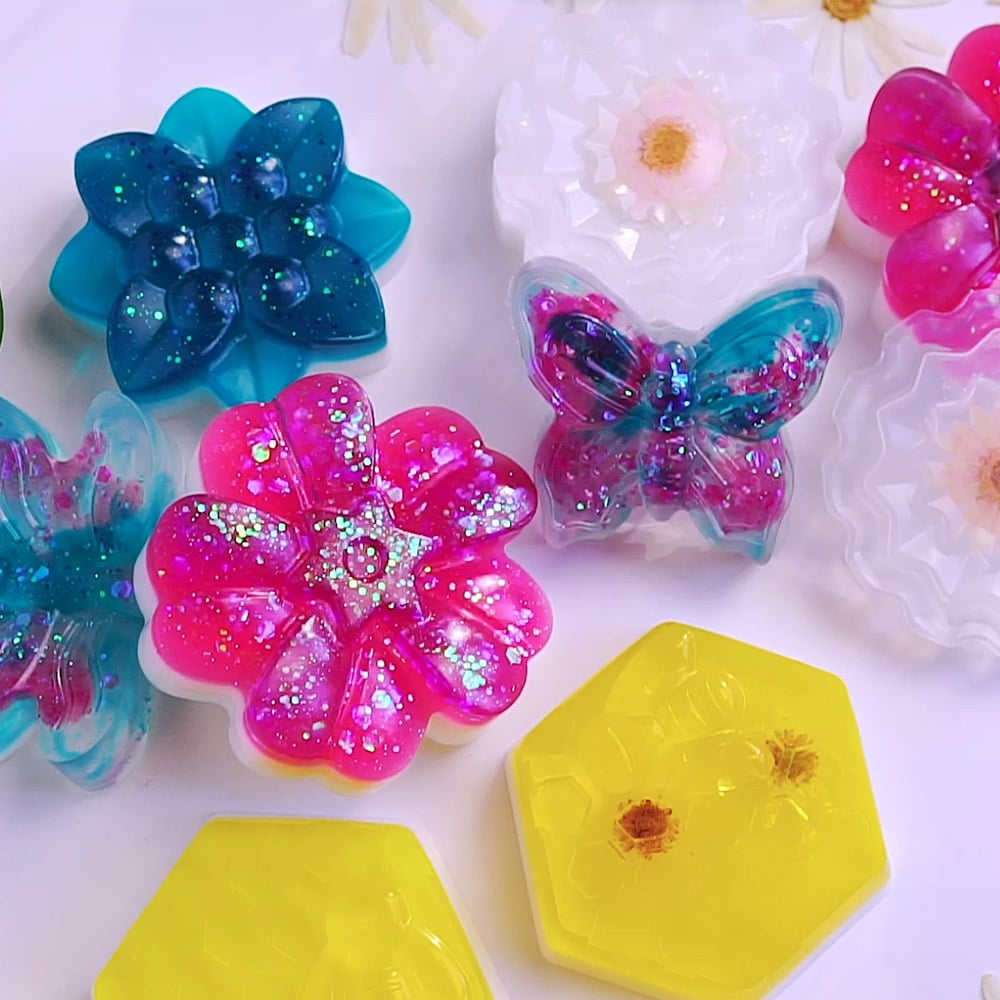
Creative Ideas to Elevate Your Soap-Making
Now that you’ve mastered the basics, here are some creative ideas to take your handmade soap to the next level:
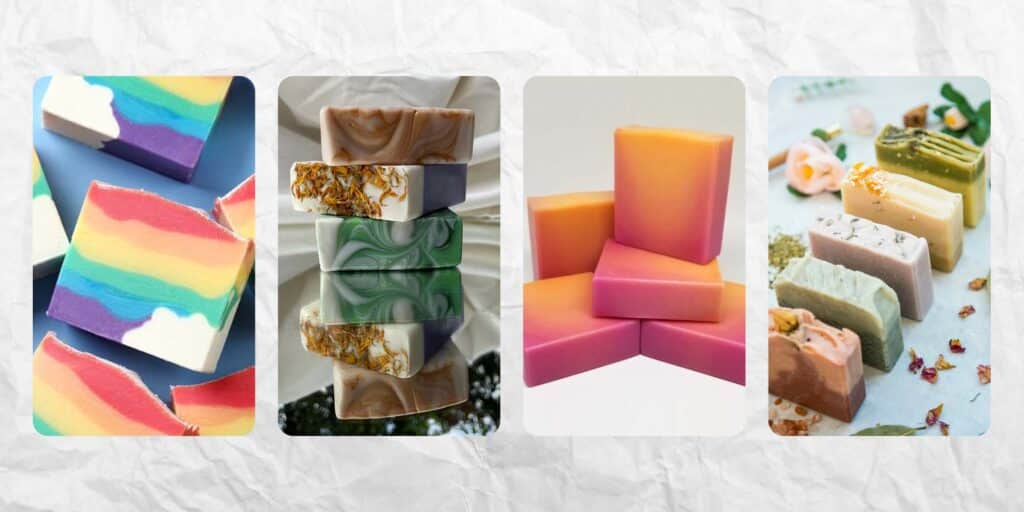
Layered Rainbow Soap: Create a soap bar with colourful layers, resembling a vibrant rainbow. Pour each layer separately, allowing them to cool and harden before adding the next.
Botanical Embeds: Embed dried flowers, herbs, or petals into your soap for a natural and organic appearance. Lavender, rose petals, or calendula can add a touch of beauty to your creation.
Marbleized Swirls: Achieve a marbled look by pouring different coloured soap into the mould and using a skewer to swirl the colours together before they fully harden.
Ombre Effect: Create a soap bar with a gradual colour shift, like an ombre. Start with a light colour at the top and transition to a deeper shade at the bottom for a visually stunning effect.
Exfoliating Scrubs: Add natural exfoliants like coffee grounds, oatmeal, or poppy seeds to your soap for a gentle scrubbing effect that also adds texture and an extra layer of luxury.
With these creative ideas and a bit of experimentation, you can turn your soap-making hobby into an art form. Enjoy the process, and don’t be afraid to let your imagination run wild as you craft personalized, fragrant, and visually appealing soap bars.
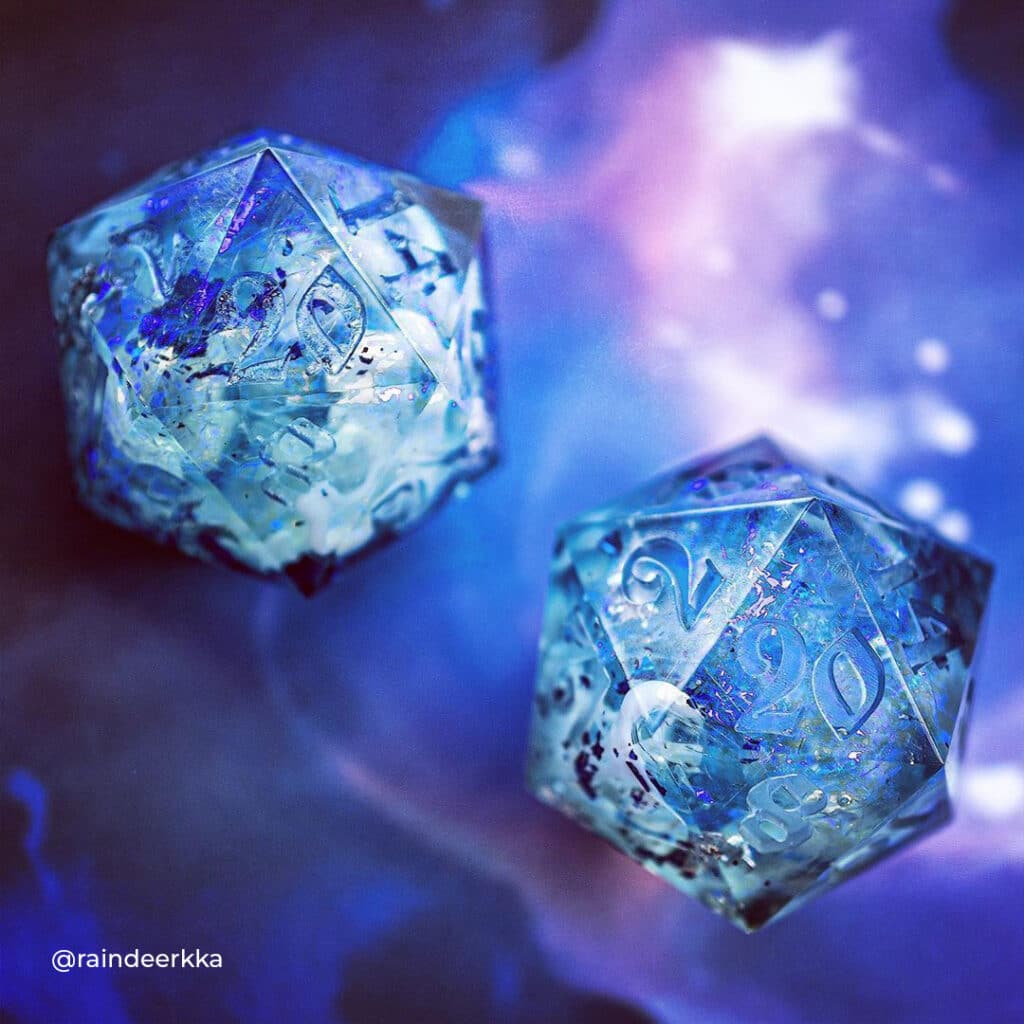
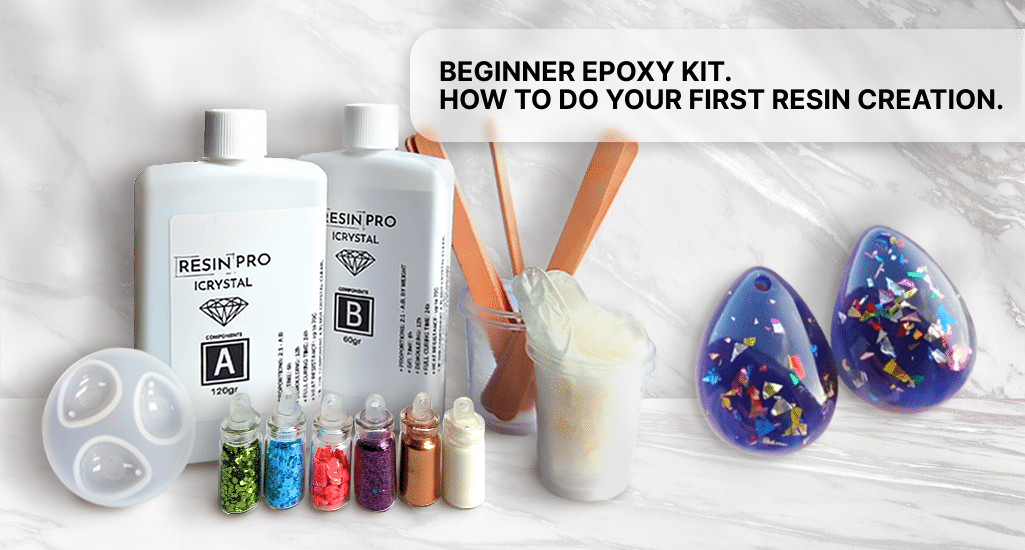
Starting something new can sometimes be challenging, especially in the Epoxy World, where so many nuances. But no worries! This post will help you to create your first Epoxy Resin art-work, especially with our Beginner Resin Kit!
So, let`s start!
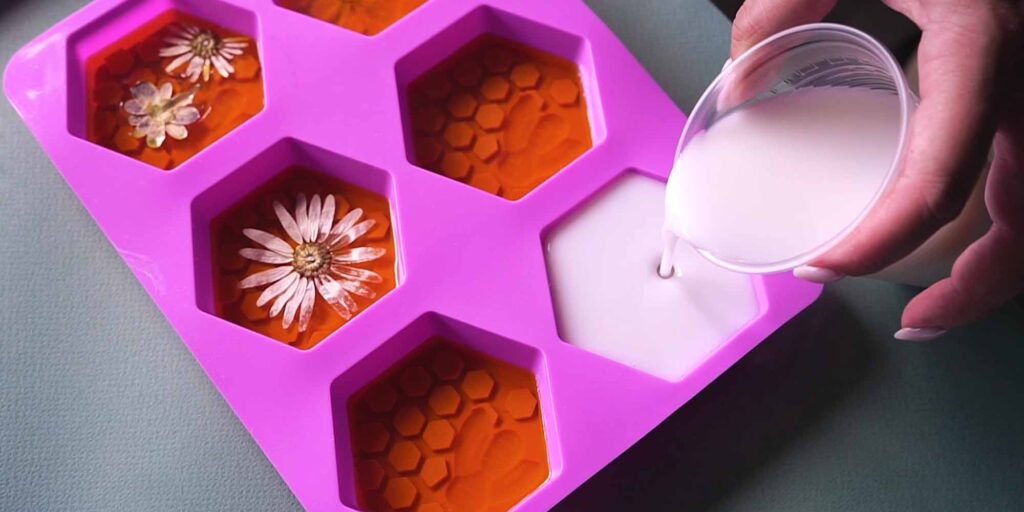
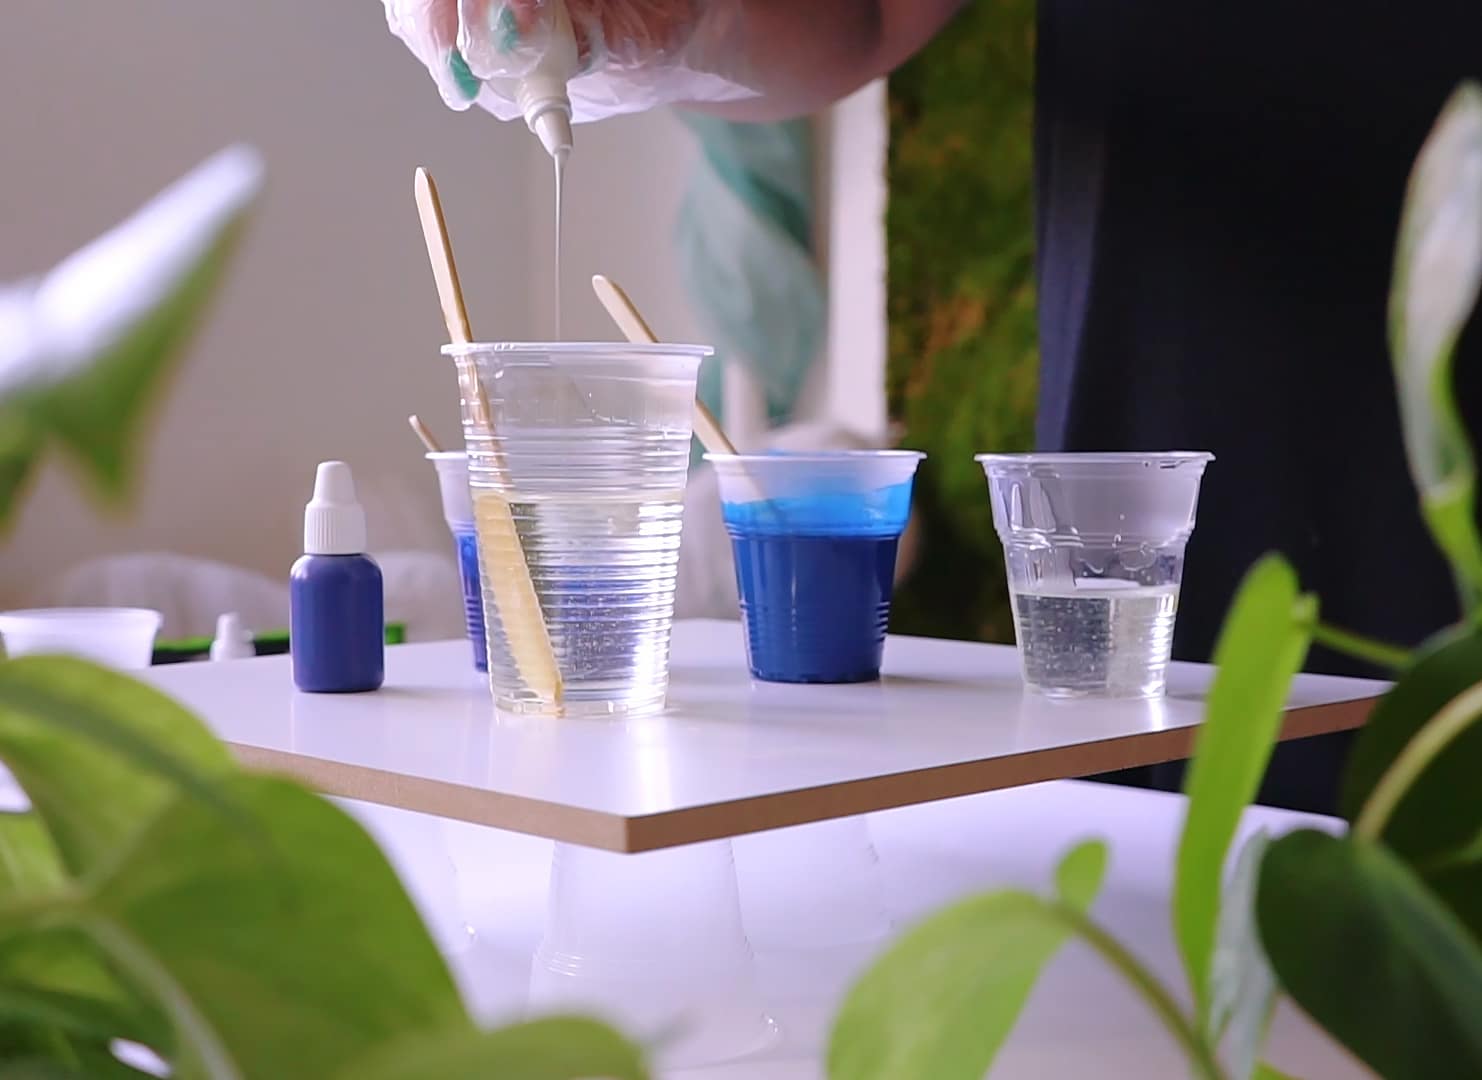
Please, take a clear cup. We`ll use it for measuring and mixing.
Our Epoxy Resin – “ICrystal” has proportions 2:1 A:B, which means you have to take 2 parts of A and add 1 part of B, For example – 2 cups of A + 1 cup of B; or – 20ml of A + 10ml of B; or – 20gr of A + 10gr of B. We insistly recommend working in well ventilated area and using protective equipment, like gloves, which you have in your kit!
Please, take a clear cup. We`ll use it for measuring and mixing. We`ve added 20ml of A and then 10ml of B (30ml in total). Please, pay your attention, the component B has a bit less viscosity and need some accuracy for pouring. After that mix very well – 2 minutes in one way, 2 minutes in another, scratching the walls for proper mixing. The mix has to become absolutely clear!
When you finished mixing, you can pour the mix into other cups for colouring by your desire! You don`t need much colourants there, just a small drop. There is a gold rule – the amount of colourants should not exceed 5% from the mix resin/hardener. Otherwise, it may not to cure fully. We advise adding additives by small portions, checking the result`s density through clear cup. Of course, the colourant has to be mixed well too. Yes, you can use the same stick, clearing that by paper tissue before mixing the new colour.
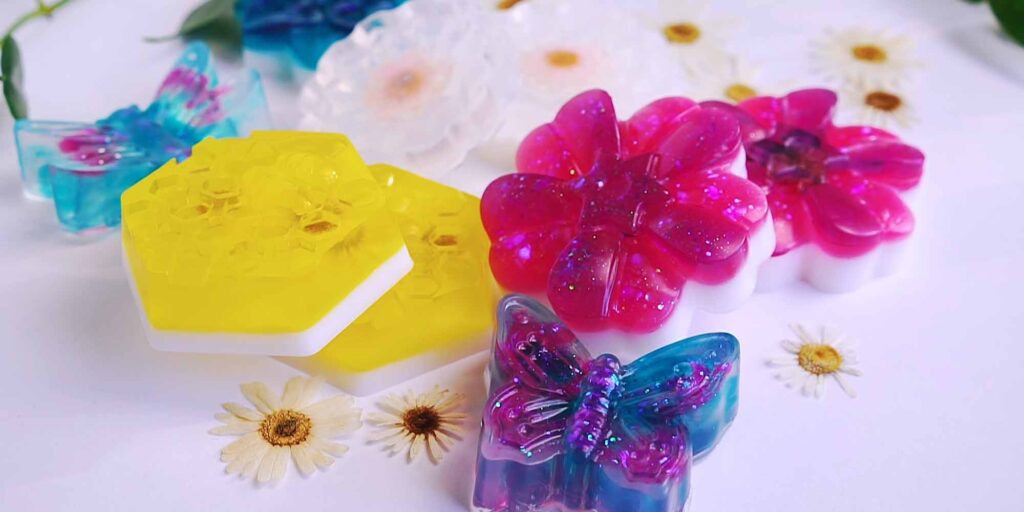
Time for magic. Mixing several colours in one casting will make your creation a bit more interesting😊 Give a freedom to your imagination!
Wait at least 12h for de-moulding and 24h for the full curing time. The magic happened! Now you can proudly call yourself – RESIN ARTIST😊
Share your results in social media, tagging us – @resinpro_uk ❤️ Epoxy resin is a complicated technical product, but if you follow the basic rules, you will get wonderful results! Oh, yes, we have a promo code (8%) on your next purchase – “MOJITO”. Thanks for your attention, and if you need any help, just call us – 07596 850968 or email us – in**@******ro.eu
The world of epoxy resin art offers endless possibilities for creativity, letting artists use a wide range of colors and effects.
Resin Pro has been a part of the epoxy scene since 2015, gaining valuable experience to provide the best solutions for resin artists. Beyond the usual clear casting and pouring, artists often want to add vibrant colors to their projects. Whether it’s resin art, ocean-inspired pieces, geode creations, practical coasters, or large river tables, these projects need special attention when it comes to adding color.
In this article, we’ll explore simple and effective ways to colour epoxy resin, making your resin art journey more colourful and enjoyable.
What Sets “Colourfun” Apart as the Ultimate Resin Colorant?
“Colourfun” takes the crown as the top choice when it comes to resin colorants. It has been meticulously crafted with one primary goal in mind – to elevate the vibrancy and depth of resin art. A remarkable feature that makes it shine is its seamless compatibility with ResinPro resins, ensuring that your resin retains its natural glossy finish. Additionally, “Colourfun” boasts incredible pigmentation, allowing a little to go a long way in enhancing your artistic creations. Importantly, we’ve made sure to avoid the use of harmful solvents, making your resin experience more enjoyable. It’s odour-free, cruelty-free, and vegan-friendly. What more could we ask for, right? 😄
Our second most popular colorant product is the Sahara Mica powder, and it’s your go-to choice when you want to add extra sparkle to your resin art project.
When using Sahara Mica powder, it’s absolutely essential to ensure thorough mixing for the best results. Failing to do so might lead to incomplete dissolution of the powder, potentially resulting in a gritty texture in your resin art.
Sahara Mica powder’s metallic pigments create a luxurious and mesmerizing pearlescent effect, elevating the beauty of your resin art. However, it’s worth noting that these metallic pigments can settle at the bottom of your resin, which may affect the desired swirling patterns. To maintain those intricate swirls, consider pouring the metallic pigments as the final layer, gently on top of a previously cured layer of resin. This approach helps preserve the captivating interplay of metallic shades in your artwork.
One last thing to keep in mind is that Sahara Mica powder is very lightweight and can disperse easily, so we recommend adding it gently and avoiding inhaling it deeply. Your safety is our priority.
The world of alcohol ink is vast and brimming with artistic potential. It’s no wonder that resin artists have discovered innovative ways to incorporate this colorant into epoxy resin.
One of the most popular techniques involving alcohol inks is “Petri-dish art.” This method entails dropping the ink into high-viscosity resin, creating a mesmerizing “burst” effect. This captivating process results in the emergence of enchanting tendrils and whimsical squiggles that appear to be suspended in time, frozen in their delicate dance.
Simultaneously, alcohol inks provide an excellent means of achieving semi-transparent resin, which exudes a clear and vibrant appearance, reminiscent of precious gemstones. This unique attribute adds a touch of elegance and allure to your resin creations.
Are there any rules to follow when using colorants for resin? Yes, but they are quite simple.
The amount of colorant should not surpass 5% of the total resin/hardener mixture.
Ensure that the colorant is not water-based, such as acrylics, and does not contain excessive solvents.
Can you cover an acrylic painting with clear epoxy resin? Absolutely, as long as the acrylic layer is completely dry.
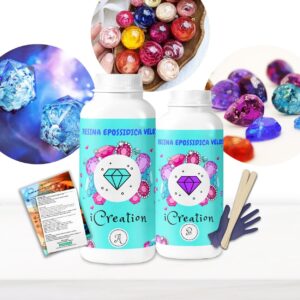
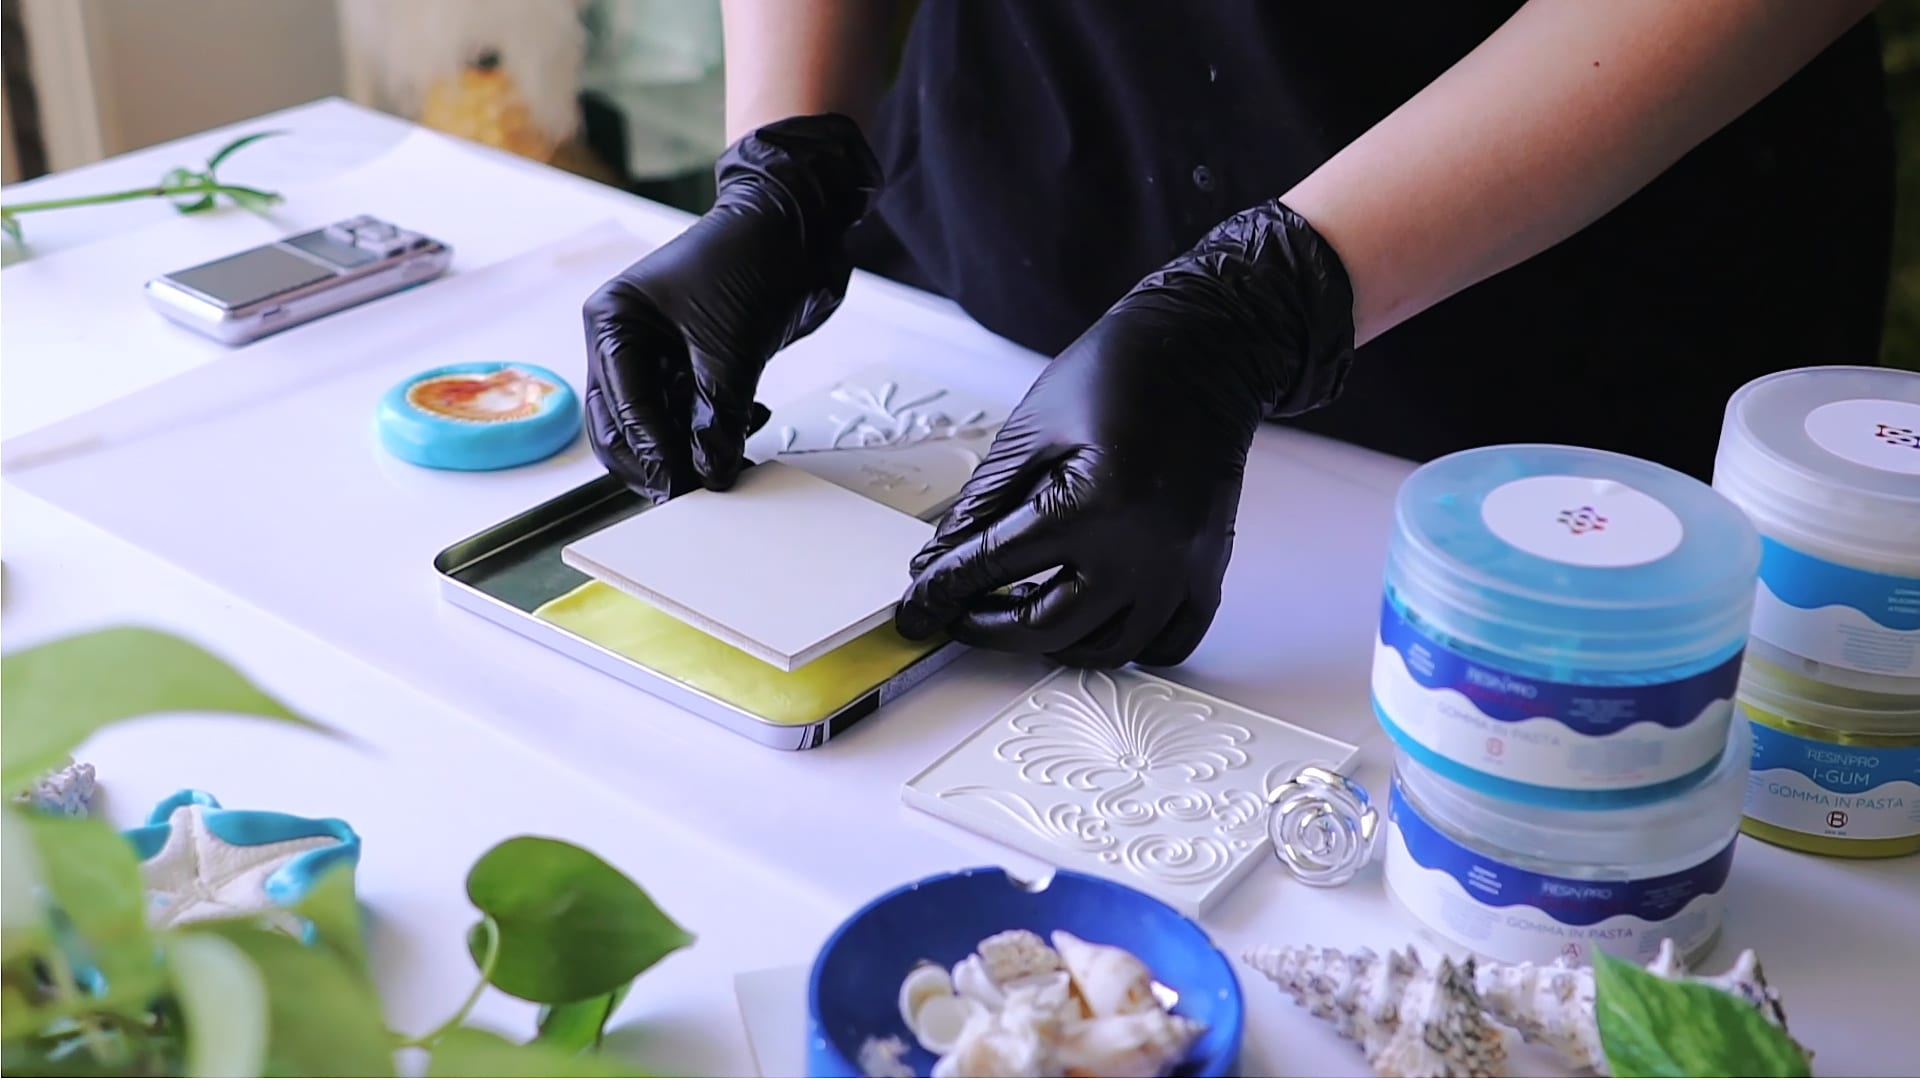
The world of epoxy resin is vast and endlessly inspiring. However, if you’re eager to craft something truly exceptional, look no further. Introducing our silicone mold pastes from the “Igum” product line by Resin Pro – your shortcut to effortless and rapid creativity. Embrace a world of less talk and more tangible results with our innovative products!
Completely non-toxic silicone rubber “IGUM” in paste to be directly applied onto the model you want to replicate. Prior to using, it should be mixed with its catalyst paste (in equal parts, 1: 1) until you have a homogeneous mixture. Due to its non-stick performance on all surfaces, you don’t need to wash the tools after use and it is not necessary to apply other release agents to the model. Let`s do your unique mould together:)
1) Take a small amount of paste from the jar with component “A”, seal it by rolling the ball. Weigh it.
2) Form a ball of the same volume and weight using the “B” component.
3) Mix component A and component “B” until a homogeneous mass of colour is obtained.
4) Press the copied product into the silicone, apply the silicone directly to the product or create the mold yourself. For example (in the case of using silicone as a rim for cup holders and trays), you can mold the shape with your fingers, attach it (stick it yourself) to the base film / plexiglass and give it a smooth and glossy surface using a smooth product (for example, a lid from a jar with silicone).
5) Leave the mould until it hardens completely – 25 minutes.
Choose your type! Fast silicone rubber “IGum Fast” – working time 5 minutes, full curing time – 30 minutes. or Slow silicone rubber “IGum Yellow” – working time 20 minutes, full curing time – 2 hours. Looking for the best epoxy resin to finish your project? Try our best-seller Epoxy Resin – “Transparente“
 Free shipping on orders over £29.85